Tis' the season for spring cleaning, so that means it's also prime pickin' for a junker like me. Likewise, others are also always on alert to find gems too. Would you say this vintage sewing stool is worthy of a landfill? I don't know if we can be friend if you answer in the affirmative. However, if you say, "NO MA'AM!" you are receiving a high five from me. {{yahooooo!!}}

While I would gladly say I found this one, I honestly did not. Another gal found it in the trash during city clean-up. Take a look inside this find...

TEARING IT UP
Let's get this DIY party started, shall we? First, grabbing my drill, I begin by removing the legs. My jaw dropped when I see the original color. Unbelieveable! It used to be blue?!?

How on earth did that underbelly of this gets so tainted? Anyhoo, after I remove the legs, I use my seam ripper to begin taking the upholstery apart. This is where it's gets good, am I right?

Then, I save every bit for the next steps of making new upholstery. Nothing against vinyl, necessarily, but I definitely think this Ikat will suit it better. The first time I used this exact upholstery was on this
rocking chair makeover. If you'd like to view my upholstery tutorial, you can find
Part 1 HERE.

Or, check out the video below to see me upholstering another curbside find in leather.

So here's the deal, I know the correct way to do upholstery, but in this instance, I'm making use of what I have to dress up this curbside find. I don't have exactly enough to replace the welting on the bias, or enough to make the pattern line up perfectly. However, I want to show you what you can do with what you have and still make it look good.
SEWING FUN
Next, out come my sewing machine and serger to whip my a twin to the original vinyl. I don't know about you, but I do love a good stent of
sewing therapy.

This serger is an awesome machine that makes my job a whole passel easier. Here's the base with not only a brand new look, but a sweet personal addition of mine too. tee hee. It's not attached yet, but I think it's entirely better than that dirty blue.

Before I call it complete-o, I tackle the legs by also giving them a freshening up. Much better! Don't worry, I also cleaned up the metal feet as well.

FINISHING
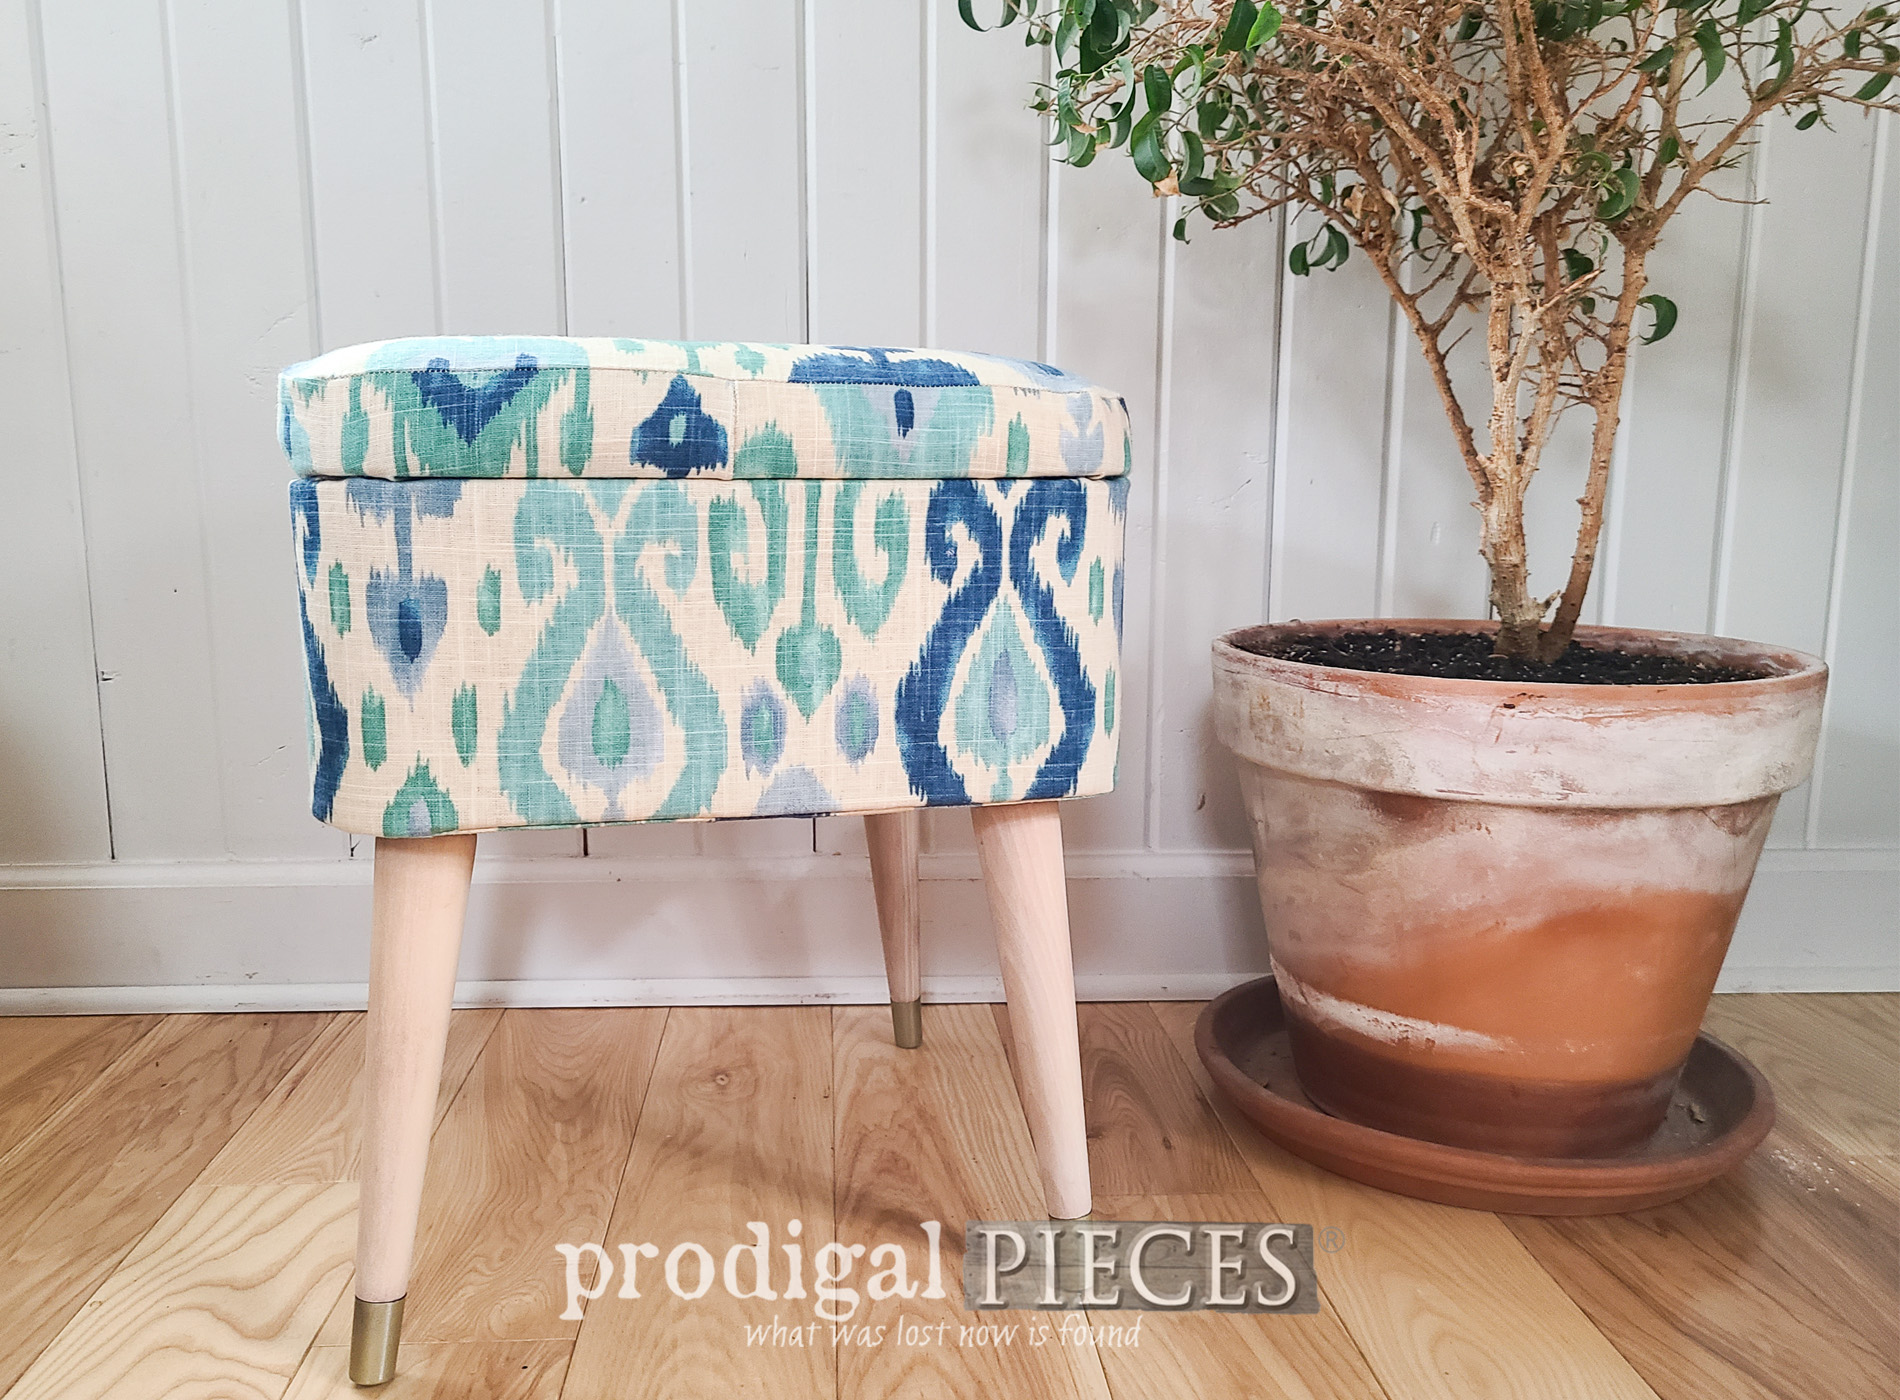
Finally, after my DIY stent, here's my vintage sewing stool in brand new duds.


I'd say that this is definitely not trash-worthy. Do you agree? I'm excited that I had just enough fabric to cover it and that the legs came out light and bright. Now for the inside...


Did you notice I reused the inside pocket and pretty much left the interior as-is? I saw no reason to replace it and it already matches the fabric. yippeeee!!

As an avid seamstress, I'm so absolutely stoked I am able to give this vintage sewing stool a new lease on life.


If you'd like to add this to your home story, you can find it and more available in
my online store. Stop by to see what else is new too!

SHARE
In addition, the whole reason for doing what I do is to inspire you to give revitalizing your own vintage find a try. Even inspire others by pinning and sharing too.

Be sure to
sign up for my newsletter so you can see what I do with this hand-me-down my dad offered me.
HEAD HERE. Until next time!

 PINTEREST | EMAIL

Also, more Mid Century makeovers like this vintage sewing stool: