Who's game for a picnic? It's the second Tuesday of the month and that means it's
Trash to Treasure Tuesday! A fun time where my blogger friends and I create new projects to inspire you to give DIY a try. Today, I'm in the mood for an vintage picnic basket makeover. Isn't this a beautiful vintage piece?

Unfortunately, it's a bit damaged and looking a little rough. Not only is the handle is busted off, but also the interior isn't as pretty as it has potential to be. Likewise, you can see my
past picnic basket makeovers HERE.


Who's ready to see the vintage beauty revived? Let's have at it! What is more, you'll see the other gal's projects in a bit.
REVIVAL
First, I need to address that broken handle. When looking close, the handles were attached into the braided edge with a bent nail, but not all the way through the basket edge. However, if I want to make this stable for future use, I'm needing to remedy that. Further, I use my tools to pry off the handles and give them a new coat of paint.

Then, I head to my local hardware store (skip the big box stores, folks) and get new hardware.

Next, while I wait for the handles to cure, I tackle the picnic basket itself. I begin by taping off the diamond design and painting the interior and exterior with a custom mixed soft green color.


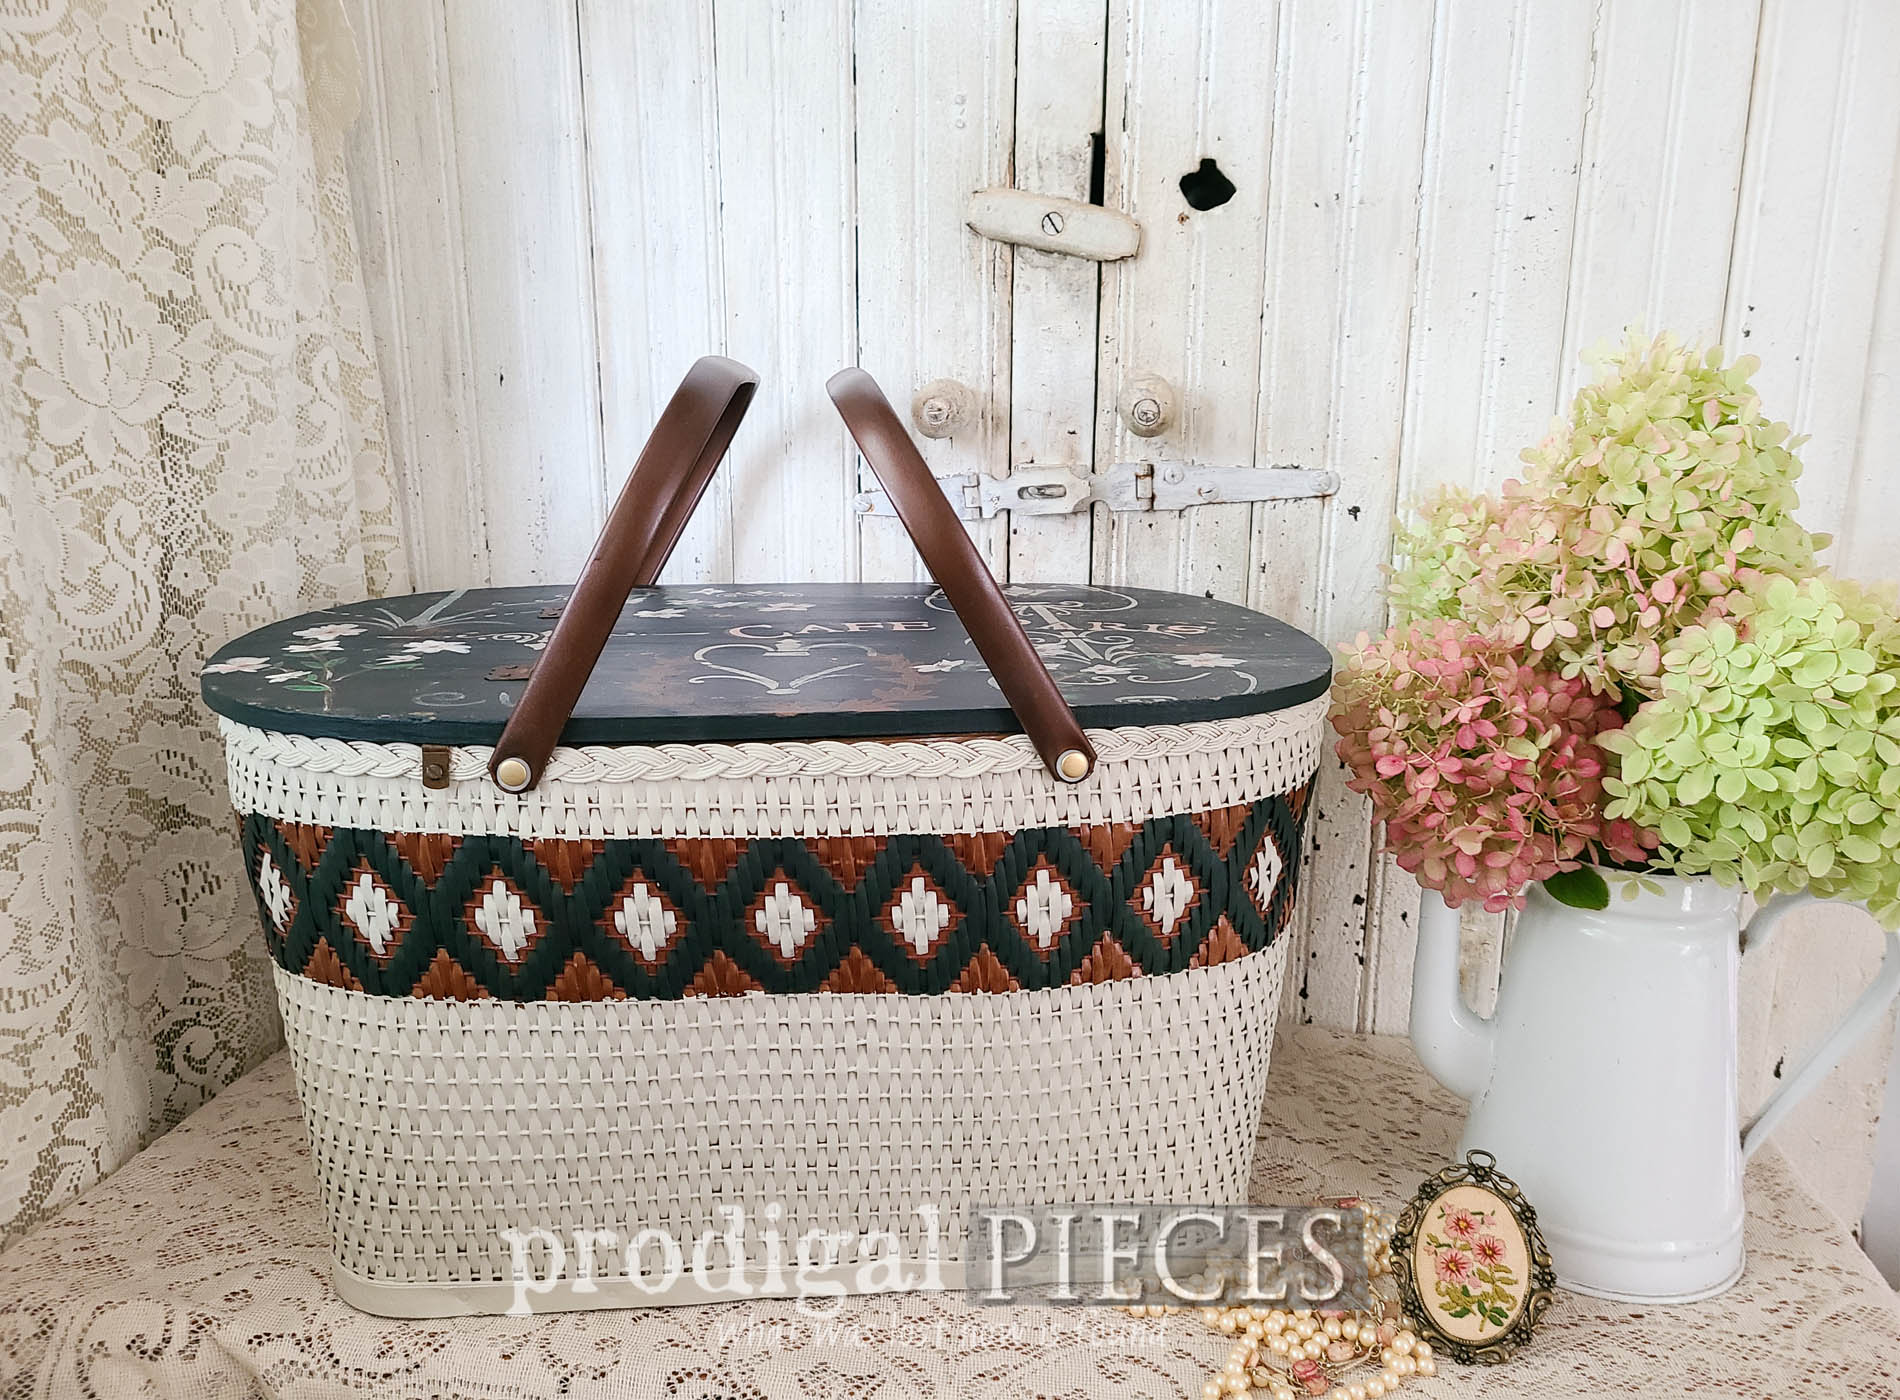
Last, once I have that base coat on, I remove the tape and patiently highlight those beautiful caning details in the exterior of the basket. I want to give a nod to the original designer and era while updating it. What is more, this gives me a chance to add my own personal touches - a sort of therapy to let my brain unload.
FINISHING TOUCHES
As a result to the damaged handles, I need to make holes in that frame that will allow me to add the new hardware to support the weight of a filled basket. First, I use my drills to tap into the basket frame. That being the case, I also need to enlarge the basket handle holes as well using the same drill bit.

Likewise, at the same time, I also want to add a bit of whimsy to the basket lid. I mean, who doesn't love some fun, right?
PICNIC ANYONE?
Finally, my vintage picnic basket makeover is complete. It came from broken and dilapidated to a new lease on life.


Not only does the new hardware revive the function of this basket, but it also adds that lovely metallic touch. Also, here is a look at the party happening on the top.


By the way, there's still plenty of room for fun on the inside. What would you take on your picnic? In all honesty, I'd take my family (tee hee). They are my best friends that I absolutely adore spending my time with in any form. I have such fond memories of just simply being in nature enjoying the blessings from God all around me.


While my goal is always to inspire you to give DIY a try, I also hope you enjoy my creative adventures too. Additionally, if you'd like to make this vintage picnic basket a gift or part of your home story, you can find it and much more available in
my online store.


SHARE
In addition to leaving me some comment love below, also take a minute to pin and share this makeover fun so others will be inspired too.

Last , but not least, be sure to
sign up for my newsletter to see the end result of this
vintage bench below. PLUS, you will get your FREE Furniture Buying Checklist and special discount to
my shop.
WAIT! With this in mind, scroll down below to see what my blogger friends have created for you.

 PINTEREST | EMAIL


- Artsy Chicks Rule
- Confessions of a Serial DIYer
- Salvaged Inspirations
- Girl in the Garage
Also, more creative jaunts like this vintage picnic basket: