Hello my fellow DIY lovin' friends. I'm back with a brand new project for you involving a treasure of mine. While I've been living in the same spot for nearly twenty years, I've held onto a dream of being able to get my bare feet back in the country. Reality of life's happenings is forcing, or rather, helping me to let go of things I've saved for that opportunity. Take, for instance, this farmhouse bench makeover.

You may recognize it from a few of my past posts. First, I bought it looking just like it is now with a bit of lovin' from my kids. We used it for a few years at
our dinner table since my littles would rather stand or kneel at the table instead of a booster seat. Second, I've used it to stage many projects like this
DIY antique store sign from wood scraps.

As much as I love the natural patina it offers, it does need repair, which is why I was hanging onto it. So, let's get this DIY party started, shall we?
REPAIR
First, if you look close, you can see that the right side has an original brace. However, the other side has a jerry-rigged repair with a small metal brace.


This worked fine for us for many years, but my plan was always to fix it right. Off to my wood stash I go! I dig around in my hardwood pallet wood scrap from
these previous projects. Since I need a 1¾" thickness to match the original, I can't use a soft pine 2" x 4" like the rest of the bench. In addition, I have hardwood on hand and that will be more stable for longevity reasons.
Next, I trace the original brace onto my scrap wood.

After that, I use my jigsaw to cut it out. Naturally, a bandsaw would have been the easier to way to do this, but I'm using what I have. (one day a bandsaw!!)

Last, I need to create a divet for the brace to rest up against the back spindles. It wasn't easy using what I have on hand, but it went quickly and I'm happy with the outcome. Now, I just need to drill holes and attach.

NEXT STEPS
Finally, it's the fun part of what I do. I need to fill the large gouges with wood filler. However, I wanted to leave some of the story as it adds more charm. Can you see the replacement? I even had salvaged wood plugs from a vintage bread box makeover. A girls gotta have a stash, right?

My choice in color is a seconds paint I just used on my last project, a
vintage Redman picnic basket rescue. It's a gorgeous dark green in a flat finish that is yet to be named. Thoughts? This is when it's wet, and it dries much darker.

Finally, after that I apply two coats of a matte poly and call the bench finished. Let's take a look-see at the final product.
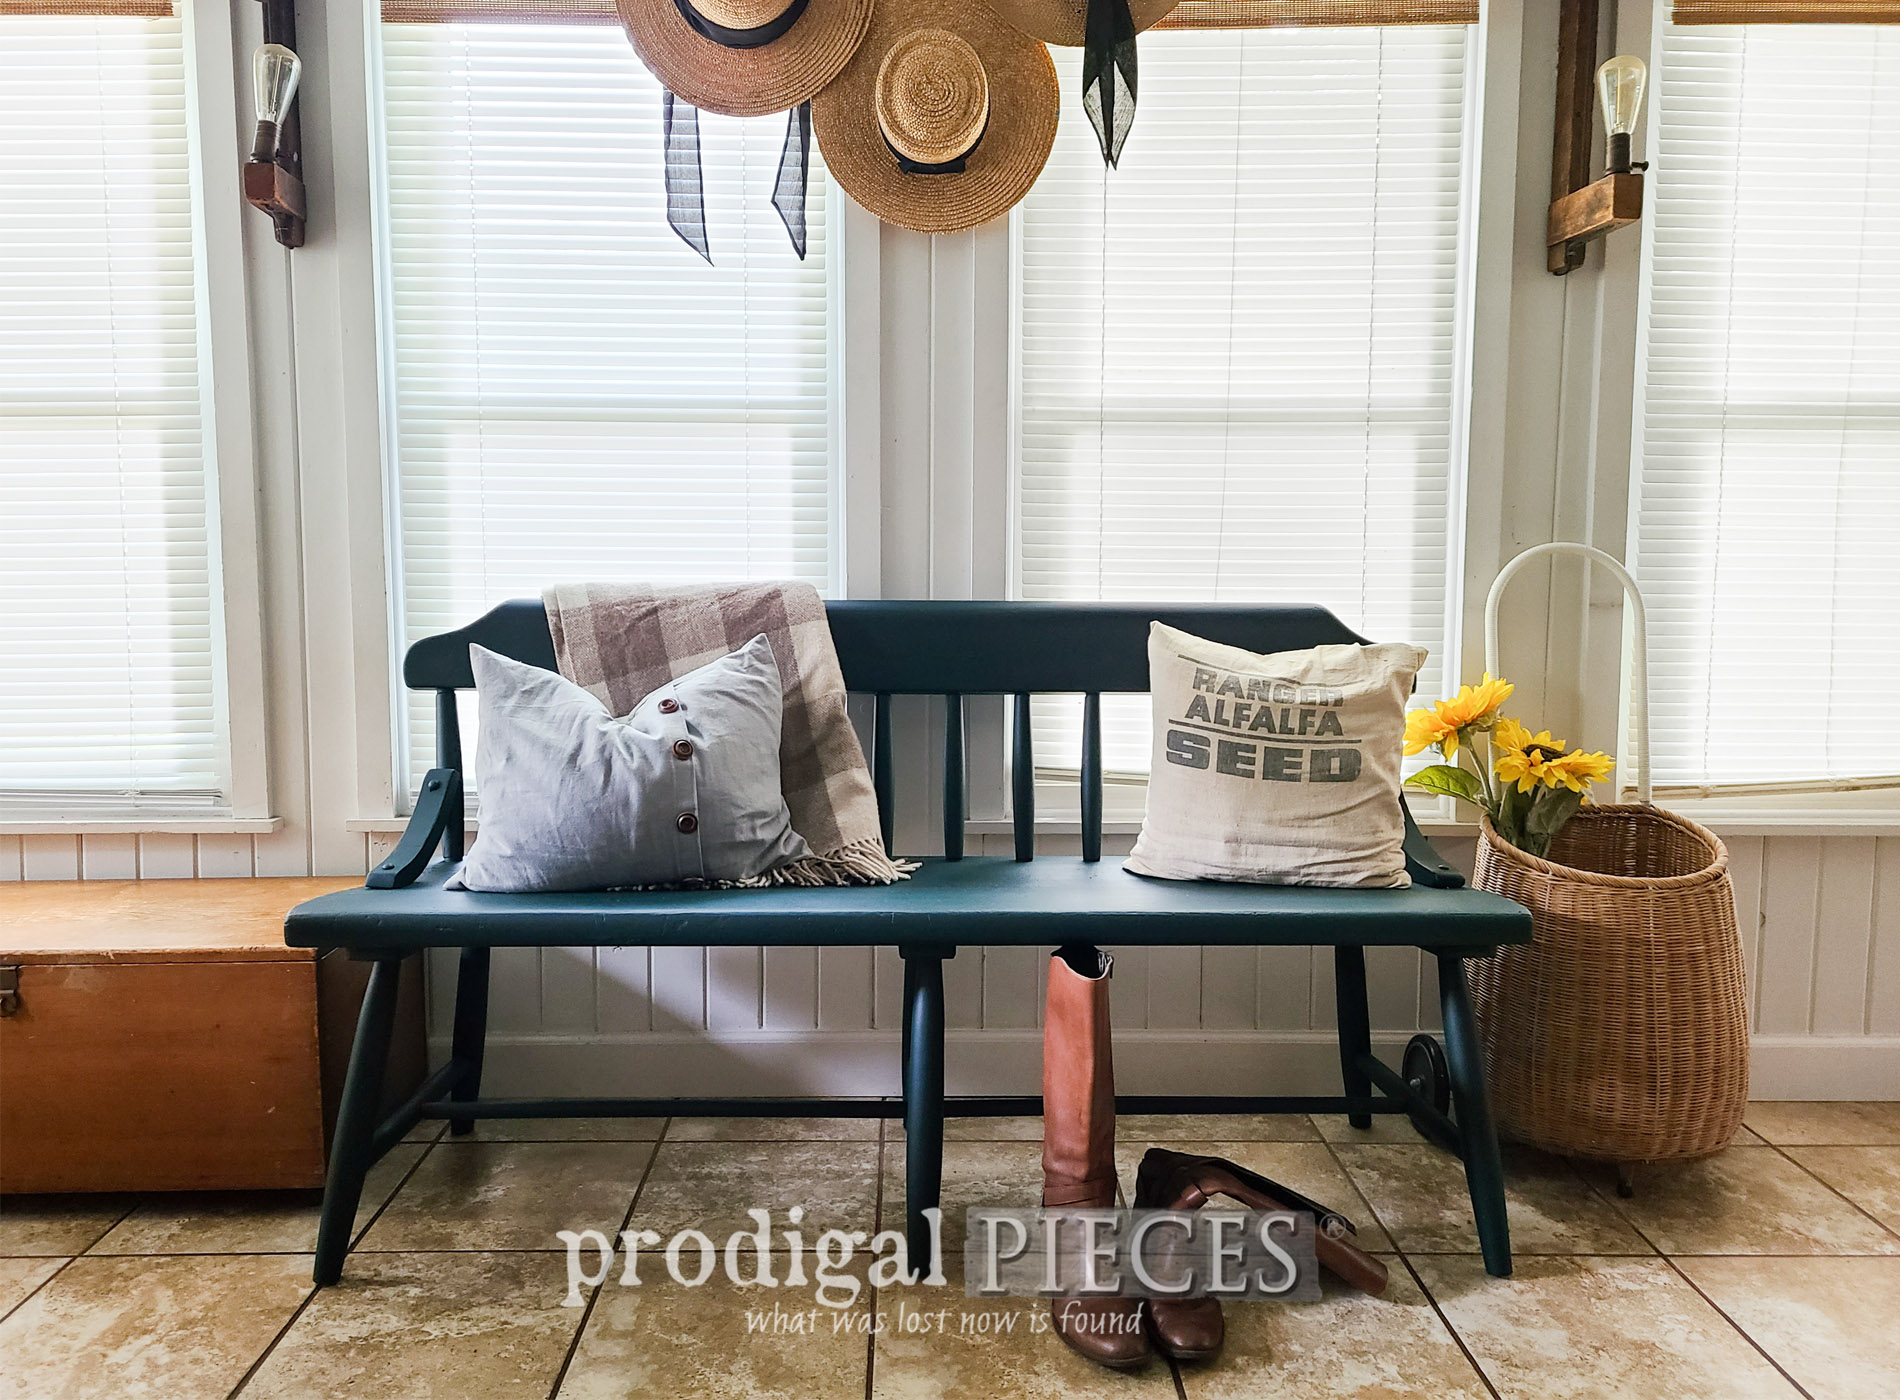
REFRESHED

Isn't that
sooooo much better? This farmhouse bench makeover is complete and it is ready for many more years of love.


Likewise, I'm smitten with that color to the hilt! It's just dark enough, but adds a touch of color punch.

Not only that, but my replacement brace is looking mighty original! tee hee.


It's even beautiful all naked. Yes, I'm a sucker for a furniture makeover. With that in mind, if you'd like to add this to your home story, you can find it and more available in
my online store.


SHARE
Alrighty folks, in addition to chatting me up in comments below, do pin and share to inspire others to give a try at their own furniture revival. It's fun, it's affordable, and leaves you beaming.
 WAIT!!
 Before you head off, be sure to
sign up for my newsletter so you can see what becomes of this caned chair I found at curb le chic.
HEAD HERE. Until next time!

 PINTEREST | EMAIL

Also, check out these DIYs like this farmhouse bench makeover: