
 There is wear to it, but nothing I can't handle. Plus, that faux leather top has to go. I'm liking the nail-head trim too, but not sure I'll bring that back. We'll see.
DIY TIME
First order of business is to remove all those stubbornly stuck nail heads. ugh. Then, once those are out, my hands get the pure bliss of removing all those staples too. Oh the joy! {{sarcasm to the hilt}} It's at this point I choose not to reuse them. Why? Mainly because four broke in my removal process and finding a match to this design is nearly impossible. Besides, I have something a little more dressy in mind.
NEXT STEPS
Next, it's time to bring on the funky fun. The overall design of this vintage piano bench is kinda boring. In order to dress it up a bit I want to add a few features. One of the easiest ways to do this is using these amazing molds. You can see how I've used them in the past HERE. I've used these molds for the paper clay, hot glue, and you can even use them for food too. Simply press in your medium, remove and let cure. Then, apply with an adhesive. I'm using wood glue and my nail gun to add a few small tacks to keep them from sliding down while glue is still wet.
See my demo in my video tutorial below.
I've used these molds for the paper clay, hot glue, and you can even use them for food too. Simply press in your medium, remove and let cure. Then, apply with an adhesive. I'm using wood glue and my nail gun to add a few small tacks to keep them from sliding down while glue is still wet.
See my demo in my video tutorial below.
 However, Before I head to the next step of fun, I paint the accents in a paint similar in color to the stain.

MORE FUN
This is the point where I get giddy. First, I start the fun with a custom color I mixed for this project. I have the first coat on in 10 minutes. Then, I add a second coat soon after.
Before I call this project finish, I want to add dimension. In order to do that, I use my old(er) to wax the bench.
First, I start the fun with a custom color I mixed for this project. I have the first coat on in 10 minutes. Then, I add a second coat soon after.
Before I call this project finish, I want to add dimension. In order to do that, I use my old(er) to wax the bench.
 Last, but not least, I add new linen upholstery to recover the top. I can't get enough of this fabric I used on this antique desk set HERE.
 For the final touch, I add some gimping with my hot glue gun. Are you ready for the reveal?
THE REVEAL
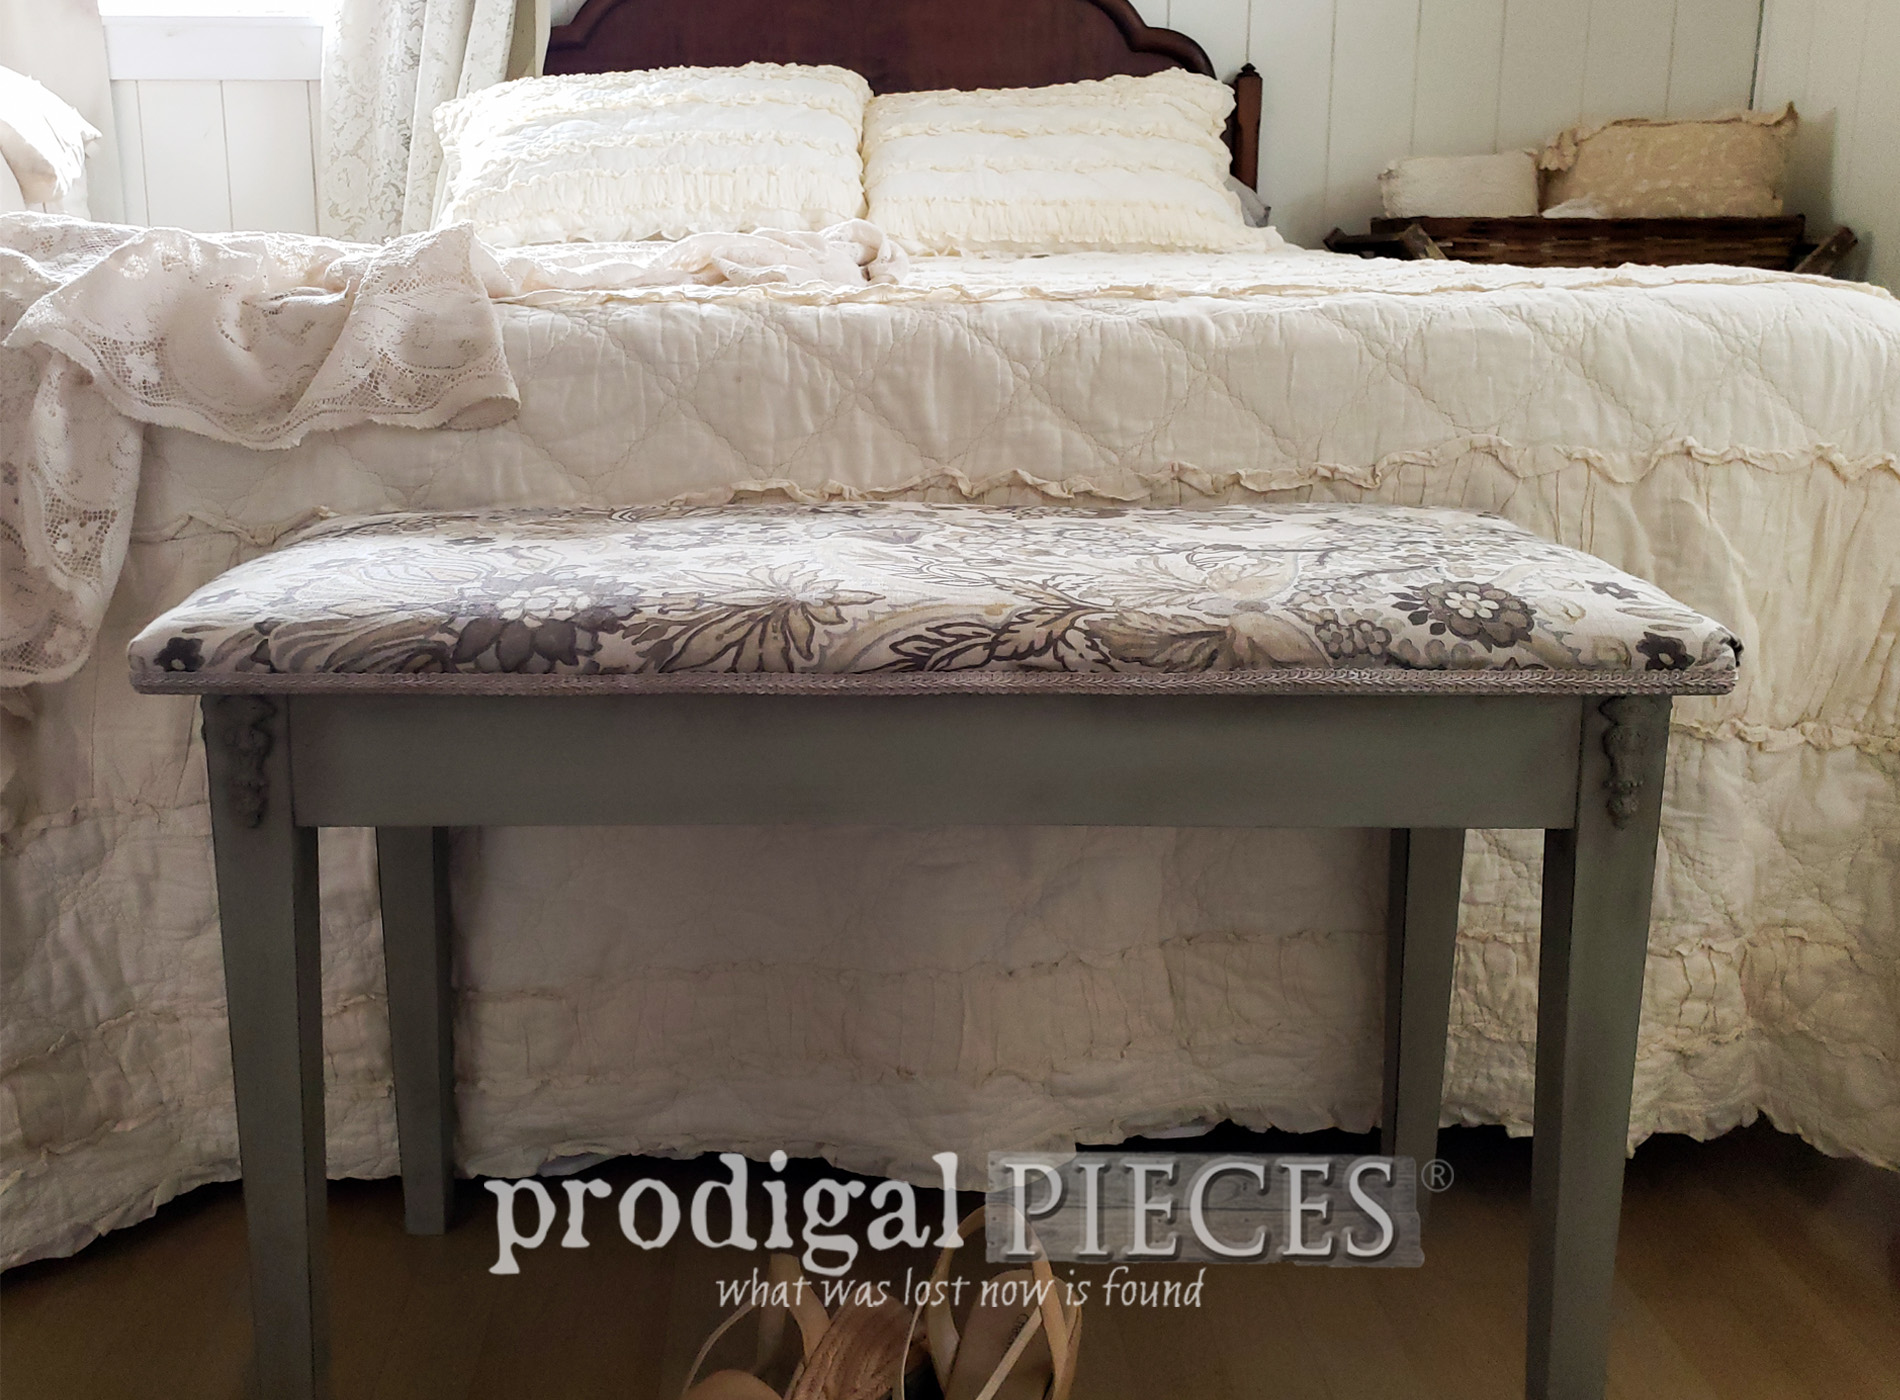
Finally, here's this vintage charm made new with paint, upholstery, and bit of fun. Would you know it's the same piece I brought home?
 Notice I didn't set it in front of my piano. It works perfectly as an accent bench in an entry or at the end of a bed as I've staged it here.


NEW LOOK
Isn't that a fun new look? The best part is that it even has storage to tuck away nightgowns, or books, or...you get the idea. Likewise, I couldn't resist adding a little whimsy to the inside.
 If you'd like to make this bench your own, you can find it and much more available in my online shop. (SOLD) In addition, don't forget to make use of your discount if you're signed up for my free newsletter.
[metaslider id=30251]

 Additionally, do pin and share my vintage piano bench makeover to inspire others to see past the obvious when creating their home story.
 To get these DIY tips & tricks in your inbox, be sure to sign up for my newsletter. PLUS, you will get your FREE Furniture Buying Checklist and special discount to my shop. Until next time!

Also, more DIY projects like my vintage piano bench makeover:

