 It is no secret that I love all things wood. Wood is one of the most versatile mediums. Just think of how we enjoy trees for so many things - beauty for our eye to behold, structures we live in, furniture, provides heat, paper in many forms, carvings...I could go on. So, when I find these geometric shapes in a bin for 52¢ instead of $3.98 I GRAB THEM ALL. hahahaha!!
 Do you blame me? Well, this loot is inspiring me to create an art I've had in my head for quite some time. This was my chance to bring it to fruition in a much easier way than my original vision. I've had fun making other forms of reclaimed art HERE and also HERE.
TERMS OF USE: when you create this DIY mountain wall art you agree to the following: it cannot be shared or distributed for monetary gain in any way, it may not be modified in any way, and you may not claim the work as your own.
Do you blame me? Well, this loot is inspiring me to create an art I've had in my head for quite some time. This was my chance to bring it to fruition in a much easier way than my original vision. I've had fun making other forms of reclaimed art HERE and also HERE.
TERMS OF USE: when you create this DIY mountain wall art you agree to the following: it cannot be shared or distributed for monetary gain in any way, it may not be modified in any way, and you may not claim the work as your own.
DIY TIME
First, these are just basic triangles cut in roughly the same dimensions (approx. 5"). I have 40 in my haul that my toddler and I have fun rearranging into various shapes to see what would be the best fit. Here's my rough layout. Here's a little tip from me: I like to take a picture of something like this on my phone, then use the editor and a stylus to play around with it. In my mind's eye, I see this...
 So easy and fun! I even let my little girl have fun designing her own art with shapes and then playing with the image. I love to see my kid's creative spirit's soar.
NEXT STEPS
Initially, you can see in my layout that I needed to cut a few of them in half. I use my hacksaw to tackle that job. Then, I cut a piece of scrap wood to fit the dimensions of my layout. Once, I'm happy with my dry fit, I begin to create my DIY mountain wall art by gluing them on with wood glue. While you could tape off sections to tackle the stain/paint, I just like to wing it. These foam brushes make it easy to be precise. For this project, I am using 3 different stains for the mountains: Summer Oak, Antique White, and Early American.
First, I fill in the smaller mountains with the Summer Oak. Then, I fill in the largest one with Early American. After that, I use the Antique White with blending to create dimension and the snow-capped tops.
While you could tape off sections to tackle the stain/paint, I just like to wing it. These foam brushes make it easy to be precise. For this project, I am using 3 different stains for the mountains: Summer Oak, Antique White, and Early American.
First, I fill in the smaller mountains with the Summer Oak. Then, I fill in the largest one with Early American. After that, I use the Antique White with blending to create dimension and the snow-capped tops.
 At this point I am have a blast, y'all!! I'm carried away creating and letting my vision come to life. I can only imagine the pure joy God had forming His creation. I marvel at it all. Being creative helps me understand Him more. I see His love in everything.
"The heavens declare the glory of God, the skies proclaim the work of his hands." Psalm 19:1
COMPLETE
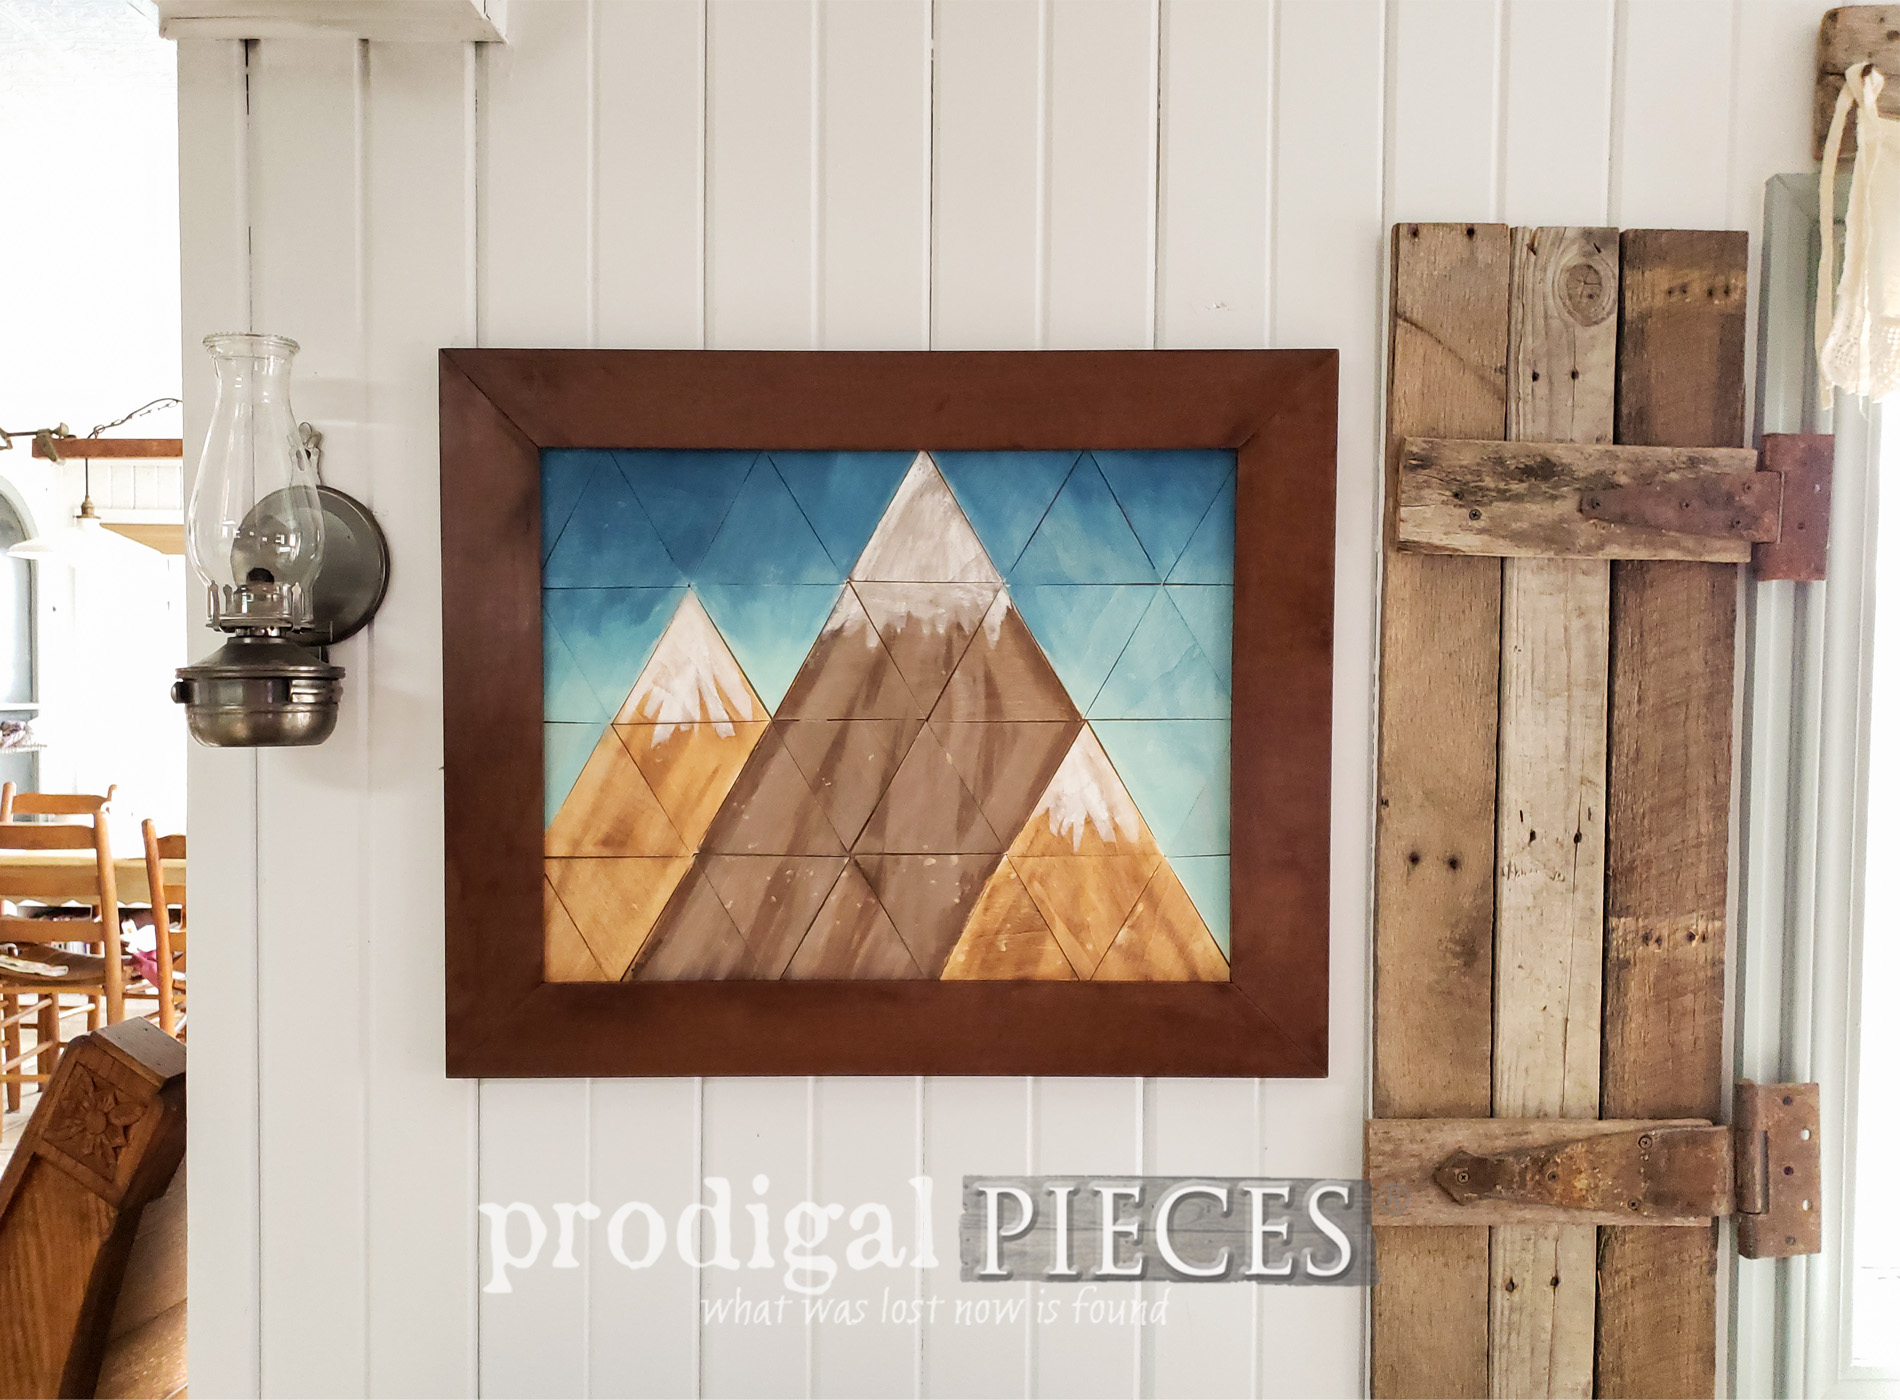
Many thanks to JC stepping in and helping me complete the frame for my art. In addition, thanks to my little brother who brought me more wood for my stash so I can continue to create. JC chopped and I assembled using my Kreg Jig, wood glue, and my point. Finally, here's my vision complete. Yay!

 So...I have to ask...what would you have created with all those triangles? I'd love to hear your ideas too.

 Likewise, as with most of my work, this DIY Mountain Wall Art is available in my online shop. You can see much more there too!
[metaslider id=30251]
 Additionally, pin and share my fun to inspire others to check the clearance bin too!
 Up next, this vintage piano bench is about to become something more. See the new look HERE!
 To get these DIY tips & tricks in your inbox, be sure to sign up for my newsletter. PLUS, you will get your FREE Furniture Buying Checklist and special discount to my shop. Until next time!

Also, more projects like my DIY mountain wall art:

