 I've said it before and I'll say it again, it doesn't take much money to make your house your home. I'm a prime example of that. With our family of 8 we have to watch spending and creating storage is key. Thrift stores, garage sales, estate sales, and even the curb offer much trashure (one man's trash is another one's treasure).
THE BEGINNING
This vintage Cosco serving cart was used in a thrift store to display wares, and even had a "Not for Sale" sign on it. However, I felt bad for it and would ask on occasion if they would sell it to me. It wasn't until the shop came under new ownership that they said they were upgrading to industrial style carts and I could have it. Happy dance!! Likewise, I've had many Cosco carts in my shop and they are built to last even if they don't always get treated properly over time. Not only does this one had contact paper on top and sides, rusted spots, dents, and chipping, peeling paint. Meh. With that in mind, there's nothing a little DIY elbow grease can't handle, right?
 So, I have to ask...would you tackle it? Many of you saw it previewed in my post earlier this week and told me you had one similar or worse. I guess we are the Cosco cart avengers!! hahaha!!
DIY TIME
First, I peeled off that contact paper which left an awful residue. Easy to take care of if you use rubbing alcohol. It works wonders in drawers where people have lined them too. Then I disassembled all the pieces to make it easier to clean. Next, I used steel wool to remove all the flaking paint and rust. Nothing like good scrubbing to freshen it up! The chrome cleaned right up and the trays were ready for the next step. This is where I am ever thankful we recently added a utility tub to our kitchen/laundry/dining area remodel. woot!
*post sponsored by HomeRight (see full disclosure)
Once clean and dry, it's time to break out my orbital sander and get rid of the rest of the damage that I could. I used a 120-grit paper and just had at it.
NEXT STEPS
After sanding, I rinsed and dried it again, and now it's ready for paint. Fun part!! If you've known me for long, you know how addicting spraying paint can be whether in a can or using my sprayer But... it's not so fun to make a hot mess that you have to explain to your husband why his tools look like Smurfs threw up on them. ahem. Enter in my spray shelter. Don't you just love it? You can see how I've used it and my small spray shelter too in these past posts. A girl can nevah have too many. For this project, I chose to use a RustOleum color called Vintage Teal. Sounds like me, doesn't it? tee hee hee. Notice my black spray-painted thumb from painting the casters. whoops!
TIP: If you happen to get spray paint on your hands, just grab some olive oil and rub it right off. No chemicals needed. {{applause}}
For this project, I chose to use a RustOleum color called Vintage Teal. Sounds like me, doesn't it? tee hee hee. Notice my black spray-painted thumb from painting the casters. whoops!
TIP: If you happen to get spray paint on your hands, just grab some olive oil and rub it right off. No chemicals needed. {{applause}}
 They key to getting a nice even coat when spraying anything is beginning the spray before you hit the project and continue off of it. Also, the distance between you and your sprayer should be as manufacturer recommends, approx. 12 inches.
 After the first coat, I let it cure for at least 30 minutes, and then apply a second coat and let cure for 2 hours at least.
While the paint layers were curing, I set about to add a bit of cuteness and privacy to this cart. I decided to whip up a dust ruffle for the bottom shelf, because who doesn't have things they want to hide...am I right?
After the first coat, I let it cure for at least 30 minutes, and then apply a second coat and let cure for 2 hours at least.
While the paint layers were curing, I set about to add a bit of cuteness and privacy to this cart. I decided to whip up a dust ruffle for the bottom shelf, because who doesn't have things they want to hide...am I right?
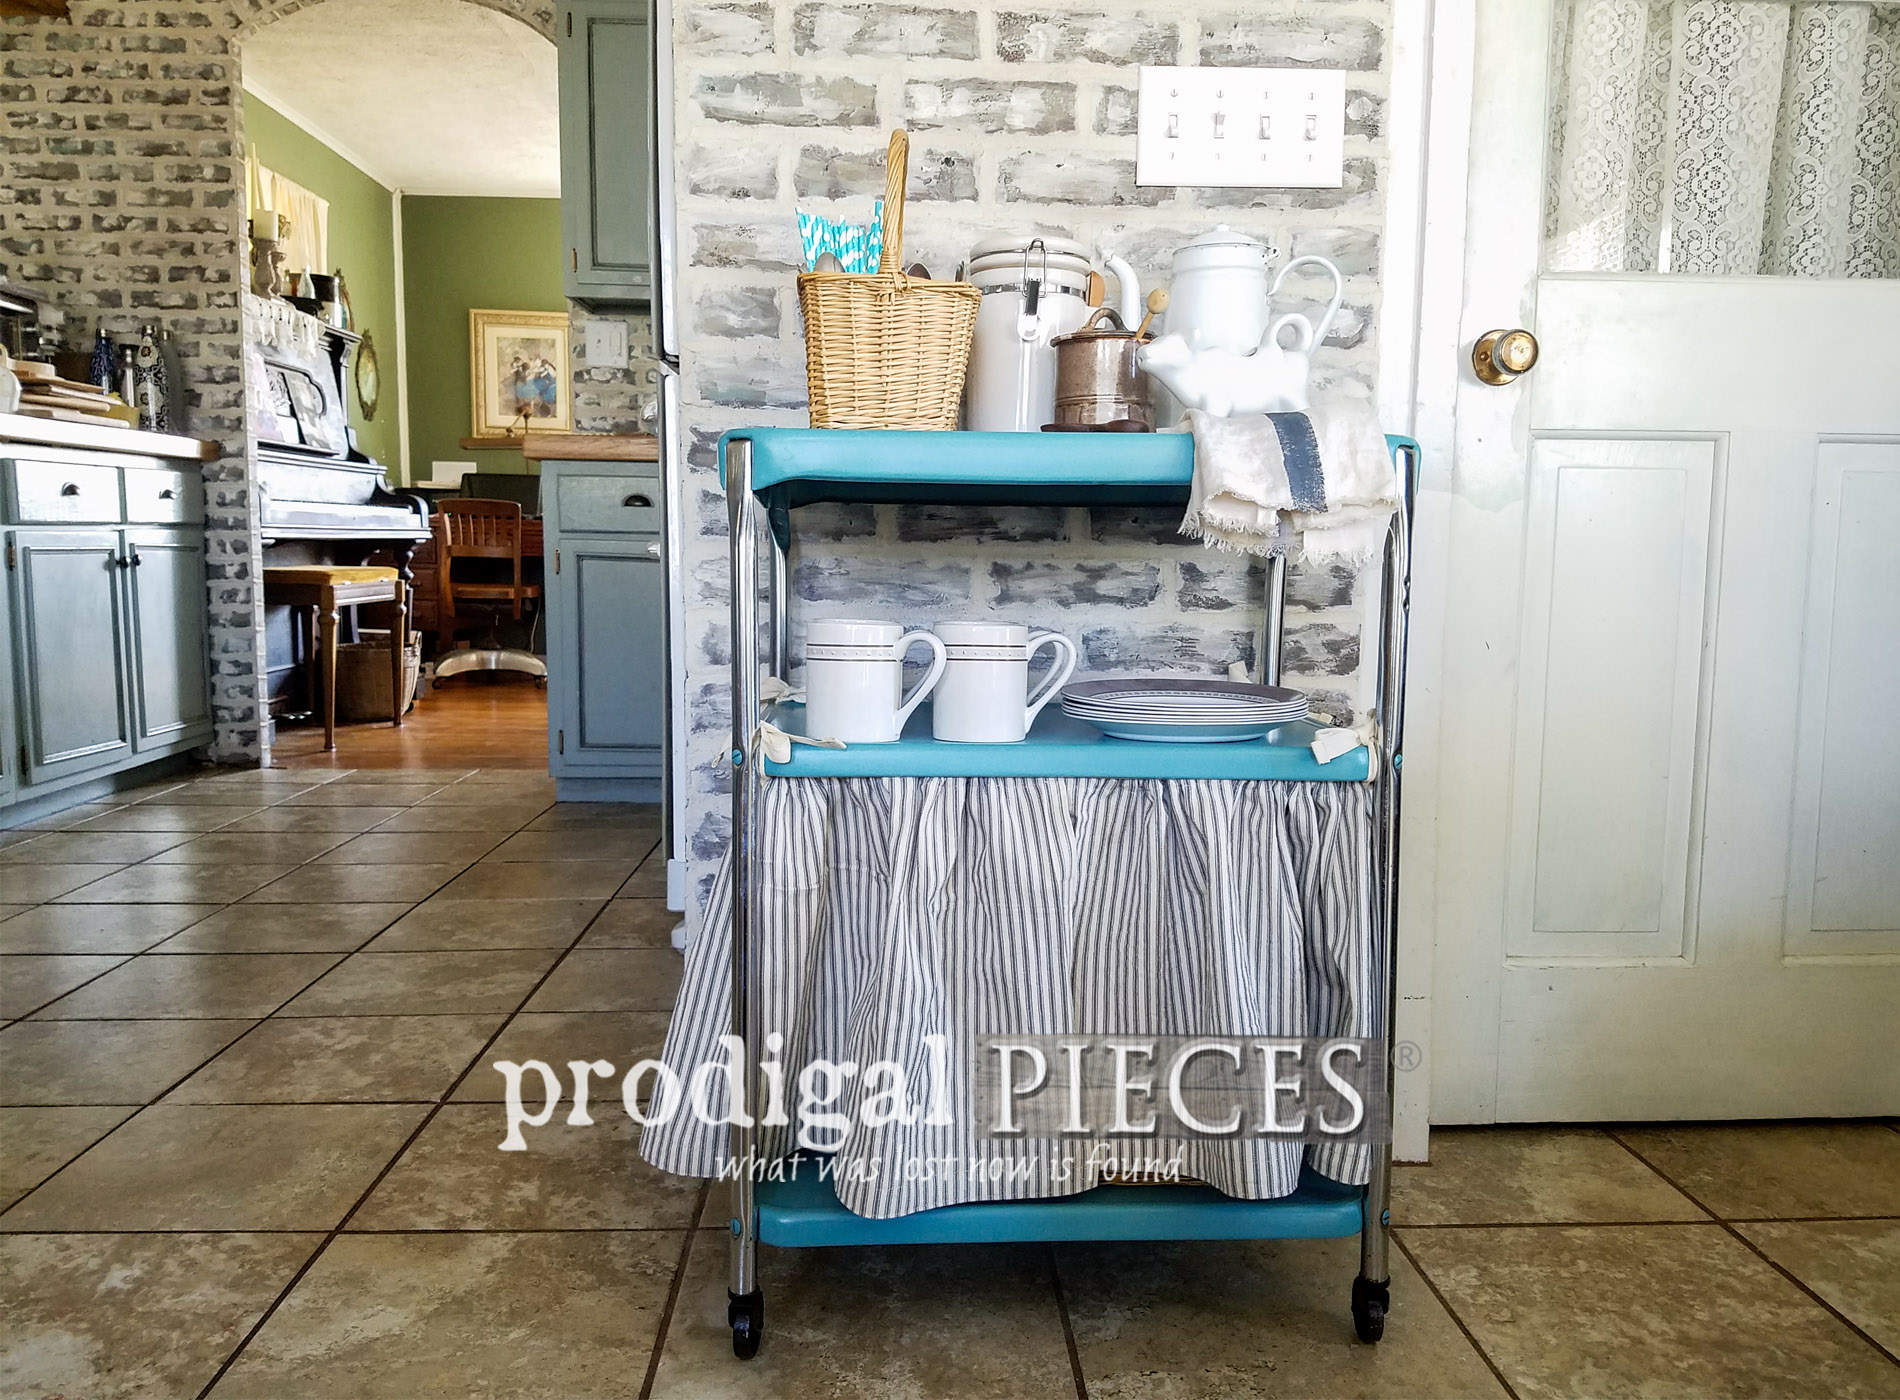
THE REVEAL
Here's the vintage Cosco serving cart all reassembled and ready to go with a cute cottage farmhouse new look.
 I just love how the blue looks so good, and the dust ruffle takes it to a whole new level. Also, I'm so happy that it came out as good as it did. The trays are not perfect, but they are 99% better and ready to go. This cart is perfect in your kitchen, laundry, bath, even as a nightstand. So many uses for these!
 In case you're curious about the dust ruffle, it does come off and easy to wash. I've made mine from gray on cream ticking fabric so it will hold up well.

BONUS
The three sectioned baskets and are included with this vintage Cosco serving cart if you would like to purchase it from my online store. If I could, I'd keep it!

 Cute twill tape bows make me smile. It's the little things we do to make our home our own. Truly you can do this project with just some time involved.


SHARE
Additionally, do pin and share this vintage Cosco serving cart makeover to inspire others to get their DIY on too. There are so many ways we can improve storage in our home, we just have to be willing to try.
Up next, this vintage Art Deco vanity is in much need of a new look. Poor thing is a hot mess! See the after HERE in the reveal.

To get these DIY tips & tricks in your inbox, be sure to sign up for my newsletter. Until next time!

Also, more projects like my vintage Cosco serving cart redo:

