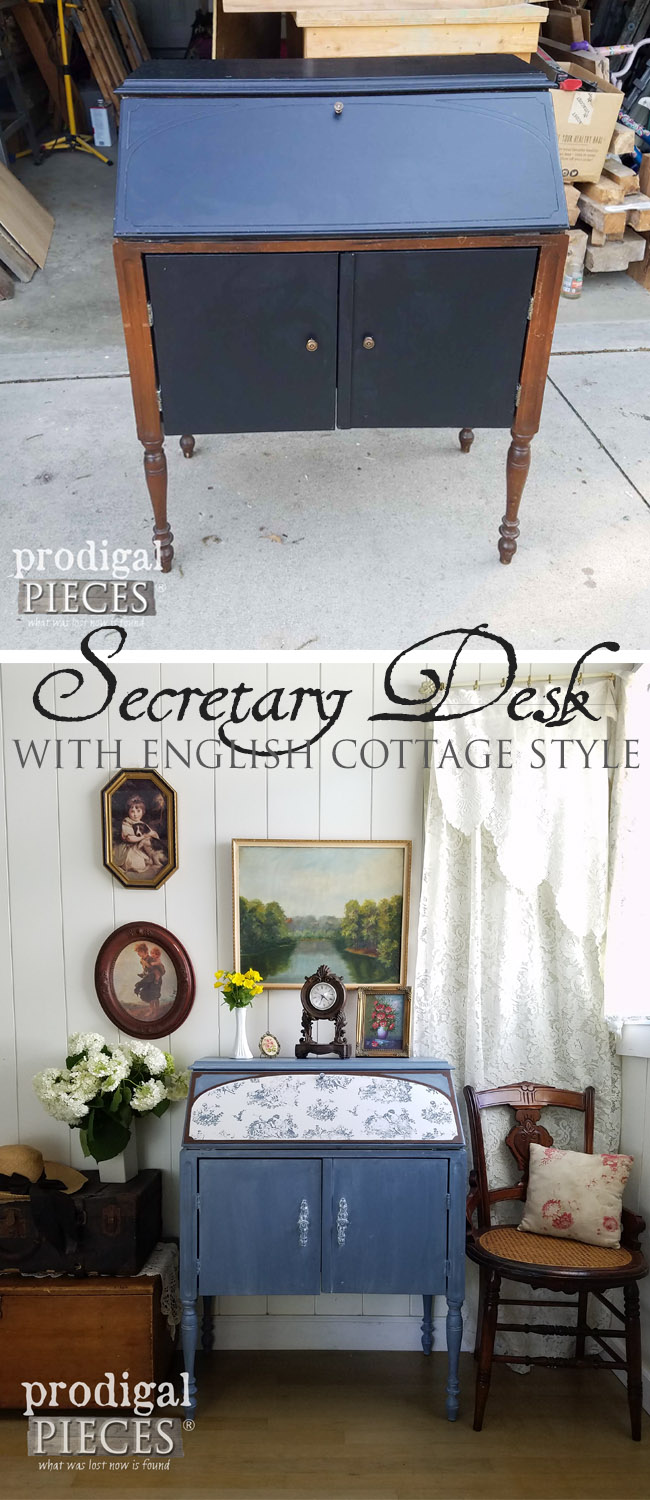
 Not only is this have fantastic lines, but plenty of function too. How many of us have a wasted-space corner that this would be perfect for? I'm thankful Christy thought enough of me to haul it to my house. Isn't that sweet?
 However, I must admit my spidey junker sense kicks in and begins to ponder...WHY was this at the curb. hmmmm...
Well, at first glance (and sniff) it looks solid enough, but then I found that the drawer wouldn't shut properly. That meant that the frame had issues because the drawer guides were fine and the drawer was square. On close inspection, I found that the leg had split away from the frame and the previous owner had used too long of screws to hold all the leg plates on. That led the legs to be wobbly and the frame to be offset.
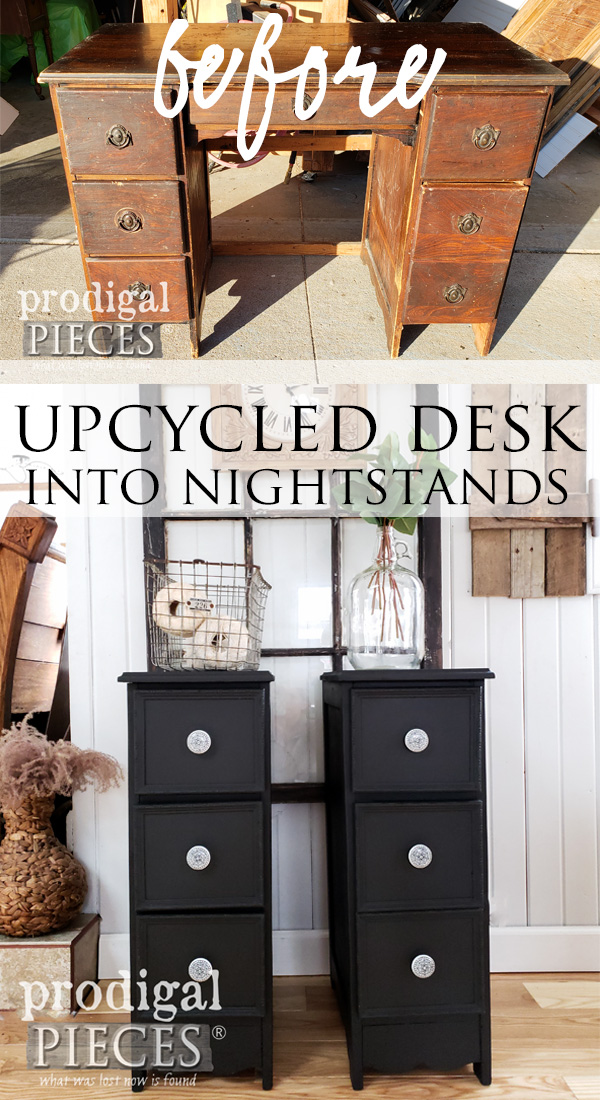
Also, if you look closely, there is a jack on top of the desk that I'm assuming held a lamp. There was also a chunk missing out of one of the legs too. No worries, all are fixable and relatively easy. It all just takes time. Free is never free - I could tell you stories. haha.
However, I must admit my spidey junker sense kicks in and begins to ponder...WHY was this at the curb. hmmmm...
Well, at first glance (and sniff) it looks solid enough, but then I found that the drawer wouldn't shut properly. That meant that the frame had issues because the drawer guides were fine and the drawer was square. On close inspection, I found that the leg had split away from the frame and the previous owner had used too long of screws to hold all the leg plates on. That led the legs to be wobbly and the frame to be offset.
Also, if you look closely, there is a jack on top of the desk that I'm assuming held a lamp. There was also a chunk missing out of one of the legs too. No worries, all are fixable and relatively easy. It all just takes time. Free is never free - I could tell you stories. haha.
DIY FUN
First order of business is to make all the necessary repairs. After a few hours of taking apart the frame and legs, gluing, and nailing it all together with my nailer, we are good to go. Next, my little man helper, Mr. O, knows that it's important to make any necessary repairs with wood filler. He removed that jack on the top, and then took care of the dings, dents, scratches, and holes he could find. He's not a newbie to DIY fun. You can see his past projects in these posts HERE.

A MATCH
While that was curing, I head out to find a chair to pair with this desk. I mean, what's a desk without a seat, right? I stopped at my normal haunts and thought I was going to come up empty. However, I finally found this gem just waiving at me to pick it up. At first glance I was like oooh...but then, again, my spidey junker sense says hmmm... I sits, I shakes, and jiggle. We are now looking at a whole lotta work. This thing was ready to fall apart. eep! I called the owner over to ask a price because it wasn't marked. I showed him all the repairs needed and he said $5. Worth a try, right? Mind you, I've wrestled with chairs before and they ain't easy. There are so many things that could go wrong with repairing, especially if you get it out of square.
It's at this point I was halfway in the tear down of THIS ENTIRE CHAIR that I was like...can I have my $5 back? haha.
At first glance I was like oooh...but then, again, my spidey junker sense says hmmm... I sits, I shakes, and jiggle. We are now looking at a whole lotta work. This thing was ready to fall apart. eep! I called the owner over to ask a price because it wasn't marked. I showed him all the repairs needed and he said $5. Worth a try, right? Mind you, I've wrestled with chairs before and they ain't easy. There are so many things that could go wrong with repairing, especially if you get it out of square.
It's at this point I was halfway in the tear down of THIS ENTIRE CHAIR that I was like...can I have my $5 back? haha.
 Just kidding. Though I did wonder if I'd ever get it to sit right again. After it was completely in pieces and put back together, I can thankfully say I fixed it!! {{happy dance}}
UPHOLSTERY
Next, it was time for the upholstery. There were dozens of tiny rusty tacks. I've been down this road before many times and never relish the journey. After what seemed like hundreds of these tiny things were removed, I found...another layer with even more tacks. {{eye roll}} I do however, love that as I peel away layers, I get to know more of the story this chair has. Do note that I save those little rusty tacks. They come in handy when recreating my trashure creations.
 Now that the chair is restored, it's time for me to paint. Why paint? Well, both the desk and chair had damaged that needed repaired with materials that wouldn't look right restored with stain. Plus, a little paint never hurt anybody.
PAINT
My fun begins with paint. My first coat is a stain-blocking primer called Kilz. While the first coat is curing on the chair, I also begin my primer coat on the vintage corner writing desk we started earlier.
 When it comes time for the sides and top, I use the same product as well.

WAXING
After the coat of primer, I use two coats of antique white, letting cure between. To finish this makeover, I used a coat of white wax on the antique white to create a work effect. My old brushes make for great waxing brushes too. While all of the paint layers and wax were curing, I took on another small makeover. I found this lamp at the thrift store while hunting for chairs. I loved the sort of Fleur de Lis design it had. The best part it accents the back of the chair I found too.
MORE DIY FUN
I thought it would pair well with my desk, so I gave it a couple coats of paint too. For added fun I decided to add a few faux dahlias to the lampshade by cutting the bottoms of pinecones off and painting them. They look pretty white, but I wanted a bit of color added too so it would accent my finish look I'm after.
Here is my vintage corner desk with thrifted chair and lamp ready to go.
They look pretty white, but I wanted a bit of color added too so it would accent my finish look I'm after.
Here is my vintage corner desk with thrifted chair and lamp ready to go.

 I love how the lines of the desk match the chair perfectly. The upholstery I chose is the same as I used on this Lane cedar chest I did a year or so ago. It suits the look I was after and is so pretty too.


ALL DONE
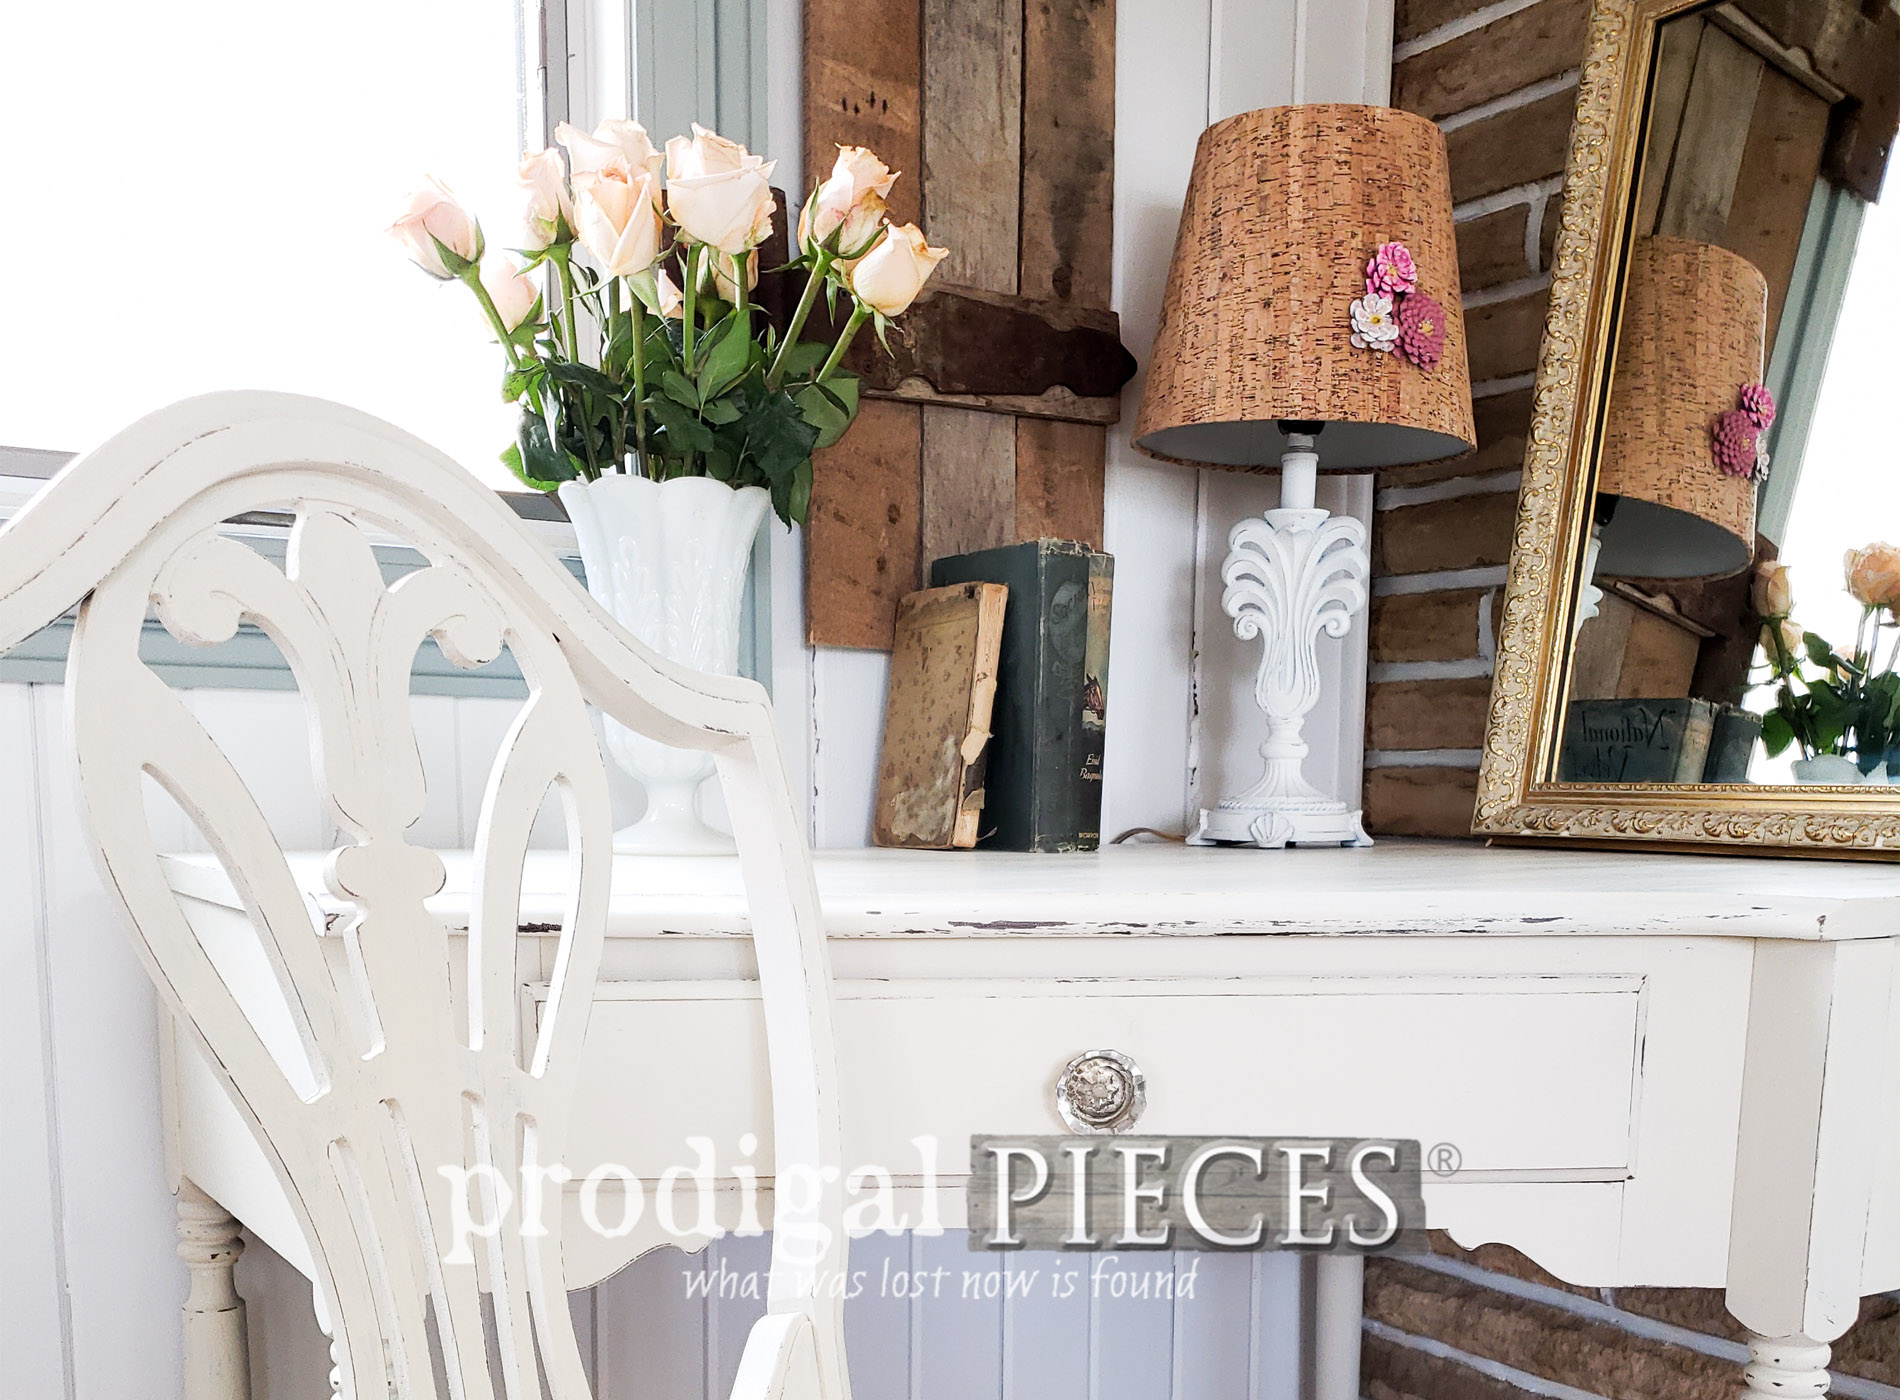
Notice I replaced the bail pull for a faceted glass knob. A little bling always makes me smile. Just for fun, I even painted the drawer a contrasting color and lined it with the same upholstery. A girl loves her pretties, right?
 The lamp I chose to update is happily decorating my little corner. I found that faux cork shade at a local store and felt it needed a pop of color. Aren't those pinecone dahlias pretty?


 What fun I have creating these things and sharing them with you. I so hope you are enjoying all that I've shared with you.


ONE MORE THING
One last thing I had to create just for fun and since so many of you have asked...more of these adorable, insulated lunch bag totes. eep!

 A few weeks back I introduced my lunch bags in this post of refashion HERE. So, as promised, I've continued in filling your orders as well as creating new designs.

 These new designs are one-and-only kind style because my vintage linens are a limited supply. However, I also still have my other linen, twill, and denim linen options available too. All bags are available in my shop along with my other creations. and finds.
[metaslider id=30251]
 Additionally, pin and share my vintage corner writing desk makeover to inspire others to grab that curbside trashure! tee hee.
 Up next, another of my curbside trashure finds will be getting a new look for our Furniture Fixer Uppers day. See the revival HERE.
 To get these DIY tips & tricks in your inbox, be sure to sign up for my newsletter. PLUS, you will get your FREE Furniture Buying Checklist and special discount to my shop. Until next time!
 Also, more makeovers like this vintage corner writing desk: