I've said it before, and I'll say it again...the wood section of the thrift store is veritable gold mine of sorts. You might be scratching your head at what I mean, but you have to remember all the fun I've had with
the loot I've had. I'm going to have some fun and show you what I did with these upcycled wooden signs. Yeehaw!

First, before you think I'm needing more coffee (1) I don't drink coffee, I'm a nut all the time and proud of it. tsk. (2) think about the versatility of wood in general. I mean, wood...one of the most readily available resources we have for creating homes, furniture, and so much more.
DIY FUN
Okay, so now you get what my mental strategy is, let's get our DIY on. {{funky groove dancing begins}} To begin, I'm choosing this weird...ummm...faux checkerboard? If you can look past the obvious 80's vibe, you will see gorgeous oak that is nearly 1" thick. Yasss...

First order of business is to cut out those hearts. You know they've got to go! I used my jigsaw to cut a handle-like spot instead to make it more functional for what I'm creating.
Then, I cut the entire piece in half with my miter saw, and sanded it down with my sander. Thankfully, my little brother (who's not so little at 6'5") brought me all sorts of gorgeous wood to play with. I just happened to have a piece of oak from that stash that would suit my purpose.

Once that was all done, I assembled my pieces with my nailer. For the finish, I applied a gorgeous hickory gel stain and topcoat of hand-rubbed wax. I will show you the finished result in a bit. Now, let's take a peek at the next upcycle.
SECOND PROJECT
With this second of my upcycled wooden signs, I wanted to change it entirely, but keep the overall shape. I don't mind the pineapple art, but feel it's time for a new look.

This one is made of a basic pine, so not much to bat an eyelash at for the wood source. However, it is still wood and can become something new. Right?
First, I added a white coat of paint with my brush. However, before it dried at all, I used my wood-graining tool (only $6!) to create a faux grain effect. You can see how I used in these posts
HERE or in the video below.

After that, I added some fun with typography and more texture. Are you ready to see my dynamic duo?
THE REVEAL

Can you find the upcycled project here in my kitchen? I'll give you a minute.
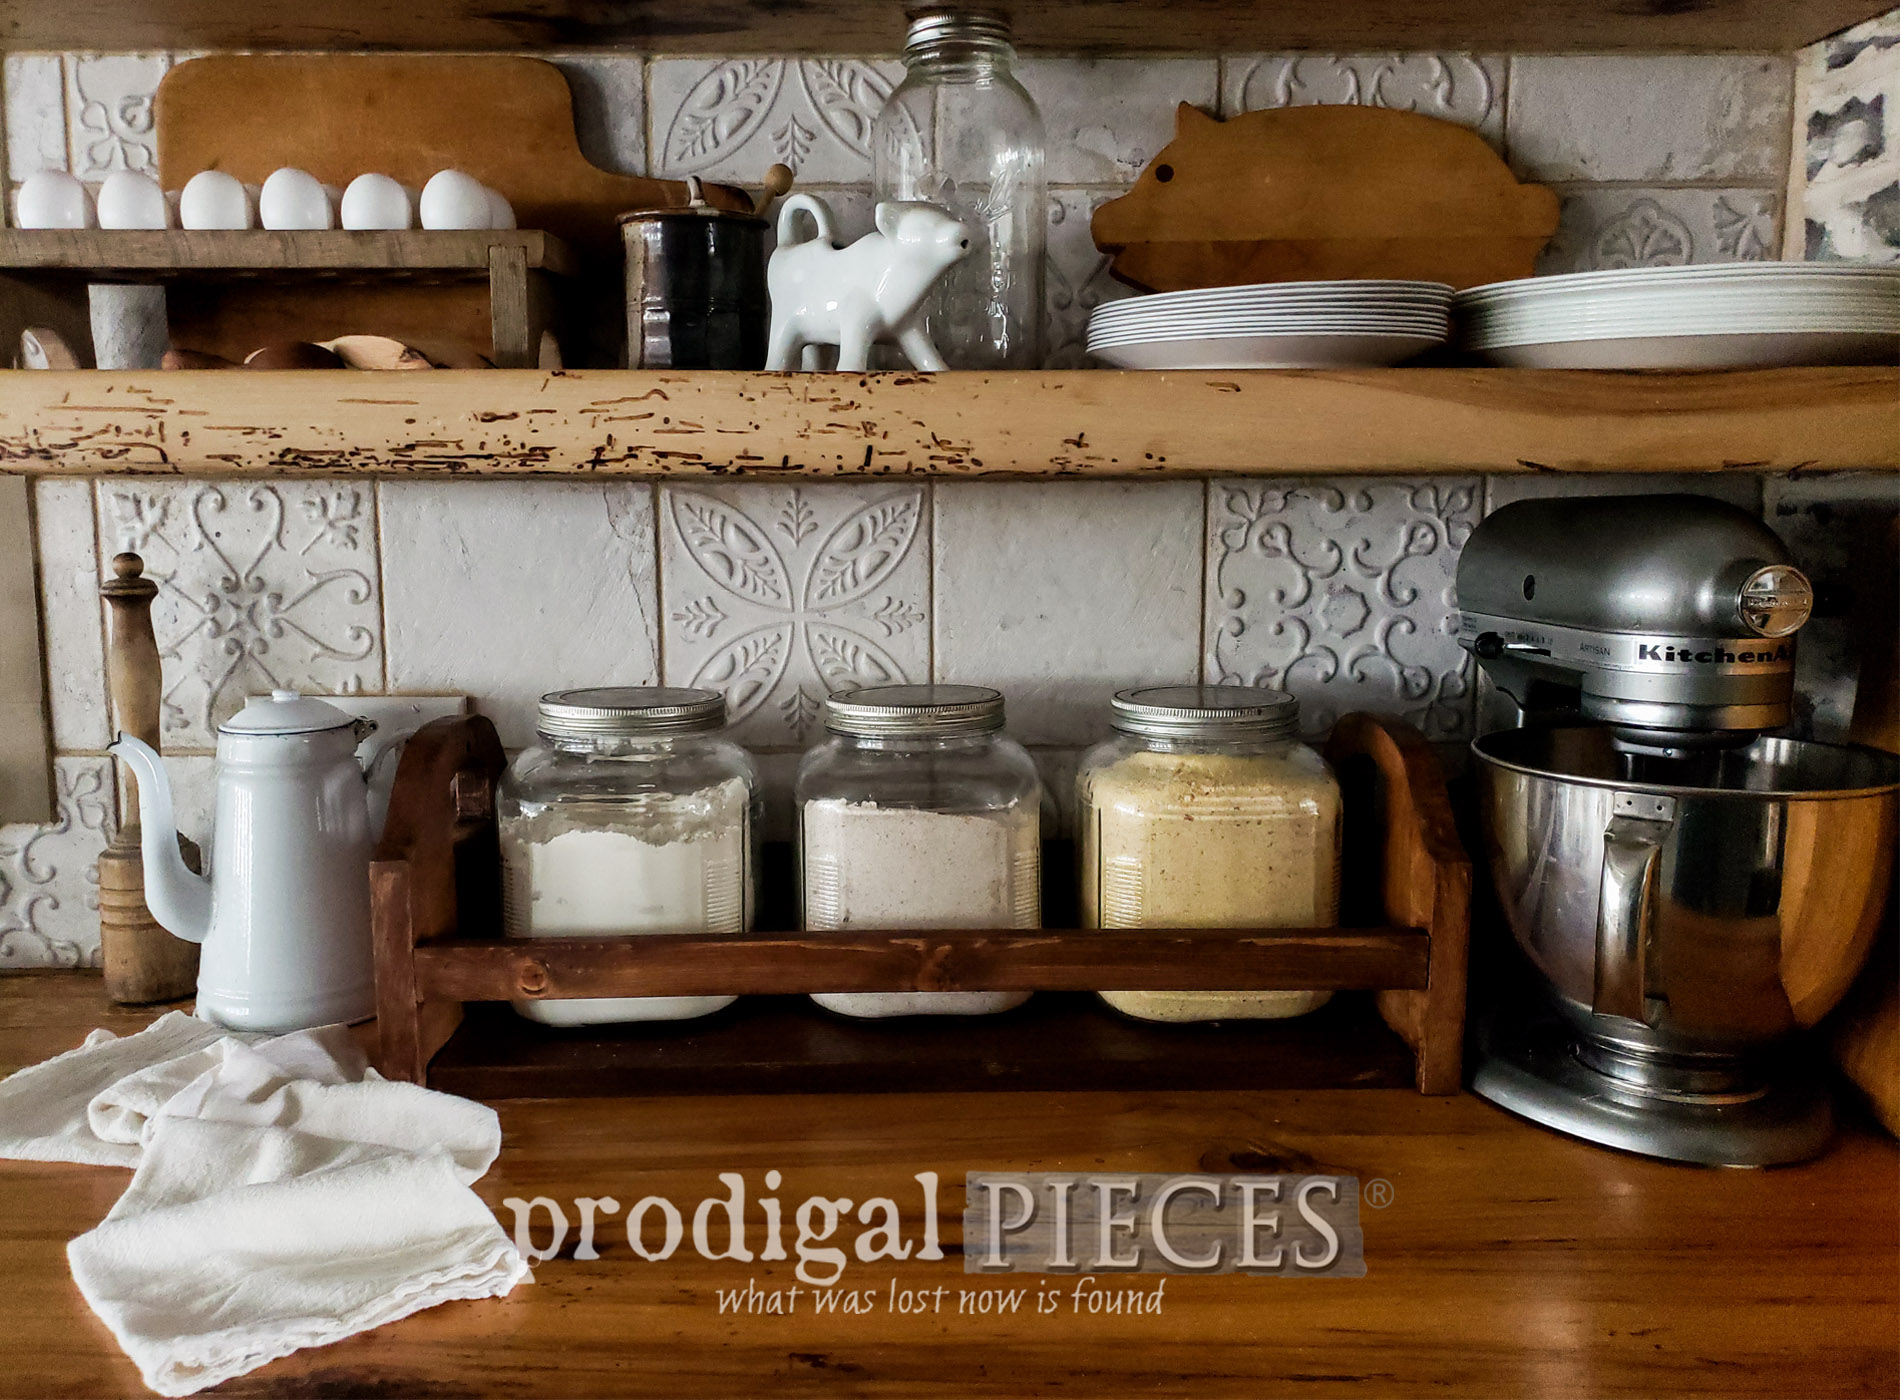
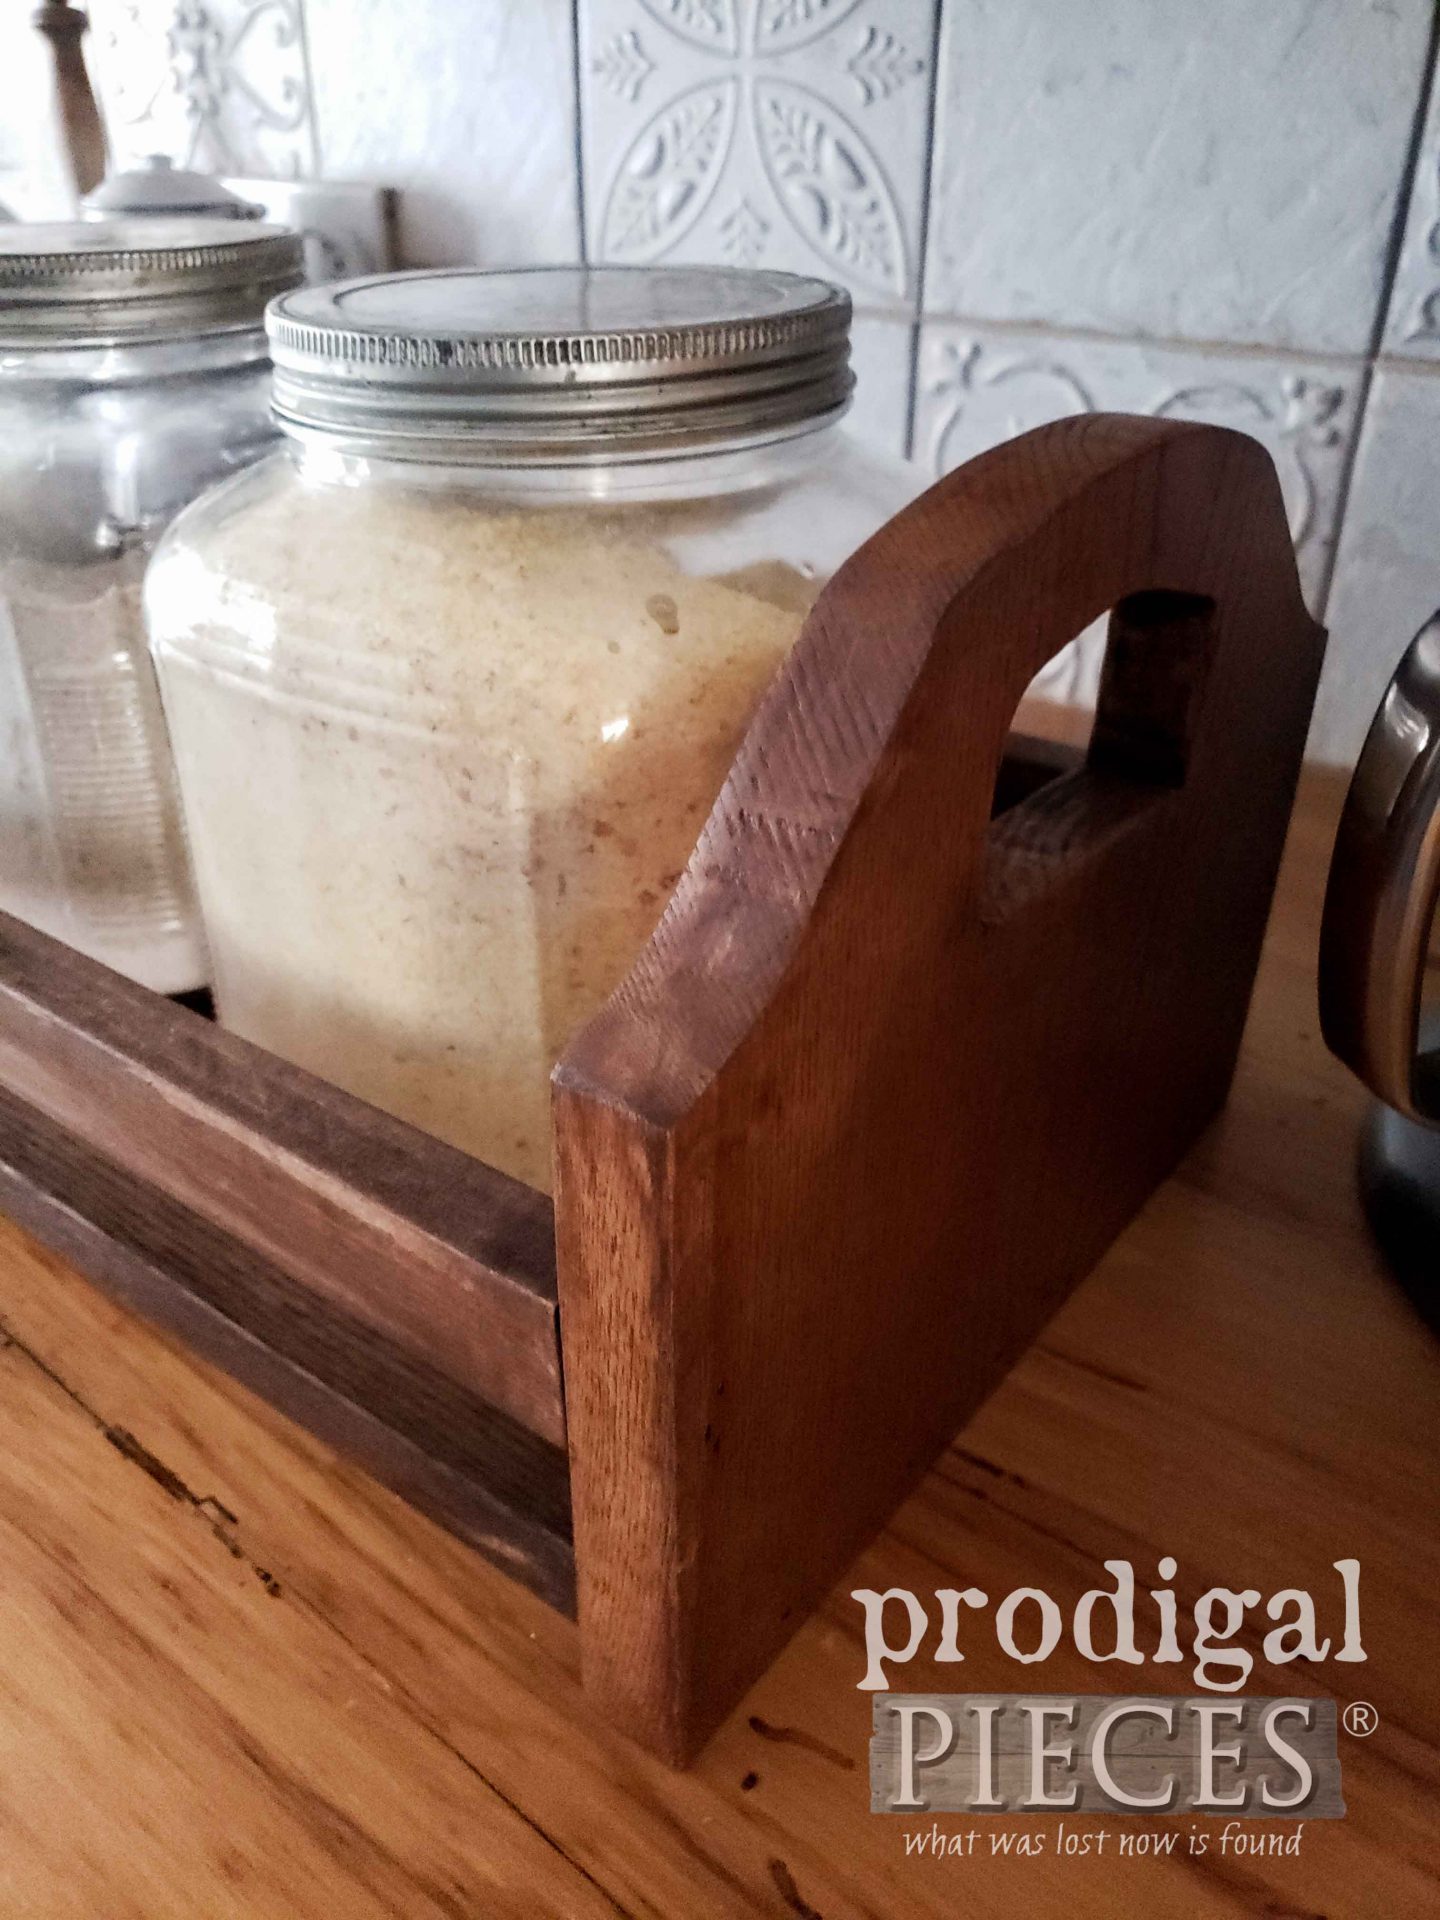
Did you guess it? Front and center, this storage crate is the first project I completed.


KITCHEN
Although I've staged it in my kitchen, it can honestly go most anywhere: centerpiece, planted pot holder, shoe storage...you get the idea. It corrals my canisters beautifully though.

Last, but not least, the second upcycled wooden sign project is now complete as well.

I was inspired with this one to make it rustic with a bit of a thought to focus on each day. It reads, "I still remember when I prayed for the things I have now." Truly something that makes you stop and think...and be thankful.

So...how'd I do? My goal is ultimately to inspire you to see past the obvious and envision something more. Maybe you have something you're tired of looking at that could use new life?

Both of these items are available in
my online store along with many other redeemed furniture, vintage finds, and handmade good. Come take a peek!


Also, pin and share my upcycled wooden signs to inspire others to think outside the sign and have some DIY fun.

Up next, I'll be sharing how this vintage secretary desk came to be mine, and how it got a new lease on life.
See the new look HERE.

Before you go, be sure to
sign up for my newsletter. Until next time!

 PINTEREST | EMAIL
Also, more projects like my upcycled wooden signs: