
DIY TIME
First, I decided to take on that extra piece there, a wine rack. I personally have no use for a wine rack. However, I know that I see them so very often in thrift stores and on the curb. So, I thought it fun to take on an upcycled wine rack transformation. My goal is to create a sort-of craft cart or multipurpose cart. This and the table set has obviously been left out in the elements for quite some time.
 No worries though, because it's made of solid wood and still has potential. I begin by taking off the top and removing the wine glass slots. This will allow me to refinish the top and do what I need to to the rack portion.

*post sponsored by HomeRight(see full disclosure).
NEXT STEPS
Next, I use my sander to take off the worn finish and prep the top for a Provincial Stain. It's looking better already. While I'm waiting for the stain, then the poly to cure, I move onto the rack. I begin by using my Rip-Cut on my 5½" Circular Saw to rip a few panels to top each rack. Then, I tack them on with my Stapler.

PAINT TIME
Once I had all assembled as I want, it's time for the fun part...PAINT. You know I adore my tools. Last month, I showcased a brand-new sprayer. Take a peek at it in action in my video below. It's handy and perfect for smaller jobs. The Finish Max, Super Finish Max Extra are still awesome too, but tackled the bigger jobs better (and smaller too). This one is designed for the crafter and small-time spraying enthusiast.
 First, I set up my DIY furniture turn table.
 In minutes I have the first coat of paint on and am ready to clean up before the next coat. Just twist the nozzle off with the Quick Connect feature and you're ready to clean. Easy!

THE REVEAL
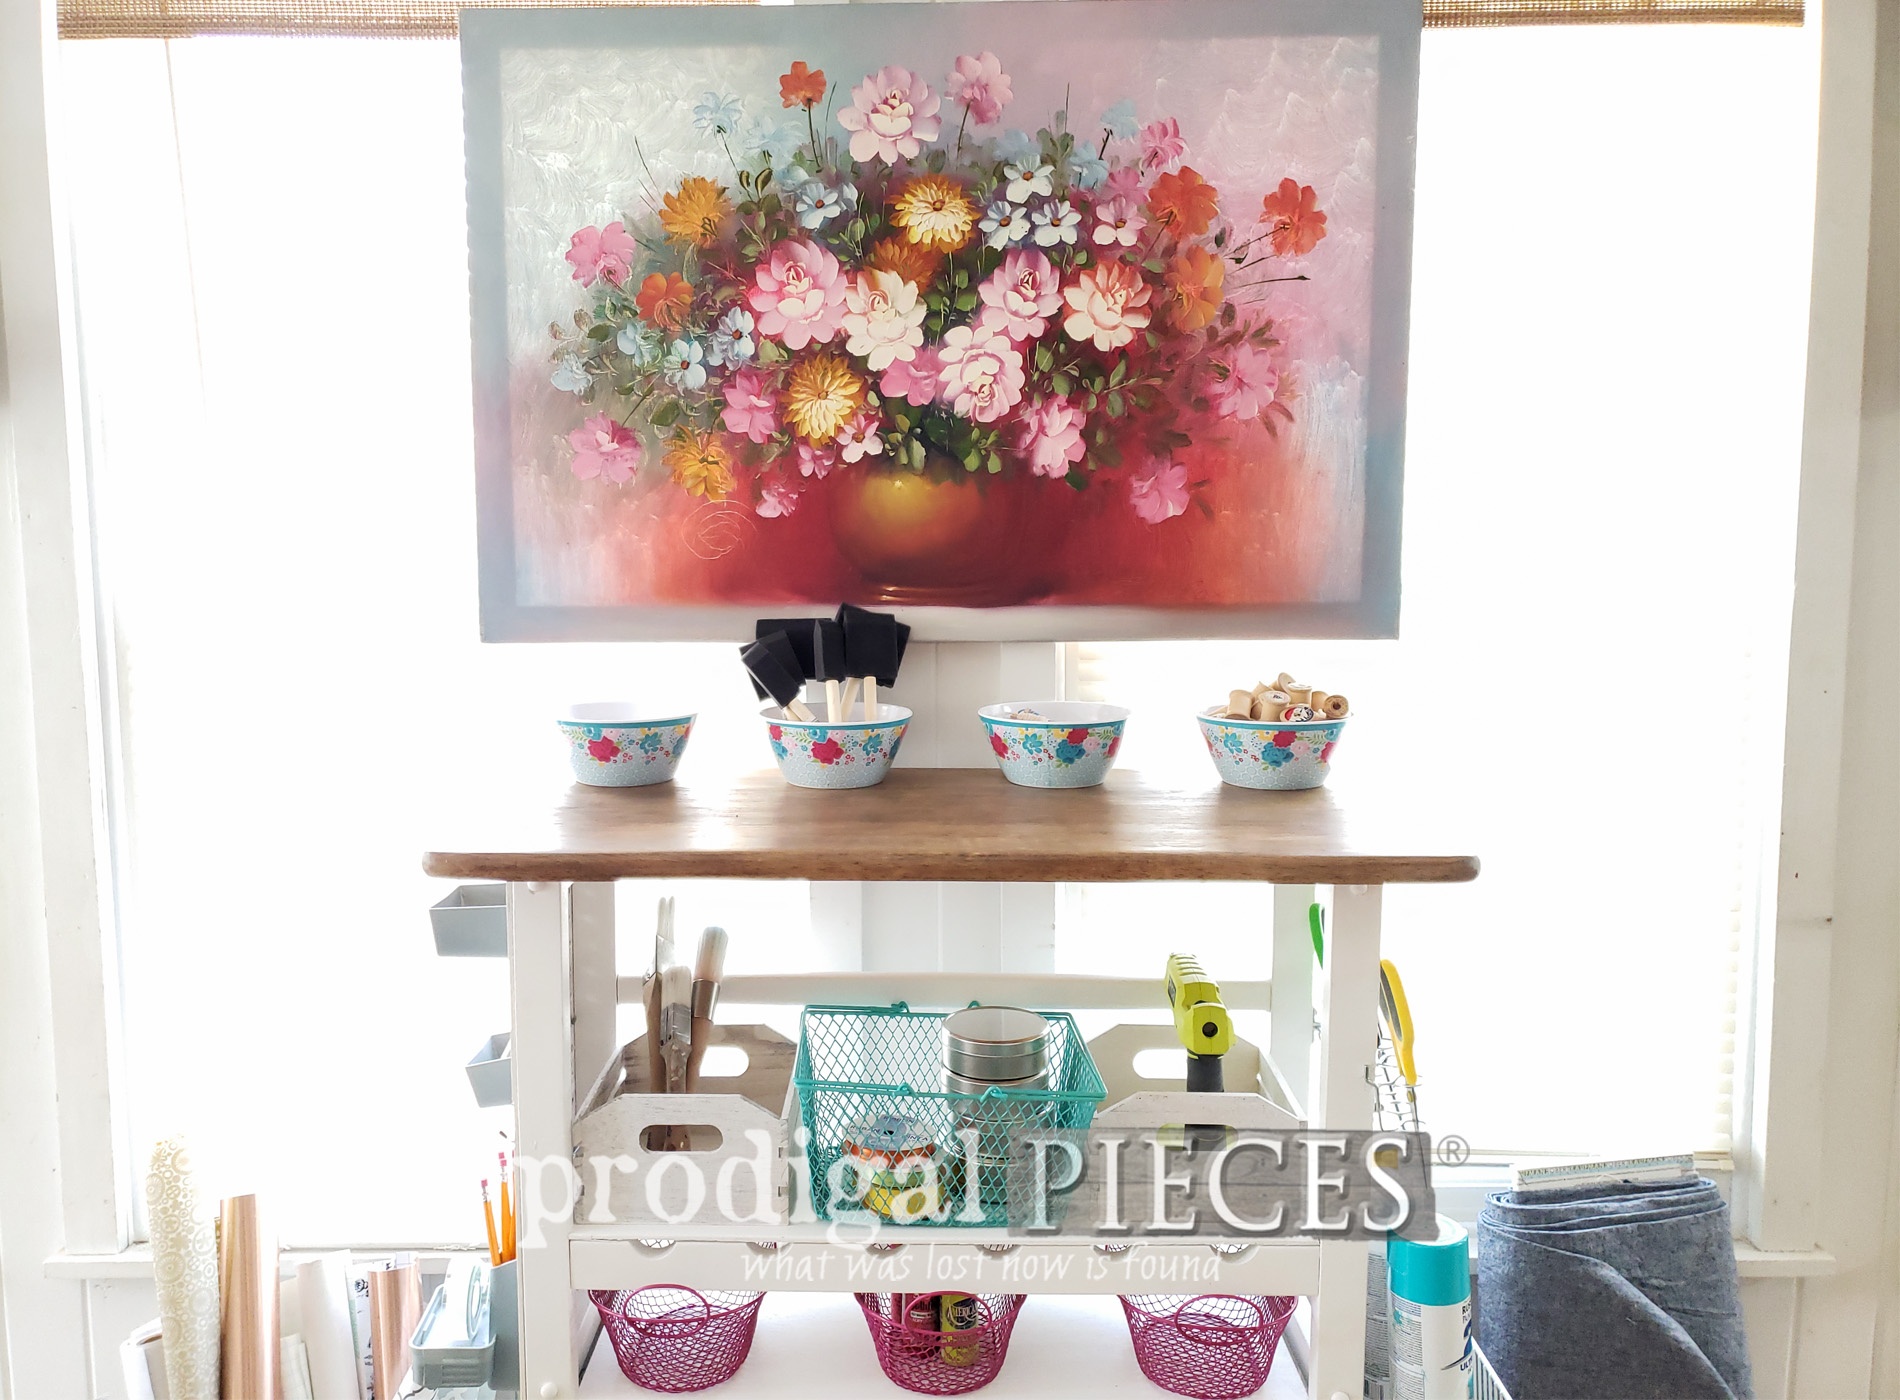
After a bit more doing, my upcycled wine rack craft cart is complete.
 I think I had fun with this...what do you think? tee hee? I had to reign myself in! While I could have continued adding stuff here and there, I felt this cart is ready to rock craft time.


 Likewise, I even added a spot to add kraft paper or rolls of any kind of paper to the backside. Plus, there's even more opportunity to add hooks and baubles wherever you want. And I love the colors, don't you?
 If you'd like to make this craft cart your own (for your kitchen, laundry, office & more), you can find it available in my online shop.


SHARE
Likewise, pin and share this upcycled wine rack to inspire other to give this a try. You can see the after of the table set found on the curb with the cart over HERE. It looks brand new!
 Before you go, be sure to sign up for my newsletter. Until next time!

While you're at it, here are more of my trashure projects like this upcycled wine rack:

 for your wedding, shop, birthday, welcome sign...you get the idea. Get the DIY details at Prodigal Pieces | prodigalpieces.com prodigalpieces homedecor diy shopping")