Today is a good day for a makeover...make that five Trash to Treasure makeovers. Yay! I'm joining my blogger friends for our monthly fun of inspiring you with our DIY work. For my project, I picked this thrifted bed tray to give a new look. These are so handy, aren't they? It's going to become my DIY tiled tray tutorial. Thrifted Bed Tray Before by Larissa of Prodigal Pieces | prodigalpieces.com This one is made in a simple design and is also kind of lightweight. I want to improve the function and style and show you how too. To make it an easy visual, I've created a video tutorial below, but also have the steps outlined here for you as well. Top of Thrifted Tray | prodigalpieces.com In all honestly, I'm not the first one to create a DIY tiled tray, by any means, but this one will be fun to do. Are you ready?

DIY TIME

First, I begin by wiping the tray down with a vinegar/water mix (2:1 ratio) to remove the crusty food remnants and get the wood ready for paint. Afterwards, I break out this happy Sun Yellow spray paint. Sun Yellow Spray Paint | prodigalpieces.com After that, I apply one coat of paint and then get ready to tile.
Here's the basic supplies you need to tile a tray of your own:
  • tile - feel free to mix it up
  • adhesive (Liquid Nails, Tile Adhesive, E6000...many options)
  • grout - preferably a premixed-sanded version
  • putty knife
  • tile snips (if needed)
  • tile sealer (if desired)
DIY Tiled Tray Tiling Supplies | prodigalpieces.com This is what I had on hand from our home remodel, but also from my DIY Faux Brick Tutorial.

NEXT STEPS

Next, to get started, I use my putty knife and tile adhesive to lay down a layer I can work work. You'll want to spread it on fairly smooth so that you don't have much cleanup later, but thick enough it grips the tile. How to Apply Tile Adhesive to DIY Tiled Tray | prodigalpieces.com While I'm just laying down the tile as-is, feel free to peel them apart and create a unique design. Have fun with it! Then, as I work my way down, I finish by placing tile by hand to fill in the design. Applying the Tile to DIY Tiled Tray by Larissa of Prodigal Pieces | prodigalpieces.com Last, I let the tile adhesive cure overnight. That will make it much easier to apply grout without ruining our spacing. Further, I add the grout by pressing it into the joints, then wiping clean. See video demo for details. Applying Grout to DIY Tiled Tray by Larissa of Prodigal Pieces | prodiaglpieces.com prodigalpieces diy entertaining home homedecor This too, will take time to cure - just follow manufacturer instructions. In addition, one word of caution, don't dump your rinse water down your kitchen sink or in-home plumbing. Dump it outside. After that, you can apply your grout sealant once the grout cures, if you prefer.
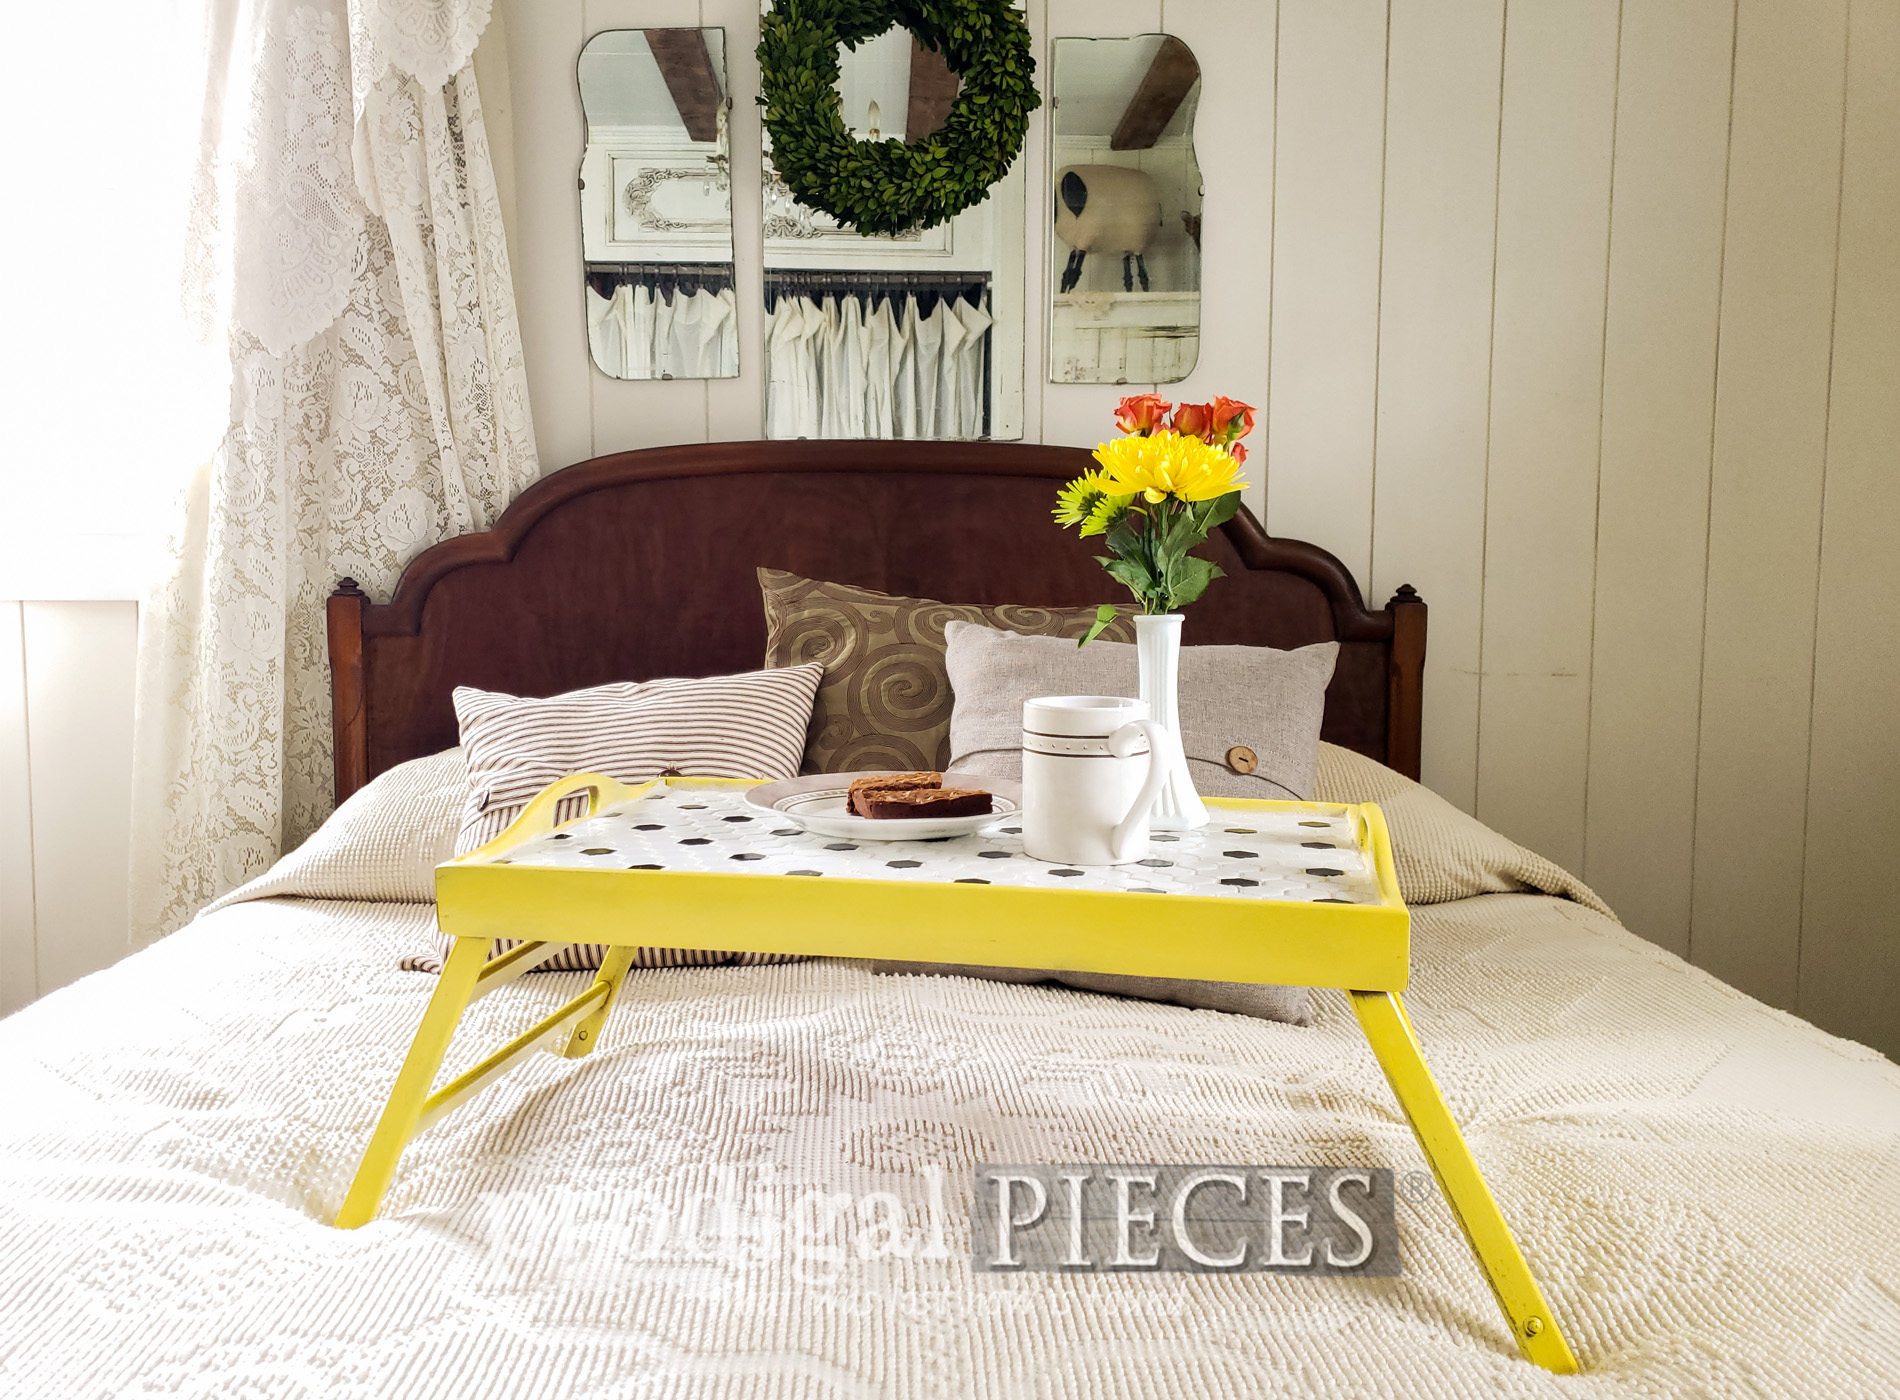
 Applying Grout Sealer to DIY Tiled Tray | prodigalpieces.com prodigalpieces diy vintage home homedecor

THE REVEAL

Finally, here is my DIY tiled tray ready to take on making someone's day. Modern Farmhouse DIY Tiled Tray in Yellow by Larissa of Prodigal Pieces | prodigalpieces.com prodigalpieces diy modern farmhouse home homedecor Top View Tiled Tray by Larissa of Prodigal Pieces | prodigalpieces.com prodigalpieces vintage diy home homedecor DIY Tiled Tray Tutorial by Larissa of Prodigal Pieces | prodigalpieces.com Nonetheless, I don't know about you, but I'll take a treat or breakfast, or book served up on this tray. How can you not smile with that happy yellow? Modern Tiled Serving Tray by Larissa of Prodigal Pieces | prodigalpieces.com prodigalpieces modern farmhouse entertaining home Fun Farmhouse Tiled Tray with DIY Video Tutorial by Larissa of Prodigal Pieces | prodigalpieces.com prodigalpieces diy farmhouse home homedecor

ANNIVERSARY

Not only am I excited about sharing this post, but I'm also celebrating 8 years of blogging today. Crazy, right? I can't believe 8 years ago I signed up for my $10 domain name on Mother's Day because I had hit a point of change. Likewise, I had no idea that this would all come of an initiative fueled by a desire to be heard, to inspire, and to share my passion. Thank you to all of you who make what I do possible, show me awesome love, and give me a reason to do what I do. To all of you who are debating on starting a new adventure, the time is NOW. Trashure by Larissa of Prodigal Pieces | prodigalpieces.com prodigalpieces blogger influencer diy Let's have a brownie to celebrate, shall we? Breakfast Snack in Bed on Tiled Tray by Larissa of Prodigal Pieces | prodigalpieces.com prodigalpieces bedroom diy If you'd like to make this tray your own, you can find it available in my online store.

Shop Prodigal Pieces | shop.prodigalpieces.com prodigalpieces

SHARE

Also, do pin and share this thrifted bed tray makeover to inspire others to give DIY a try too. It's fun! Grab that thrift store tray and turn it into a DIY Tiled Tray with step-by-step video tutorial by Larissa of Prodigal Pieces at prodigalpieces.com prodigalpieces diy home homedecor entertaining video tutorial

UP NEXT

Up next, this I'm starting the makeovers of this curbside loot. Would you have picked it up? Likewise, see the wine rack HERE and the table set HERE. Curbside Furniture Found by Larissa of Prodigal Pieces | prodigalpieces.com Before you go, be sure to sign up for my newsletter. Now, it's time to see what my Trash to Treasure friends have for you! blog signature

let's get socialPINTEREST | EMAIL

In addition, check out these funtastic DIYs to inspire you: Trash to Treasure Tuesday | prodigalpieces.com Trash to Treasure May 2020 | prodigalpieces.com
  1. Confessions of a Serial DIYer
  2. Salvaged Inspirations
  3. Artsy Chicks Rule
  4. Girl in the Garage

While you're at it, here are more projects like DIY my tiled tray tutorial:

Fantastic! This cast-off mirror is married to this antique dresser for a lovely upcycled dresser set makeover by Larissa of Prodigal Pieces | See the details at prodigalpieces.comHow to Make Natural Catnip Cat Toys with Tutorial by Prodigal Pieces | www.prodigalpieces.com


Lori Sawyer

Shared publicly - 2020-05-12 07:27:21

I love the tray! Yellow anything makes me happy

Larissa

Shared publicly - 2020-05-12 08:45:46

You and me both. I'm wearing a yellow shirt now. haha. Thanks!

Nancy @ Artsy Chicks Rule

Shared publicly - 2020-05-12 10:54:25

So cute, Larissa!! Love the happy colors! xo

Claudine

Shared publicly - 2020-05-12 11:06:30

Happy Blogaversary & Congratulations! This tray is adorable and perfect for Mother's Day! :)

JO-ANN

Shared publicly - 2020-05-12 12:01:42

Congratulations on your eight year anniversary, love your blog. The combination of the sunny yellow and that tile on your tray reminds me of summer and daisies, very pretty.

Larissa

Shared publicly - 2020-05-12 12:19:15

Thanks! I wanted to have a smile be made when its seen. :D

Larissa

Shared publicly - 2020-05-12 12:19:29

Thank you so much! Long time and such an adventure.

Larissa

Shared publicly - 2020-05-12 12:20:01

Thank you! Crazy how time flies when you're constantly busy...haha. You got what I was after...daisies. yay!

Denise - Salvaged Inspirations

Shared publicly - 2020-05-12 12:46:14

Happy 8 years of blogging my friend and I love your tiled tray and video. The brownies look yummy!!! Pinned :)

Becky

Shared publicly - 2020-05-12 13:26:49

Happy 8th birthday!!! Eight years of goodness! ??? Cute tray! I'll use this as guidance as I tile my mom's tray. She picked up tiles in Mexico for an embarrassing number of years ago. (Not that I've been procrastinating all that time, but the tiles have been sitting around my house for the last 2+ years, eek!) Thanks!

Larissa

Shared publicly - 2020-05-12 14:25:48

Thank you, Denise. I was such a different person 8 years ago. Wow!

Larissa

Shared publicly - 2020-05-12 14:26:25

haha. You are certainly not alone when it comes to things like that. Thank you for the birthday wishes, Becky!

Jen @ Girl in the Garage

Shared publicly - 2020-05-12 19:02:06

Larissa this tray turned out adorable! Happy blogging anniversary!!

Larissa

Shared publicly - 2020-05-12 19:43:16

Thanks! It's been so gray and dumpy here - I needed some sunshine! :D

Mary Loveland

Shared publicly - 2020-05-12 21:20:22

The tray is really cute but OMG WOMAN! What a hall!!! Can't wait for you to share!

Christy James

Shared publicly - 2020-05-12 21:51:49

You can’t help but smile when you see this tray! Love the yellow with the black and white tile! XOXO

Shelley S

Shared publicly - 2020-05-13 00:12:38

When our thrift stores and auction houses reopen I'll be keeping an eye out for a tray like this because your's inspired me to do a slightly different version. I plan to keep the outside of the tray wood if possibly, or failing that paint it a gloss black, then use the same adorable vintage looking tile - EXCEPT - I'll paint the black tiles intense yellow, leave white flower "petals" around each yellow tile, then paint the in-between tiles green. I'll probably buy enough tile to make some matching coasters and rivers too, but maybe vary the flower center and petal colors. Thank you for the inspiration!

Larissa

Shared publicly - 2020-05-13 05:11:56

haha! Funny thing is that I didn't want any more stuff. :D I couldn't just leave it there. tee hee!

Larissa

Shared publicly - 2020-05-13 05:12:14

Thanks! It did what I intended it to do. :D

Larissa

Shared publicly - 2020-05-13 05:12:59

Sounds like fun, Shelley! :D

Katie

Shared publicly - 2020-05-18 02:01:49

I love this! I’ve never done any tile work or used scary things like grout ? so this looks a little intimidating but I might just try it. Thanks for sharing!

Larissa

Shared publicly - 2020-05-18 05:35:23

You can do it, Katie! Grout is just sand in a pasty material, so it's messy, but very forgiving. If you find it needs more after it cures, you can fill in and repeat. :D

Marie

Shared publicly - 2020-05-19 11:26:23

What a sweet, happy, summery tray upcycle, Larissa!

Larissa

Shared publicly - 2020-05-19 19:48:25

You know I needed some sunshine! :D Thank you, Marie.

Sign Up To Comment