It's this time of year when I start to get cabin fever bad. Particularly this year, I think, because of
my new pup. We are all so excited to show her all the fun things to do outside when it's not F-R-E-E-Z-I-N-G. Given that I need relief of my craving for warm temps, I like to work on challenging brain projects. With that in mind, I head to a thrift store or dig in my stash to see what I can come up with. Here is the result of a thrift store run. Isn't it exciting...{{crickets}}. Well, hang with me as I take this yet-to-be upcycled paper towel holder and turn it into something new.

Now, I realize not all see this as such a stimulating a ...er...fun piece, but I wanted a
real challenge. While it might have held paper towels at one point, it will now become part of something more. How about that lovely decal? ahem.

In general, at this time of year, I begin to purge a bit of things I'm wanting to work on and try to make a list to keep me on track. I imagine I'm not the only one that does this very same thing.
CREATING TIME
Straightaway, let's get down and DIY. First, I need to see what I'm dealing with, so I disassemble the holder and here are the parts.

Does anything strike you? hmmm... For me, I want to make use of all the pieces, but just in a different form. While I'm at it, I also want to make use of some other items in my stash. On the positive side, here's some scrap pieces from a build we have left over from a custom build for our four daughters' bedroom remodel.

What you're looking at are cabinet-grade ¾" plywood with dados already cut into them (slots), and shelf pieces ready to go. Can you see where I'm heading with this? Not only, do I plan to use those wooden circles from the upcycled paper towel holder, but also the dowel and the back plate. In order to do that, I use my drill and forstner bit to finish the hole on one of the circles.

BUILD'N' UP
Next, this is where I take the plywood pieces and marry them to the paper towel holder pieces. Prior to assembly, I need to make sure my dry fit is appropriate. After researching, it is recommended sitewide online that a toilet paper holder stand at 26" tall. Take a look at where this stand without making any changes.

{{fist pump!!}}
With the measurements in mind, I use the circles to make a measurement on the long side of the plywood, then cut notches with my jigsaw. Secondly, using the first side as a template, I trace my cuts onto the second long side and cut as well.

In addition, I need to cut those original circles, so that the original dowel is removeable. See how I used my jigsaw to cut notches slightly wider than the dowel diameter?

While I'm at it, I sand down the blunt end of the dowel, and add two pins to keep it from moving side-to-side in the slots I just cut.

FINISHING TOUCHES
Last, but not least, I need to dress up this now toilet paper holder stand a bit. To finish, I use a reactive stain to cover the entire piece. As a matter of fact, this stain not only is less toxic, but also ages the wood right before your eyes. Similarly, you can see
my past posts using it HERE.

After that, once the stain cures, I apply a single whitewash coat. As an aside, you can see my not-so-little helper is tuckered from her tennis ball game and falling asleep on my feet while I work.

Still, if you know me, I aim to add a bit of typography to take this to another level. In light of my typography addiciton, my basic go-to transfer method is seen in
this past post or in the video below.


TP OR NOT TP
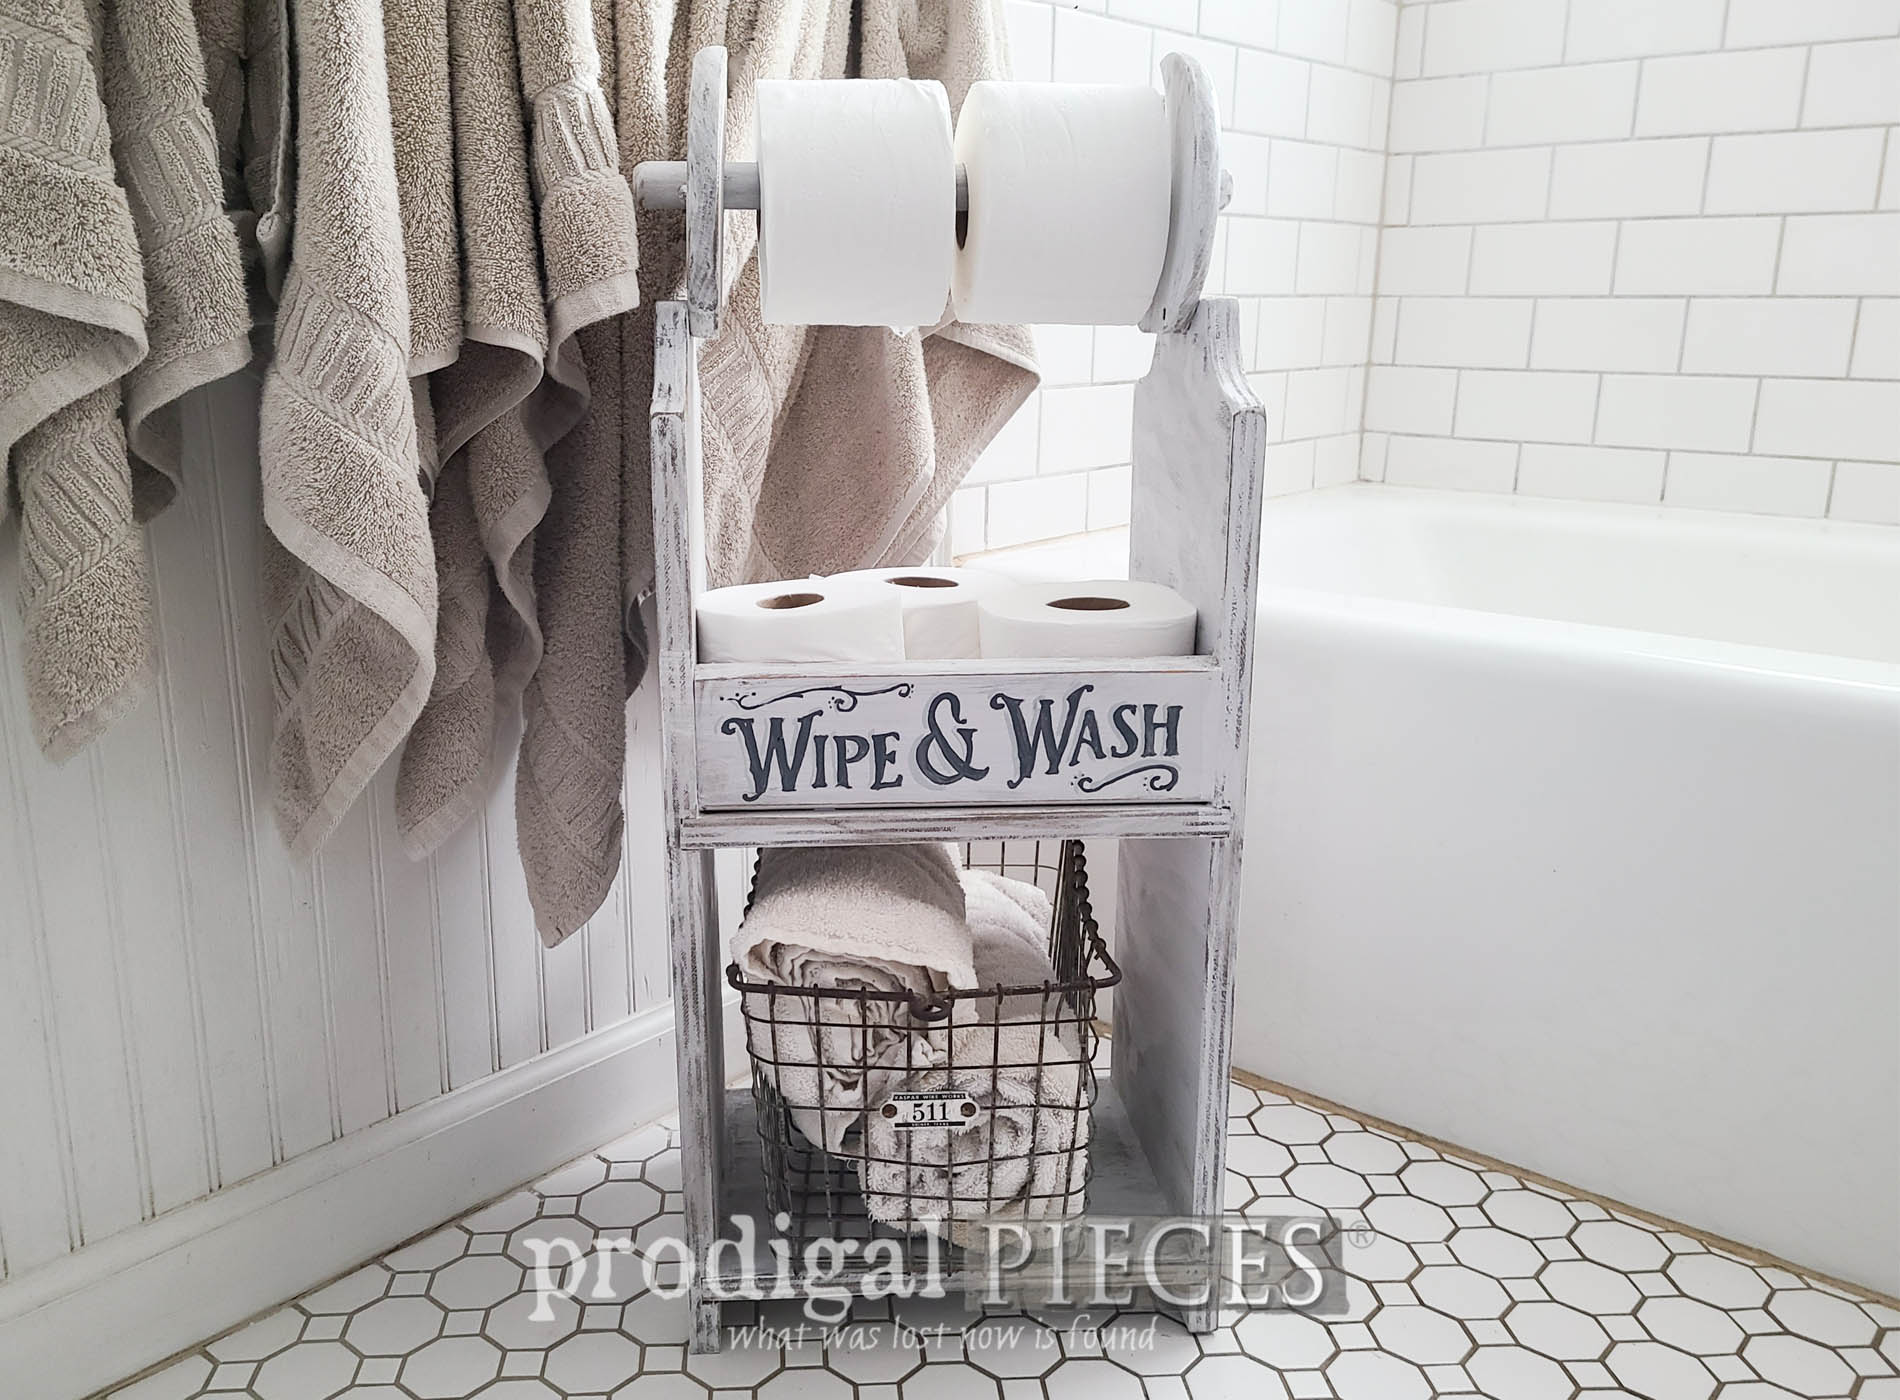
Okay, ladies and gents, get ready to wipe...er...wash! Can you tell I had fun with this? I'm on a roll!


I believe I not only rocked the challenge to upcycle that paper towel holder, but also make use of those scrap pieces of ply hanging out in my workshop. Undeniably, I'm a skip-happy DIYer!


Yes, we want folks to wipe, but also WASH. ahem...you know who you are. That being the case, the words are right there for young and older alike as a whimsical reminder. Better yet, you can even use this at a coffee bar with towels, or near a serving line during a celebration. As well, if you make something similar, use it for twine, ribbon, yarn. The options are limitless!

By the same token, if you like, you can find this and much more available in
my online store.

SHARE
By all means, my goal is all about inspiring you to tackle your own projects with fervor and to make your own home story. Along with leaving some comment love below, pin and share to inspire others too.

To conclude, before you go, be sure to
sign up for my FREE newsletter as I show you what happens to this
thrifted lampshade HERE.

Until next time!

 PINTEREST | EMAIL
Further, take a peek at these fun makeovers like my upcycled paper towel holder: