
*post sponsored by HomeRight (see full disclosure)
My goal this year was to replenish my salvaged wood stash and boy did I score some awesome things. You can imagine my delight when I pulled up and saw these doors laying there. In my truck they went along with all the other fun goodies I've been showing you on social media. The doors were in great shape for the most part, except they had been cut on the top and bottom to apparently be shortened for a custom fit. Nevertheless, they still had plenty of life left and did not need to be trashed.DIY TIME
To get this upcycled louver door project started, I first made the necessary repairs to rebuild it a bit before making any changes. My nailer, wood filler, and wood glue were my best friends. hee hee. I took note of any repairs that needed made, and took care of those. I left the hinges in tact so I could use that to hold my corner shelf together. However, I removed the door knob and filled the hole.
To mount the shelves, I used scrap bed slats, also found on the curb, ripped in half and cut to length. JC was a huge help running the table saw while I worked on other cuts.
I took note of any repairs that needed made, and took care of those. I left the hinges in tact so I could use that to hold my corner shelf together. However, I removed the door knob and filled the hole.
To mount the shelves, I used scrap bed slats, also found on the curb, ripped in half and cut to length. JC was a huge help running the table saw while I worked on other cuts.
 I then mitered the outside ends on a 45° angle with my miter saw and attached with screws. I chose to use no less than 12" for each shelf spacing so that can allow most books and random object to fit. Bonus is that the mitered ends will allow me to add a face to each shelf to hide the shelf braces in the next steps.
NEXT STEPS
Next, to create the shelves, I took note of the depth of the 45° angle they were set at and cut a triangular piece out of sanded cabinet grade plywood using my circular saw and table saw. Attaching the shelves was simple using my brad nailer and nailing from the top down into the side braces we just attached. The next step was to cut the face piece to cover the front edge of the shelf and have it also hide the braces holding the shelf underneath. Measure the width of your opening and cut to length with a mitered edge at a 45° angle pointing inward, and attach pieces with a brad nailer. I also chose to add a bit of corner round to the back edge of each shelf to keep things from falling behind and some decorative trim to the tops and bottom to give it a more finished touch. Before I did that though, I used my Corner Cat to give my shelves a good sanding.


PAINTING TIME
To add the last decorative bits I mentioned above to my upcycled louver door project, I measured the lengths from the corner and mitered each end at a 45° angle with my miter box and saw. Last, I finish up with by filling all nail holes with wood filler and gave it a good sanding. Here it is ready for the fun part! If there's one dreaded job in the painting world, it surely is painting louvers by hand. (can I get an amen?) Whether it's on a closet doors, shutters, or on furniture, they can be a beast. But no fear! A paint sprayer comes to my rescue. With the interchangeable tips on this paint sprayer, you can paint or stain this set to your heart's desire. It's a blast to use, literally, and fast to clean all while giving you fantastic coverage and finish.
PRIMING
For this project, I chose to paint and am using the black nozzle with the blue tips. Also, be sure to wear protective eye wear, a respirator, and hearing protection as well. Here's a video I created for a past project to give you a visual. Since I've chosen to paint, I start off by spraying on a primer to prep the wood and create a cohesive undercoat.
 Allow it time to cure and you're ready for the next step. The key to a great finish is getting the sprayer settings correct before beginning:
- Practice on scrap wood or cardboard to get the flow right.
- Keep the sprayer about 10-12 inches from your surface
- Move using your shoulder, not your wrist.
- Begin spraying before you hit the project and continue until off the project.
- Clean up your sprayer by following manufacturer instructions and let dry until you are ready do your topcoats.
GREEN
Once the primer has cured, I apply my first coat of paint. In this instance I'm using a seconds paint in a green tint by Behr in an eggshell finish. I showed this picture to you guys on social media asking you to help me name the color, and almost all of you came back with a blue related name, particularly Caribbean. However, it's really a green with a hint of blue. See what I mean below. Only two coats will be needed to get the look I'm after and I make sure to let each coat cure at least two hours before adding another coat.
 I was done in a matter of 15 minutes for each coat, which is like lightning compared to using a brush. Woot! You can't get much better than that.
THE REVEAL
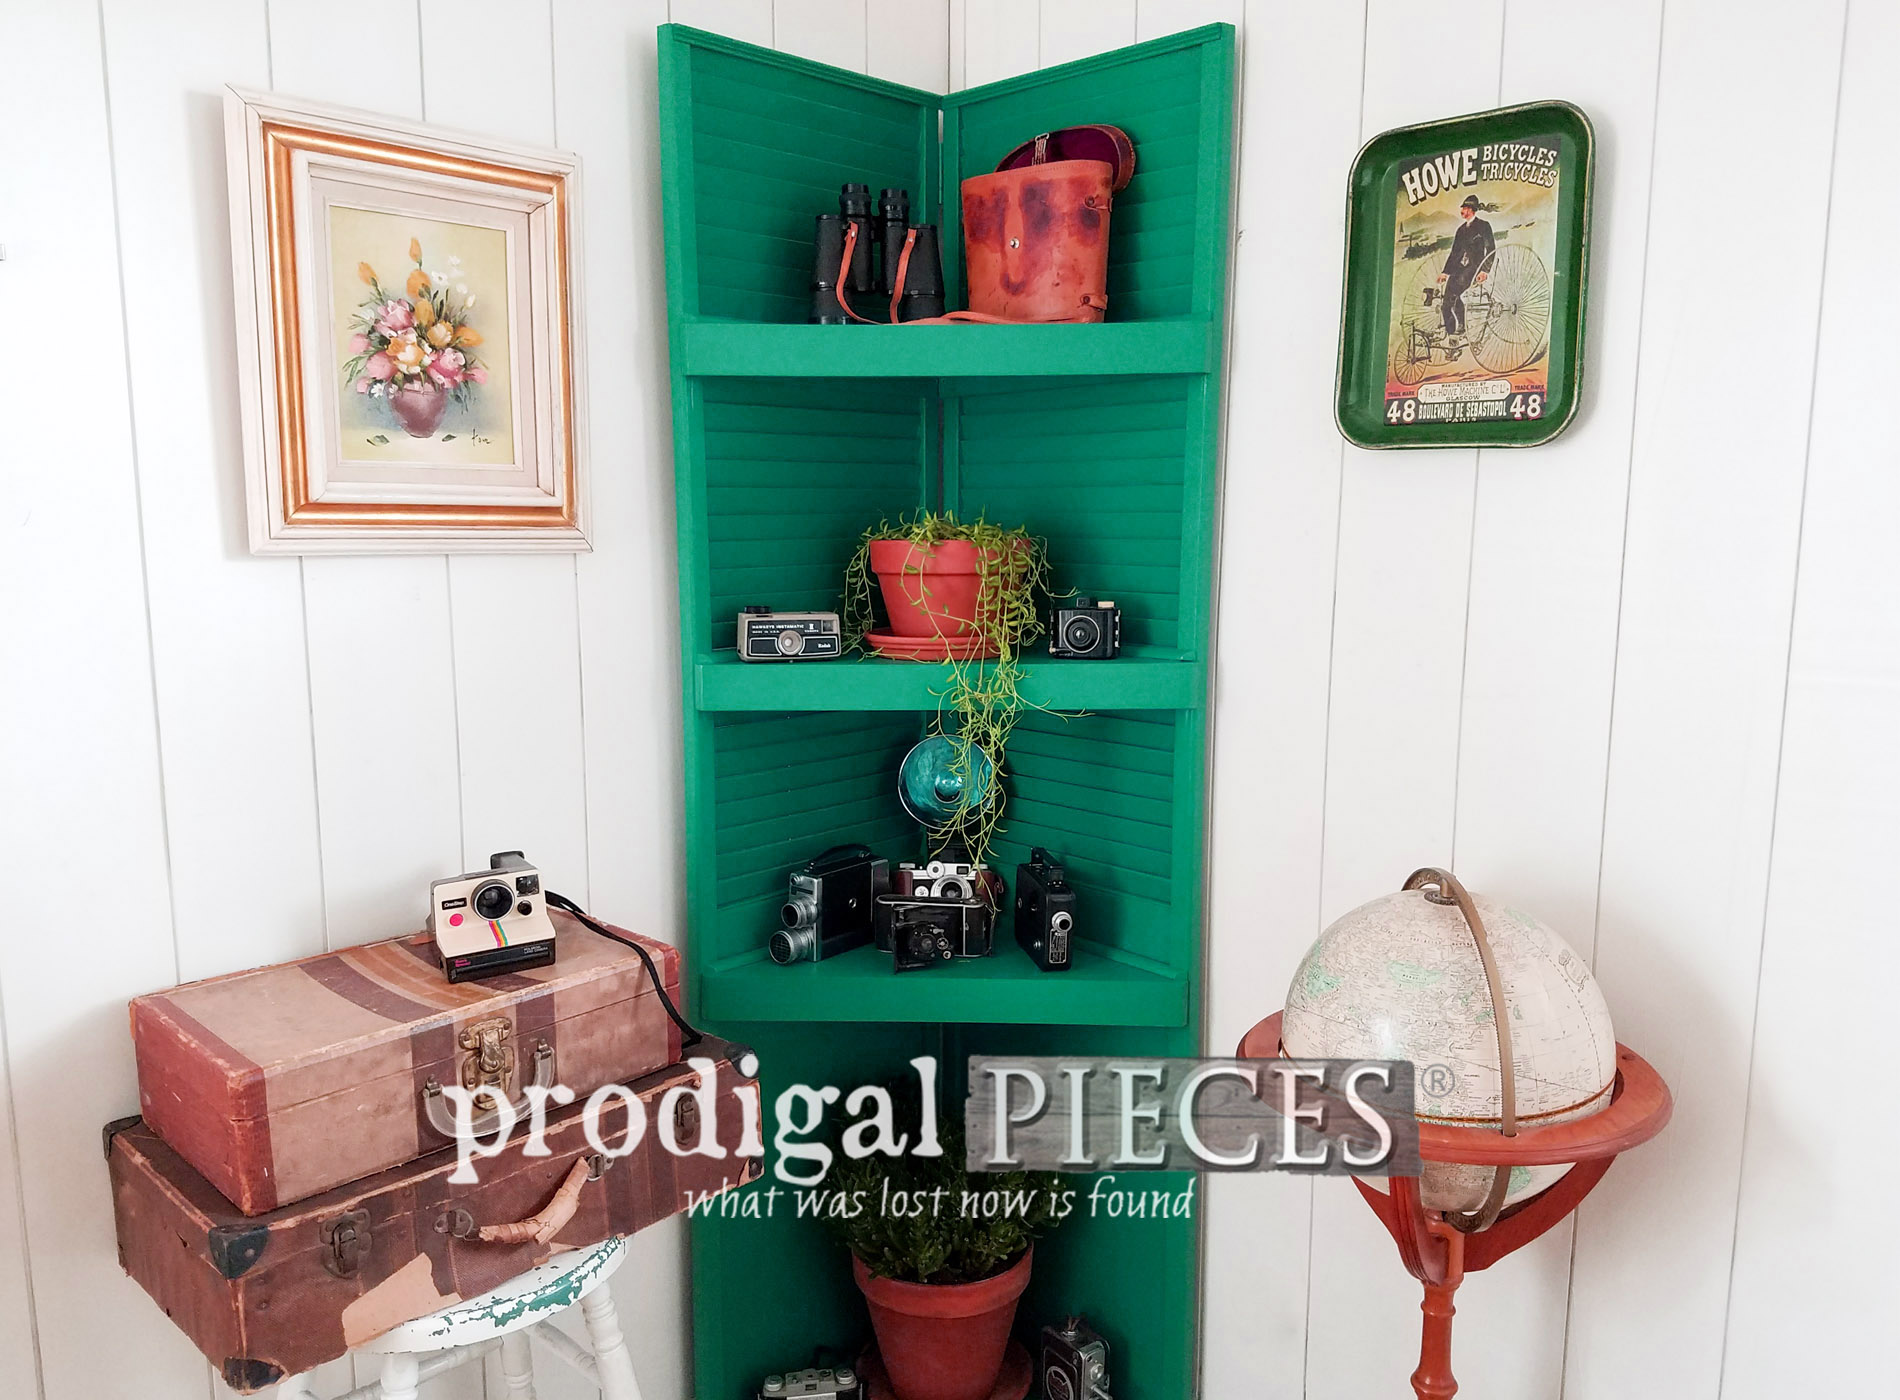
And we're done! My upcycled louver doors from the trash (what I like to call trashure) have found a new life as a repurposed corner shelf.

 All it took was a little building and some painting fun to create functional and stylish storage. I got to go down memory lane bringing out my vintage and antique camera collection to stage this new build.

 I even finished the backside so that it can be freestanding in a space as well.
 This upcycled louver door shelf was so fun to create and finish with my sprayer.


SHARE
Likewise, pin and share this upcycled louver door corner shelf to inspire others to give DIY a try and to create less waste. There really is a purpose for almost anything. Up next, see what I do with these two items I pull from my next-door neighbors' pile of trash. Love me some trashure! See HERE.
 Before you go, be sure to sign up for my newsletter. Until next time!

While you're at it, here are more projects with using an upcycled louver door:

