Did you blink? Yes, another month just flew by and it's
Trash to Treasure Tuesday already! I'm excited to join in with my T2T gals to bring brand new inspiration for you. You'll see their projects in a bit. In the meantime, here are some things I found while purging my entire home. I have learned much about myself from my family of origin and why I do what I do. However, I'm not one to have clutter. I like order and tidy, so these were accumulated by someone else in my house. oy. What to do with them? Make an upcycled license plate caddy, right?

That's a 17 random license plates needing a new life. In the past, I've made use of them for birdhouse roofs and even
this funky rooster art HERE.


The
minute I lay these plates down;
Loula walked all over them and threw her ball at me. haha. She hates not being the center of attention.
DIY TIME
First, I take inventory as shown above of sets and single plates. I start by bending the plate in half the best I can. However, keep in mind that some plates have a letter, or a number fall on that "fold" and make it harder to bend.

Thankfully, most of mine are easy to work with. Then, after a pair (or two) are bent in a 90° angle, I place them as shown below.

Next, I measure that opening and cut a piece of reclaimed wood to fit.

In order to attach the base to the metal, I use these self-drilling screws intended for sheet metal. They're the same as the ones I use on
my reclaimed birdhouses.

ASSEMBLY
With the base attached, I now need to add supports where the corners meet. In order to do that, I cut random scrap pieces, pre-drill the bottom in the corners and in each upright support bottom. Once drilled, I connect the uprights with wood screws.


Also, if you look closely, I attach the supports to the plate using the self-drilling screws as well. To finish assembly, I cut and notch a wooden dowel to go between as a handle.

Last, but not least, it's time to paint. Yes, paint. I could totally stop right here in all the rustic reclaimed glory. However, I want to take this project one step further. Like you've seen in my other posts (
vintage suitcase and
garden sculptures turned doorstops, for example) where I want to create a time-worn look, I use a flat black to give a base coat.

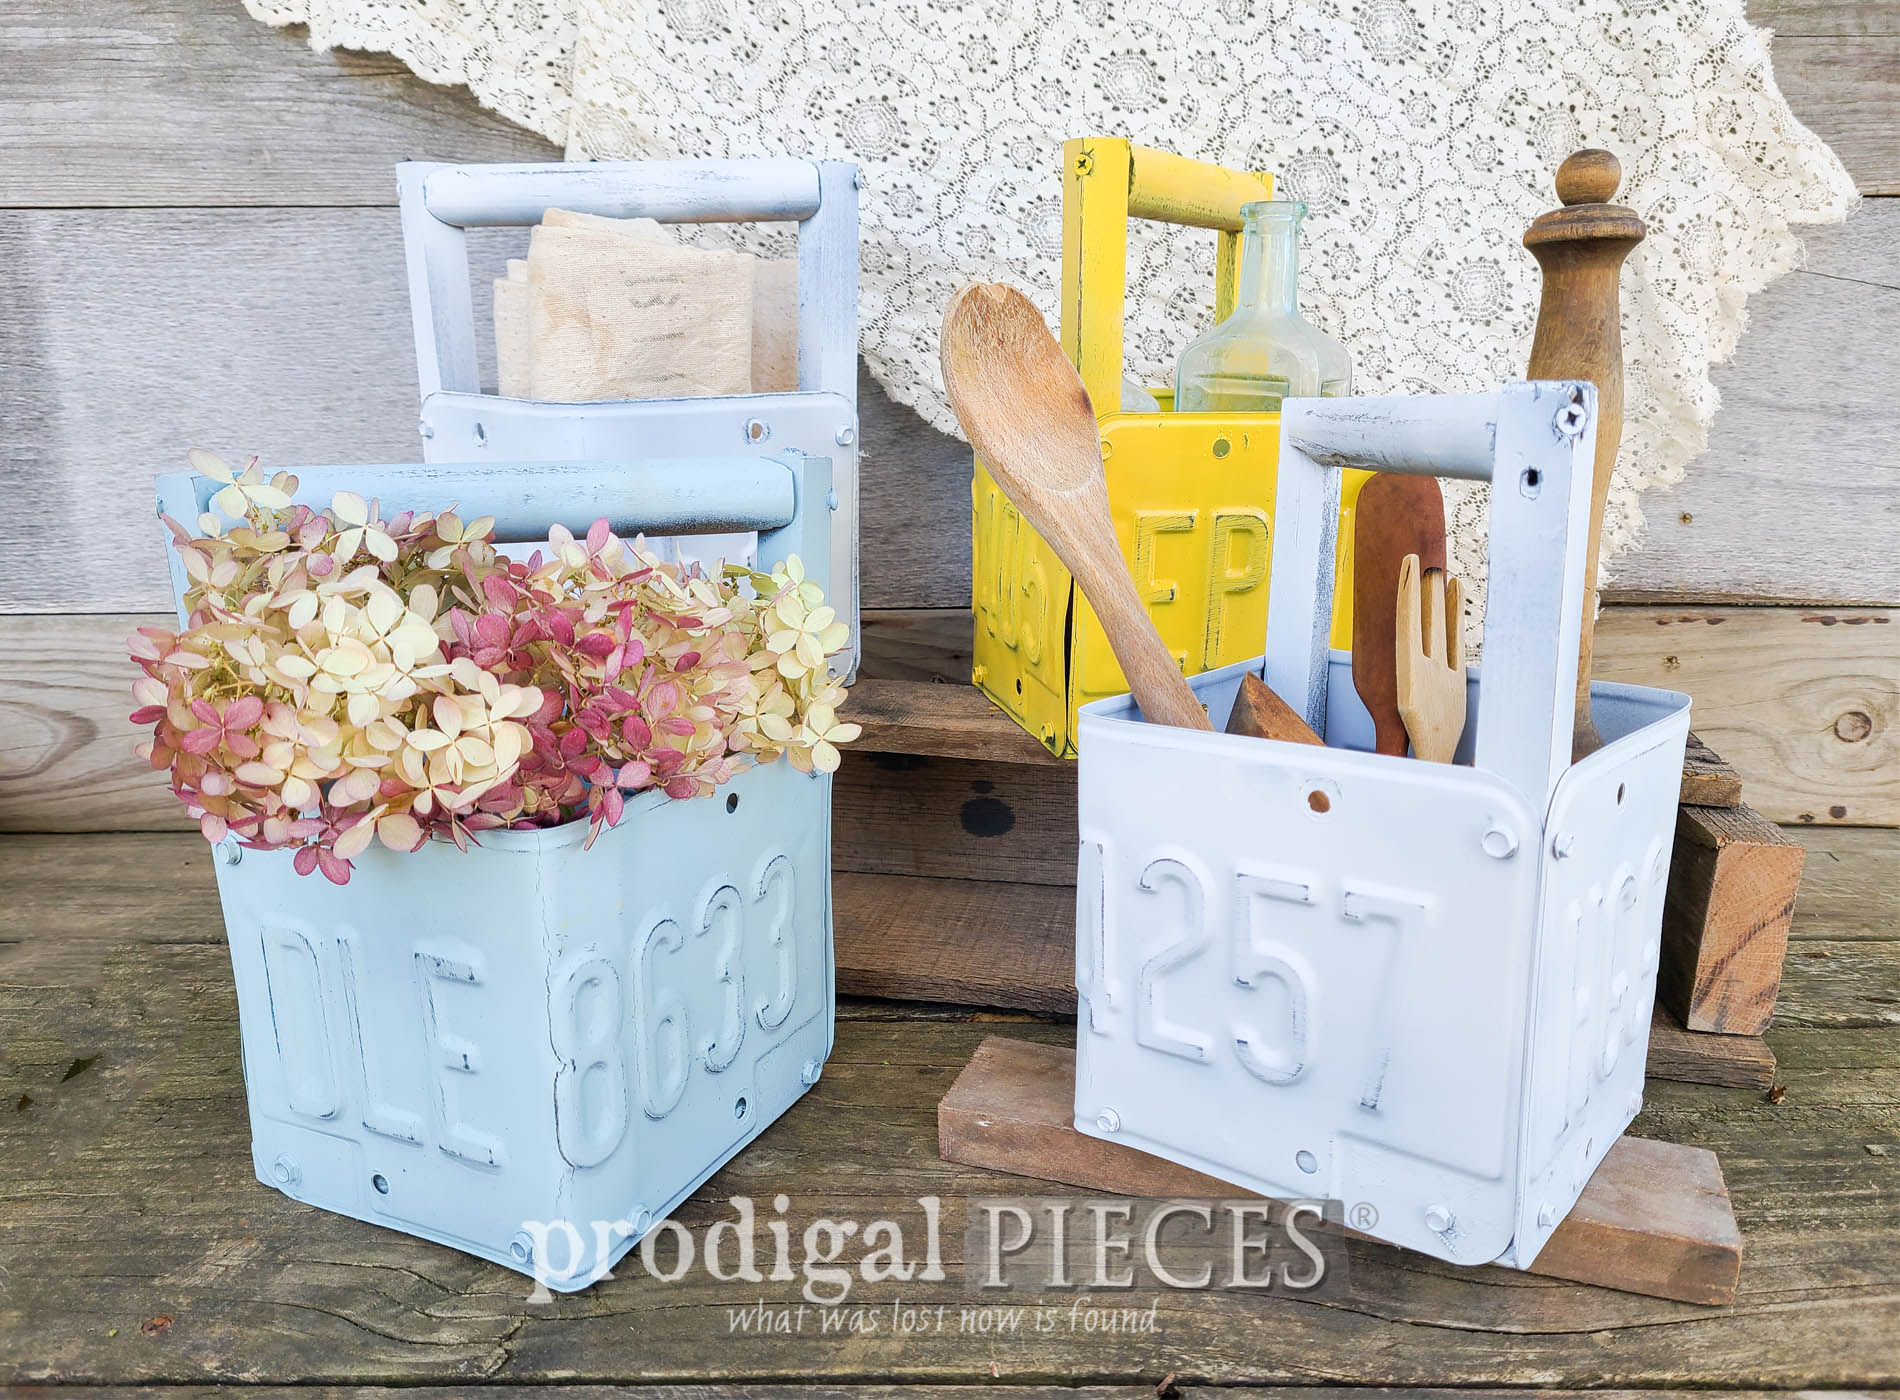
CADDY UP!
Finally, after the base coat cures, I use whatever color spray paint that inspires me. Because I'm eager for spring, I couldn't resist these uplifting colors.


We've got blue, white and yellow for a fun color pop in the doldrums of winter, still. Which one for you?


As per my usual, I'm smitten with the blue, but I really do like each of them. Just think of the possibilities with these... gift idea of guys and gals filled with oodles of goodies. Or bath towels, kitchen utensils, plants... whatever suits your fancy.


As always, I would love to keep what I create, but I would need a warehouse by now or a dozen homes. So, you'll find these and much more in
my online store.

SHARE
What is more, inspiring you is what I'm all about. Leave some comment love below of what you'd do with a caddy like this. Likwise, pin and share to inspire all those aspiring DIYers out there.

Before you go, be sure to
sign up for my FREE newsletter to see what my middle-aged motivation leads me to.
HEAD HERE.

Now head below to see more inspiration!

 PINTEREST | EMAIL

- Artsy Chicks Rule
- Salvaged Inspirations
- Confessions of a Serial DIYer
While you're at it, here are more DIY creations like my upcycled license plate caddy: