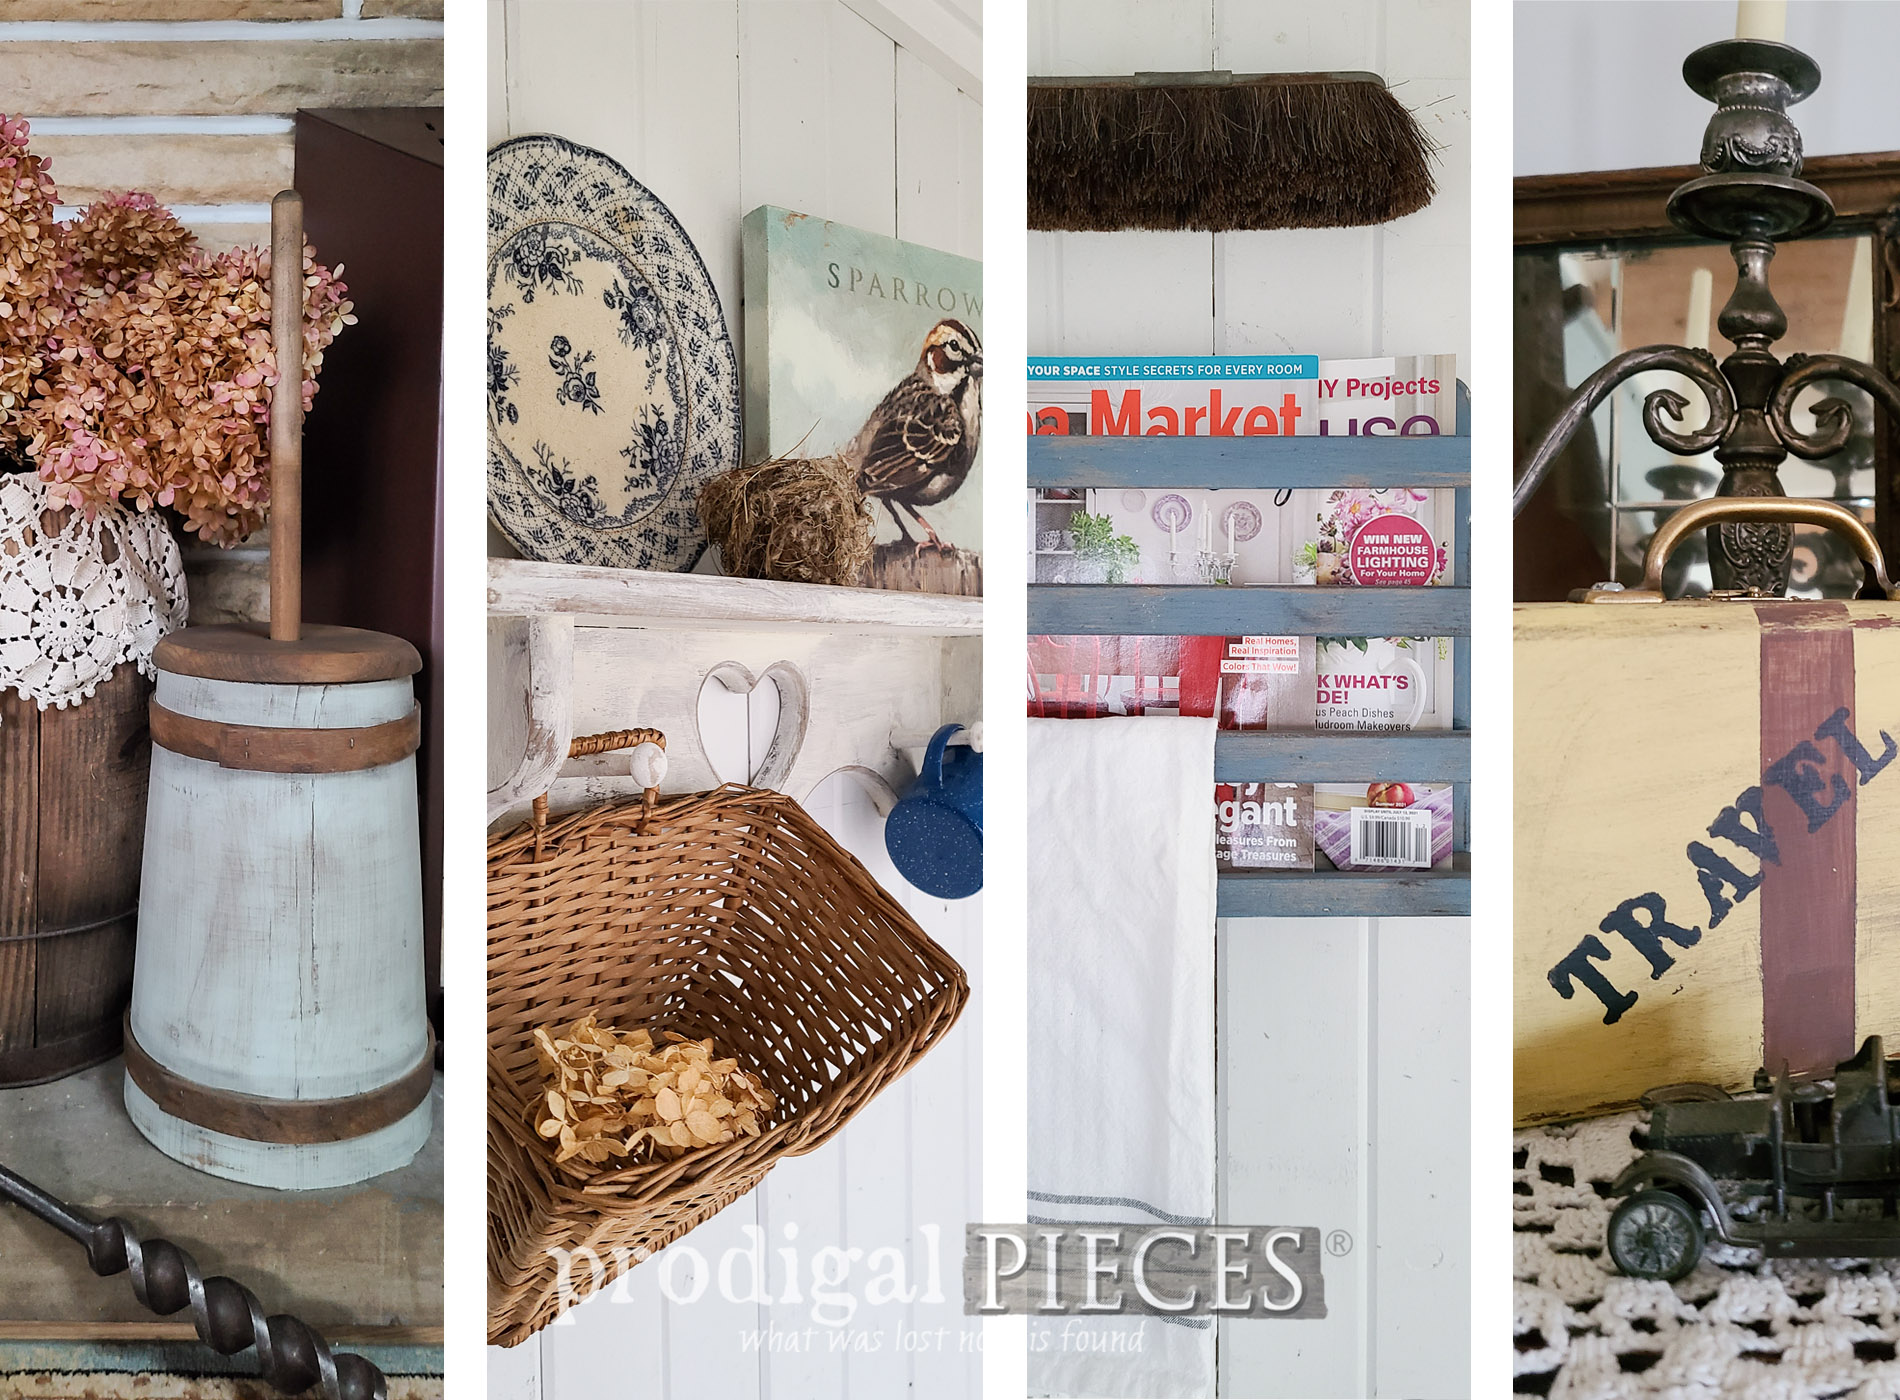
 What you behold is a (1) a butter churn (2) a heart cut-out shelf (3) a magazine rack (4) a card box...I think. Not only are they all are in raw/rough condition, but that also means I get to have my way with each of them. woot!
PROJECT 1
First, let's take a closer look at the at butter churn. It is raw pine, but it has seen water damage at some point around the bottom primarily. To begin, in order for me to make this cohesive, I stain it with a natural reactive stain that instantly ages the wood as it dries giving it a patina. These stains are awesome as they come in different colors for different aging effects. See how I've used them HERE. Then, once the stain cures, I apply paint to parts of the churn so that those bands, lid, and dasher all remain a dark contrast. In addition, you can see a larger one I refinished in this past post HERE. My apologies for the blurry picture below...I am on the move!
 Finally, before this thrifty farmhouse makeover is complete, I add two different waxes and distress to give it an aged appeal. Ta da!


 Do you love it too? I'm certainly smitten.
PROJECT 2
Second, let's show some love to the heart cut-out shelf. I definitely have a l0ve/hate relationship with those silly pine heart pieces. What in the world is with the hearts??? Over the years, however, I've learned to embrace the hearts, whether it's cut them out, fill them in, or leave them be. Also, you can see my other heart cut-out makeovers HERE. For this one, I'm letting the love flow with heart as-is, but adding two Shaker pegs using my drill and forstner bit. Then, I stain the pegs so that they match the original pine. After that, I use a milk paint to give it one coat, then distress for a fun aged look.
 At last, here is my second thrifty farmhouse makeover complete and ready for many more years.


 I mean, who doesn't love milk paint on anything...tsk. The chippy look and added pegs really make this piece functional and cute.
PROJECT 3
Next, my third project is the magazine rack/wall pocket. I'm tellin' ya, these things are so super handy for many things. Tuck in cutting boards, books, towels, and...you guessed it...magazines. This one, however, has been attacked by water and has damage that needs some TLC. First, I apply a boring base color. After that layer cures, I apply a blue in a wash fashion. That way, the base color peeks out creating a time-worn layered look.
 Last, I add a bit of brown wax and call it done. BAM!

 So much more fun in blue, right? I slipped in a couple of the magazines I've been featured in recently. woot! It such a treat to be recognized in any fashion.

PROJECT 4
Last, but not least, this little cutie patootie. I believe it held cards for a game at one point, but my trashure eye sees something more. First, I fill in the carved front with wood filler and sand smooth. Then, I apply a fun yellow in several coats. I'm already lovin' it!
 Once I got started, I didn't want to stop. So, I add a stripe, some hardware and voila! Finally, here's my mini luggage box ready for filing till your heart's content.

 Alright...I confess...I have a thing with luggage, even all things mini. If you remember, I turned silverware boxes into luggage (see HERE and HERE). Plus, I turned a cigar box into a mini dollhouse too. Viva la mini!
 Additionally, I add a hasp and window sash for added function and fun. What would you tuck inside? Also, if you'd like to make any or all a part of your home story, you can find them and more available in my online shop.
[metaslider id=30251]
SHARE
With that in mind, take a minute to tell me which is your favorite of my thrifty farmhouse makeovers below. I'd love to hear! Likewise, do pin and share to inspire others out there with misfits laying around needing life. To get these DIY tips & tricks in your inbox, be sure to sign up for my newsletter. PLUS, you will get your FREE Furniture Buying Checklist and special discount to my shop. Until next time!

Also, more thrifty farmhouse makeovers for you to enjoy:

