Does making your house into a home seem daunting at times? Or maybe you would love to update, but think you can't afford it? You CAN. Especially if you have a thrift store near by. Does it mean you will have it all in a day. No. However, it does mean that there is oodles of possibilities just waiting for you to find them. Check out how I took this thrifted tray and gave a makeover like noneother. {{three snaps and a Z formation - yes, I'm nutty like that}}

So, I have to ask...would you have bought this in the current condition? It's pretty stinkin' ugly, that's for sure. However, notice that the frame is solid wood, the glass, though disgustingly dirty, is free of chips and damage. Also, it even still has both handles. Folks, we have a winner for a makeover.
DIY TIME
First up, I remove the felt backing.

Then, removing the bent the nails out of the way that were holding the tray pieces in place.

It took out the awful cardboard pieces and then the glass and set aside. Now, for the fun part...Paint! My choice for this project is one of my favorite spray paints, Heirloom White by RustOleum. After giving the frame a good cleaning, it's time to have some fun.

PAINT TIME
When handling a small project like this, I always use my small spray shelter. It saves me from telling my husband his saw has blue paint all over it because a smurf exploded. ahem.

After a couple of coats of paint, I decided to take this thrifted tray to a new level...literally. Since I have an endless stash of leftover knobs and pulls, I decided to take these wooden knobs from
my Ikea Hack and add them to the bottom of my tray. Likewise, they get the same color of white as the tray.

I decided to pitch that cardboard inlay of the tray that was behind the glass and replace it with some hardboard. You seriously need to get a 4' x 8' sheet of that stuff to just have on hand. I use it all the time for my chalkboards, etc. See
my other projects HERE.
NEXT STEPS
On top of the hardboard, I decided to go with one of these wallpaper samples. Yes, I am going to be hanging wallpaper in my near future. This stuff is not only gorgeous, but easy to use
and remove. You can see how I've used in these past posts.

The glass was in great shape, but disgusting. I just cleaned it up with rubbing alcohol to remove the sticky substances and stains. Then put it all back together.
THE REVEAL
Take a looky...

Doesn't that look better? And I daresay you wouldn't know it was the same tray.

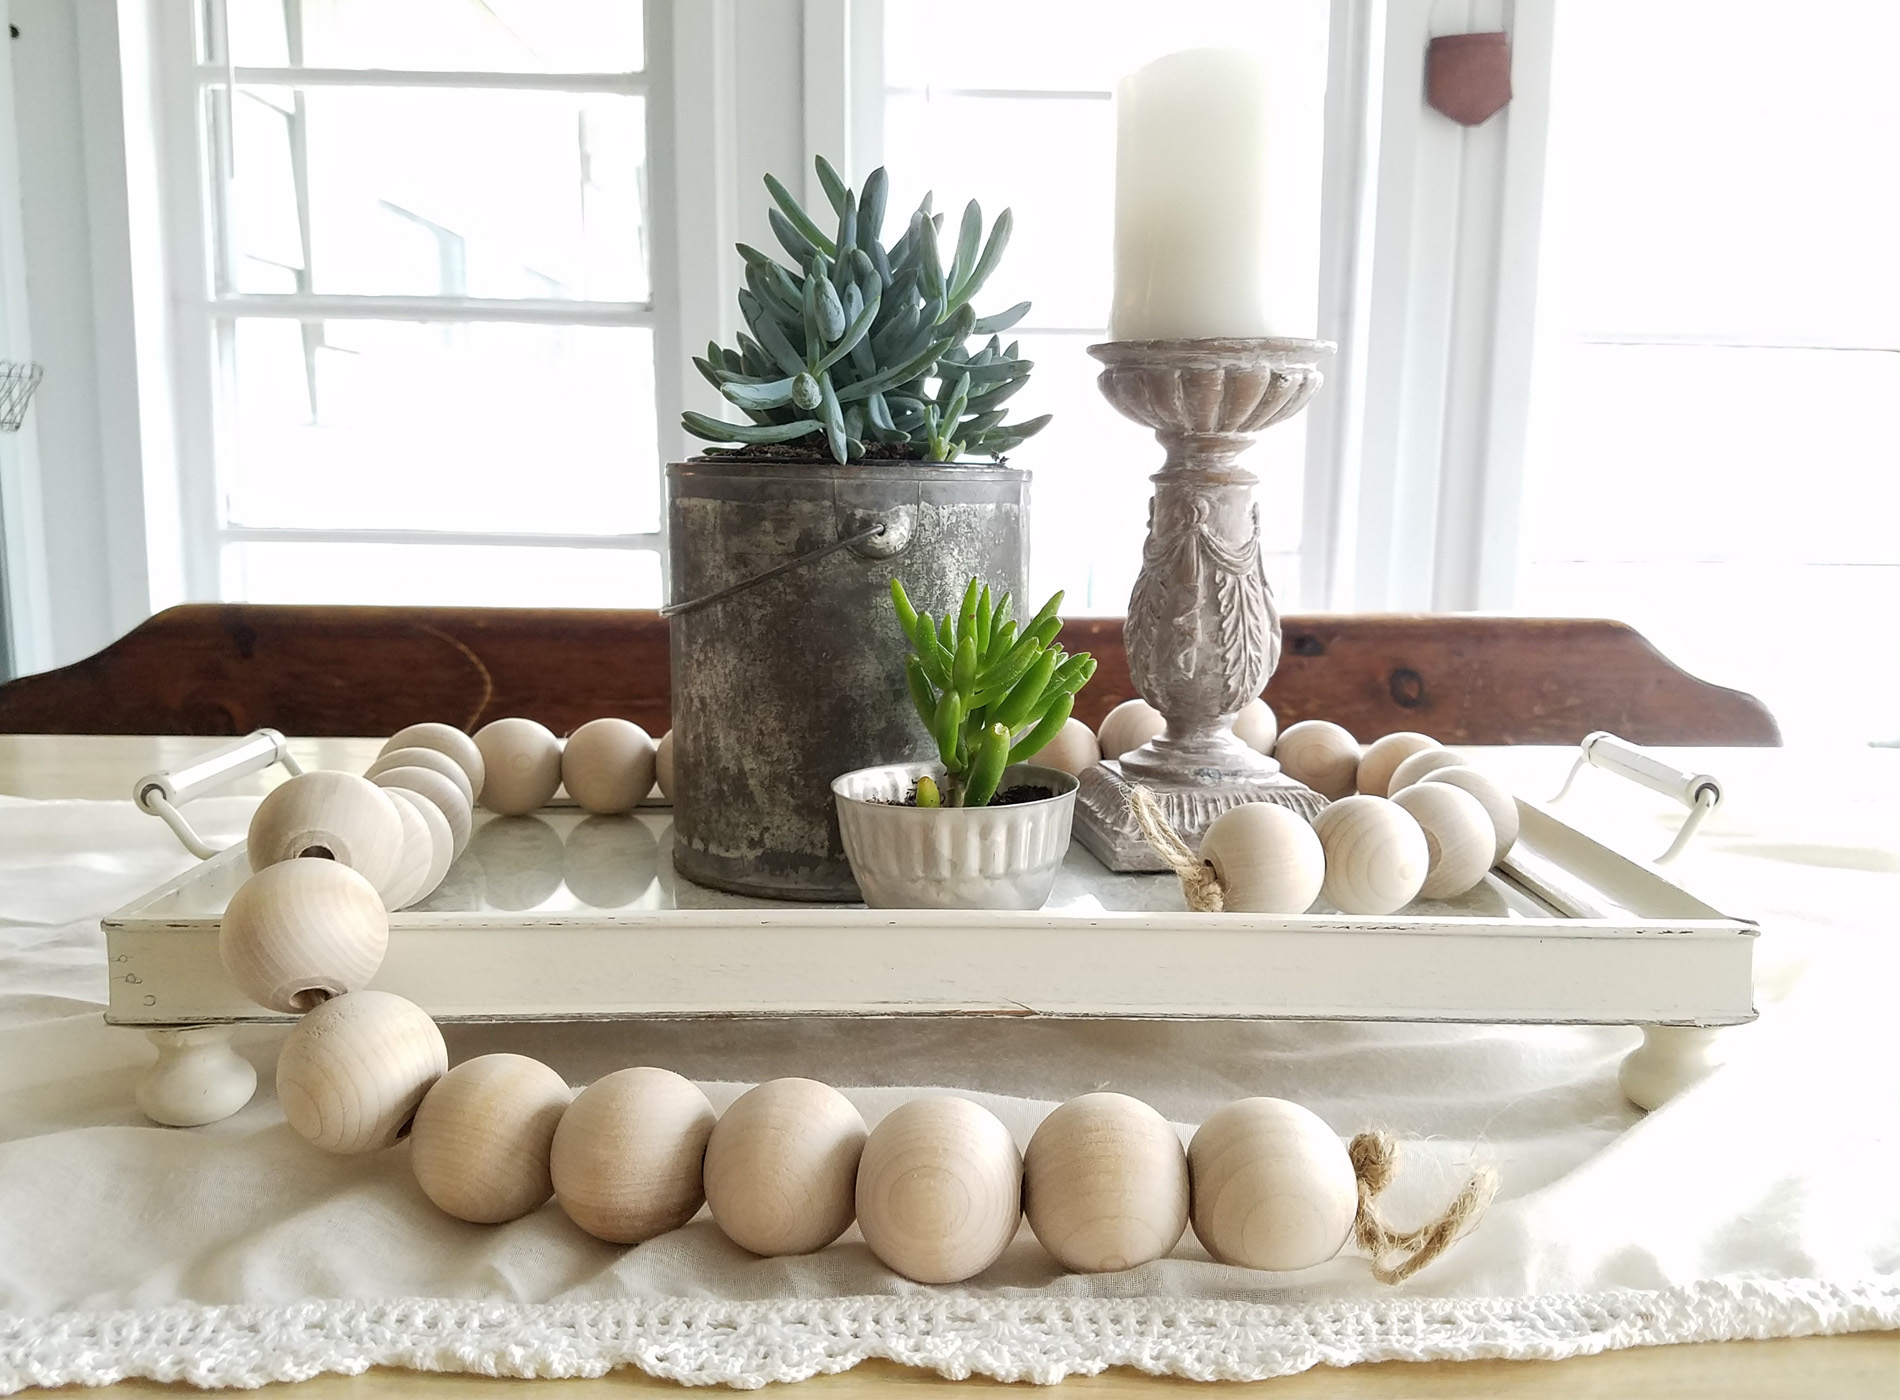
I used a white flocked wallpaper with a metallic background. It is so beautiful!! And you gotta love succulents, right? (psst...you can find this tray in
my online store.


The tray works perfectly as a centerpiece, but also for everyday use. You could use it on a dresser or vanity, or even serving up a special breakfast treat.

Fun to see it in
my bedroom. Seems like just the other day we got that finished. And...most everything in here is second-hand. I actually just knocked my wreath down and it fell apart, so I put it back together with some dried roses I had on hand. Budget fixes are awesome!


Boy, could I use a nap and some tea with my grain-free muffins (
recipe HERE).

Finally, my goal in this blog is to teach, encourage, and inspire you to make your house your home. I can attest that our budget is non-existent and we still are able to make our home to our liking. It can be done!
In addition, pin and share this thrifted tray makeover to inspire others. That's what it's all about.

Likewise, you can get these DIY tips & tricks in your inbox. Also, be sure to
sign up for my newsletter. Up next is
Trash to Treasure Transformation time. You're in for a treat - this cabinet...in much need of love.
See the after over here.


 PINTEREST | EMAIL
Also, more projects like my thrifted tray makeover:


 So, I have to ask...would you have bought this in the current condition? It's pretty stinkin' ugly, that's for sure. However, notice that the frame is solid wood, the glass, though disgustingly dirty, is free of chips and damage. Also, it even still has both handles. Folks, we have a winner for a makeover.
 Then, removing the bent the nails out of the way that were holding the tray pieces in place.
 It took out the awful cardboard pieces and then the glass and set aside. Now, for the fun part...Paint! My choice for this project is one of my favorite spray paints, Heirloom White by RustOleum. After giving the frame a good cleaning, it's time to have some fun.

 After a couple of coats of paint, I decided to take this thrifted tray to a new level...literally. Since I have an endless stash of leftover knobs and pulls, I decided to take these wooden knobs from my Ikea Hack and add them to the bottom of my tray. Likewise, they get the same color of white as the tray.
 I decided to pitch that cardboard inlay of the tray that was behind the glass and replace it with some hardboard. You seriously need to get a 4' x 8' sheet of that stuff to just have on hand. I use it all the time for my chalkboards, etc. See my other projects HERE.
 The glass was in great shape, but disgusting. I just cleaned it up with rubbing alcohol to remove the sticky substances and stains. Then put it all back together.
 Doesn't that look better? And I daresay you wouldn't know it was the same tray.
 I used a white flocked wallpaper with a metallic background. It is so beautiful!! And you gotta love succulents, right? (psst...you can find this tray in my online store.

 The tray works perfectly as a centerpiece, but also for everyday use. You could use it on a dresser or vanity, or even serving up a special breakfast treat.
 Fun to see it in my bedroom. Seems like just the other day we got that finished. And...most everything in here is second-hand. I actually just knocked my wreath down and it fell apart, so I put it back together with some dried roses I had on hand. Budget fixes are awesome!

 Boy, could I use a nap and some tea with my grain-free muffins (recipe HERE).
 Finally, my goal in this blog is to teach, encourage, and inspire you to make your house your home. I can attest that our budget is non-existent and we still are able to make our home to our liking. It can be done!
In addition, pin and share this thrifted tray makeover to inspire others. That's what it's all about.
Finally, my goal in this blog is to teach, encourage, and inspire you to make your house your home. I can attest that our budget is non-existent and we still are able to make our home to our liking. It can be done!
In addition, pin and share this thrifted tray makeover to inspire others. That's what it's all about.
 Likewise, you can get these DIY tips & tricks in your inbox. Also, be sure to sign up for my newsletter. Up next is Trash to Treasure Transformation time. You're in for a treat - this cabinet...in much need of love. See the after over here.


