 Let's take a look at what I thought was worthy purchases. First, an unfinished stool, a wooden chest, and a corner cabinet. All are solid wood ane are handmade. However, they are most definitely needing something.
DIY TIME
To start, I choose that little milking stool as my first subject.
Since this piece was nothing but raw, I decided to have a little fun with it. First, I used my brush to apply Provincial Stain (one of my favorites seen here).
 After I let that cure a bit, I started out using some of my stash of paints to create a textured look with layers. My goal was to make this look like it had been around awhile. Next, I applied a wash of this blue.
 For the next layer, I used milk paint. This color is one of my favorites by Junque called Jadeite. Isn't it pretty? In addition to this project, you can see how I used it on this dresser makeover in this post.

STRIPPING
Before I show you the after, let me show you the other chest real quick. Would you have bought this? What caught my eye was the hardware on the back and the awesome joints that held this thing together. However, what needed gone fast was that awful orange finish that was slapped all over everything. The only thing I had in mind was to TAKE IT OFF. haha. My Citristrip came in super handy for this. I used my brushes to apply a thick coat of gel. To ensure it wouldn't dry out on the hot day I was working in, I always wrap in plastic wrap. This also works well when you are letting it sit overnight. See the finish starting to dissolve in about 30 minutes?
 When ready, I just used my putty knife to scrape off all that I could. Last, to finish it up, I used steel wool and mineral spirits to get the gunk off. I was after a rustic worn look, so this worked well.
TWO REVEALS
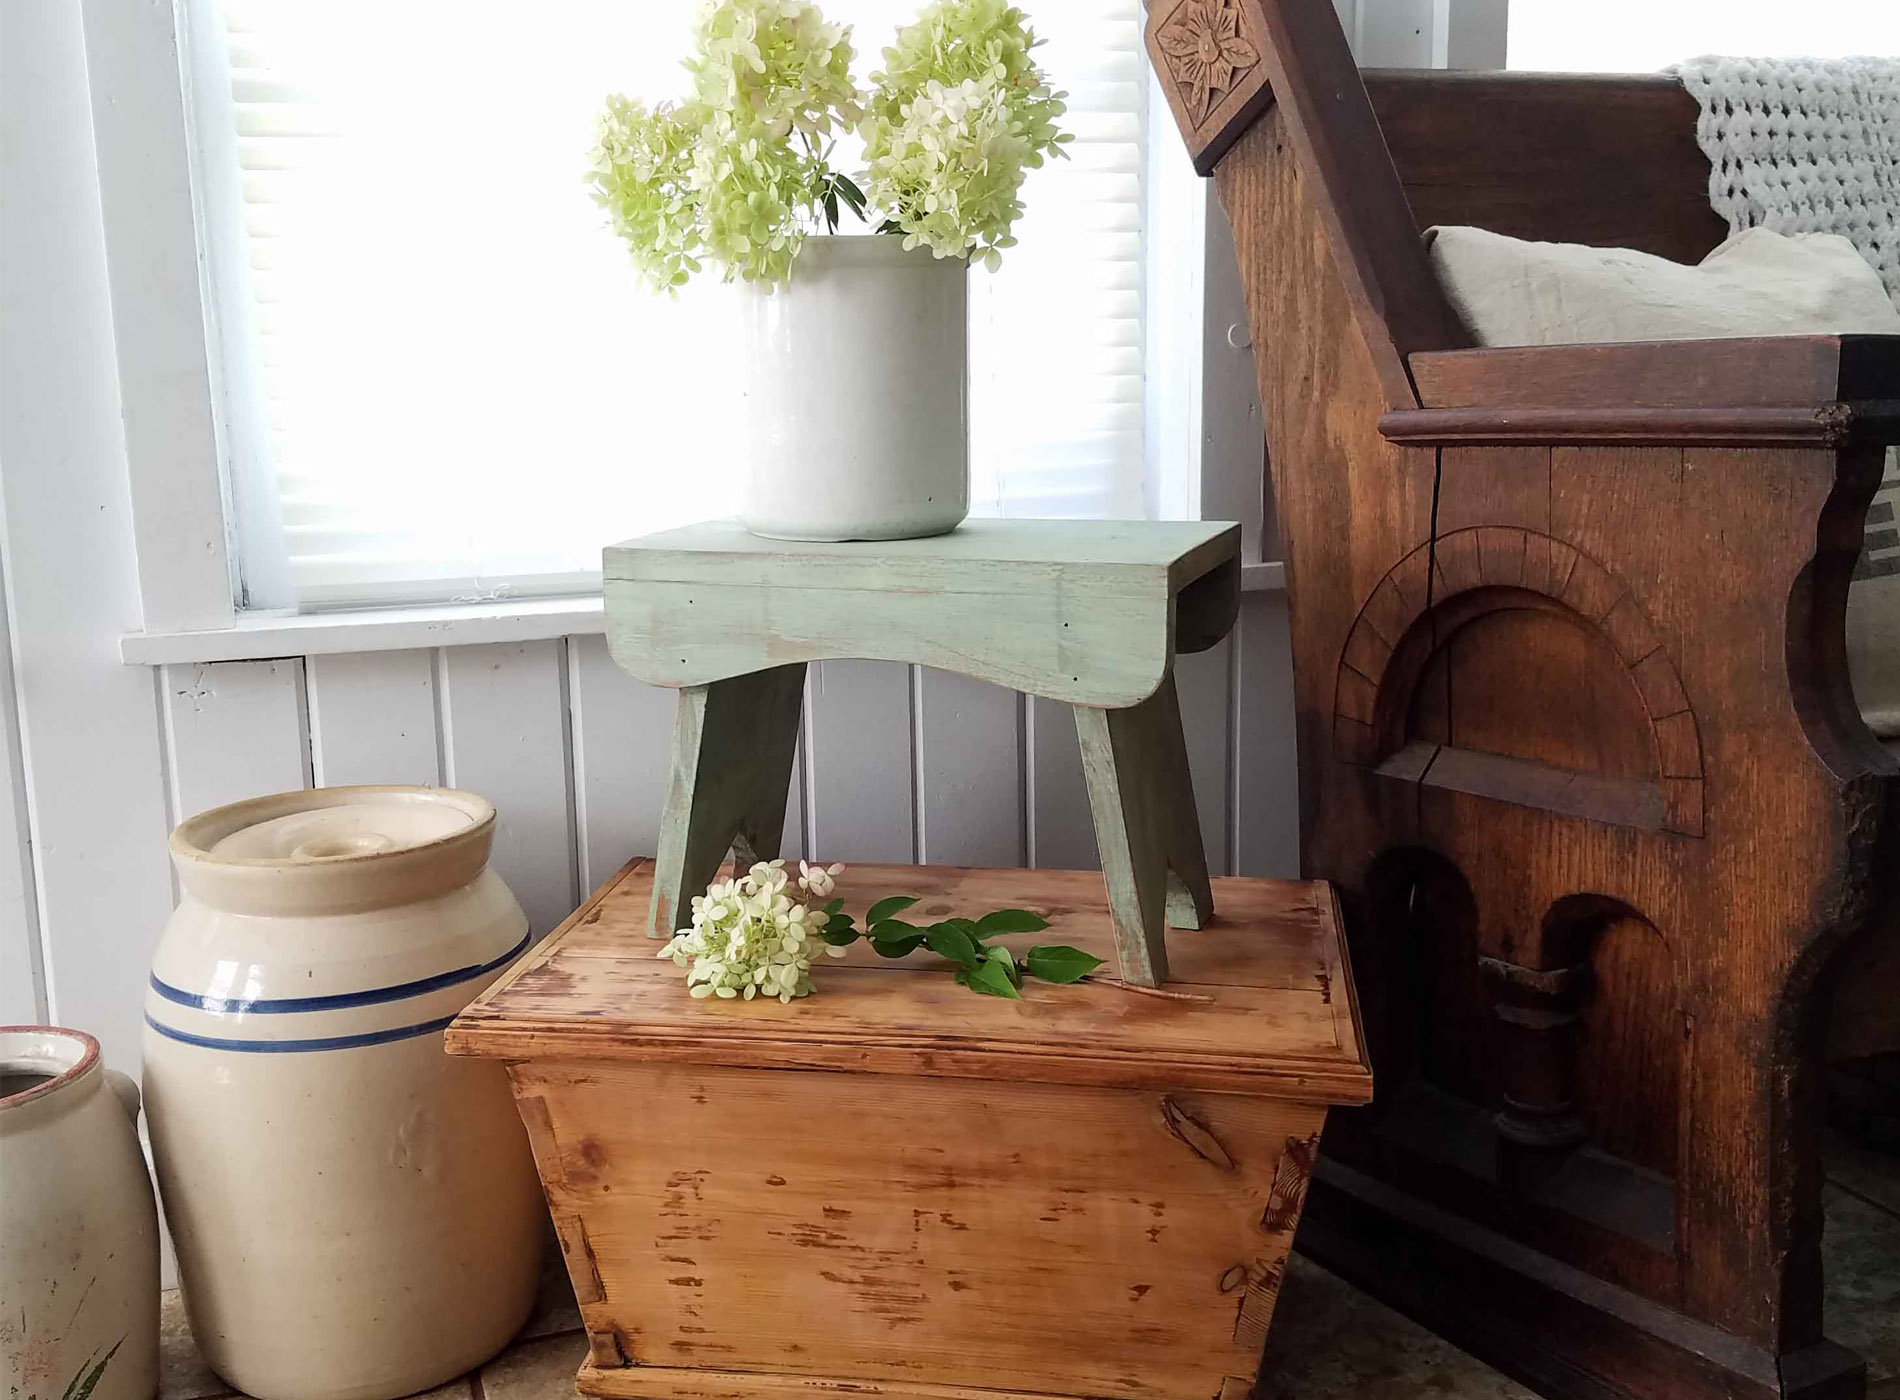
Here are the first of my thrifted makeovers, the milking stool and farmhouse chest in their finished state. aaahhh...that's better. They look like they belong together, don't they?
 The milking stool has that washed look I love...

 ...and that chest is a time-worn beauty now. It sure looks like a rustic gem to me! Check out those joints and cool hardware.


LAST, BUT NOT LEAST
Last, but not least, is my goose corner cabinet. Raise your hand if you have (and still do - ha!) have geese and country blue decor in your home. Llikewise, my mother did, so you are not alone. As cute as the goose is, it had to go bye-bye with my sander. The first thing after sanding was to paint the inside. I chose to use the Tea Rose Pink I used on this vanity makeover. It is just the right feminine shade.
 The outside got two coats of a off white. But, for added drama, I used my fun mold and hot glue gun to create some pretty decorative pieces like I did for my secretary desk.
 In addition, to give these moldings a depth, I painted and then used my brown wax to add detail.

CHECK IT OUT
Once done, I applied them to my newly made over corner cupboard. Amazing isn't it? The details are so fun and to think it was all done with hot glue. Yay!

 Also, I was even able to find an antique glass knob in my stash to replace the wooden one. It's all about the little things to me. Though, my favorite is the inside. tee hee.
 Likewise, if one or all of these recreated pieces catch your eye, you can find them available for purchase in my online shop.
[metaslider id=30251]
So there you have it...3 quick thrifted makeovers to encourage you to give DIY a try and make your house your home. Also, pin and share these thrifted makeovers to inspire other to break out their DIY skills and update their home decor. It's fun! Up next, is Furniture Fixer Uppers and my kitchen remodel is back in full swing, starting with my bar stools. Head here to see the updates!
 To get these DIY tips & tricks in your inbox, be sure to sign up for my newsletter. Additionally, you will get your FREE Furniture Buying Checklist and special discount to my shop. Until next time!
 In addition, more of my thrifted makeovers for you:


