I have been having a blast making use of all the things that my dad brought to me from various places. First was
my repurposed changing table cart, then
my farmhouse side table, and next
my piano bench lap desk. He knows me all too well, don't you think? Well, today I'm making use of those couch parts left on the pile of stuff he brought, plus another curbside find from my stash. They're going to become DIY candlesticks. {{fist pump action!!}}

Story goes like this, my dad has rentals and when someone leaves he has to clean out, refresh the home, and get it ready for the next person, right? Well, he gets left with all sorts of messes and one of them was an old couch that had cat yuck all over it. However, he thought that these wooden pieces up by the head rest looked cool enough to save. I agree!
THE BACKSTORY
The post, however, came from my neighbor's trash a few years ago. They had put two of these posts into buckets with concrete. I told JC that they had too much potential to let go to the trash, so we dragged them over an cut off what we could save. One was ripped in half and used in
our DIY faux fireplace - it's one you should check out. See it in the mantle?

Okay, so let me get started. First, I chopped that post into two different lengths using my miter saw. For the other couch parts, I used my hack saw to cut out the turning. I'm going to mainly focus on the larger two because it's the same idea for both sets.

I wanted them to have a base, so again using my miter saw and scrap wood from my stash, I cut a couple of pieces for each. To make the top suitable for a candle, I used my jig saw to cut rounds out of scrap wood as well.
DIY FUN
Once everything was cut, I used wood glue and my nailer to attach starting with the small base to the large base. Then, attach the base to the turning. Last, to top off with the wood round.

I give the candlesticks two coats of dark gray.
Once the paint has cured, I use a white wax to dry brush the DIY candlesticks. This gives the aged look like I use in
my zinc tutorials. Rub off excess with a soft cloth and leave a little here and there to create dimension.

THE REVEAL
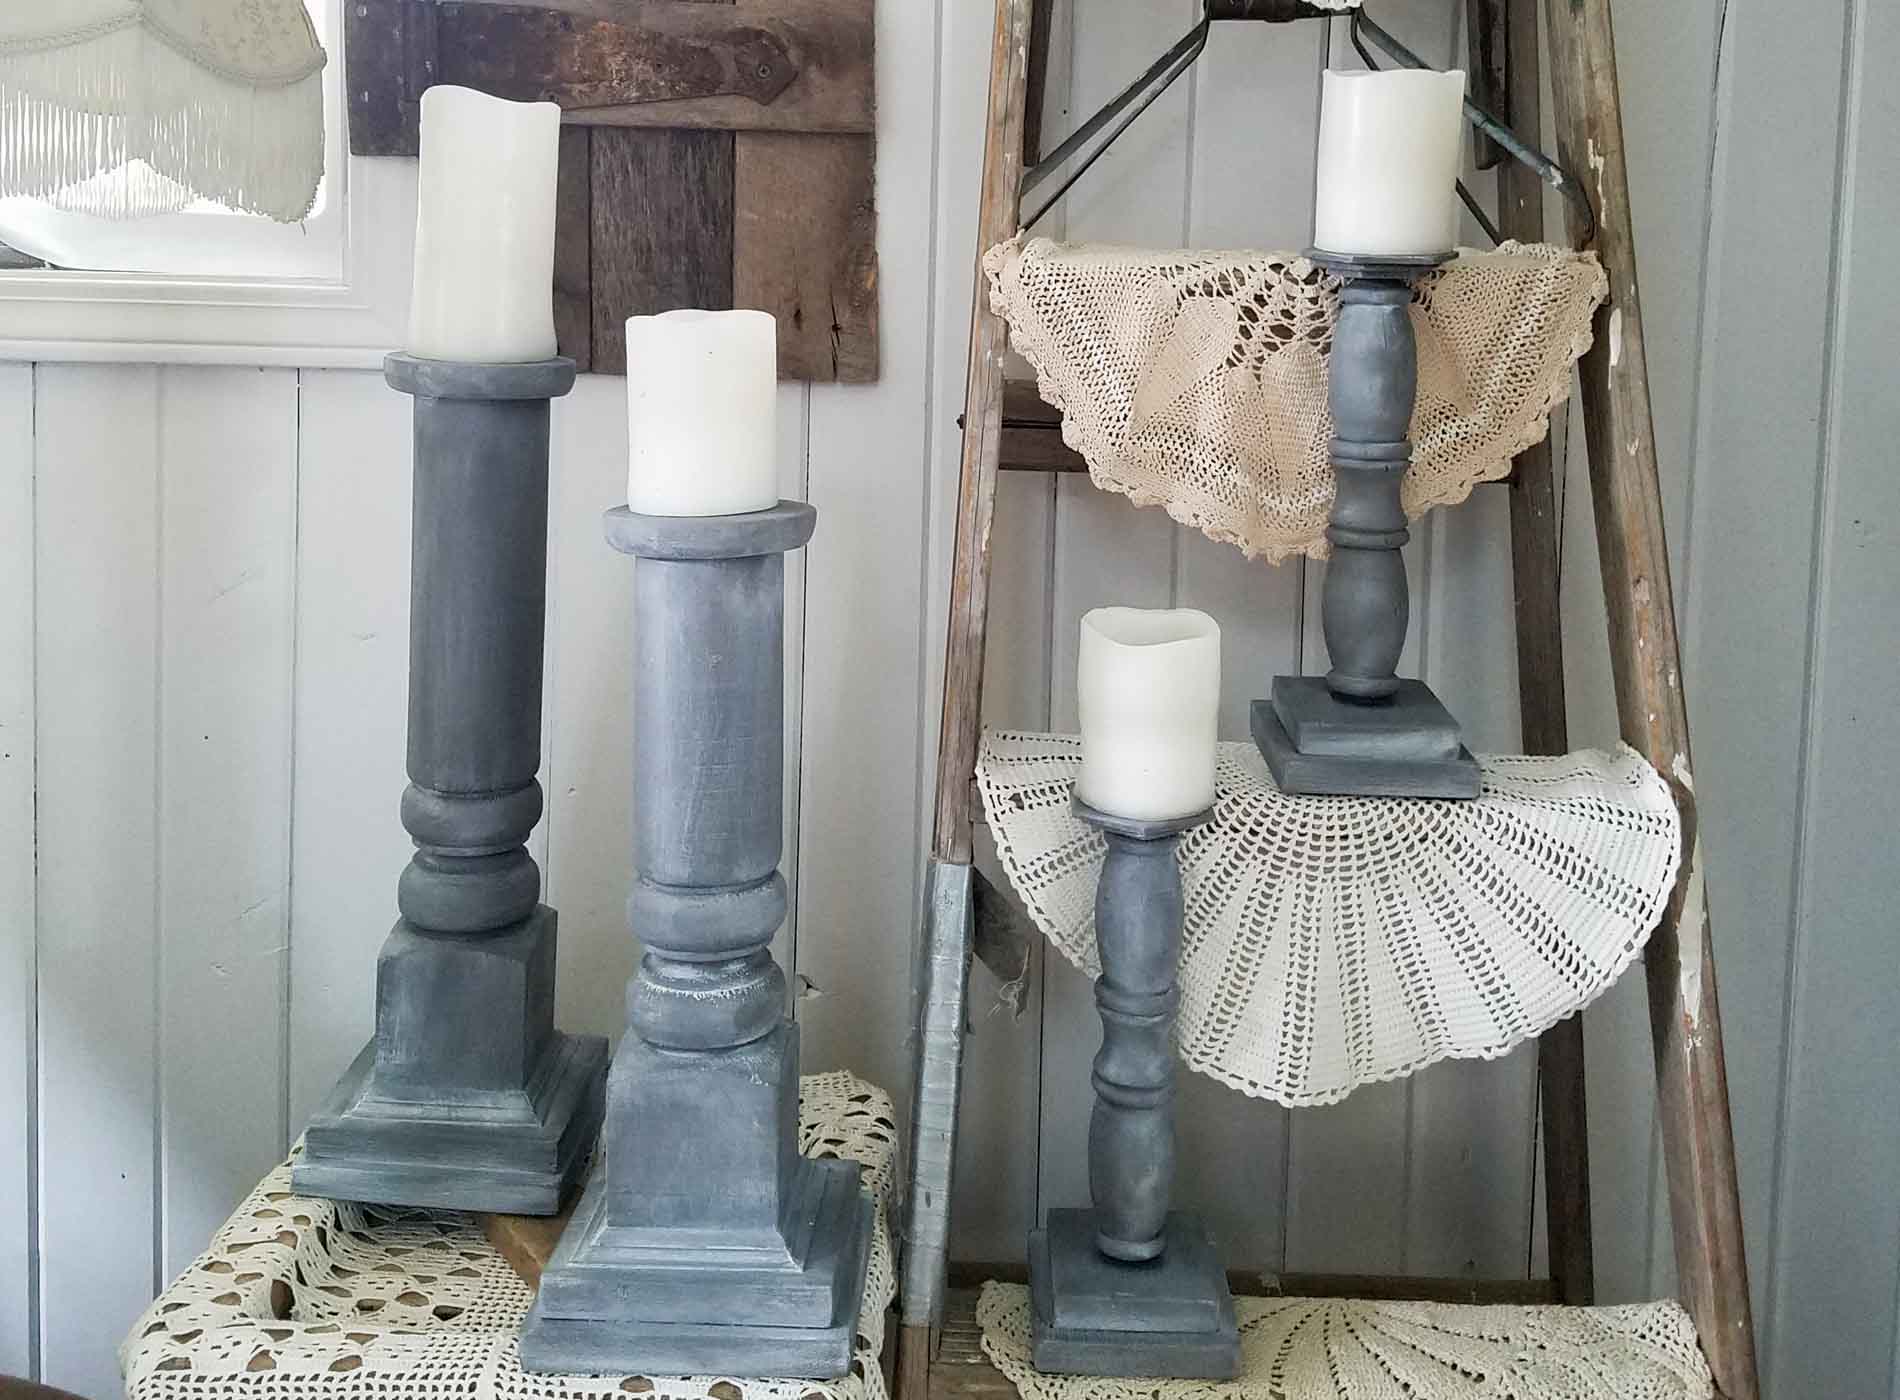
Here they are all finished and ready to go. I love it!


Those chunky turnings make me smile, and it's kinda funny as I can still see the posts sitting on the curb in concrete. haha!

I had fun with the smaller pair giving them a unique top.

The finish is my favorite. It has the aged zinc appeal I enjoy using throughout my home. Isn't it neat how the wax gives it such dimension?

The sweet part about all of this is that you aren't limited to couch parts and posts. You can use chair or table legs, balusters, pretty much anything you want. Making your home your own doesn't have to break the bank. YOU CAN DO IT!

I'm happy to say that I've created both sets for you, and they are available in
my shop. (SOLD) You can also find many other home decor, furniture, and handmade items. Stop by to see!

In addition, pin and share these DIY candlesticks because you never know when that one person is looking to up their decor game and are on a budget.

To get these DIY tips & tricks in your inbox, be sure to
sign up for my newsletter. PLUS, you will get your FREE Furniture Buying Checklist and special discount to
my shop. Until next time!

 MEWE | PINTEREST | GAB
Also, more projects like my DIY candlesticks:


 Story goes like this, my dad has rentals and when someone leaves he has to clean out, refresh the home, and get it ready for the next person, right? Well, he gets left with all sorts of messes and one of them was an old couch that had cat yuck all over it. However, he thought that these wooden pieces up by the head rest looked cool enough to save. I agree!
 Okay, so let me get started. First, I chopped that post into two different lengths using my miter saw. For the other couch parts, I used my hack saw to cut out the turning. I'm going to mainly focus on the larger two because it's the same idea for both sets.
 I wanted them to have a base, so again using my miter saw and scrap wood from my stash, I cut a couple of pieces for each. To make the top suitable for a candle, I used my jig saw to cut rounds out of scrap wood as well.
 I give the candlesticks two coats of dark gray.
Once the paint has cured, I use a white wax to dry brush the DIY candlesticks. This gives the aged look like I use in my zinc tutorials. Rub off excess with a soft cloth and leave a little here and there to create dimension.
I give the candlesticks two coats of dark gray.
Once the paint has cured, I use a white wax to dry brush the DIY candlesticks. This gives the aged look like I use in my zinc tutorials. Rub off excess with a soft cloth and leave a little here and there to create dimension.


 Those chunky turnings make me smile, and it's kinda funny as I can still see the posts sitting on the curb in concrete. haha!
 I had fun with the smaller pair giving them a unique top.
 The finish is my favorite. It has the aged zinc appeal I enjoy using throughout my home. Isn't it neat how the wax gives it such dimension?
 The sweet part about all of this is that you aren't limited to couch parts and posts. You can use chair or table legs, balusters, pretty much anything you want. Making your home your own doesn't have to break the bank. YOU CAN DO IT!
 I'm happy to say that I've created both sets for you, and they are available in my shop. (SOLD) You can also find many other home decor, furniture, and handmade items. Stop by to see!
 To get these DIY tips & tricks in your inbox, be sure to sign up for my newsletter. PLUS, you will get your FREE Furniture Buying Checklist and special discount to my shop. Until next time!


