Do you look at pictures in magazines and long for the farmhouse look in your home? Wipe the drool off your chin and head to the thrift store, my friend. There is a plethora of potential waiting for you around the corner - seriously! I have shown you mini-makeovers like this before and I want to continue to do so as so many love them. Here's is a selection of goodies I nabbed and I'm going to show you how you can turn them into thrifted farmhouse decor for your home.

This set may not look like much now, but with a few simple tricks I can make them take on a whole new vibe. Which shall I start with? hmmm...how about the small knick-knack shelf.

It's solid oak and totally beautiful as is, but let's say you don't care for the stain and don't want to sand it all down. There's an easy fix for you! Wax. Yup, just plain ol' wax. You can see how I've used it in past posts
HERE.
DIY TIME
All I do is brush it on using circular strokes and rub off the excess. The wax will remain in the grain of the wood and in the nook and crannies giving it a soft glow.

I filled it with a few of my antique apothecary bottles, and a few other gems that were found for pennies here and there.

It doesn't take much to create these vignettes, so don't be shy about going fleatiqueing. Did you notice how the wax softened that orange glow?

UP NEXT
Okay, next let's grab that wooden sign and make it new.

I removed the "Bless Our Home" metal text and then did a cleaning to the piece.

Then enters in your best friend...spray paint. I chose a white satin and oil-rubbed-bronze for my finish.

LAST, BUT NOT LEAST
Before I show you the after, let me also demonstrate how I redid that pine heart cut-out shelf for our thrifted farmhouse decor. In my area, you can find this style everywhere. It was a hot rage in the 80's that has continued to today. However, sometimes hearts don't cut it for me, so I cut them off. hahaha...
Here's how I do it. I trace one side of the profile of the top of the shelf to get a sort of stencil.

Then, I draw on the paper where I want the cut-line to flow and cut it out with scissors. I place the paper back in the same spot that I traced, except on this time on the front of the shelf. Trace the new cut-line on one side and then flip the stencil and draw on the other. Now I have a new cut-line and use my jigsaw to cut off the unwanted pieces.

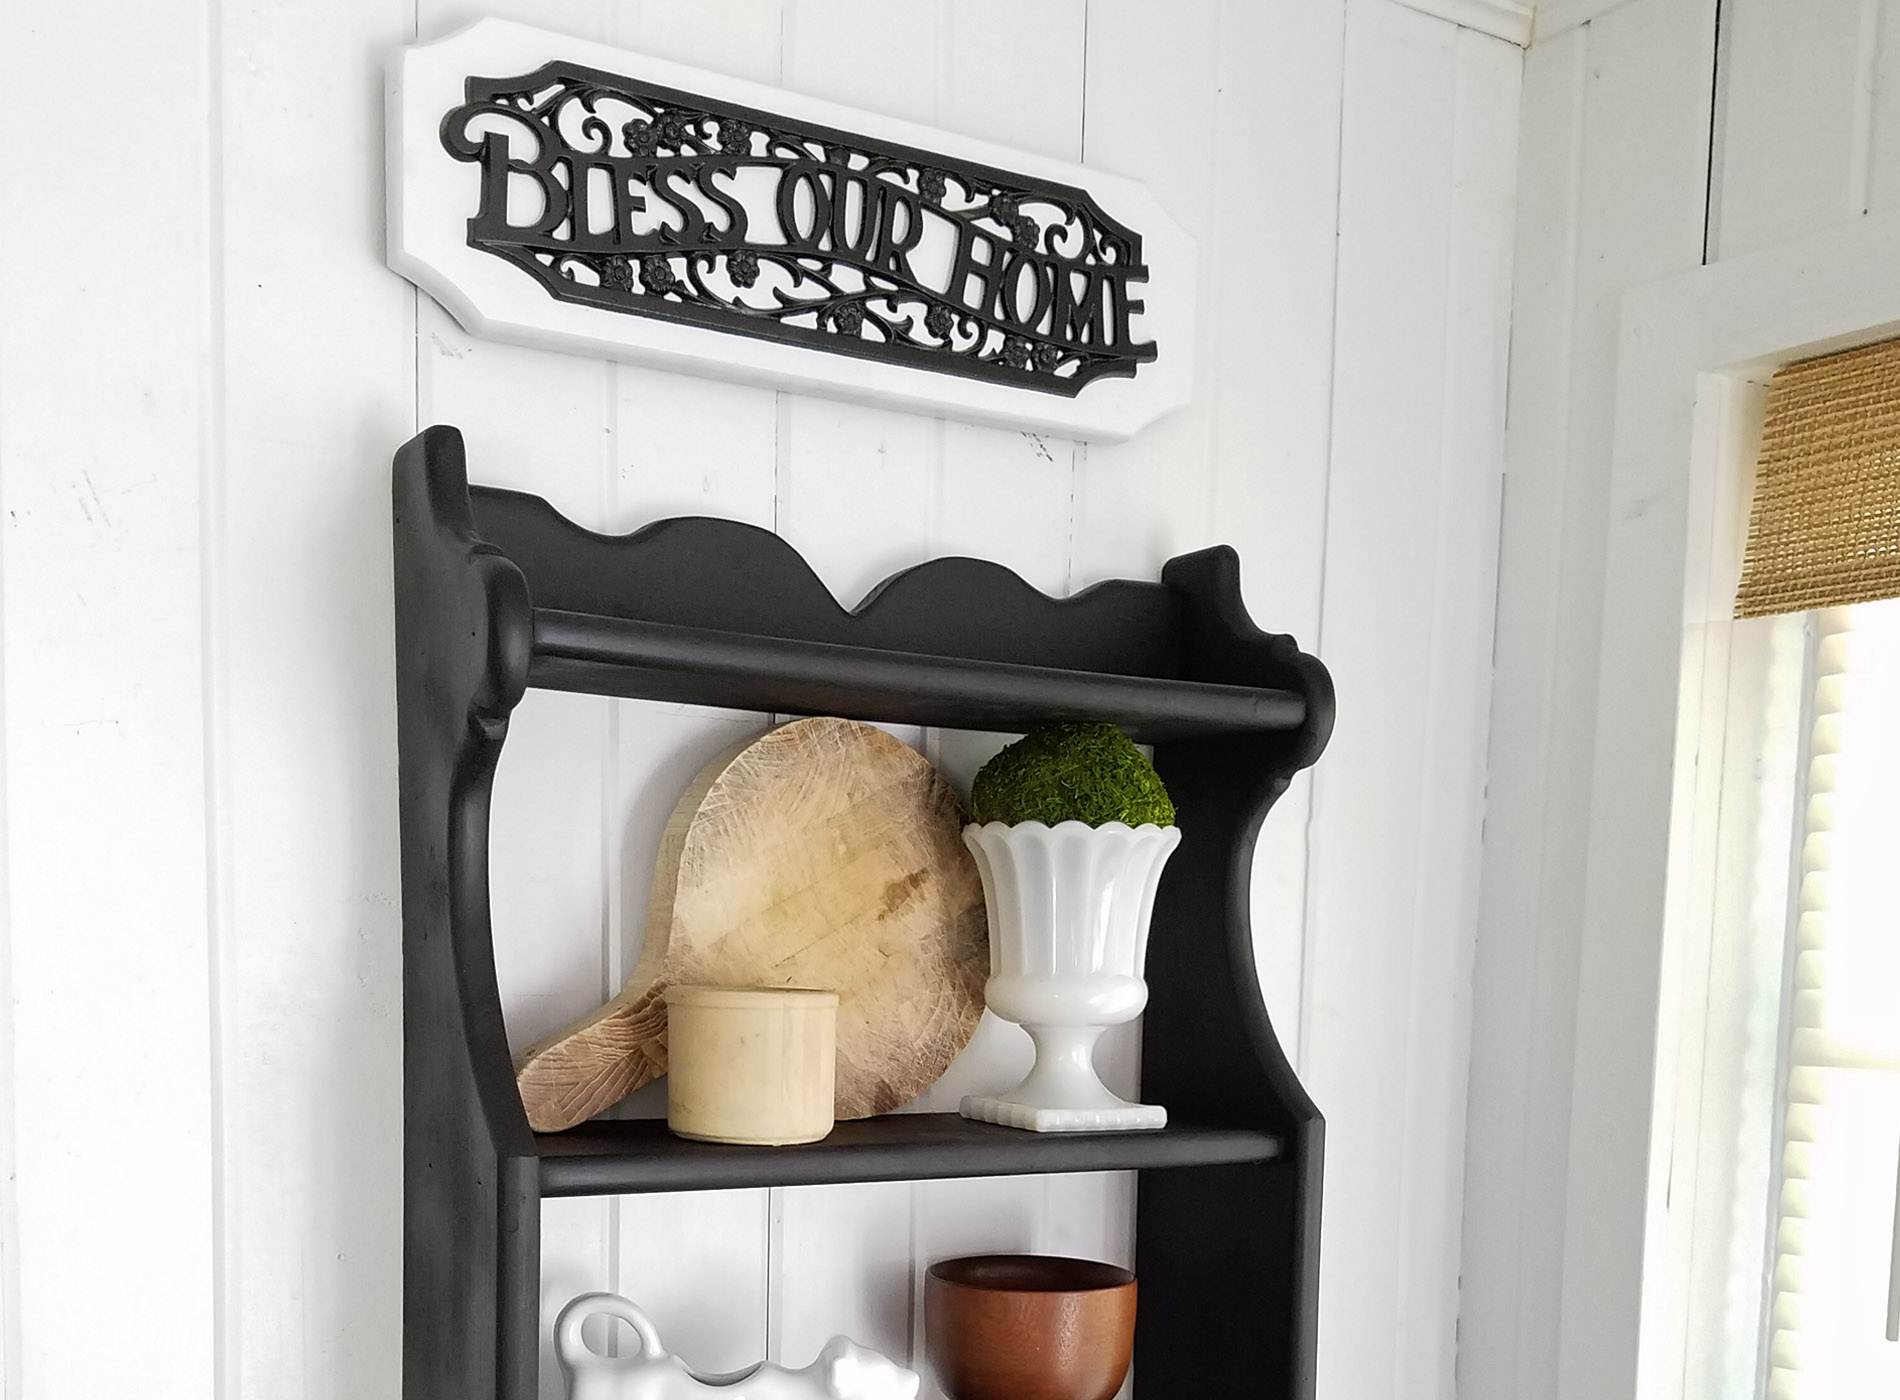
After that I sand down with my sander to make the edged nice and smooth, then spray paint to give it a new look altogether. Here is my sign and shelf put together and staged with 100% thrifted items.
THE REVEAL

Notice how the cutesy heart is gone and the look it totally updated. The sign said goodbye to the 1980's too. So much better, don't you think?


ONE MORE THING
Last, but not least in our thrifted farmhouse decor makeover series is that ugly green thing I nabbed. Know what it is? A plastic ice bucket. I had fun asking JC and each kid if they could guess what it was. We do this often so they can learn to tell what something is and the age of the item. Fun!

The green was funky and totally not my style, so...I paint it. BIG surprise, right?? hee hee hee. I was so stoked to find this because when we enjoy our
new fire pit and
patio, I haven't had something like this to serve guests. Instead I was using a mini crock pot to suffice. So, just like I redid my candlesticks in this video below or my buffet makeover
in this post, I used that funky orangey paint as a base (knowing full well it will get better). My brush is my go-to for all nooks and crannies.

I use two coats of paint letting them cure properly in between and then add the same white wax I used above to highlight that faux wood grain and embossed grapes.
THE REVEAL
Look who's stylin' now. tsk.

Finally I feel like a grown-up with a good lookin' ice bucket to set with my served beverages. That there is one of my favorites...fresh apple cider. Mmm... Not to mention those handmade fry pies. I think I'm hungry!!

SO GOOD
I gave the ice bucket a contrasting handle with a darker paint, and added a metallic color to the lid knob. It made for a nice contrast and gave a realistic look.


There you have four mini makeovers all done in a different way with the hopes that you have learned something new. I also hope you will take on the challenge of trying a DIY to not only have fun, but get the look you're after. And...you can find the shelves and sign, along with much more, available in
my shop.
(SOLD)

In addition, pin and share this thrifted farmhouse decor post to inspire others to put on their trashure glasses and see past the obvious to the potential. It's fun to share!

Up next is
Furniture Fixer Upper day and this already beautiful set will be getting a new look too. See the after
HERE in this post.

To get these DIY tips & tricks in your inbox, be sure to
sign up for my newsletter. PLUS, you will get your FREE Furniture Buying Checklist and special discount to
my shop. Until next time!

 MEWE | PINTEREST | GAB
Also, more projects like my thrifted farmhouse decor:


 This set may not look like much now, but with a few simple tricks I can make them take on a whole new vibe. Which shall I start with? hmmm...how about the small knick-knack shelf.
 It's solid oak and totally beautiful as is, but let's say you don't care for the stain and don't want to sand it all down. There's an easy fix for you! Wax. Yup, just plain ol' wax. You can see how I've used it in past posts HERE.
 I filled it with a few of my antique apothecary bottles, and a few other gems that were found for pennies here and there.
 It doesn't take much to create these vignettes, so don't be shy about going fleatiqueing. Did you notice how the wax softened that orange glow?

 I removed the "Bless Our Home" metal text and then did a cleaning to the piece.
 Then enters in your best friend...spray paint. I chose a white satin and oil-rubbed-bronze for my finish.

 Then, I draw on the paper where I want the cut-line to flow and cut it out with scissors. I place the paper back in the same spot that I traced, except on this time on the front of the shelf. Trace the new cut-line on one side and then flip the stencil and draw on the other. Now I have a new cut-line and use my jigsaw to cut off the unwanted pieces.
 After that I sand down with my sander to make the edged nice and smooth, then spray paint to give it a new look altogether. Here is my sign and shelf put together and staged with 100% thrifted items.
 Notice how the cutesy heart is gone and the look it totally updated. The sign said goodbye to the 1980's too. So much better, don't you think?


 The green was funky and totally not my style, so...I paint it. BIG surprise, right?? hee hee hee. I was so stoked to find this because when we enjoy our new fire pit and patio, I haven't had something like this to serve guests. Instead I was using a mini crock pot to suffice. So, just like I redid my candlesticks in this video below or my buffet makeover in this post, I used that funky orangey paint as a base (knowing full well it will get better). My brush is my go-to for all nooks and crannies.
 I use two coats of paint letting them cure properly in between and then add the same white wax I used above to highlight that faux wood grain and embossed grapes.
 Finally I feel like a grown-up with a good lookin' ice bucket to set with my served beverages. That there is one of my favorites...fresh apple cider. Mmm... Not to mention those handmade fry pies. I think I'm hungry!!


 There you have four mini makeovers all done in a different way with the hopes that you have learned something new. I also hope you will take on the challenge of trying a DIY to not only have fun, but get the look you're after. And...you can find the shelves and sign, along with much more, available in my shop. (SOLD)
 Up next is Furniture Fixer Upper day and this already beautiful set will be getting a new look too. See the after HERE in this post.
 To get these DIY tips & tricks in your inbox, be sure to sign up for my newsletter. PLUS, you will get your FREE Furniture Buying Checklist and special discount to my shop. Until next time!


