'Tis the season for entertaining! Actually, when isn't it always the season for entertaining? Inviting friends, family, and new folk to spend quality time is something we can do at any time. Even better, we can make our loved ones feel special by creating a special meal or event just for them. How about breakfast in bed? (I have no idea what that is...haha) With that in mind, let's take this thrift store tray and give it a much-needed makeover. Dark and dingy be gone!

Obviously, this is not a vintage item that is mass-produced in another country. While it's made of wood, it's not super high-quality, but is sturdy enough to do what we want to do. It needs some TLC to tighten it up, but really, it's all fun from here.
MAKEOVER TIME
Because I have a blank slate to work with, I'm excited to take this to a new level. You can see an 80's goose bed tray from
this past post, or a
checkerboard wall art turned tray in this video tutorial, or even this
curbside table turned tray. In addition, you can see all my
DIY trays HERE.

With that in mind, you can see all sorts of tray inspiration, so what to do now? The sky's the limit! If you were around a few weeks ago, you know I'm smitten soft blush pinks, browns, and neutrals that I use on
my candlestick makeover.
First, I wipe down the wood with a 1:2 vinegar/water mixture to remove any residue and grime. Then, I dig into my knob stash and find these beauties from
my repurposed dressing table. My goal is to give a bit more functionality to the tray by adding feet.

To adhere them, I place a good bead of adhesive, press them into place, and let cure overnight.
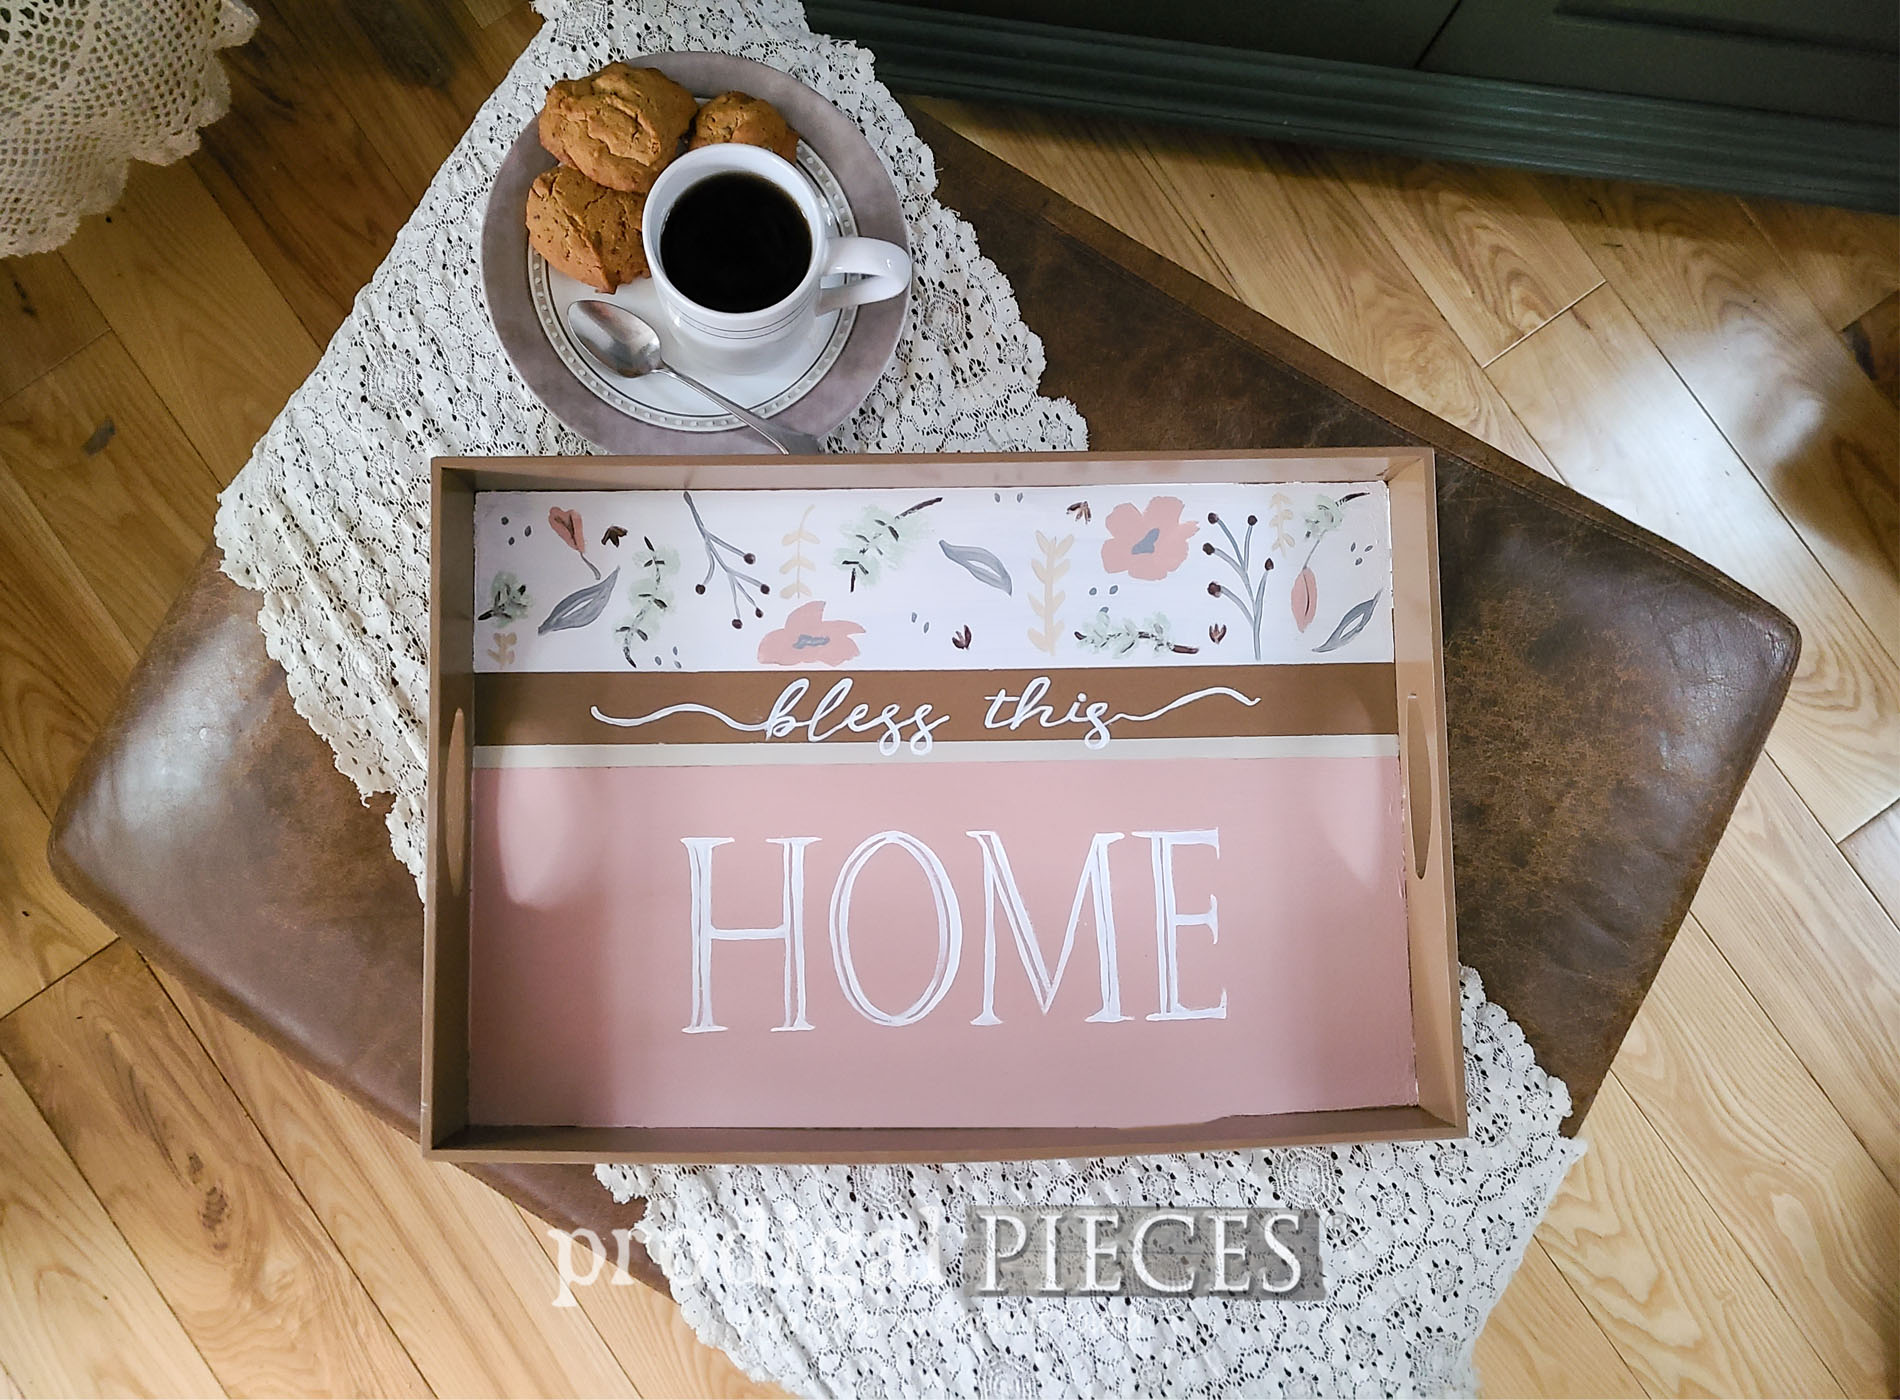
DESIGN FUN
As I mention earlier, I'm wanting to modernize this piece because it already has modern lines. While I could give it a vintage vibe, I want to stay with the obvious era appeal. That's where those muted colors come into play. Next, I use this Nutmeg color spray paint to give it a solid base color beginning with the bottom first.

After I let the paint cure, I use my painter's tape to make designs and paint them in. Additionally, I do some free-hand painting too.


Last, but not least, I use a spay polycrylic to seal it all in. woot!
SERVING UP DIY
Finally, here's the best part...getting to serve up a DIY project to you. While I'm always about inspiring you, I also want to encourage you to create something for yourself or those you love.


Gifting something like this can not only bring instant smiles when filled with homemade goodies, but it can warm the heart for years to come. I'd love to hear your stories of how someone went above and beyond to bring you joy. This week my littlest created a tea party with homegrown tea leaves her sister made, and little desserts for us all to share. Not only did sitting with my four daughters fill my heart but makes this mama so proud.


As always, I find such joy sharing my work with you. Thank you for making this a happy place to be. If you have any questions, please feel free to ask either by commenting or email via the contact tab above.


SHARE
If you'd like to make this a part of your home story, you can find this tray and much more in my online shop. Also, you can get an instant discount by
signing up for my FREE newsletter to see!

Not only do I want to hear from you, but I also invite you to pin and share my thrift store tray makeover. In my heart, it's always the season for giving, so make someone smile today.

Up next is
Trash to Treasure Tuesday with oodles of inspiration for you. What will become of this...er...goose?

Until next time!

 PINTEREST | EMAIL
Also, check out these other fun DIYs like this thrift store tray makeover: