What's wonderful, and yet troublesome at the same time, is when folks realize you will take their trash or unwanteds. Over the years, I've been offered truly fantastic pieces but also have turned away oodles because...well...I'm a one-woman show. Not only that, but I have a small home and very little space to spare. However, when I picked up this antique dresser I recently revived, the sweet gal also offered me this vintage sewing machine table. Vintage Sewing Machine Before Upcycle | prodigalpieces.com prodigalpieces For the record, I adore aqua color in any form as shown in these past posts, however, previously painted pieces are typically a nightmare. With that, I hesitate to accept, but then quickly figured that if I didn't want to take it, I could always find a home for it. So, here we are ready to take a closer look at this vintage gem.

FIRST LOOK

First, obviously, it's painted. While you think..."oh, it's painted, no problem!" Well, you encounter problems:
  • the paint may be oil based and quite a bugger to deal with. To find out, take rubbing alcohol and rub the paint. If it comes off, it's latex.
  • if you alter the paint in any form, most likely you won't be able to match it
  • oftentimes when a piece is DIY painted, it's done in an awful fashion (chunky, wrong brush strokes, drips, uneven, etc.)
  • removing the paint can be horrible! I've literally sworn off painted pieces because my time is more valuable, and I don't like using even the cleanest stripper because it is still toxic. See my testimony to saying NO HERE.
  • what is the paint hiding? You could find highly damaged, fake wood, etc. that makes a redo or upcycle take twists and turns
As you can see, this paint finish is lacking AND the leaves that fold open are painted shut as well. Painted Sewing Tabletop | prodigalpieces.com prodigalpieces Moreover, I've done a few sewing machine table makeovers as seen in this one turned table, another turned desk, and the tops turned chess board and another a mud bar.

LOOK UP

What to do? Let's take a peek under and inside... Underside of Vintage Sewing Table | prodigalpieces.com prodigalpieces As you can see, there is the piece that holds up the sewing machine when it flips up, you can see the two top pieces locked together, plus the original knee pedal as well as the small drawer for notions. Additionally, the sides are made of pressed board. Then, I grab my drill and remove the panel and hardware, plus remove all the screws holding the top on. After that, I head out to my workshop to see if I have something to replace the top completely. Per usual, I find a perfect size piece of cabinet-grade ply that I just need to shorten up a bit. In order to do that, I use my circular saw and large ruler as a guide. While I would normally use my Rip Cut jig, I want to show you how you don't need special tools to DIY. Cutting New Tabletop for Vintage Sewing Table | prodigalpieces.com prodigalpieces In addition, while I have my saw out, I want to shorten this vintage sewing table making it more suitable for use as a nightstand or side table. I find a random block of wood in my stash and use it as a guide to mark all four sides of each leg. Measuring Table Leg to Upcycle Vintage Sewing Machine Table | prodigalpieces.com prodigalpieces As soon as they all check for level, I cut the legs using my circular saw. BAM! So fun. Cutting Vintage Sewing Table Leg | prodigalpieces.com prodigalpieces

WHAT NEXT

Initially, remember I mention that the hardware is brass. How did I know that if it is painted so heavily? Every good junker carries a magnet with them. Brass is not magnetic (and silver, copper, etc.) and these just need stripped. First, I toss them into a baggie and pour in my CitriStrip. Notice Loula thinks this is a snack for her. Loula the Goldendoodle Puppy Sees After sitting overnight, I clean off the thick paint, and then need to polish with another must-have - Bar Keepers Friend to polish. Cleaning Brass Hardware from Vintage Sewing Table | prodigalpieces.com prodigalpieces Amaaaaazing, right? As soon as I have the hardware done, I head back to the table that I sanded down the drips and what was apparently a rough texture because the painter used a textured nap to roll it on. However, if you want a smooth finish, you need to use a micro foam roller like I did on this laminated dining table. Painting Vintage Sewing Table Upcycled | prodigalpieces.com prodigalpieces Last, I want to make the tabletop I cut look dressed up a bit. In order to do that, I use my roll of veneer and iron it on. This stuff is awesome!!
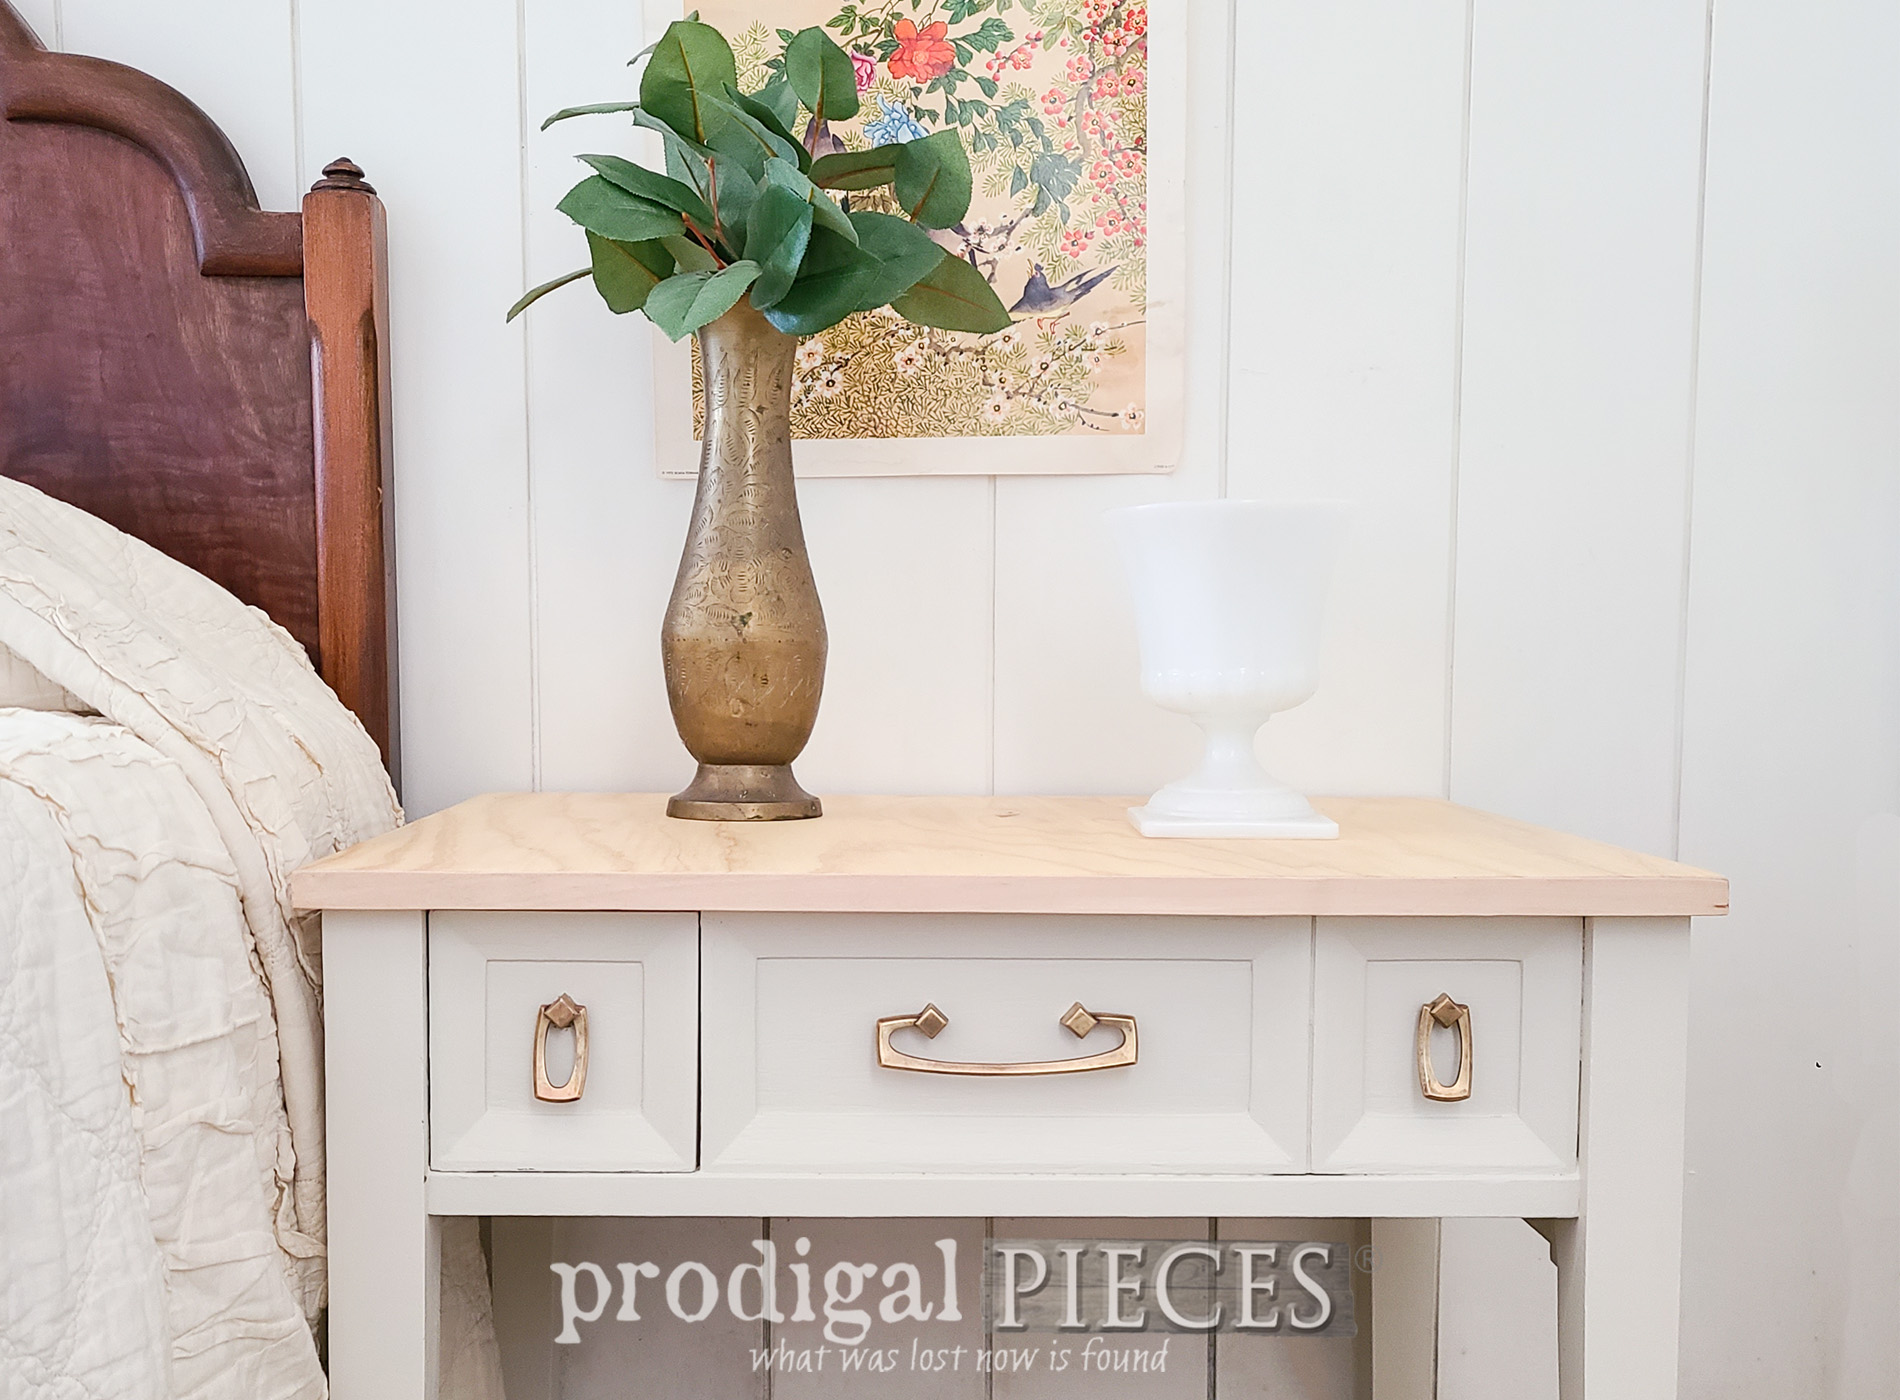
 Band It Veneer for Upcycled Sewing Machine Table | prodigalpieces.com prodigalpieces Ironing on Veneer Banding to Table Top | prodigalpieces.com prodigalpieces

NEW LIFE NEW LOOK

If you're like me, it's so fun to finally see what has become of this vintage sewing machine table upcycle. woot! DIY Minimalist Boho Style Nightstand from Upcycled Sewing Machine Table by Larissa of Prodigal Pieces | prodigalpieces.com prodigalpieces furniture boho minimalist Boho Nightstand Corner by Larissa of Prodigal Pieces | prodigalpieces.com prodigalpieces boho diy It's perfect for use as a side table or nightstand or...whatever your heart desires, don't you think? Not only does the smaller style suit more uses, but I also just adore those brass pulls. Top View of DIY Boho Nightstand from Upcycled Sewing Machine Table by Larissa of Prodigal Pieces | prodigalpieces.com prodigalpieces upcycled minimalist Open Drawer of Boho Nightstand from Upcycled Vintage Sewing Machine Table by Larissa of Prodigal Pieces | prodigalpieces.com prodigalpieces vintage furniture Additionally, that sweet notions drawer works a hidden spot to tuck in your treasure, spectacles, or a midnight snack. tee hee. Furthermore, if you'd like to make this part of your home story, you can find it and more in my online store.

Shop Prodigal Pieces | shop.prodigalpieces.com prodigalpieces

Boho Style Nightstand Table by Larissa of Prodigal Pieces | prodigalpieces.com prodigalpieces boho

SHARE

In addition to leaving some comment love below, I invite you to take a moment to pin and share this vintage sewing machine table upcycle. Because ya never know if someone else has a similar piece they have no idea what to do with, right? A vintage sewing machine table makes for a great upcycle into a nightstand side table by Larissa of Prodigal Pieces | prodigalpieces.com prodigalpieces diy upcycled furniture Before you go, sign up for my FREE newsletter to see what becomes of this sewing table top HERE. Sewing Machine Table Top Before Upcycle by Larissa of Prodigal Pieces | prodigalpieces.com prodigalpieces Until next time! blog signature

let's get socialPINTEREST | EMAIL

While you're at it, more upcycles like this vintage sewing machine table:

What an absolutely adorable idea! Larissa of Prodigal Pieces upcycled a bread box into a pretend play grill set with all the bells & whistles. Take a peek at prodigalpieces.com prodigalpieces handmade kids toys shopping fun pretendFrom curbside underbed drawers to a rustic farmhouse workbench for kitchen or console. Larissa of Prodigal Pieces loves taking trash and turning it into trashure . Come see the DIY details at prodigalpieces.com prodigalpieces farmhouse furniture homedecor shopping


Janette

Shared publicly - 2023-03-21 07:21:35

What a gorgeous table, I was worried about this one to be honest, but it looks fabulous, very classy.xx

Charleen

Shared publicly - 2023-03-21 10:08:39

I was concerned aabout turning it into a side table,as I need a sewing table. However,you made a silk purse out of a bedraggled sewing table. Really like the cream paint.I am a fool for aqua!!. Great transformation. God bless you. Looking forward to Sping, myself.

Trudy

Shared publicly - 2023-03-21 10:16:21

Love the cream with brass hardware. I need to start carrying a magnet!

Larissa

Shared publicly - 2023-03-21 11:16:16

Thanks! Gotta ask...worred about...? ;)

Larissa

Shared publicly - 2023-03-21 11:16:53

Happy spring!! And thank you for the everlasting smile.

Larissa

Shared publicly - 2023-03-21 11:17:40

tee hee!! I debated but this will be better off for many reasons, and then I have the top to do. Aqua for me too! :D Thanks, Charleen.

Larissa

Shared publicly - 2023-03-21 11:17:55

You definitely should!! :D Thanks so much, Trudy.

AnnMarie

Shared publicly - 2023-03-21 13:13:11

Can you elaborate on how you checked the legs for level before you cut? And I’d love to see how you used strips of veneer to cover the whole top! You are an inspiration.

Becky

Shared publicly - 2023-03-21 14:34:01

Such a pretty and classy makeover!

Marietta Walker

Shared publicly - 2023-03-21 14:53:15

Holy Moly, this is gorgeous! It is a fantastic transformation. I watched your shed video and I about feinted at the reveal. I just had a huge she-shed built, 16" by 32" and it is nice but rather plain on the outside right now. I love you cedar shingles. I love everything you do, but the shed just blew me away. You are a DIY Rock Star!

Larissa

Shared publicly - 2023-03-21 16:00:00

Sure! I used the same block to mark on all four sides of each leg while it rests on a level surface. The cutting part is the hardest, but a steady hand will reap huge rewards. For the veneer, I only used the veneer on the edges to "hide" the ply look. The top is cabinet-grade ply so it didn't need anything. Hope that helps!

Larissa

Shared publicly - 2023-03-21 16:00:51

I'm so glad spring is here! Thanks so much. I love brass for it's natural anti-bacterial properties but also real brass isn't brassy (if that makes sense)

Larissa

Shared publicly - 2023-03-21 16:01:13

That's music to my ears, Becky! Thank you for the smile :D

Larissa

Shared publicly - 2023-03-21 16:01:53

Well, aren't you super fun?!? Thank you for that, Marietta. I worked hard on it and I still smile when I walk in today. Hugs!!

p

Shared publicly - 2023-03-21 16:59:13

Ohhhhhh so pretty. I love the cream color, and the hardware looks wonderful. Got love cutsey little drawers too. :) Great choices. I'm sure it will sell fast. p

Larissa

Shared publicly - 2023-03-21 17:29:48

Thanks! I saw this color on just placed on the second's table and a grabbed it. It's neutral and great for many things. Now it needs a name... :)

susan

Shared publicly - 2023-03-21 22:22:41

AWESOME,

Larissa

Shared publicly - 2023-03-22 04:58:31

Thanks, Susan!

Sign Up To Comment