Are you a scrappy kind of person? I am! Without a doubt, I'm a waste-not-want-not kinda gal. Not only is fun to create from leftovers, but it makes me feel good too when I can keep goods out of the landfill or from going to waste. In fact, that is why I created scrap wood decor DIY tutorial for you using pieces of 2" x 4" wood scraps from my stash.

Would you think they could look like this?

So, if you're game, this project only takes minutes and is so budget-friendly you'll be surprised. Moreover, the best part is it makes a fun craft with friends and family of any age and makes a great housewarming gift or gift to self.
CREATING TIME
Let's get started! To start with, you'll want my supplies/tools list below AND my video tutorial as well.
TOOLS & SUPPLIES
- scrap wood in any size (I'm using three different sizes that happened to be in half-inch intervals)
- sandpaper (if needed)
- stains and paints in your color choices
- paint brushes
- two aluminum beverage cans
- scissors
- stencils, transfers, and any other fun crafting goodies
- e6000 adhesive
- spackling
- putty knife or plastic card
- optional; wood discs or similar, twine, etc.

STEP 1
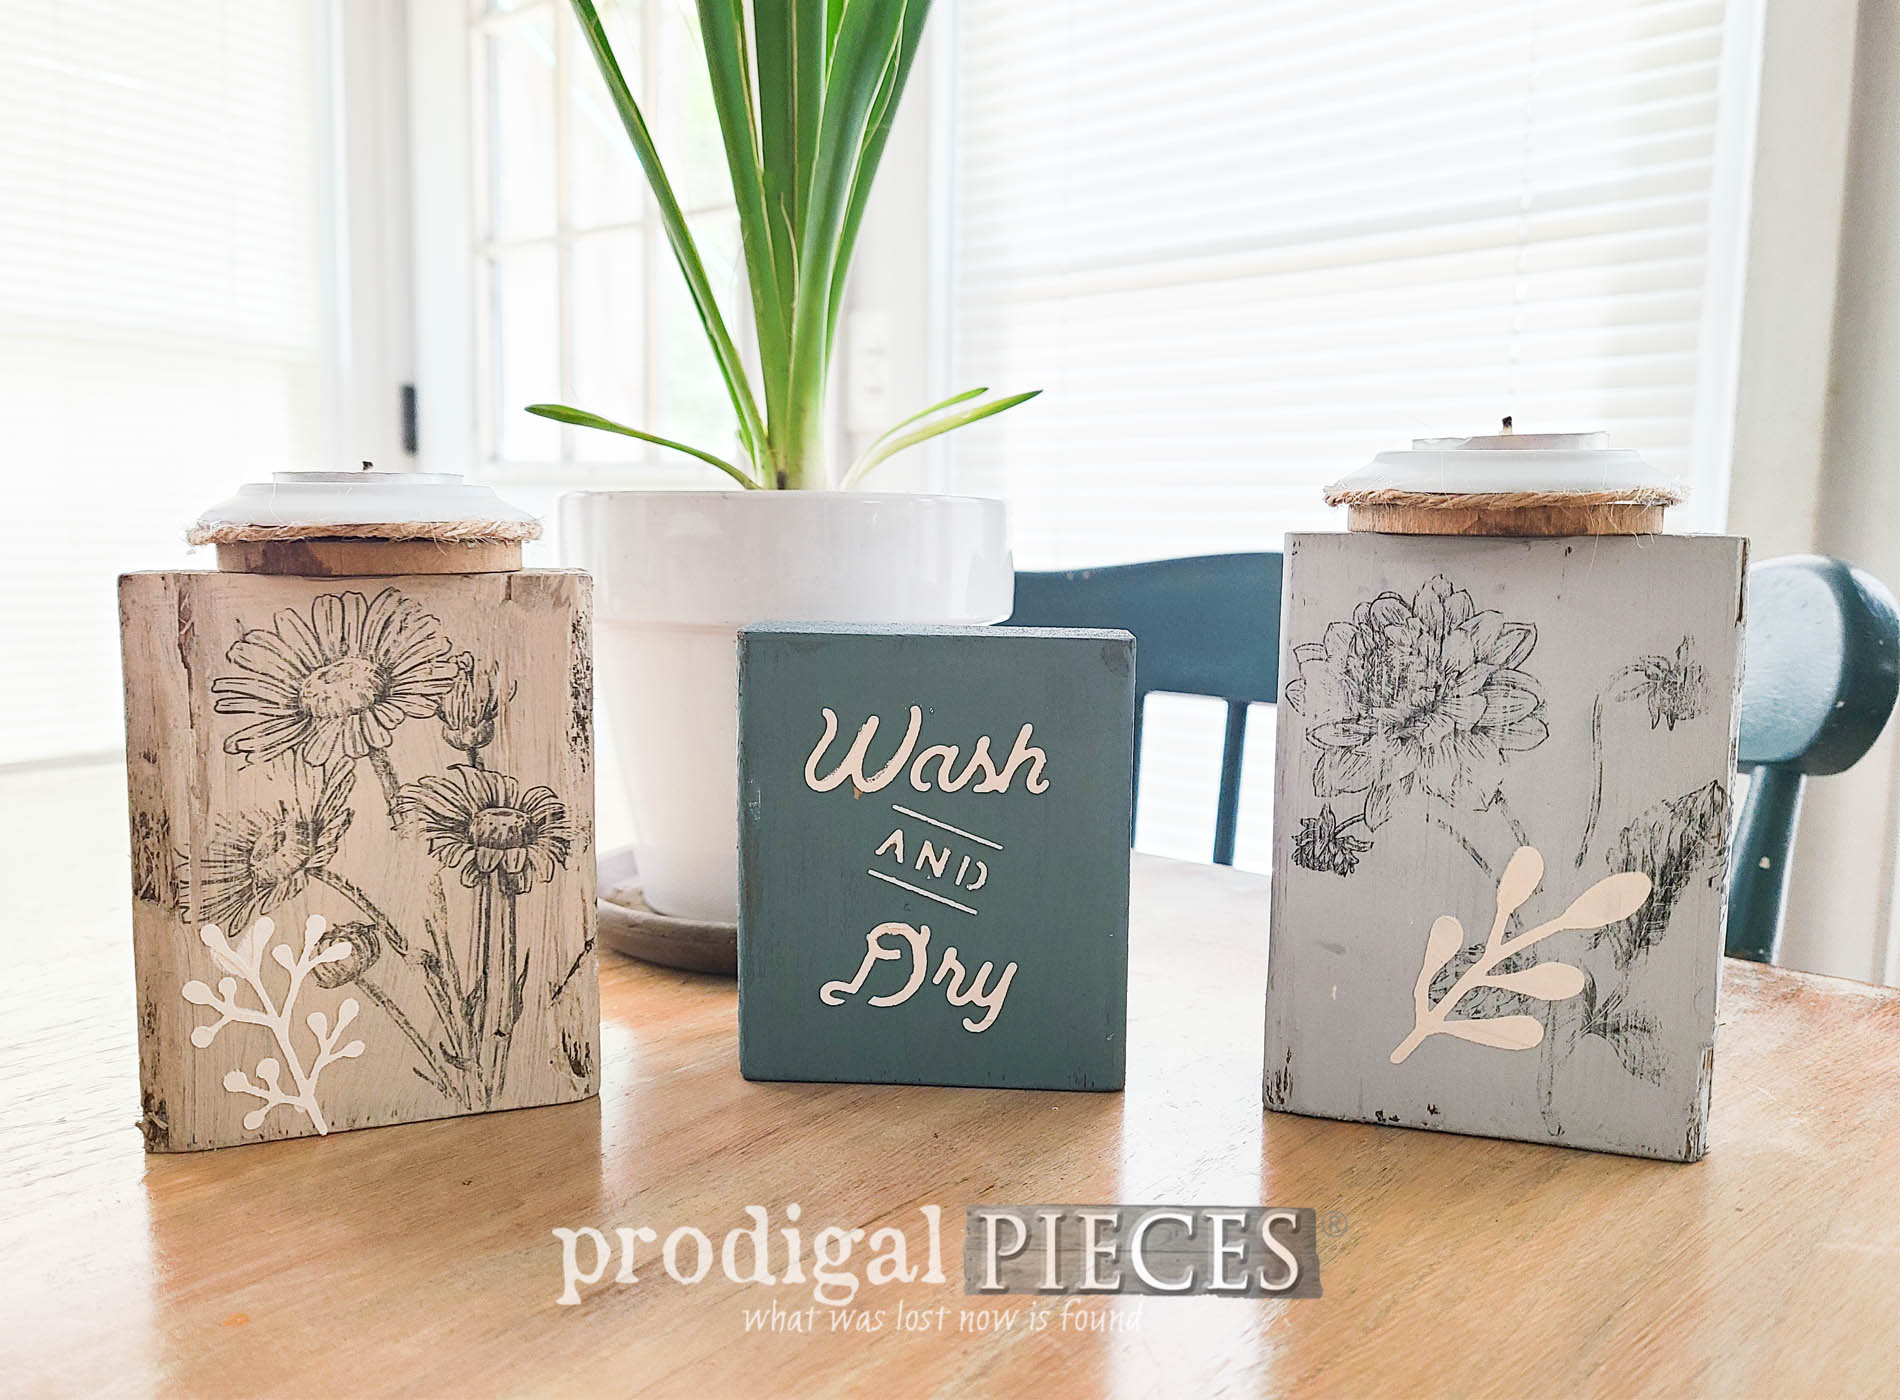
First, the beginning step in making your scrap wood decor is to prep your wood for paint/stain. Keep in mind the options with this is you can do any decor style you want. Actually, feel free to go bold with it, use as many block as you want, or keep it super simple. I'm focusing on a simple farmhouse style with a stained base with washed paint over top. In order to that, I use this reactive stain to naturally age the wood. You can see how I've used it in
these past posts. I love this stuff!

Additionally, at this time I stain those two small wooden discs. However, you don't need these necessarily if your blocks are bigger or have a surface to add the tealight holder to.
STEP 2
Subsequently, once the stain cures, I use three different muted-toned paints on each, also letting cure.

STEP 3
Next, this is when you can go crazy with it. By the way, I'm using dollar store stencils and transfers, but you can use
whatever you want.

For one block, I use my spackling and putting knife to add an embossed text to one side.

In addition, you can see how I use this same technique on other great projects:
STEP 4
Then, for the other two blocks, I use these rub-on transfers to add a floral touch.

As soon as the transfer is on, I use the stencil again to add embossing to these blocks too. As previously mentioned, the video above demonstrates this best.
STEP 5
Last, but not least, I cut the pop can bottoms off. In order to make them gel with the rest, I spray paint them a flat white.

Then, once cut, I adhere the pop can bottoms to the wood discs and also to the top of two of the blocks.
LIGHT IT UP
Finally, it's time to enjoy your scrap wood decor. Not only can these go in any room, but also make great gifts.


Incidentally, I also add a transfer to the back of the '"wash and dry" to make it more versatile.


What is more, I'm lighting these two candles representing the "old" me and the "new" me. The past two years have taken me on a rollercoaster ride with me trusting God to lead to me a peaceful stop.


Here's to a starting anew, right?
Likewise, if you'd like to purchase this set, you can it and more in
my online store.


SHARE
As always, my goal is to inspire you to get creative in any form. Leave me some feedback below as well as pin and share to inspire others too.

Before you go, be sure to
sign up for my FREE newsletter because it's
Reduce, Reuse, REFASHION time and you don't want to miss out.

Until next time!

 PINTEREST | EMAIL
While you're at it, check out these other projects like this scrap wood decor tutorial: