 If I mention to my kids I'm going thrifting or especially to the flea market, I hear a collaborative, "I want to come!!" I couldn't ask for a sweeter sound because doing what you love with the ones you love is the best.
DIY TIME
When I spied this screen I originally had planned to do my embroidery as I've done in these past projects. Instead I decided to do something else I've had mulling around in my brain that involved even more vintage goodness. A few months back one of you awesome readers gifted me with a delicious pile of vintage doilies. eep! I have been using them for various things, like these thrifted art creations see here. I am a hooker myself, of the crochet type, and can't get enough of the time and love put into each of these pieces. In this awesome stash I happened to find a similar set of 5 round ones that were perfect for my vision. One of my favorite textile combinations is lace with burlap - it makes the perfect juxtaposition. Next, to marry these two fabrics, I placed my doily on burlap and cut around making sure to not cut the doily (that would be sacrilegious - ahem).
 Then, once cut, I use a basic long zig-zag stitch to put them together. I could have glued them, but I may want to use the doilies for something else at a later time and I don't want to ruin them. Fuzzy pic...meh.
 Finally, after the doilies and burlap are stitched together, I bend them into a cone and use a basic running stitch by hand to hold it together. For extra fun, I dig into my collection of vintage buttons to add a few to the cones. Aren't they the best?!

THE REVEAL
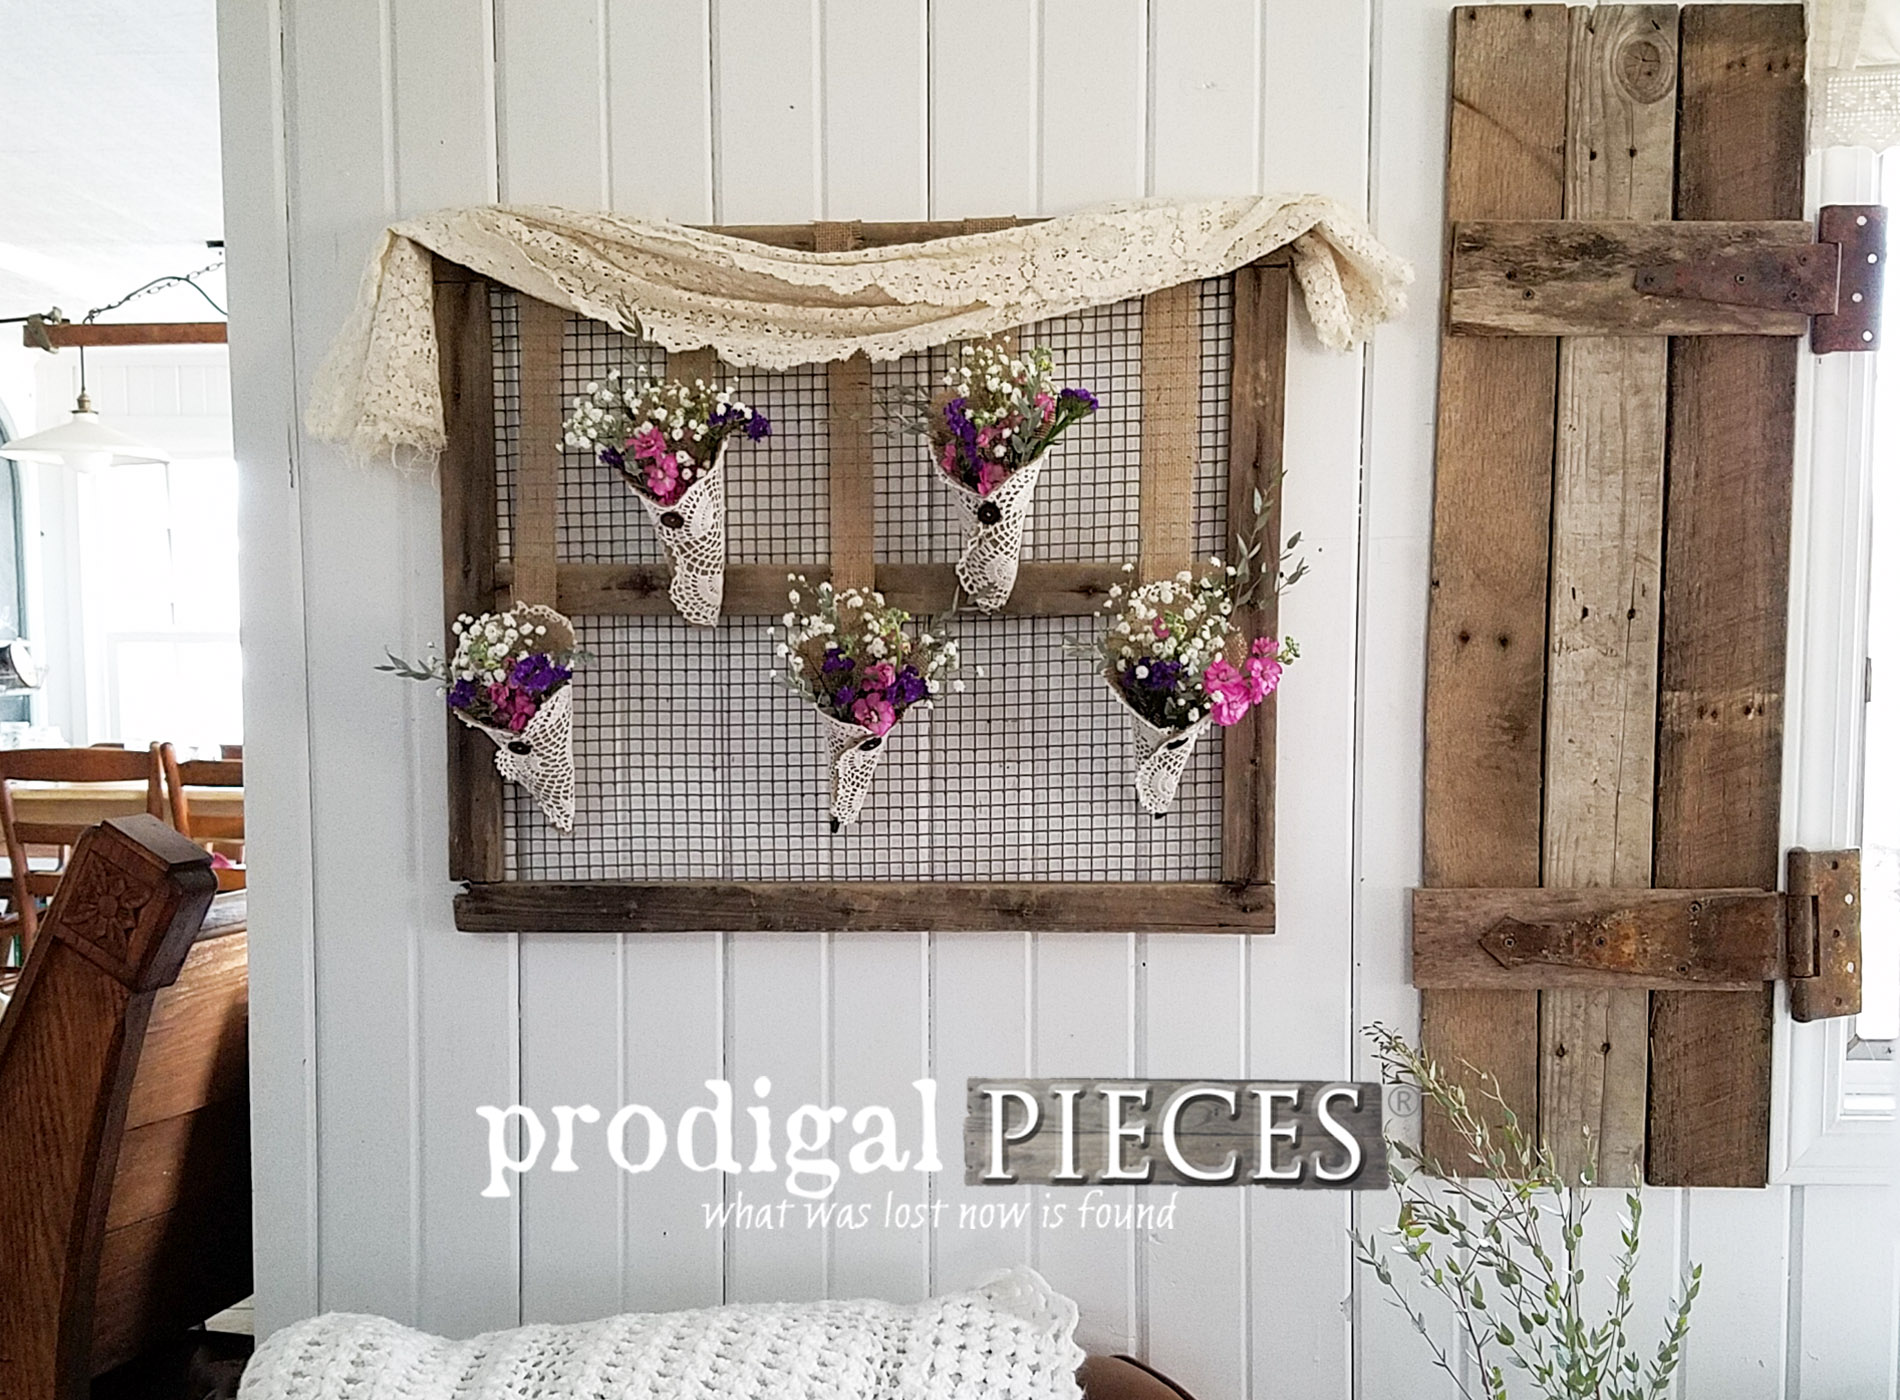
Last, but not least, I cut a few strips of burlap and sew them to the back top edge of the cone so they can hang on the screen like this...

VIGNETTE
This vignette truly makes my heart happy as I miss my blooms from my own flower beds, and the scent is...heavenly. I just love eucalyptus in all it's variations.
 I mean, who doesn't love tiny little bouquets greet you with a happy bit of color? And don't forget that rusty metal and gorgeous wood patina. Be still my heart!
MORE LOVE
Well, my original plan was to put this above my bed, but I just couldn't take down those vintage vanity mirrors - I love the depth they offer. So, instead you can find the rustic farmhouse wall art in my online shop.[metaslider id=30251]
 You can see how I created my indoor shutters with this tutorial here using pallet wood and old barn hinges. I made those about 7 years ago and still love them. I also created the valance from barn wood and a bed skirt in this tutorial. Gotta love DIY decor, right?
 I hope you've enjoyed this fun creation as much as I have enjoyed sharing it with you. Also, feel free to make one of your own for your own personal use but refrain from making to sell or using in your retail space. Thanks!
SHARE
Additionally, pin and share to inspire others to create their own rustic farmhouse wall art from flea market finds. Creating is the spice of life. Likewise, to get these DIY tips & tricks in your inbox, be sure to sign up for my newsletter. Until next time!

Also, more projects to make rustic farmhouse wall art:

