I think there should be sweet music playing when I write for our Themed Furniture Makeover Day because it is my favorite time each month. Do you blame me? I don't have local friends and neighbors, even family, who enjoy doing what I do, so having some peeps to share in the goodness is fantastic! Not only that, but they challenge me as well. Be sure to stop by the linkup at the bottom and check out all their hard work. This month's project was all about
RUSTIC furniture. tsk. Now you know that got me excited. Yay! Love me some rustic chic. ♥
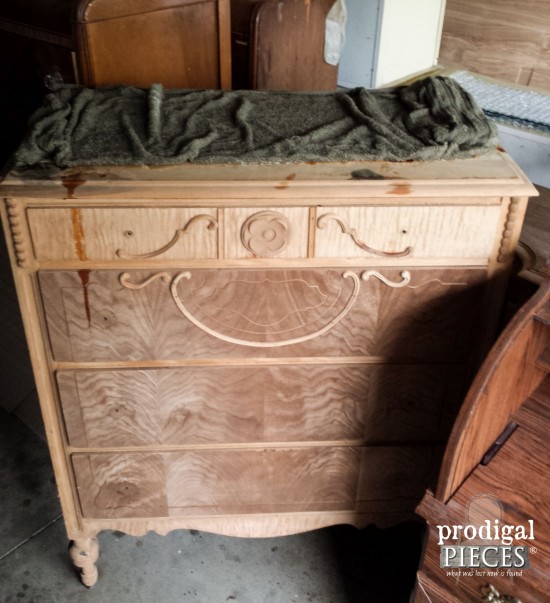
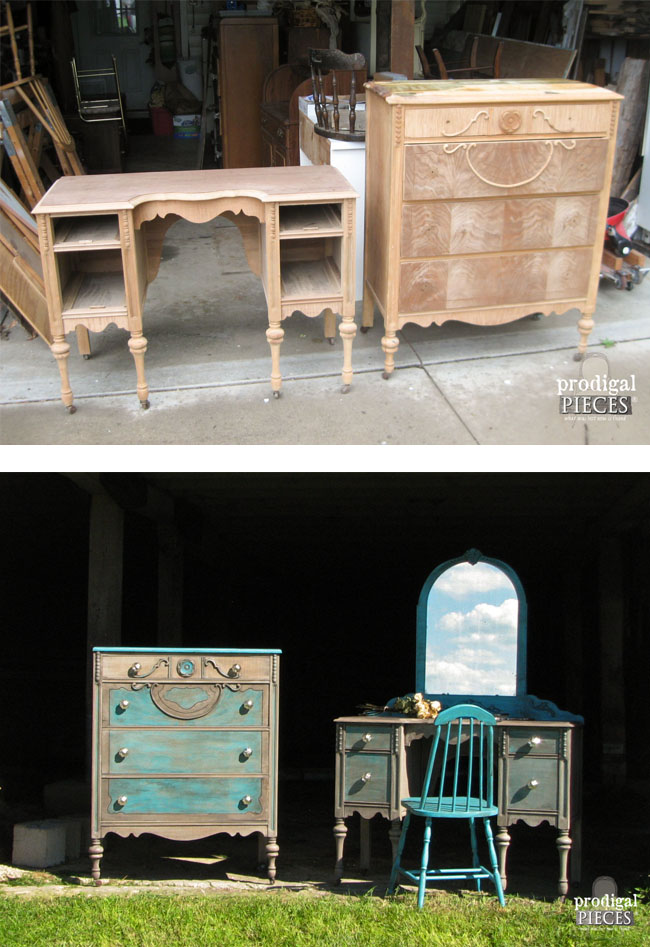
A few weeks ago I was on Craigslist (like I'm never on there - right.), and was relisting some of my items. I make a habit of always checking the free section because you just never know. Here is what I saw when I clicked...
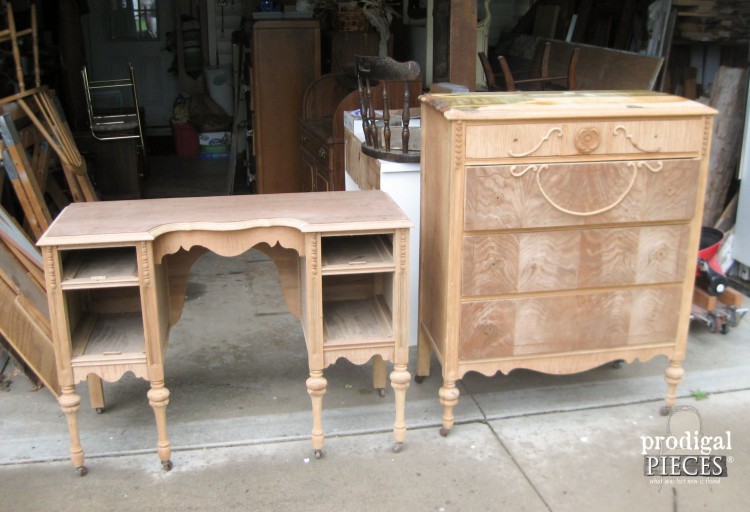
Seriously, my jaw hit my desk and I grabbed my phone lightning-fast. (You know, I seriously wish I could see what my face looks like when this stuff happens. I'd laugh my rear off!) Missing a few drawers, casters, and mirrors, but it's already stripped!!
THE BACKSTORY
Story goes like this: Lady tries to strip this set herself and finds out she took on more than she could handle. She damages it beyond repair (in her mind) and lets it sit in a friends' barn (Man) for over a year. Man asks her what she'd like done with it because he'd like it gone, to which she replies, burn it. {{gasp}} Man says he can't do that (good, Man!) and puts them on Craigslist thinking someone could do something with them. Enter in me...and the rest is history.
Now, would you drive straight over to grab them before somebody else? I would have, but couldn't because you can't fit 6 kids and bedroom set in a suburban, now can you? I asked the gentleman if we could come later that evening and thank the good Lord he said he would wait. He said it sounded like I was a nice lady. So, thank you,
awesome hubby for driving an hour one way to get them, and thank you kind man for not giving them away before he got there!!
FREE?
Funny thing though, sometimes the word free doesn't totally mean free. There's usually a trade. Gas to go get said items, etc. In this case, I knew that the man said they were a mess, but how bad could they be, right? What came to mind, was Maria on The Sound of Music asking the Mother of the Abby , "What's wrong with the children?" when she found out they had trouble keeping governesses. So, what was so wrong with these pieces?
That man wasn't kidding that the previous owner didn't know what she was doing. Bless her heart she tried and here is the result...
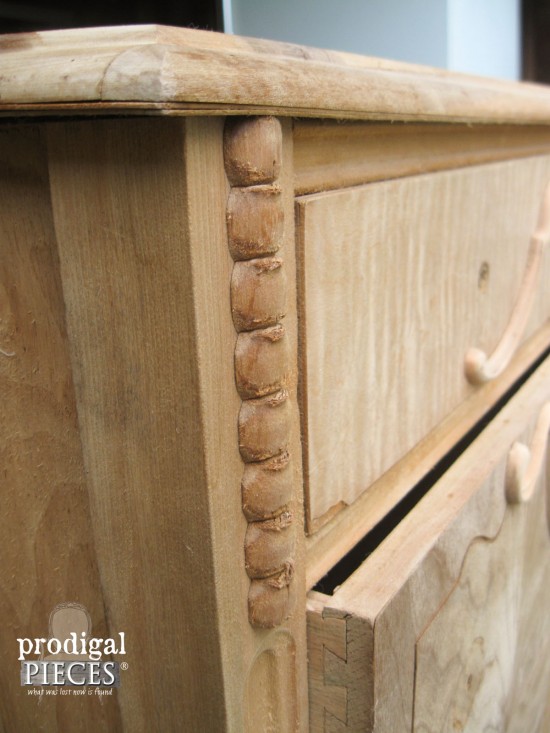
Snaggle teeth everywhere...the whole set was, well...fuzzy! I have lovingly named this set my "Fuzzy Duo".
The veneer was coming off and it was dry as a bone from sitting naked for so long.
DIY TIME
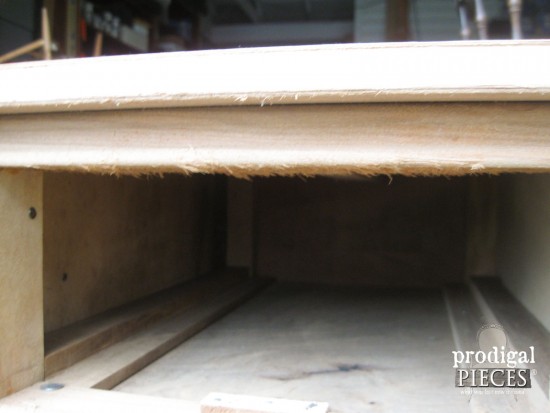
I used my towel-soak method to get two layers of veneer off the top of the chest, and it came off like butter on hot toast.
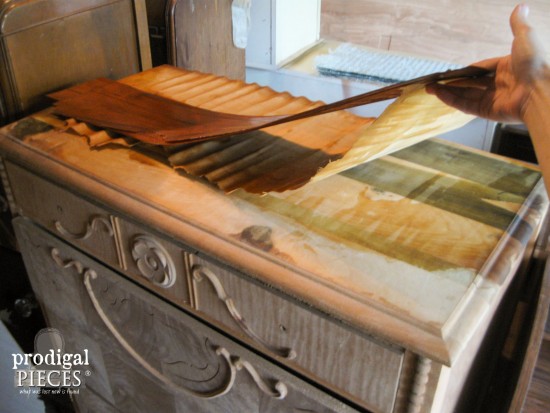
One problem. Remember I told you my life's motto is, "Haste makes waste"? Well, I knew the wood was parched, and when I soaked it good, it sucked up that water like a dehydrated elephant. It warped that top right into a rainbow and deemed it no good. I knew better than to do that method on dry pieces, but was in a rush to get it soaked overnight. grrrrr....

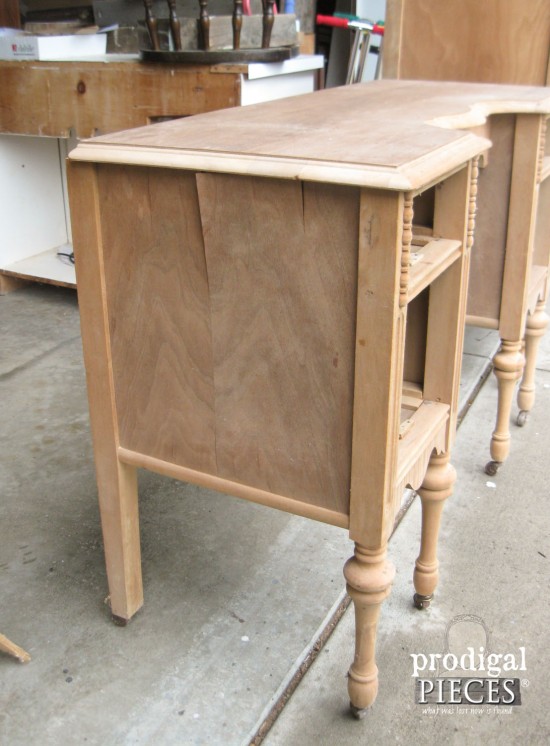
See...even the dresser is smiling at my foolishness, but is still excited to get a new look. Some rustic chic lovin'.
NEXT STEPS
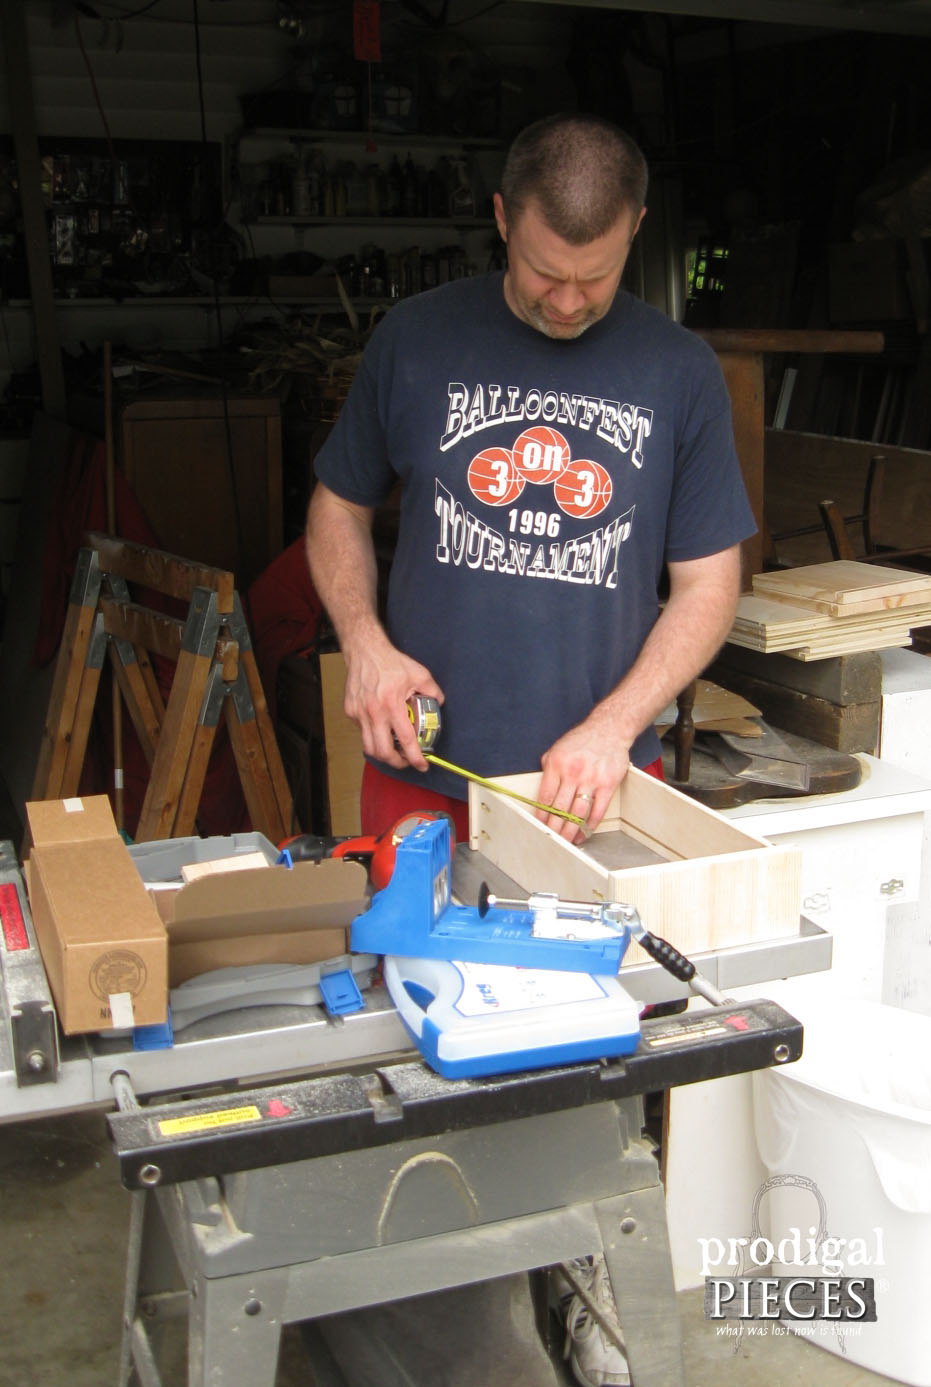
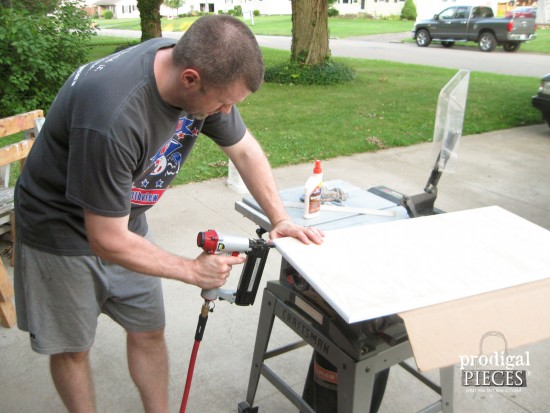
So, not only did the vanity need new drawers, now the dresser needed a new top. Ah well, live and learn. So with my newest gift-to-self, my Kreg pocket screw jig, my husband built new drawers while I worked on the rest.
The theme is rustic, right? My goal is rustic
chic since this is an ornate set that is just aching for some styling. My base coat is done in one of my favorite go-to stains, Sunbleached, that we used in our
master bedroom, my
DIY bathtub tray, and also on this
coffee table.
Like I said, I knew these babies were dry, but my goodness! They sucked up a near full can of stain. I knew that staining would lift the grain even more, so I didn't start to sand until after the stain was applied. That is not normal in most cases.
MORE DIY
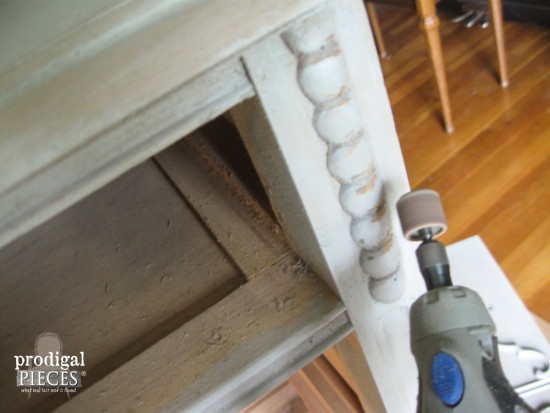
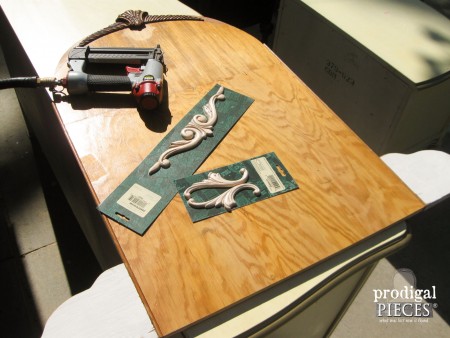
In those crevices, my handy-dandy Dremel is a big help on saving my hands all the work. I seriously love the versatility of that tool.
 TIP:
TIP: When you're getting ready to stain any wood, it's always a good idea to lightly dampen it so that the grain does lift up and open, and that allows the stain to penetrate deeply, giving a rich color.
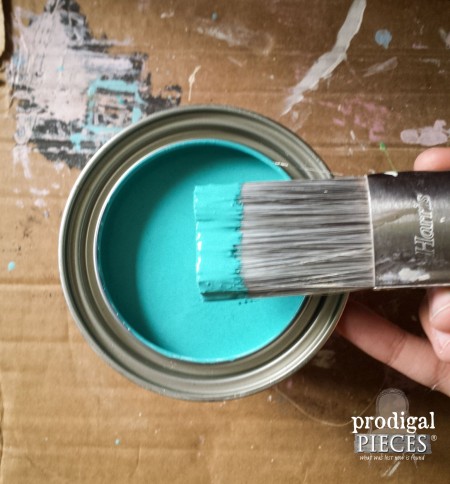
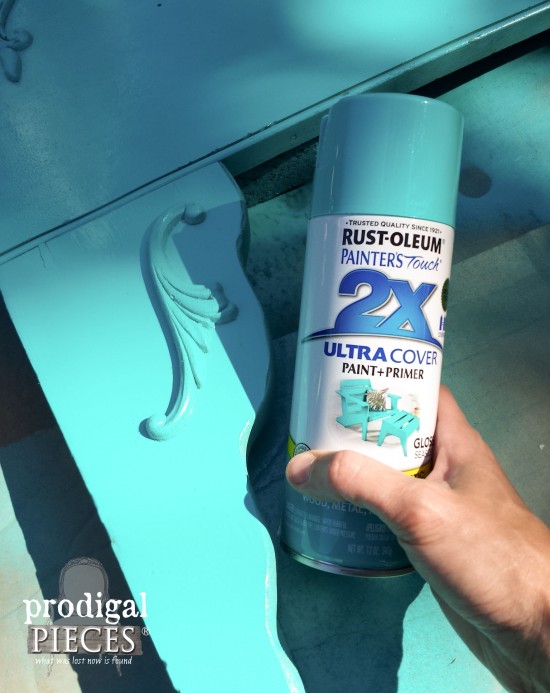
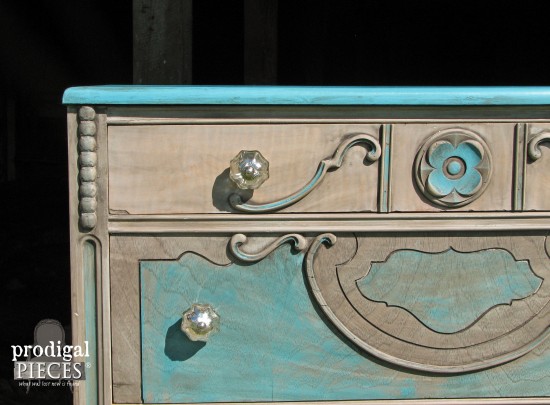
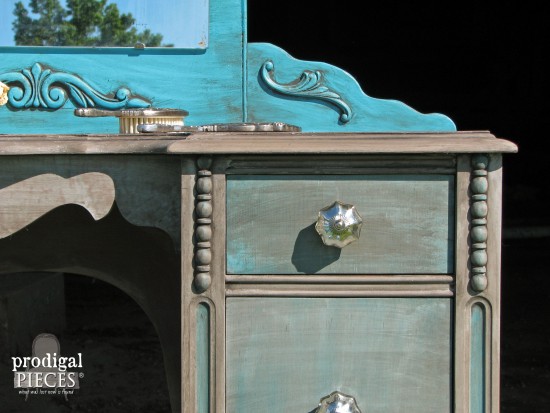
To add a touch of color, I decided to use a bright blue to accent the details. This specific color is Marine Blue by Glidden. Isn't it purdy?
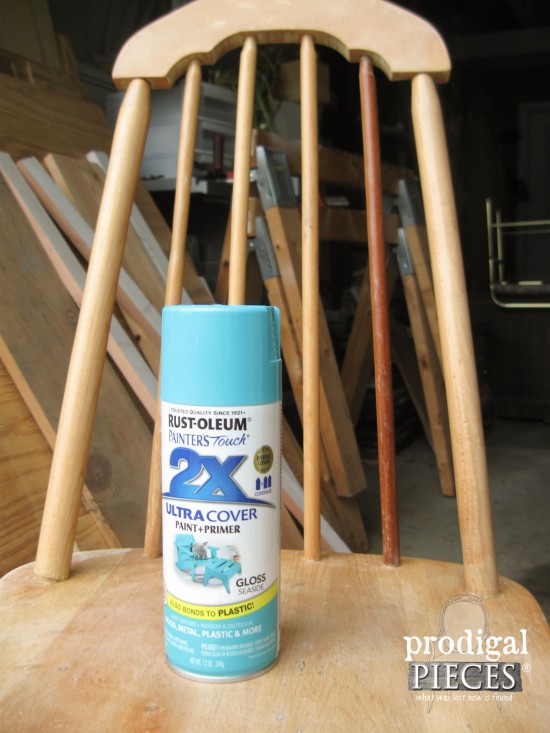
Because I wanted a quicker painting method for some of the details, I used a Rust-Oleum spray paint, called Seaside, for the chair and accessories. It matched my Glidden paint perfectly.
PAINT TIME
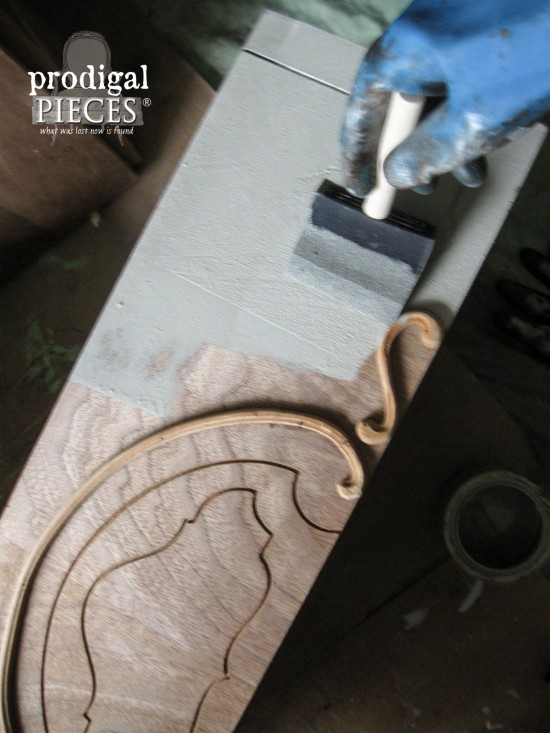
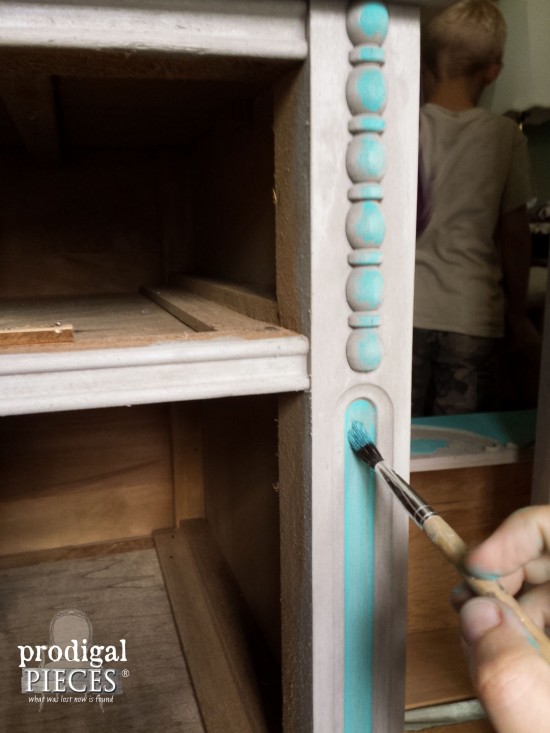
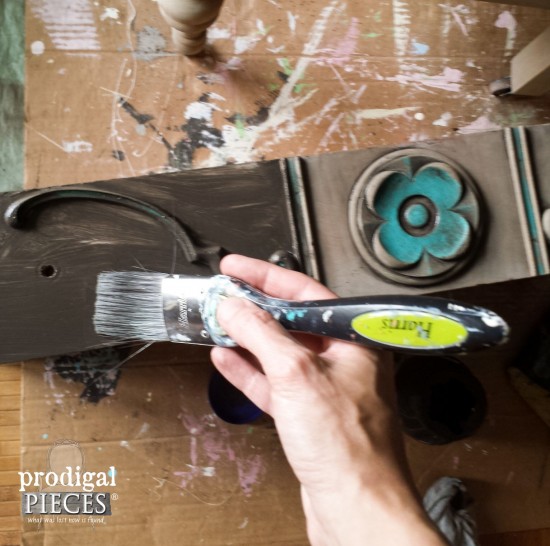
Once the stain dries, I add a wash of the blue on all the details I want to highlight. To do that, just brush over the part you want highlighted, and then wipe off quickly after with a rag, leaving the color behind.
Now, I want to create even more texture, so with a dark, smoky gray paint thinned to about 1 cup paint with 1 tablespoon water (the color I used was a seconds paint and I don't know the name - sorry!) and you can see more of my method on my garage door
here. I brush it over everything, working in small patches. Quickly wipe off with a slightly damp cloth, again, allowing it to fill in the nooks and crannies creating dimension.
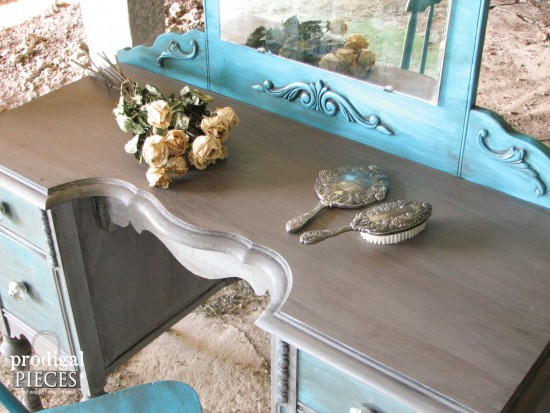
After all has had an hour or so to dry, I added my topcoat. I wanted a subtle layer, so I used my paste wax to rub on one coat to the sides, and two coats to the top surfaces.
BUILDING
Thankfully, my hubby could help me whip up a dresser top from our stock, which made the dresser good as new.
Now, the vanity also isn't much of a vanity without a mirror. A few years ago I snatched up a busted up vanity found curbside that was in pretty bad shape. It really had been glorious at one time and I didn't want to fuss with the expense of replacing the mirror, so
I gave away the base and kept some parts. One of which was the center mirror backboard. I had planned to use this for myself in our living room remodel, but I needed a mirror...now.
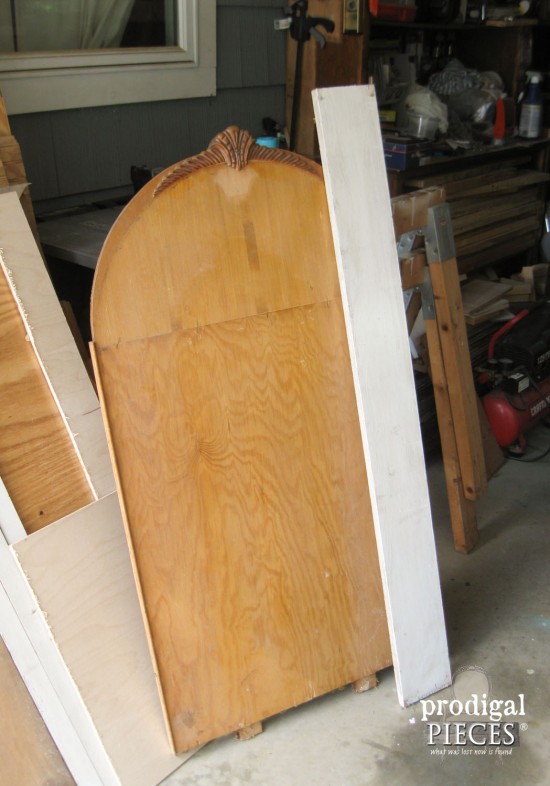
With a little dismantling, and a good shaving down with a jigsaw, that backboard was ready for my vanity. I also had a mirror that would fit this backboard perfectly from replacing the original 1930's mirror off of
this vanity for a client a few months back.
The mirror was raw edged, but I took it to my guy at a local glass shop and he sanded it down on the spot for free. I love small businesses.
FINE DETAILS
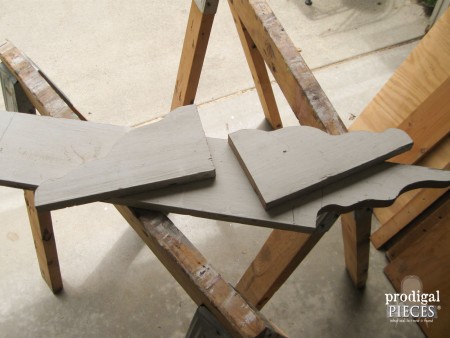
Since I had a remnant piece of that tore up vanity, I decided to use it as a stencil to create some mirror supports that would add length to my mirror stance.
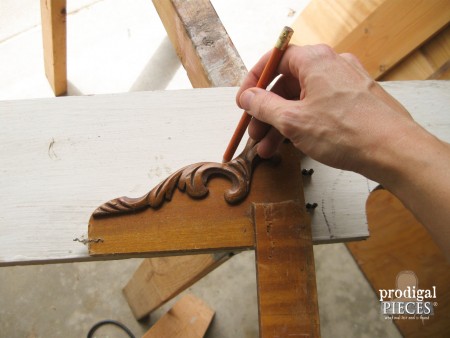
The parts are cut out with my jigsaw and then I attach using our Kreg jig. (tools over jewels, I say!)
It seems like the whole mirror is missing intricate details like the rest of the set. To remedy that, I add a bit of wood carvings to the front.
Since I wanted to tie in the mirror with the rest of the piece. It also has a touch of that smoky gray.
It's time to show you how it all comes together! I'm super-excited and hope you are too.
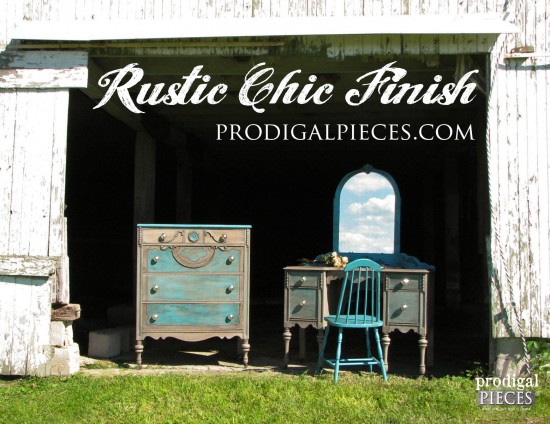
THE REVEAL
Thanks to my dad's farm, I was able to take my rustic chic pieces out there to stage them in a farm setting. It's so wonderful to be able to be outside and I just stopped and smelled the wonderful scents of summer.
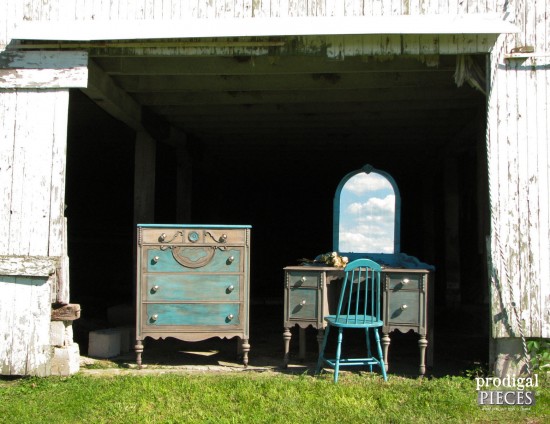
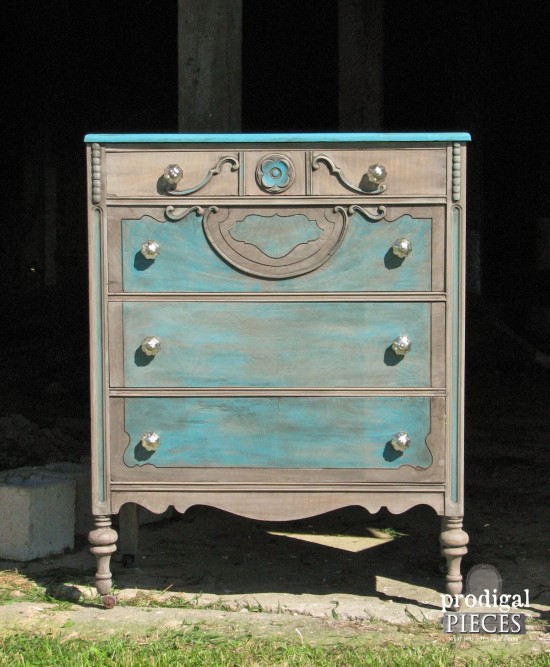
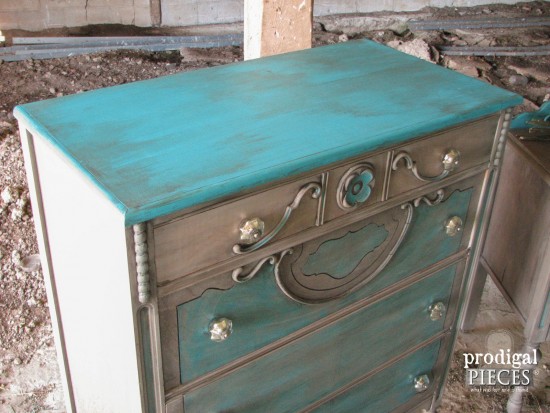
See, now that chest is smiling. Can't say that I blame it. Sitting unloved for over a year all hairy and unloved.
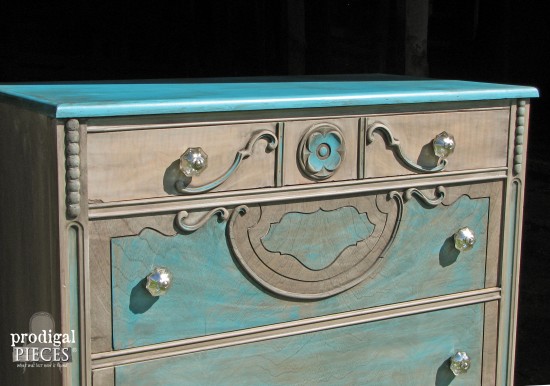

Now how about those pulls! {{swoon}} Those mercury glass pulls are gorgeous and I can't wait to use their goodies on more pieces to come!
Thank you to my hubby for the fantastic drawer work and building a new top at a moment's notice.
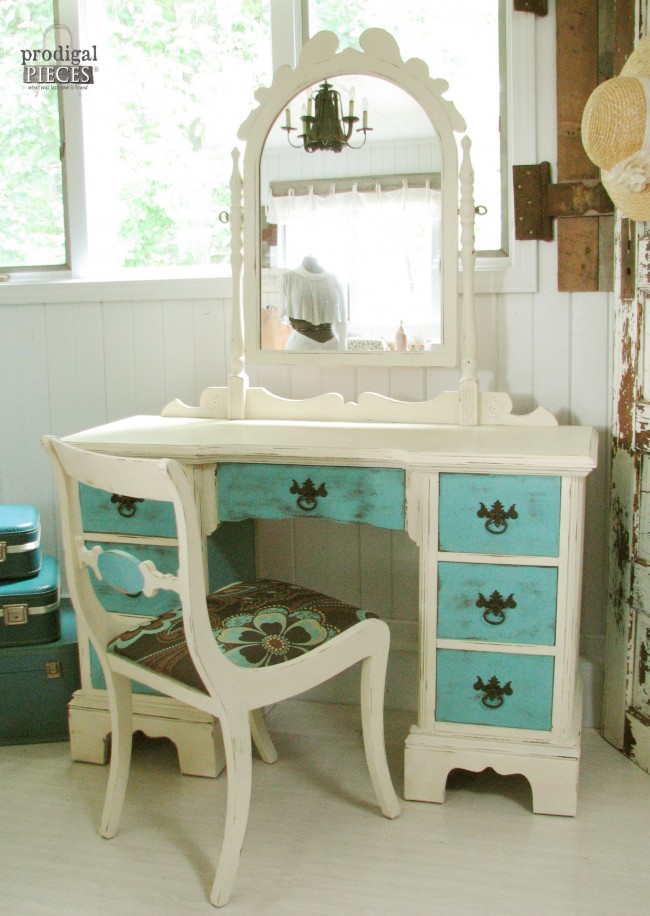
That vanity is so chic and lovely, don't you think?
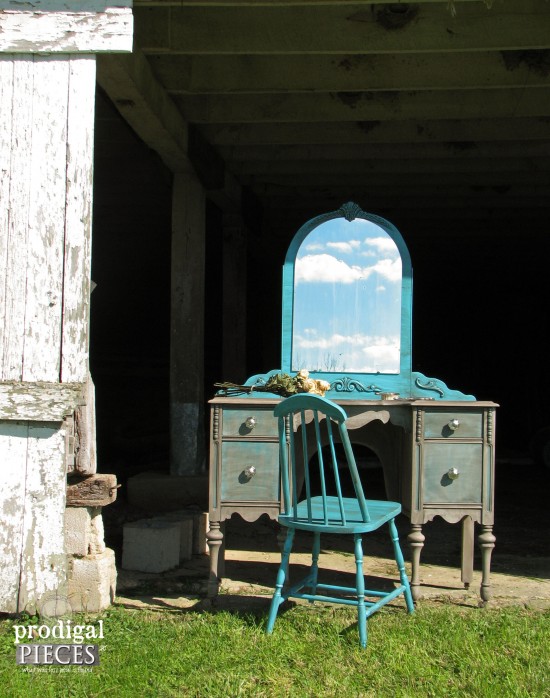
The entire set came out just as I had planned, even amidst the little hangups. I'm happy with this rustic chic finish and hope to do it again...soon.
Those soft tones are so soothing to me and I could say it a thousand times...I wish I could keep it, but alas, it is
now available (SOLD) in
my shop.

WRAP-UP
Hard to believe this is the same set that was going to be
burned.
You know you want to try this rustic chic finish. tee hee. Be sure to pin it so you can find it again! And by all means, ask questions if you have any - I'd love to help.
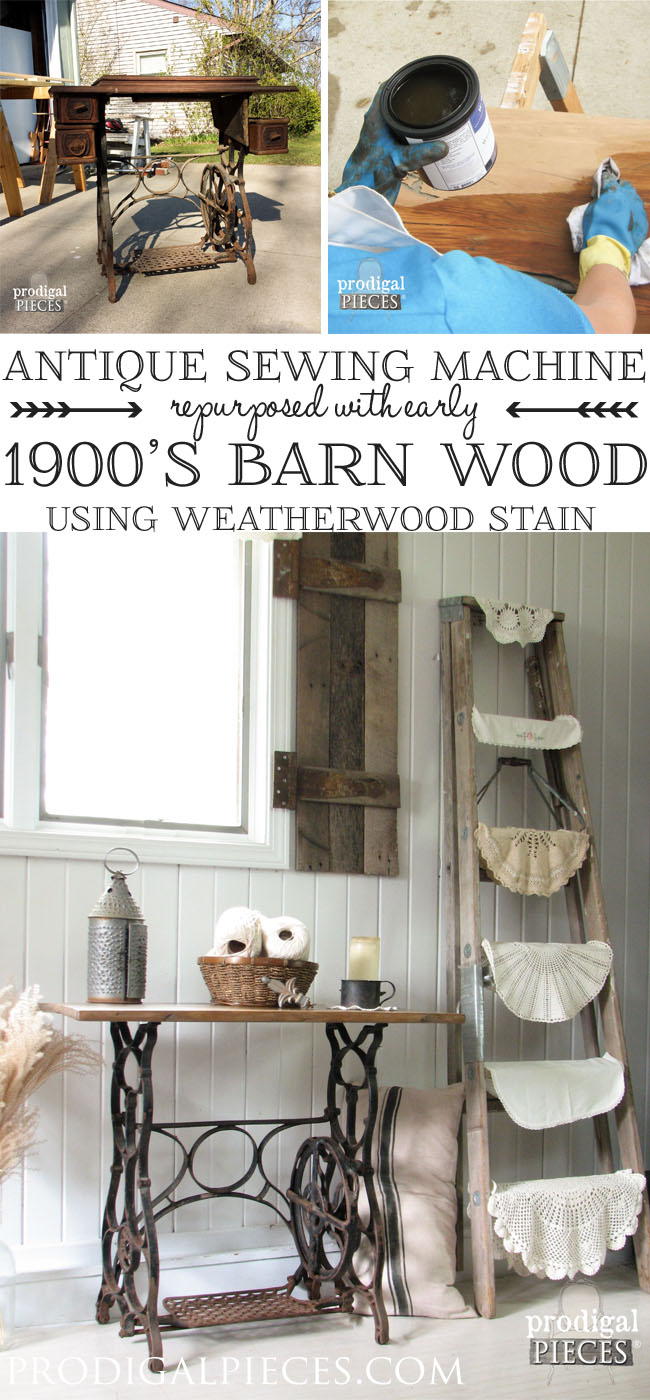
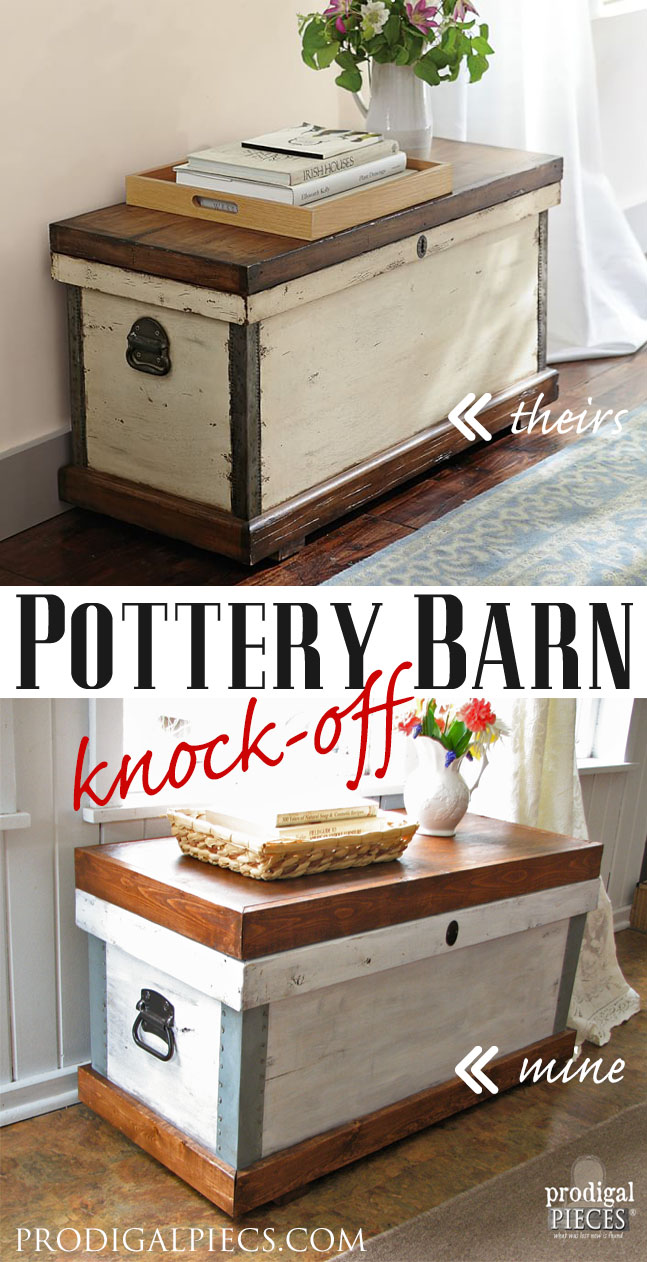
Here are a couple past themed makeovers:
Small Tables
Pottery Barn Knock-Off
Now take a minute to visit these fine ladies and see their rustic goodness!
To get these DIY tips & tricks in your inbox, be sure to
sign up for my newsletter. PLUS, you will get your FREE Furniture Buying Checklist and special discount to
my shop. Until next time!

 MEWE | PINTEREST | GAB
More projects like this rustic chic set:


 Seriously, my jaw hit my desk and I grabbed my phone lightning-fast. (You know, I seriously wish I could see what my face looks like when this stuff happens. I'd laugh my rear off!) Missing a few drawers, casters, and mirrors, but it's already stripped!!
 Snaggle teeth everywhere...the whole set was, well...fuzzy! I have lovingly named this set my "Fuzzy Duo".
 The veneer was coming off and it was dry as a bone from sitting naked for so long.


 One problem. Remember I told you my life's motto is, "Haste makes waste"? Well, I knew the wood was parched, and when I soaked it good, it sucked up that water like a dehydrated elephant. It warped that top right into a rainbow and deemed it no good. I knew better than to do that method on dry pieces, but was in a rush to get it soaked overnight. grrrrr....
 See...even the dresser is smiling at my foolishness, but is still excited to get a new look. Some rustic chic lovin'.
 The theme is rustic, right? My goal is rustic chic since this is an ornate set that is just aching for some styling. My base coat is done in one of my favorite go-to stains, Sunbleached, that we used in our master bedroom, my DIY bathtub tray, and also on this coffee table.
 Like I said, I knew these babies were dry, but my goodness! They sucked up a near full can of stain. I knew that staining would lift the grain even more, so I didn't start to sand until after the stain was applied. That is not normal in most cases.
 TIP: When you're getting ready to stain any wood, it's always a good idea to lightly dampen it so that the grain does lift up and open, and that allows the stain to penetrate deeply, giving a rich color.
To add a touch of color, I decided to use a bright blue to accent the details. This specific color is Marine Blue by Glidden. Isn't it purdy?
TIP: When you're getting ready to stain any wood, it's always a good idea to lightly dampen it so that the grain does lift up and open, and that allows the stain to penetrate deeply, giving a rich color.
To add a touch of color, I decided to use a bright blue to accent the details. This specific color is Marine Blue by Glidden. Isn't it purdy?
 Because I wanted a quicker painting method for some of the details, I used a Rust-Oleum spray paint, called Seaside, for the chair and accessories. It matched my Glidden paint perfectly.

 Now, I want to create even more texture, so with a dark, smoky gray paint thinned to about 1 cup paint with 1 tablespoon water (the color I used was a seconds paint and I don't know the name - sorry!) and you can see more of my method on my garage door here. I brush it over everything, working in small patches. Quickly wipe off with a slightly damp cloth, again, allowing it to fill in the nooks and crannies creating dimension.
 After all has had an hour or so to dry, I added my topcoat. I wanted a subtle layer, so I used my paste wax to rub on one coat to the sides, and two coats to the top surfaces.
 Now, the vanity also isn't much of a vanity without a mirror. A few years ago I snatched up a busted up vanity found curbside that was in pretty bad shape. It really had been glorious at one time and I didn't want to fuss with the expense of replacing the mirror, so I gave away the base and kept some parts. One of which was the center mirror backboard. I had planned to use this for myself in our living room remodel, but I needed a mirror...now.
 With a little dismantling, and a good shaving down with a jigsaw, that backboard was ready for my vanity. I also had a mirror that would fit this backboard perfectly from replacing the original 1930's mirror off of this vanity for a client a few months back.
 The mirror was raw edged, but I took it to my guy at a local glass shop and he sanded it down on the spot for free. I love small businesses.
 The parts are cut out with my jigsaw and then I attach using our Kreg jig. (tools over jewels, I say!)
 It seems like the whole mirror is missing intricate details like the rest of the set. To remedy that, I add a bit of wood carvings to the front.
 Since I wanted to tie in the mirror with the rest of the piece. It also has a touch of that smoky gray.
 It's time to show you how it all comes together! I'm super-excited and hope you are too.

 See, now that chest is smiling. Can't say that I blame it. Sitting unloved for over a year all hairy and unloved.


 Now how about those pulls! {{swoon}} Those mercury glass pulls are gorgeous and I can't wait to use their goodies on more pieces to come!
Thank you to my hubby for the fantastic drawer work and building a new top at a moment's notice.
Now how about those pulls! {{swoon}} Those mercury glass pulls are gorgeous and I can't wait to use their goodies on more pieces to come!
Thank you to my hubby for the fantastic drawer work and building a new top at a moment's notice.
 That vanity is so chic and lovely, don't you think?
 The entire set came out just as I had planned, even amidst the little hangups. I'm happy with this rustic chic finish and hope to do it again...soon.

 Those soft tones are so soothing to me and I could say it a thousand times...I wish I could keep it, but alas, it is
  You know you want to try this rustic chic finish. tee hee. Be sure to pin it so you can find it again! And by all means, ask questions if you have any - I'd love to help.
 Here are a couple past themed makeovers:


 To get these DIY tips & tricks in your inbox, be sure to sign up for my newsletter. PLUS, you will get your FREE Furniture Buying Checklist and special discount to my shop. Until next time!
