It's always good to start the day off with a trashure makeover, don't you think? When I say
trashure, I mean "a one man's trash is another one's treasure" kinda thing. When you have friends that know the way you tick, it's a great way to be. So, when I'm asked if I wanted some large empty frames, you know what I said. Bring it on! Let me show you how I created some repurposed wall art from these 3 big beauties.

Aren't they gorgeous?! Solid wood and oh, so much potential. This was one of those projects that I had to set aside until I completed other commitments. In the meantime, my wheels were turning.
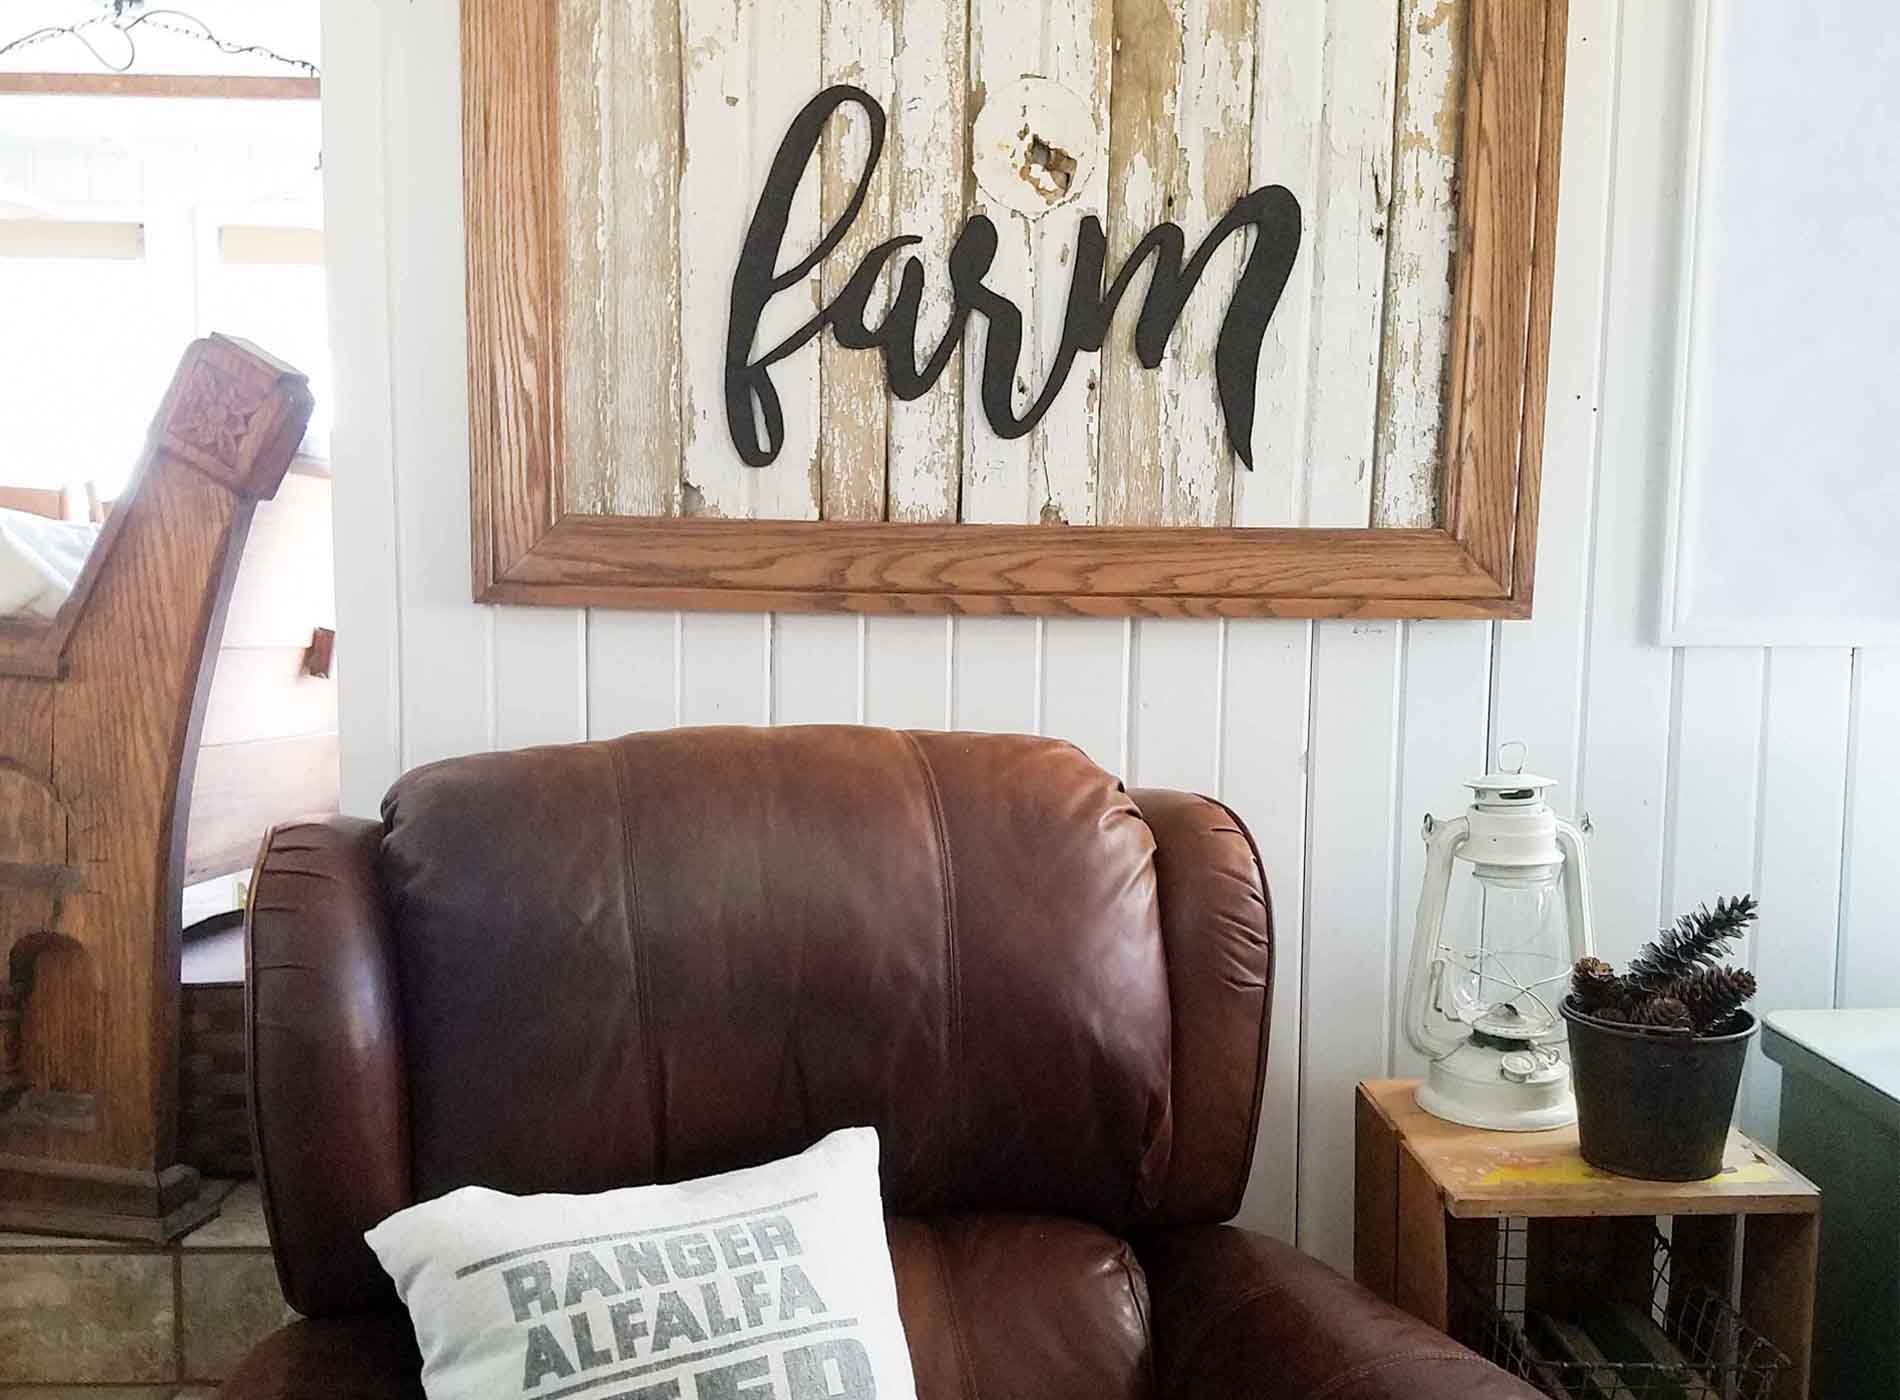
The first frame I decided to work with was the lighter oak one. While I had no intention of painting that beautiful grain, I could only envision using the same chippy siding I used in
my DIY totes (with tutorial) to create a planked effect. I use my miter saw to chop them to length and then nail them in with my nailer/stapler. After I added the siding, I created some text and used
my transfer method to cut it out with my jigsaw and called it done.

Chippy bliss, I tell ya. Nothing like some good barn wood to make me smile.

UP NEXT
The next two frames I decided to give a wash effect with paint. To fill the empty space of the first one, JC ,aka. best partner ever, cut me a piece of luan on our table saw. I wanted to create texture and chose burlap and chicken wire to cover it.

Once the board was covered, I attached it using my new favorite cordless toy, the my nailer.

Since that would be kinda boring all by itself, I cut out more word art with my jigsaw and created a sort of memory board.

The three picture frames make it fun to switch out the photos when a new one comes along. And if you're like me, that's pretty often. hee hee.


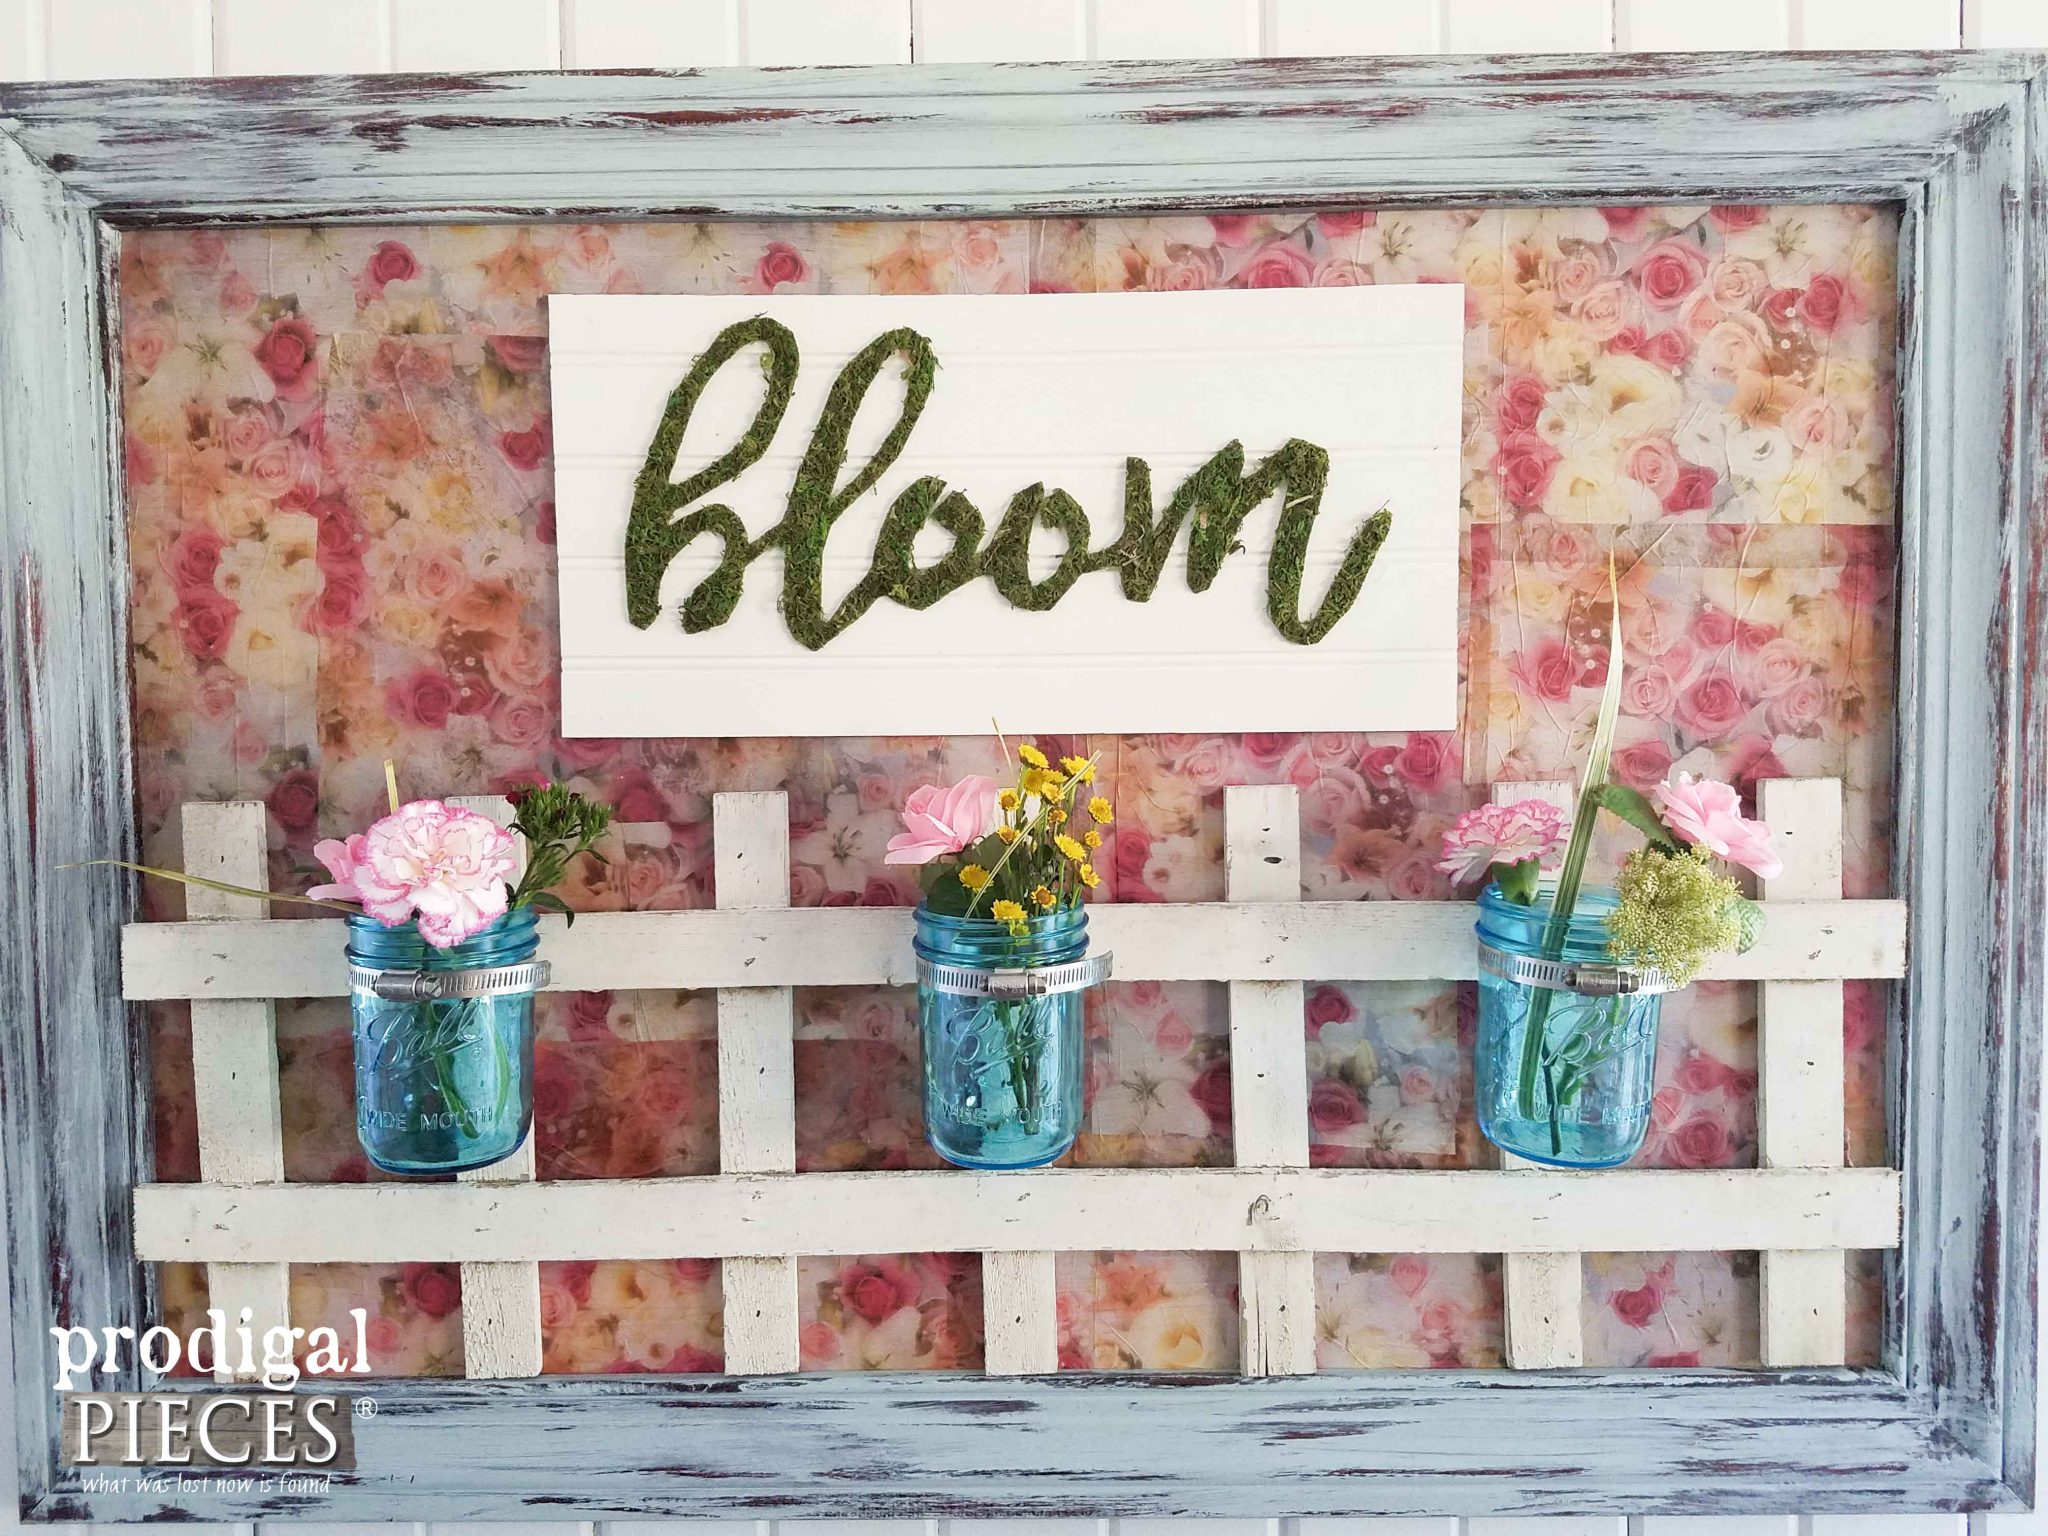
THIRD FRAME
Last, but not least, is the third frame. For this one I chose a piece of hardboard, like I use for my chalkboards
seen HERE. I gave it a single coat of paint to promote adhesion as I wanted to decoupage it using the same paper I used on
this curio cabinet and on my
Dumpster Diva.

I then added another of those picket fences I used in my repurposed wall art shown
in this post. For fun, I hung some blue Ball jars as a place to stick some fresh flowers, or even succulents.

You can imagine how much help my nailer was to make these transformations a breeze.
So...I have to ask...which one is your favorite repurposed wall art? The "Farm", "Family", or "Bloom?" I had fun creating them all and adding them to
my online store.

Pin and share to inspire others and then head below for an announcement.

Up next, I am sharing a yummlicious, family favorite recipe for you that is healthy and is so super-easy. Get it
HERE.

Until then...keep on junkin' on.

 PINTEREST
Also, see more projects like my repurposed wall art:


 Until then...keep on junkin' on.
