Time for some
Reduce, Reuse, REFASHION fun! The last Tuesday of each month I challenge myself (and you) to see things a bit differently. Today, I'm going to be showing you what I did with this refashioned tea towel.


You can best bet that I snag any and all embroidery that I spy in thrift stores, garage sales, and even the curb. Since I personally love to get my stitch fix, I know the time, thought, and love poured into such an item. Just look at this sweet tea towel.

While it isn't vintage, per say, it is handmade from India. The sweet fabric tea bags along with the embroidered names of tea. So sweet! This actually came from a fellow blogger who wrapped up her DIY era and sent me all sorts of goodies to play with. You can see my other bag from one of her finds
HERE.
DIY TIME
First, if you look close there are some stains accompanying the embroidery. However, that doesn't bother me. It makes me less hesitant to make my refashioned tea towel project. This is my creative license to change it up.
To get my project started, I decide what my purpose is for this towel. I have on my mind to create a cute bag (big surprise). I sketch out the dimensions and decided what size to box the corners for a flat bottom.

Oh, and I grabbed this adorable navy blue floral cotton out of my hand-me-down stash. It picks up the colors of the tea towel perfectly.

Then, once I've established my shape and dimensions I get started. I wanted to add as much function to this refashioned tea towel bag, so I chose to add a zippered pocket. Since I have a stash of a 100 zippers from a bulk purchase, why not, right?
ZIP IT
Adding zippers isn't not hard, just a little time consuming. However, it's so worth it. I measure and mark, then cut my opening.

Next, use an iron to press the edges for a finished edge. Then, insert the zipper and sew down using a zipper foot.


Finally, add the fabric to make the pocket. While this isn't a full-on tutorial, you at least get the visual of how to do this.

FRUSTRATION
Okay, I'm gonna take a minute to clue you in. First, not all my projects go as smooth as butter. I share my hurdles along the way. However, sometimes there are doozies like this one. It all started just fine with me finding my tea towel and coordinating fabric. Then, the fun hit. Along with the oodles of goodies I was gifted, there is also a set of vintage wooden bead purse handles.
I originally couldn't find them for a previous project. Eventually, I let it go that they are hidden for now. Oddly, I found them a few weeks later and told my daughter I would have never found them. So, when this project rolled around I am like, "I know where they are...I think." For goodness sake though, I couldn't find them ANYWHERE AGAIN!!
My search went on over 10 times in every corner, every possible place I could have put them. Funny thing is that I told my daughter when I last found them that I would have never known to look there. And...I remember putting them back because I thought I'd know where to look. NOPE.
After a few days of searching (yes...
days), I kept feeling like they were in the basement where I store much of my sewing paraphernalia. Finally, I found them in box of stuff I cleared off my sewing desk while we were remodeling. GAH!!

MORE FRUSTRATION
At long last, I sat down to my serger and sewing machine. Then, I see this...

Someone had left my sewing machine pedal up on my desk. While in most normal households that is not a problem. However, when you live with a wicked cat, you know this is a huge no-no.
Our dear Lily, is an addict to rubber and foam. When she is bored at night (or wanting to go out), she will chew anything. She is by far worse than any dog I've owned. To make matters worse, this is not the first machine pedal she has destroyed. My serger has also lost a few. It's at this point I'm ready to quit. If it weren't for my determination to finish and show this to y'all, I would have.
Thankfully, my daughter let me borrow her oldie, but goodie sewing machine and I could finish up. That's not the end though. I typically use my serger for making strong seams, it is now broken too. I find myself having flashbacks of old-school sewing days and I remember why I love my modern machines. ahem.
FINISH STRONG
After pulling up my big girl panties to finish this silly refashioned tea towel bag, I am now set to finish strong. Speaking of strong, I want my bag to stand on its own, so I sew up a skeleton of plastic canvas to line my bag.

Doing this reminds me of those tissue boxes my grandma had in her house. sigh...the good ol' days. Do you remember those?
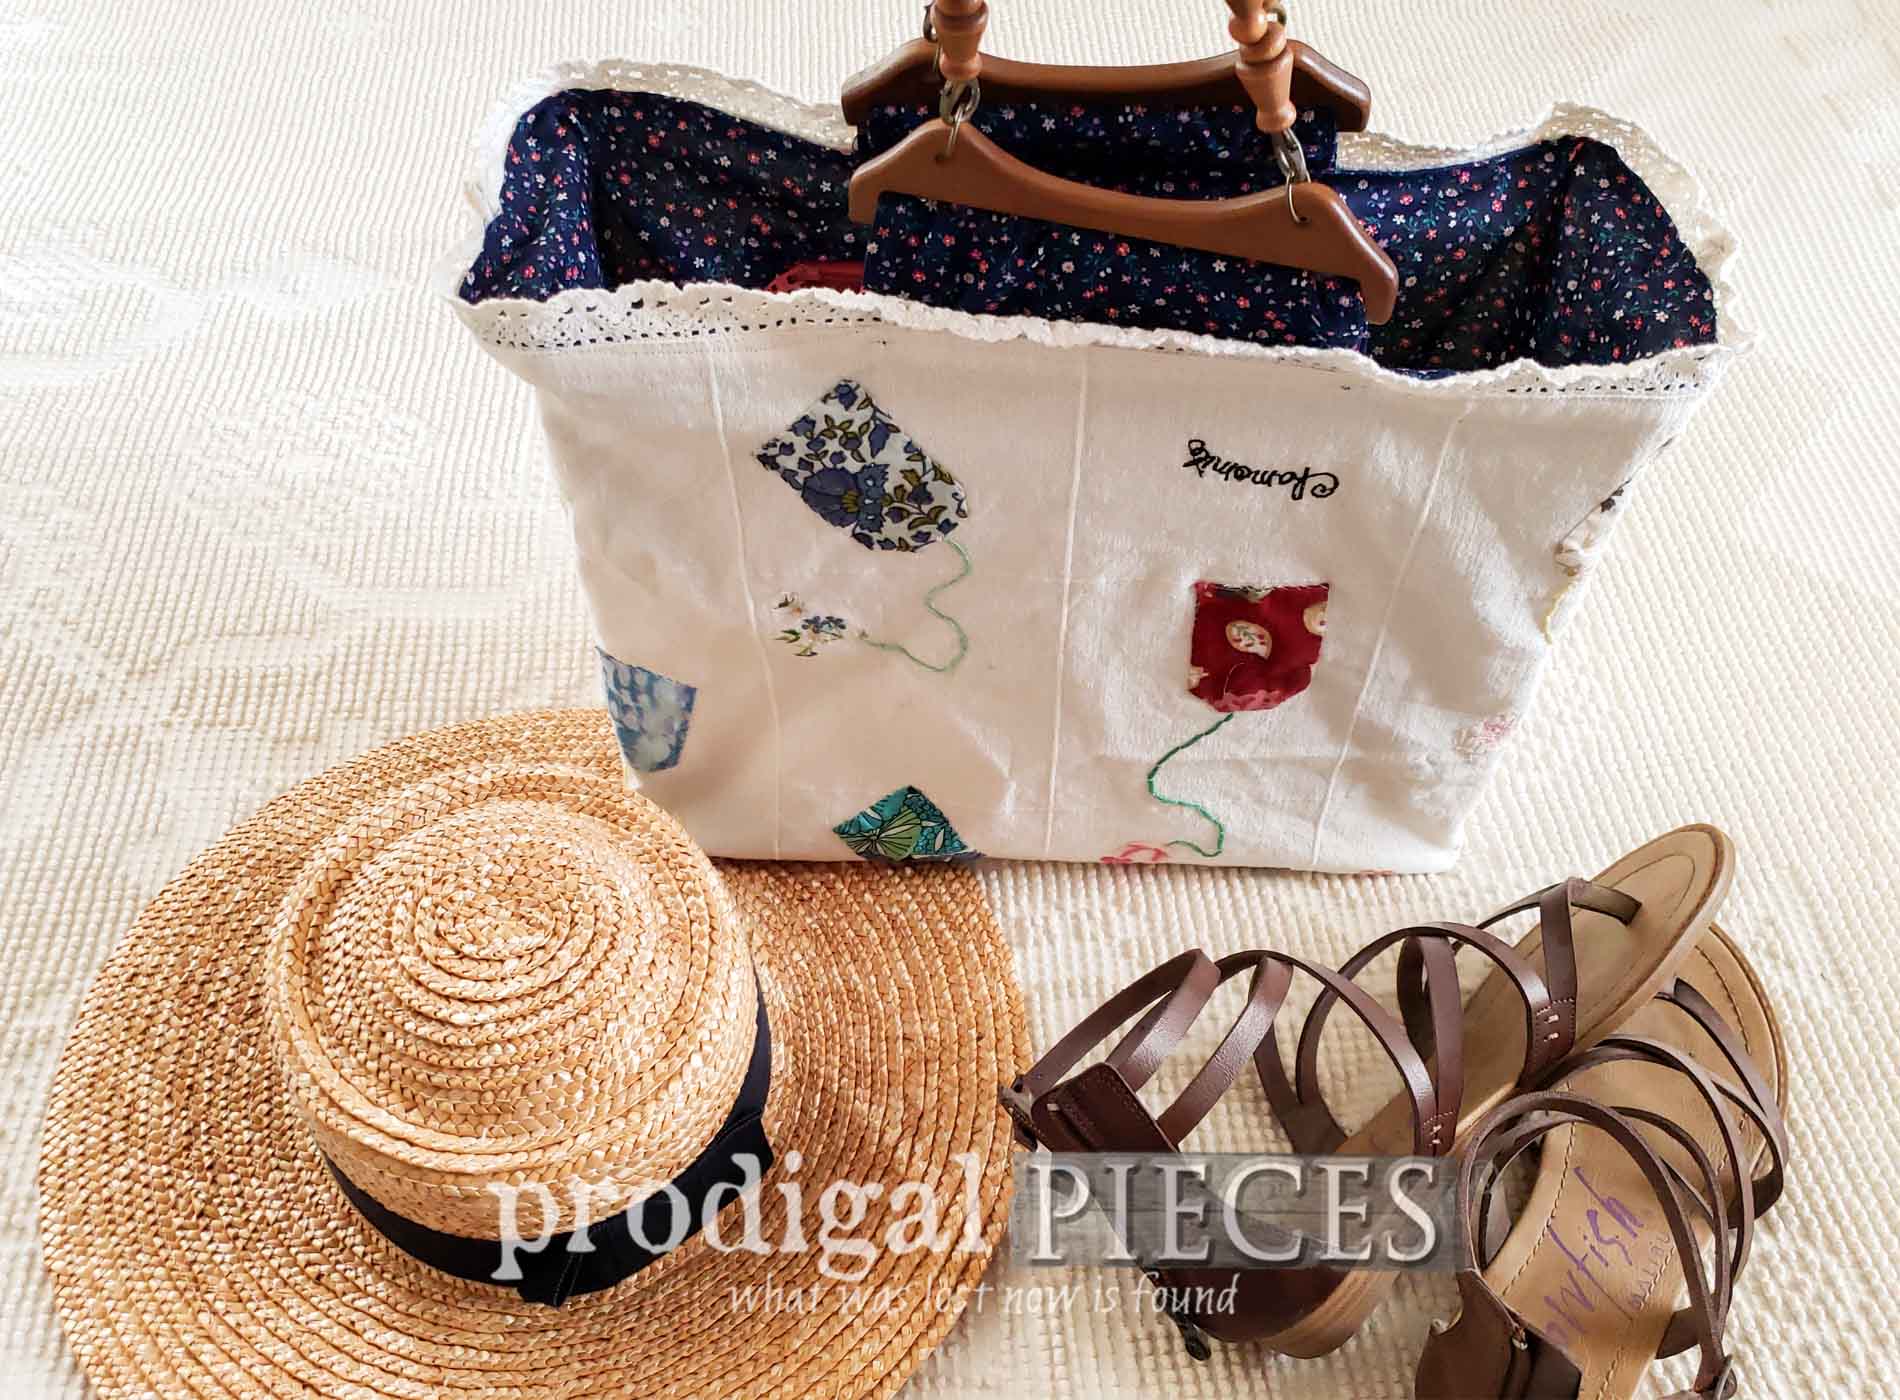
At long last, my bag is complete.


It's stout, sweet, and ready to go! Isn't that fun? I'm smitten with the outcome despite my super-long journey to complete it.


My bag holds form perfectly so you can drop items in while shopping, at the beach, or library.


While I'm tempted to keep this bag (and I just might), it's now available in
my online store. You'll find my other bags and home decor there too.


My hope is that you are inspired to have some fun with those fun embroidery pieces you find. I promise that your journey won't be as long and arduous as mine.
Also, pin and share to inspire others to think outside their fashion too.

To get these DIY tips & tricks in your inbox, be sure to
sign up for my newsletter. Until next time!

 PINTEREST | EMAIL
Also, more fun like my refashioned tea towel: