Yet another month was quickly flown by and it's already time for Trash to Treasure Tuesday! You'll see my four blogger friends' inspiration for you in a bit. In the meantime, I'm here to share this thrifted find I recently acquired for $5. I'm in the mood for a Queen Anne side table makeover. How about you? Queen Anne Side Table Before Makeover | prodigalpieces.com prodigalpieces This is made of oak, offers a batwing pull with drawer, and beautiful curvy legs. If you're new here, you can see two other tables exactly like this I gave a facelift to HERE and OVER HERE. I'm a sucker for the wonderful legs and also all about these solid pieces. Now, in both the past instances, I've painted the base and stained the top. This time around, however, I want to change it up.

MAKEOVER TIME

Since this table has wear to the top and is sturdy as-is, I only need to address the drawer initially. It is tight on the guide, but I simply remove it and sand the runner, then use an old candle to wax to make it glide better. After that, I use a vinegar/water ratio of 1:2 to clean the surfaces. Cleaning Queen Anne Side Table Top | prodigalpieces.com prodigalpieces Once my surface is clean, I apply two coats of a white milk paint, letting cure in between, to act as my canvas for what comes next. Base Paint of White Milk Paint for Queen Anne Side Table | prodigalpieces.com prodigalpieces Then, as soon as those coats cure, I use a gray paint to do a light layer on the top. This is the same color I used on this side table recently. Painting Gray Over White on Tabletop of Queen Anne Side Table | prodigalpieces.com prodigalpieces However, before that coat cures, my little Miss J helps me spray a mist of water over it as I us a black milk paint to blend in like I did on this buffet HERE. Misting Table Top to Blend Milk Paint | prodigalpieces.com prodigalpieces Do you see her helper, Miss Loula, too? Loula loves any and all water - tee hee. Gray Wash for Queen Anne Tabletop | prodigalpieces.com prodigalpieces

ALL ABOUT THAT BASE

Next, while that layer is curing, I head back to the base of the Queen Anne side table. It's quite white, but I want to give a grunge/aged look. In order to do that, I think a beige paint and wash the white. Aging Table Legs with a Paint Wash | prodigalpieces.com prodigalpieces The idea is that it will look as if this painted white table had a protective coat put on it (like a poly or lacquer) and it has yellowed over time. After that, I do some hand-painting with a seconds blue paint. Hand-Painted Boho Design on Queen Anne Side Table | prodigalpieces.com prodigalpieces Now, I typically like to change up the hardware on pieces for a fresh look, but sometimes, like in this instance, I want to keep to the age but age it more. Not only does that brass not work with what I'm after, but it offers potential. First, I prime the pull and once that cures, I use a brown paint to give it more aged appeal. Priming Drawer Pull | prodigalpieces.com prodigalpieces Last, I go back to the top and use my orbital sander to knock down the layers, but also my mouse sander to age the base with a heavier paper. Sanding Queen Anne Side Tabletop | prodigalpieces.com prodigalpieces In addition, I apply a brown wax with a heavy hand to add to that aging effect as well as several coats of poly to the top for longevity.
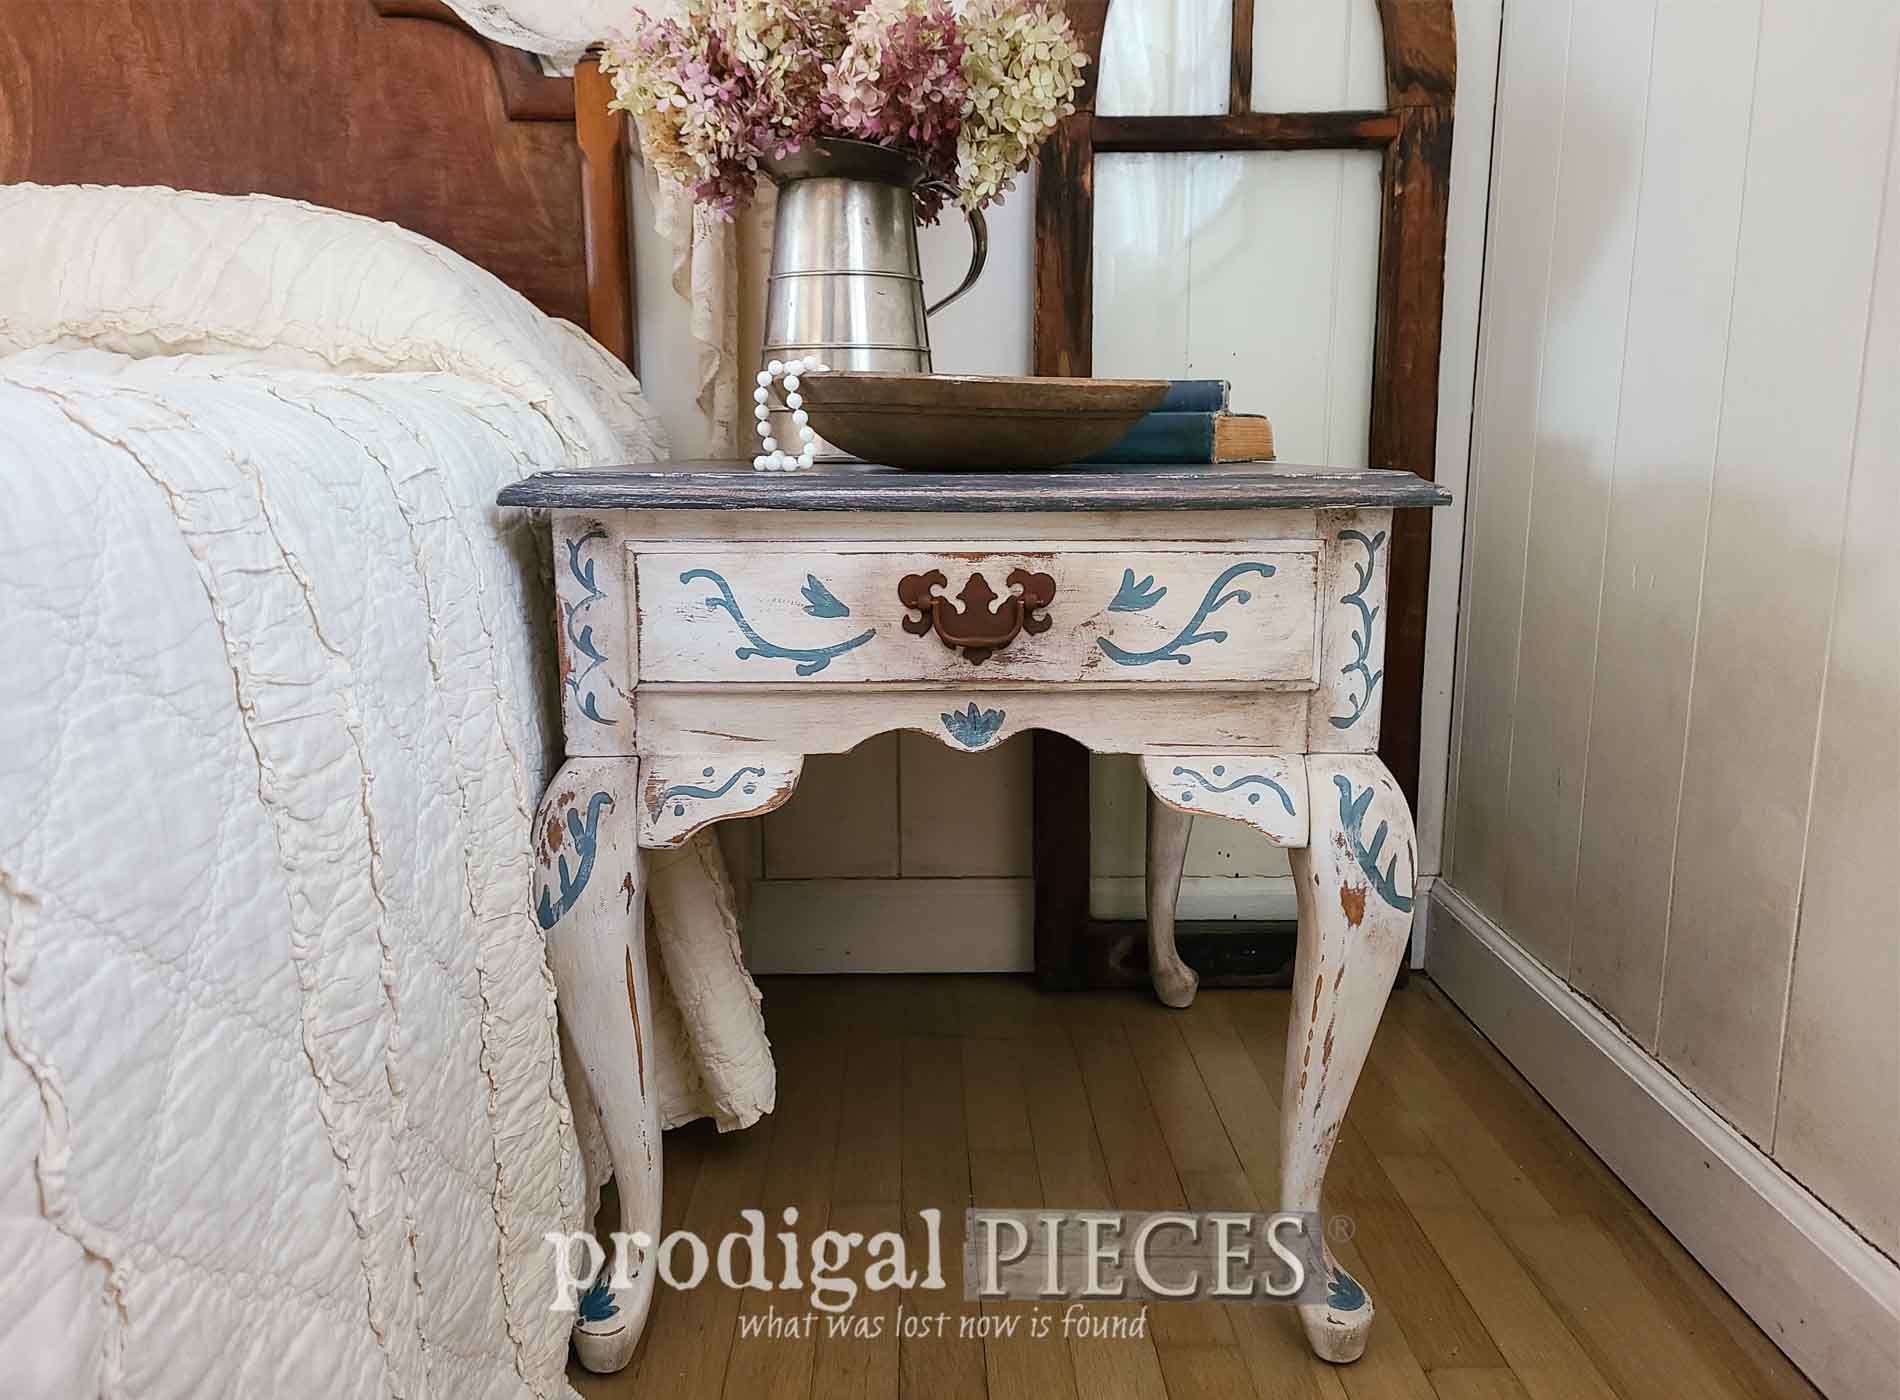
GRUNGE BOHO STYLE

After my DIY fun, here is my Queen Anne side table now kickin' a grunge Boho vibe and a new story to tell. Grunge Boho Queen Anne Side Table by Larissa of Prodigal Pieces | prodigalpieces.com prodigalpieces DIY Grunge Boho Table by Larissa of Prodigal Pieces | prodigalpieces.com prodigalpieces Closeup of Queen Anne Side Table Corner by Larissa of Prodigal Pieces | prodigalpieces.com prodigalpieces I love it! It adds to the story of my home and is far more interesting than that scuffed up finish in the before. The top showcases a story as well, but also offers a finish that will stand up to many years of use. Distressed Vintage Side Table | prodigalpieces.com prodigalpieces Distressed Queen Anne Side Tabletop View by Larissa of Prodigal Pieces | prodigalpieces.com prodigalpieces And... just for fun, a pop of color on my peek-a-boo drawer. eep! Open Pink Peek-a-Boo Drawer by Larissa of Prodigal Pieces | prodigalpieces.com prodigalpieces Side View of Grunge Boho Side Table Nightstand by Larissa of Prodigal Pieces | prodigalpieces.com prodigalpieces This table is a fun outlet for me as I also work on my life and creating a new story as well. While I would love to keep this, my house is full, so you can find this and more in my online store. Shop Prodigal Pieces Furniture, Vintage Finds, Handmade Goods, & Supplies for your home | shop.prodigalpieces.com prodigalpieces

SHARE

Is this inspiring to you? I hope so! Leave me some comment love below telling me what you would have done with the table. Additionally, pin and share to inspire others too. A Thrifted Queen Anne Side Table is Given a Grunge Boho Makeover by Larissa of Prodigal Pieces | prodigalpieces.com prodigalpieces Before you go, be sure to sign up for my FREE newsletter. Now it's time to see what my Trash to Treasure friends have for you this month. blog signature

let's get socialPINTEREST | EMAIL

Trash to Treasure Tuesday | prodigalpieces.com Trash to Treasure January 2024 | prodigalpieces.com prodigalpieces
  1. Salvaged Inspirations
  2. Confessions of a Serial DIYer
  3. Girl in the Garage
  4. Artsy Chicks Rule

While you're at it, here are more DIY projects like this Queen Ann side table makeover:

Create a reclaimed wood star from curbside wood to add interest to your home by Larissa of Prodigal Pieces | prodigalpieces.com prodigalpieces farmhouseFound in the trash, this vintage ice cream bucket is perfect for farmhouse style by Larissa of Prodigal Pieces | prodigalpieces.com prodigalpieces farmhouse diy home  


Denise Zdziennicki

Shared publicly - 2024-01-09 09:35:48

The finish is great and the hand-painting makes this piece so unique and special! So charming Larissa! XOXO

Christy James

Shared publicly - 2024-01-09 09:49:49

I can tell you really enjoyed this one, Larissa! It's a shame you aren't keeping it, it looks perfect beside your bed! XOXO

Larissa

Shared publicly - 2024-01-09 09:57:57

That's music to my ears, Rebecca (& Debbie! ) Thank you for the love.

Cheryl r Atkinson

Shared publicly - 2024-01-09 10:27:56

Hi Larissa and Happy New Year! I love how it turned out. I always enjoy your furniture makeovers. Thank you for sharing your creativity

Larissa

Shared publicly - 2024-01-09 10:44:22

Thank you, Cheryl. That's awesome to hear.

Catpainter

Shared publicly - 2024-01-09 13:46:53

I read the post, saw that you used brown wax and several coats of poly over it. Can you poly over wax? Just trying to learn the process.

Niki

Shared publicly - 2024-01-09 13:53:22

Very fun! It reminds me of Scandinavian rosemaling, it’s very hygge as well! You created a wonderful new story for this little table Larissa, and I have faith that your new story will have wonderful moments as well. Blessings my friend!

Larissa

Shared publicly - 2024-01-09 14:03:31

Questions welcomed! I waxed the base, but not the top. You cannot poly over wax as it will resist. Thanks for asking. :)

Larissa

Shared publicly - 2024-01-09 14:03:54

You got what I was after. ;) Thank you, Niki.

Nancy @ Artsy Chicks Rule

Shared publicly - 2024-01-10 14:44:21

So fun and whimsical, Larissa! Love the pop of color in the drawer ! xo

Jen @ Girl in the Garage

Shared publicly - 2024-01-10 14:56:20

Such a fun new look that I wasn't expecting! :)

Larissa

Shared publicly - 2024-01-11 14:06:46

Thank you, Jen. :)

Sign Up To Comment