It's the second Tuesday of the month, so that means it's
Trash to Treasure time! {{applause}} My blogger friends and I eagerly look forward to sharing our latest project with you with hopes to inspire. Today, I'm so excited to share with you this piece I've had waiting for a new life for over 5 years. My dated pine hutch is becoming a painted pine hutch for
my own decor. Yay!

This is my flea market find from (what seems like) eons ago. When I happened upon this flea market, I spied this hutch that sat for weeks and weeks. Finally, I asked the owner what the bottom dollar is she would take for it? To the tune of $25 I stuffed it into the back of my suburban and headed home.
I was literally doing a happy dance because in my living room I had this totally awkward wall. My goal was to add height, texture, and storage to the space, but it also had to function with traffic. I had been searching for years and that's why I was so excited to find it. It has a narrow profile, simple lines, and plenty of storage. However, it needs much TLC. Here it in the "before" of our living room.

It's a jumbled mess. You can see demo is already happening in the hallway. Take the
full remodel tour HERE or view the video below.

DIY TIME
One benefit to having a piece like this in a household with 6 children as we homeschool is that it can be beaten up and I don't care a lick. The top two doors are missing the glass. Meanwhile, the bottom door panels have popped out.

And, the hutch top needed my jerry-rigged fix to keep it stable. Hey, it worked for years! haha. Do you see the perfect cursive "O" on the side?

The bottom and top are busting with books. Thankfully, I can say it will no longer house all those books, but finally be put to use for its original purpose.
In order to remedy the issues, I first begin by taking it all apart - removing the top backing, the doors, taking out oodles of staples. Then, my sander and I had a good length of time to remove the finish on the top surface.

NEXT STEPS
Next, it's time to break out the paint for my painted pine hutch. I had a hard time deciding on a color for a time because this is for me and I've waited far too long. My inspiration for the scheme is this beautiful wool rug I found at the thrift store a few years ago.

To compliment my room as well as bring in one of my favorite colors, I choose to use NYPD Blue with my paint brush.

For the surfaces that are staying a wood tone, I used a tannin reactive stain to give it an aged feel. Then, I replace the back of the hutch with pine planks, much like I did for
my curio turned bookcase HERE. My awesome stapler makes it quick fix for this project.

Finally, I wanted to attach the top in a proper fashion while still keeping it removable. That way, in the future I can move it easily. Oh, and I also added one fun element...tee hee.
THE REVEAL
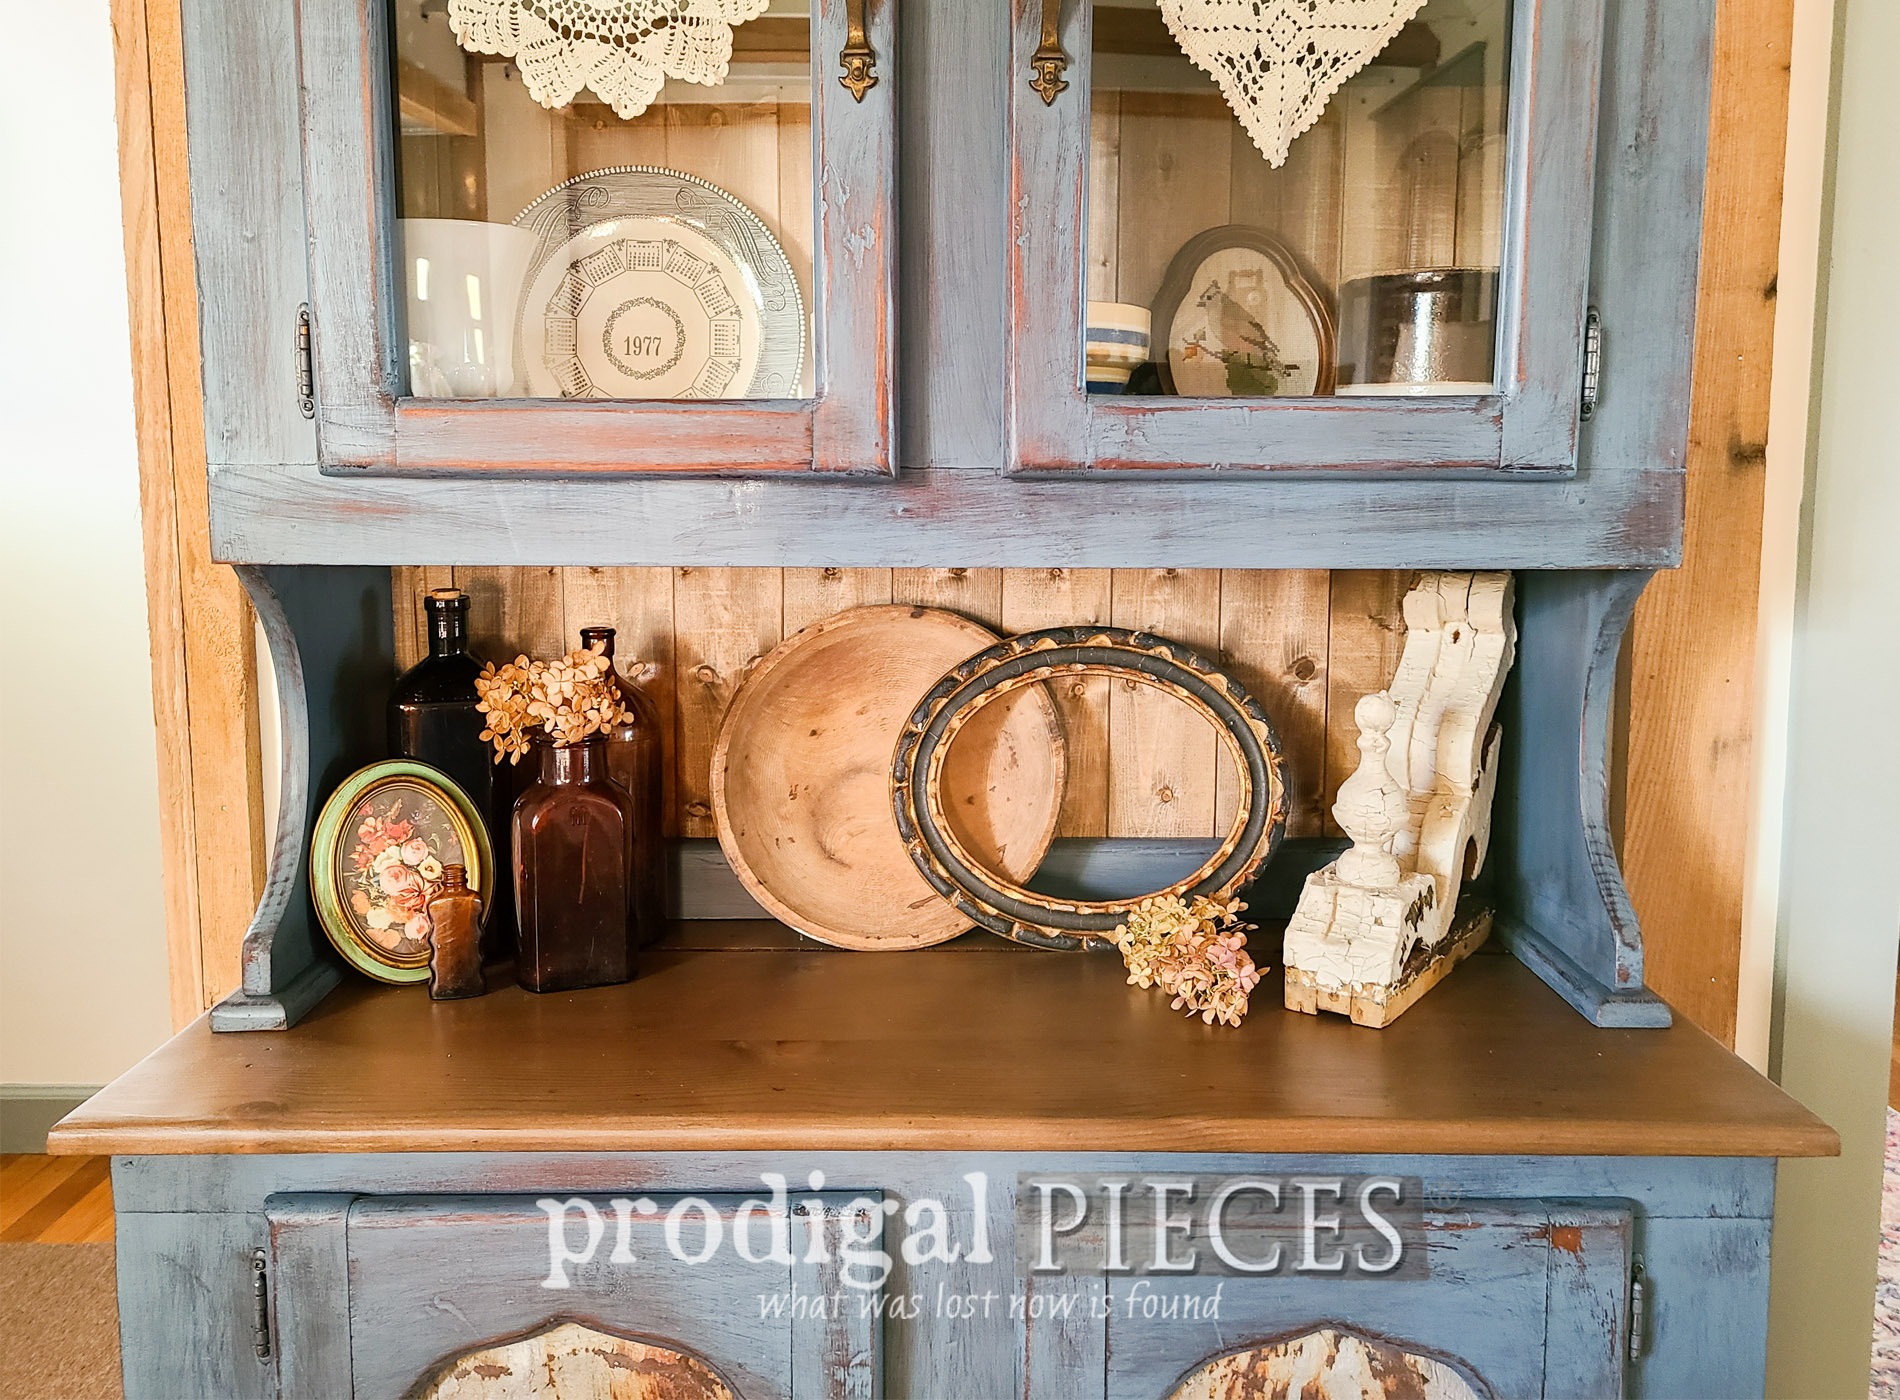
Here is my painted pine hutch all done. I love it!


Did you notice the bottom panels? While initially unsure of what to do with them, I finally had a light-bulb moment. I had a couple of extra antique barn roof panels from when I installed
my coffered ceiling in our family room. They are a PERFECT FIT!


To finally see this done and in my room is a huge weight off my shoulders. Being that this sits inside our front door, it always made me cringe when folks came in. In my head I was like...yeah...I have awesome furniture...you just wait. haha.
Now the top is displaying a bit of my goodies. I honestly have much of my stuff tucked in boxes due to remodel, so I used what I had on hand.


ONE MORE THING
Additionally, here's more storage.

The bottom now houses my collection of vintage tablecloths. No mo' books in heeyah! woot!

Funny thing is this is only the second piece I've painted for my home. Most of my pieces are in their original time-worn state letting them tell their stories.
I hope you're enjoying seeing my work and how it all comes together. Do pin and share my painted pine hutch makeover to inspire others. No matter how long it takes to make your home story, just know...IT'S YOURS.

Up next, this pile of loot is ready to become something more.
HEAD HERE TO SEE!

Before you go, be sure to
sign up for my newsletter.

 PINTEREST | EMAIL
It's time to see what my Trash to Treasure friends have for you!


- Confessions of a Serial DIYer
- Artsy Chicks Rule
- Salvaged Inspirations
- Girl in the Garage
Also, more furniture projects like my painted pine hutch:


 It's time to see what my Trash to Treasure friends have for you!