More and more in today's society it has become a necessity to be ever-conscious of what we allow in our environment and how we are taking care of our bodies with nourishing foods. Nobody should have to bear a toxic load, and that includes our pets. Today, I have a fun DIY tutorial for you today that will give your furry feline family members a treat that will not only entertain, but will be free of poisonous rubbers and harmful chemicals. Interested? Let's get our craft on and make some natural cat toys!

Aside from being healthy, the best part about these natural cat toys is that it makes perfect gifts. It only takes about 20-30 minutes of your time, and once you get the hang of it, they're easy to whip one up.

Here is what you'll need to get started:
- hollow papier mache shapes - I used fruits and vegetables, you can use any style you want
- craft glue - either school glue,or wood glue (I found using a tiny amount of hot glue makes this go faster)
- 6 yds/18ft. of colored twisted paper (aka paper twist)
- sesame seeds
- catnip
- scissors
- drill and drill bit
- optional extras: toilet paper tube, rubber bands
For this tutorial, I am showing you how I made the carrot toy since 0nce you get the idea, it really is only a matter of changing it up a bit to get a different fruit or veggie. I found my papier mache shapes in an online store, but you can find them at your local craft or hobby store or you can even make them yourself at home too. Now wouldn't that be a flashback to elementary school days?
DIY TIME
First, since most of the shapes are ornaments, you will need to snip off the string.

In order for the cat to smell the catnip, you will drill holes with your 3/32 drill bit all over the cone.

Next, the cone has an open end and you will make a top by cutting down the length of a toilet paper tube with scissors.

Flatten the roll out and then trace the top of the cone on the roll.

Cut around the circle you just traced, leaving a half-inch border. Take your scissors and make small cuts from the outside edge of the paper circle up to the circle you traced at half-inch intervals. This will make tiny flaps that will lay down around the top of your cone.

FILLING
First, using the tip of your scissors, make a hole in the middle of your paper circle that is about a half-inch in diameter. Before adding the top, fill the cone with about a teaspoon each of sesame seeds and loose catnip.


TIP: For non-cone shapes, I made a hole in the top and inserted a paper cone. Just fill with seed and catnip in the same way.

Once the cone is filled, apply your glue to one side of the paper circle you just cut out and place it on the cone. You can use a rubber band to hold it in place while the glue dries.

WRAP IT UP
Snip the tip of the cone off with your scissors. This will give you a hole to insert the twisted paper. Apply a small amount of glue to one end of the orange twisted paper and thread it into the point of the cone. Let the paper and cone glue have a minute or two to cure.

Once the glue has set, begin to twist the paper around the cone, gluing in small amounts as you go. Also, make sure to keep the twisted paper taught and be sure to check that it isn't coming untwisted. I found that I mainly used my craft glue, but that I needed a small amount of hot glue every so often to help hold the paper in place as the craft glue dried. Just make sure that you are using either a bead smaller than a pea or a spread out length of glue in case your cat should chew apart the toy.

Then, before you get to the top, cut a 4" length of green twisted paper.

Unfold one end of the green twisted paper and fan it out about halfway. In addition, take your scissors and make cuts in the paper to resemble carrot stems.

Apply glue to the unopened end of the carrot top and insert it into the top of the cone and let cure for a minute or two.
 Continue to wrap the twisted paper up and around the carrot top, and then insert the last bit into the same carrot top hole with a bit of glue. You're done!
FUN TIME
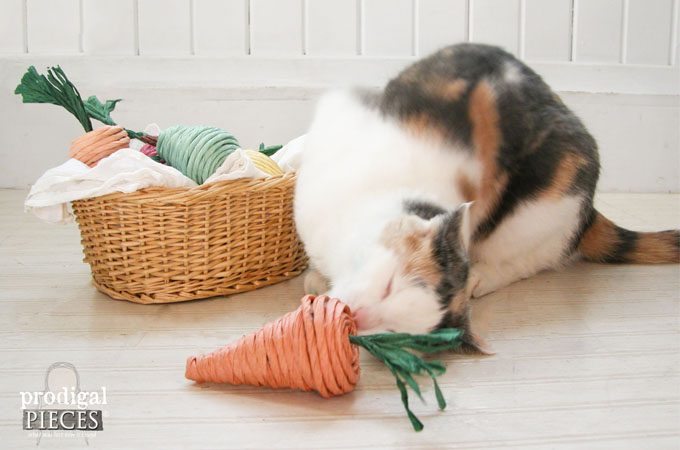
Finally, with those assorted shapes, I created a lemon, pear, plum, beet, and, of course, carrots.

Those cones could also make hot peppers, the balls could be apples...have fun with it!

Now you sweet furry friend will have not only a fun toy, but a whole slew of natural cat toys. Our di,va cat, Lily couldn't wait to have at these cute creations.
If you would love to have one of these toys already made, just head to
my online shop.


SHARE
The best part is that these are perfect for kids too. Likewise, my guys couldn't keep their hands off of them. So, go on and make other cats and cat owners happy by pinning and sharing these natural cat toys. Additionally
, show me some love! ♥

Up next, this chest of drawers will be getting a new look. Any guesses as to what treatment it will get?
Head here to see.

To get these DIY tips & tricks in your inbox, be sure to
sign up for my newsletter. Until next time!

Also, more of my projects like my natural cat toys: