Each year when spring rolls around I get excited because it was on Mother's Day six years ago that I began my blogging adventure. I'll be having a 6-year blogiversary party soon! Who knew where it would lead me, but the adventure has been grand. Today, I want to show an easy and affordable way to create a DIY Mother's Day flower basket for mom's everywhere...or just as an "I Love You" gift or gift to self. tee hee.

What you see above is collection of thrifted, hand-me-down baskets, as well as the
Amish-made wooden buckets I carry in my shop. All of these are perfect for creating a special gift for the mom's in your life.

While you could use them to create gift baskets filled with goodies, I'm going to show you how to make a Mother's Day flower basket. Why? What lady doesn't love flowers, right? Especially ones that aren't just grabbed off a display and have a ribbon stuck on it. Making it personal is key to the hug she will feel when presented with these beautiful blooms. Plus, she can enjoy it for as long as she likes - each season even.
I created a video tutorial on how to make this Mother's Day flower basket below but am also outlining the steps for you here.
Here's a list of supplies you'll need to create your gift:
- basket or bucket - thrift stores have oodles of new ones. Shop & save.
- plastic sheeting
- stapler
- staples
- rocks for drainage
- potting soil
- plants and flowers of your choice
I don't know about you, but some sort of spell comes over me when I go flower shopping. It seems I ALWAYS come home with more than I went for. ahem. Tell me I'm not alone, k?

DIY FUN
From that thrifted basket selection above, the green one still had the price tag on it for $19.99, while the other has "Happy Harvest". Now, "Happy Harvest" isn't going to float for our Mother's Day flower basket. haha. No fear...paint is here! I removed the broken handle (my daughter did that the instant I paid for it. geesh) and got started refreshing the basket.

I also could have popped out the wood piece the text was printed on and just had a plain basket too or wrapped a ribbon around. Either way, this makes for a great planter.
Next, I cut a piece of the plastic sheeting large enough that it would extend a couple of inches past the top edge so I could fold it down. You could also measure the diameter and depth to figure out a size too. My video demonstrates sizing this best.

Then, I press the sheeting liner in making sure to center it and leaving enough on each side for excess to be folded.

UP NEXT
When you're satisfied with the layout, begin to staple the sheeting liner to the interior edge of the basket as shown below or in the video. Fold the liner towards the outside, and make sure to keep the edge below your basket for a clean finish. Also, you will need to slightly overlap as you go if your basket is round. You can see how I've used this liner in
my DIY planters (free build plans) HERE.

Last, you'll want to line the bottom of your basket with few stones or pebbles. This promotes drainage so you don't get soggy roots or root rot. Bonus, the rocks offer a bit of weight stability if you plan to use this planter outside.

Next up...FLOWERS. {{happy dance}}
While I may think this is the super fun part, many feel daunted by flower selection. The problem that many face when shopping for flowers is knowing what goes well together. First, think of what mom likes (pinks, purples, red, yellows, whites, etc). The items I look for first are the ones that are going to add height. For instance, I prefer a grassy spike to add fun, then work around it heading downward. I go over this in detail in my video tutorial.

ALL DONE
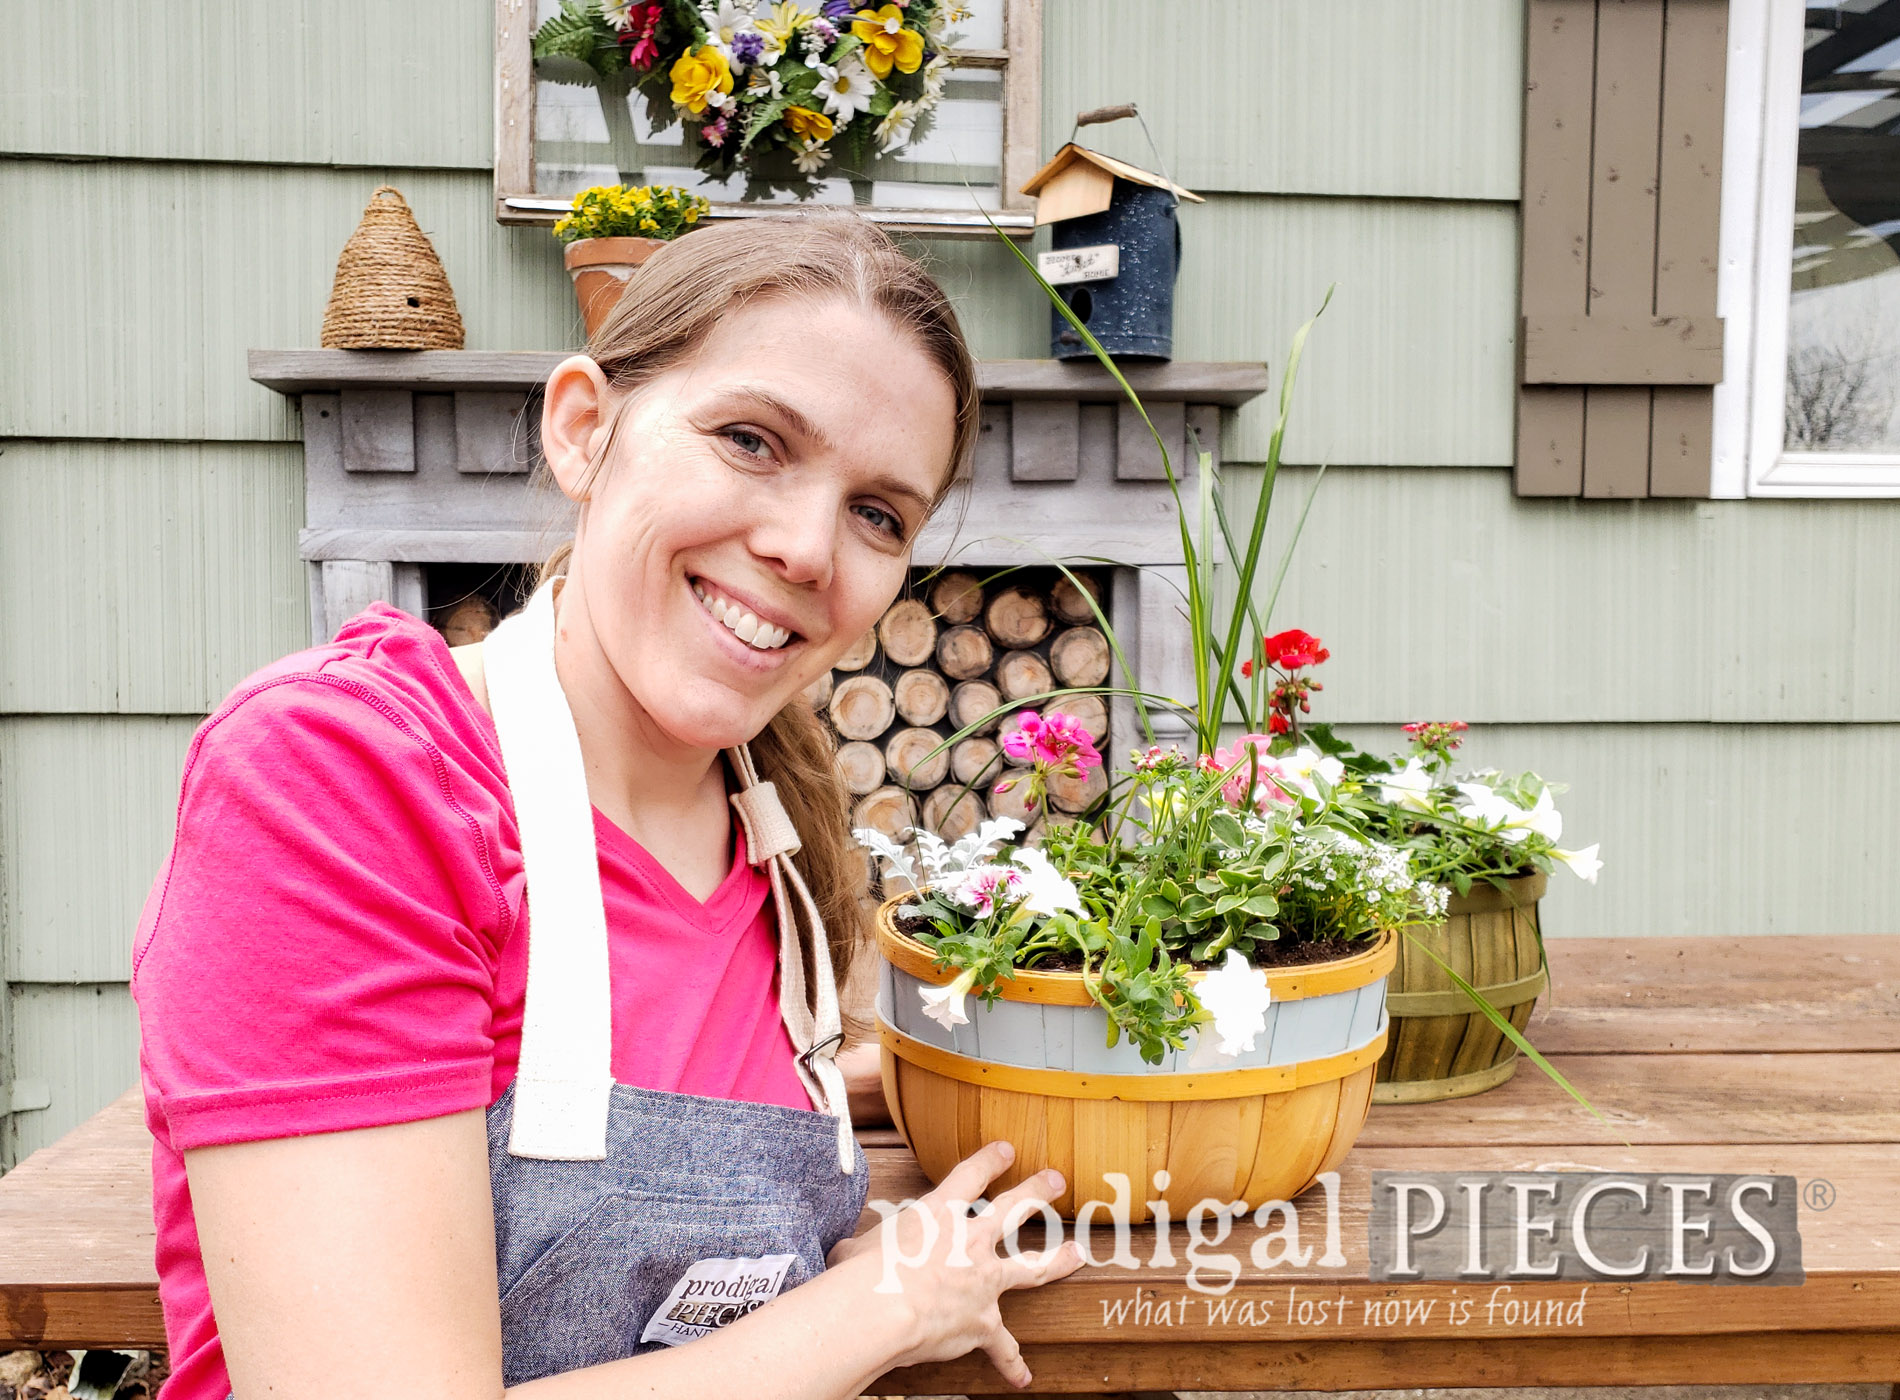
Also, since many flowers come in packs of 6, I try to find flowers that are a neutral for more than one mom. For instance, white pansies, alyssum and dusty miller) all make a great neutral combo and filler. Then, I look for the color scheme to compliment the flowers I've chosen. For one mom, I chose a red geranium and then picked out flowers to compliment that red (snapdragons, dianthus). Meanwhile, the other basket got more of a pink color scheme.


For even more dynamics, choose an ivy that will trellis out of the basket and create interest.


Over the spring and summer months, this basket will flourish and fill out with lush details. I can't wait to gift these and see.


GIVEAWAY
Since I'm totally wanting to celebrate mother's everywhere, here is my gift to you. I created this basket with a ticking lining, and it is filled with
- trashure mug with tea basket strainer
- one of my handmade sheep
- set of vintage linen napkins with lace edging
- handmade vintage doily
- a handmade antique typewriter key bracelet that reads, "HOPE"
- and a digital gift card to my shop treat yourself to something fun.


Easy entry - just complete as many entries as you like in the widget below (daily even for more entries). Open to U.S. residents 18 years of age and older. Winner will be notified via email and will have 24 hours to claim their prize. Be sure to check your spam!!
a Rafflecopter giveaway
Do pin and share this DIY Mother's Day flower basket tutorial. You know there are some guys and kids out there needing some help too!

Up next, this funky thrifted find needs a much-needed makeover (do ya think?)
See the new look HERE.

To get these DIY tips & tricks in your inbox, be sure to
sign up for my newsletter. Until next time!

More gift projects like this DIY Mother's Day flower basket: