
DIY TIME
When I am blessed enough to have such a piece come across my path, I try to find out as much as I can about it's history so that when it's no longer mine I can continue the story. But...sometimes it's fun to create my own story by using paint and stain make something appear to have had a history. That's what's led me to share my project. It's all about layers!In my normal jaunts of thrifting, I came across two brand new wooden totes. They are just aching to look like they have love for many years. So I snatched them up, along with a towel rack and headed home. My mother knows my passion to create and found me this sweet little pine drop leaf table from a thrift store that she knew I could improve.


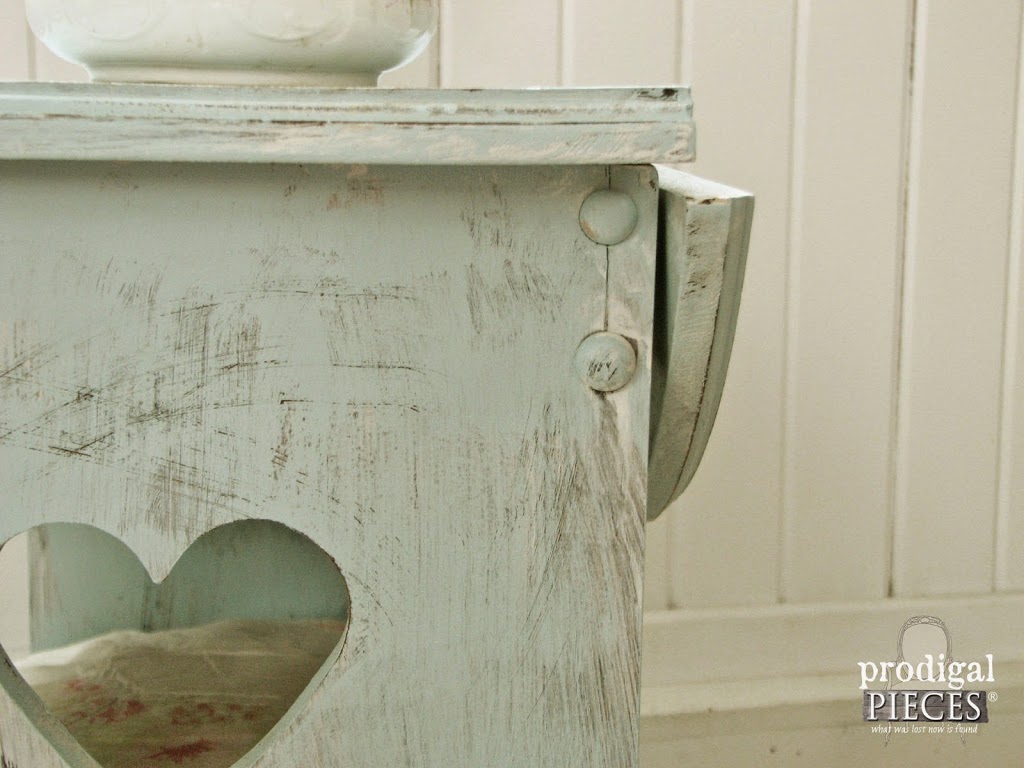
In order to create a time-worn story on these pieces, it just take a little time and forethought to achieve the end result. I'm a lover of aqua and knew that these pieces would have some sort of blue on them as their last coat.
PAINT TIME
First, I stained the wood totes (any color will do), but didn't touch the table or the towel rack because they had already started their story at some point with stain. Looking better already right?
After allowing that stain to set for about an hour or so, I grabbed my can of ridiculously thin ceiling paint. This stuff was cheap and it shows. It wouldn't cover any ceiling! Because of that useless feature, I use it to whitewash my pieces, including these totes. Just brush on without the intent to cover all of it, but create a wash. (You could just thin down some regular white paint with a touch of water too)

LAYERING
Next, I add on the blue layer by dry-brushing it into the whitewash layer. What I mean by dry-brushing is to just get enough paint on your brush to get color. But empty out your brush completely before grabbing a bit more. That way you don't get a solid coat, but rather another sort of wash. It's as if that blue had been worn away to show the white and stain.

Sometimes I take a hammer or other tool to dent up the project piece to create more of a story. Dents, nicks, and other goodies add to the dimension of the piece and another twist in the tale.

The little table my mother found for me already had ample wear and just needed a bit of dressing up. I used my favorite can of aqua paint I talked about here to do the last coat after whitewashing. Even the vase and quilt are a combo for a total of $4.

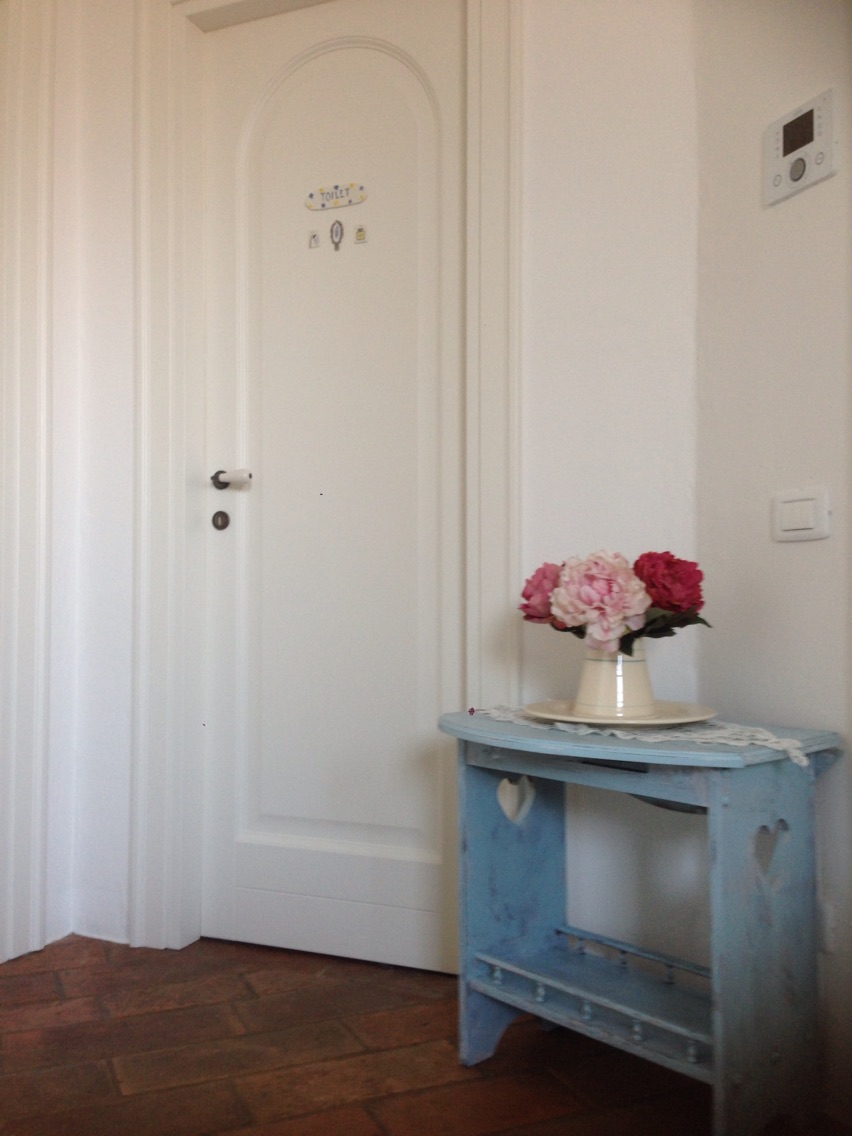
Don't you love the finished product? This sweet little table is headed to its new home in Italy along with some other goodies from my store. I would love to sneak a ride to see where her new home!


UPDATE: Here's where she is in Italy! How fun to see.
 Creating that layers of love aged look is fun and totally allow you to run with it. There are no rules. mwahahaha...


I'm always up to something DIY, so to get these DIY tips & tricks in your inbox, be sure to sign up for my newsletter. Until next time!


![]() PINTEREST | EMAIL
PINTEREST | EMAIL
Also, more projects like my creating layers of love:

