
*post sponsored by HomeRight (see full disclosure)
This project is super simple and will make a lovely part of your holiday decor. The best part is that it can be used for every day too when the holidays are over. Yay! Everything in this vignette was either thrifted or handmade, so it is doable and, on a budget, as well. We all love those kinds of makeovers, right?
To get started, here is what you'll need:
Everything in this vignette was either thrifted or handmade, so it is doable and, on a budget, as well. We all love those kinds of makeovers, right?
To get started, here is what you'll need:
Materials:
- picture frame
- hardboard - found at home improvement stores in various sizes
- spray paint of choice color for frame
- chalk or chalk markers
Tools:
- small spray shelter
- turn table or lazy susan
- staple puller (optional)
- utility knife, hacksaw, or jigsaw
- mask or respirator
- point driver or heavy-duty stapler

Step 1
First, disassemble your picture frame by removing any unwanted artwork and the glass, if present. Set aside those parts for later. There are times you can reuse the glass for later like I showed how to turn basic glass into a mirror in this tutorial. So, why not hang onto it and swap it out as your whim suits you, right? Also, you can use this inexpensive tool called a staple puller to make things easier. I talk about it all the time and it sure is handy. It helped me in my recent desk makeover and cedar chest redo.

Step 2
Next, pop open your small spray shelter and place your frame on an empty box or some other raised surface. I like to use a thrifted lazy susan covered in paper so that I can turn my frame easily. You can also get a turn table made for spray projects. I use a scrap piece of wood to hold the frame and make turning a bit easier.

Step 3
Using your spray paint of choice and a mask or respirator, give it a nice even coat. Then, begin by staring to spray before you hit the frame and continue off of it. Let cure for about 30 minutes and give it a second coat, if desired. I used RustOleum Heirloom White in satin finish for my frame.
Step 4
While your spray paint is curing, it's time to create the chalkboard part of our last-minute art. Take the artwork or glass you set aside and place it on your hardboard. Trace and then either cut/score the hardboard with a utility knife, hacksaw, or jigsaw to the size you need. I used a remnant piece of hardboard from a previous project, and it works fine. You can find the hardboard in your home improvement store. It comes in small sheets and large. I prefer to buy the 4' x 8' sheets since I use it so often and is more bang for my buck. You can see my other chalkboard creations in these posts.
Step 5
Place your cut hardboard in the small spray shelter and give it a first coat of your flat black spray paint. Not only is there no need for the expensive "chalkboard" paints, but flat black paint works just as well. Let it cure and give it one or two more coats, allowing to cure in between.
Step 6
Next, take your chalk and rub it long side down all over your painted chalkboard. This primes the chalkboard for repeated use. Use a soft, dry cloth to wipe clean.
Step 7
After all pieces are cured, it's time to reassemble. At first, put your frame face-down and insert your chalkboard painted side down into the frame. Secure with a point driver (as shown) or staples, glazier's points, or small nails. You can cover the back with paper or fabric, or even leave it as-is. Totally up to you how to complete it.
Step 8
Since this is a versatile piece, you can create any art you want in a software program or grab a freebie off the internet. For our last-minute Thanksgiving decor, I've created this one for you.-->>PRINT TRANSFER HERE <<--
 Step 9
Frist, to transfer any image to your chalkboard, simply print it onto basic office paper, and place it on window with image facing out. Then, trace and color over all the letters with a piece of chalk.


Step 10
Now take your chalk-coated transfer paper and place it where you want it on your chalkboard. Next, tape it down to keep it from shifting during transfer. Using a colored pencil, trace over the letters, outlining them (no need to press hard, lighter tracing works fine). This transfers the chalk design to your chalkboard.

Step 11
Remove your transfer carefully. To fill in the design, use a basic pencil sharpener to sharper your chalk. Again, no need for expensive pencils to get the job done. Likewise, fill in the the design as you see fit. To sharpen up the lines, you can use a cotton swab to wipe away and excess dust that may have shown. Last, if you like, you can even use craft paint to make this a permanent feature and paint it in as desired.
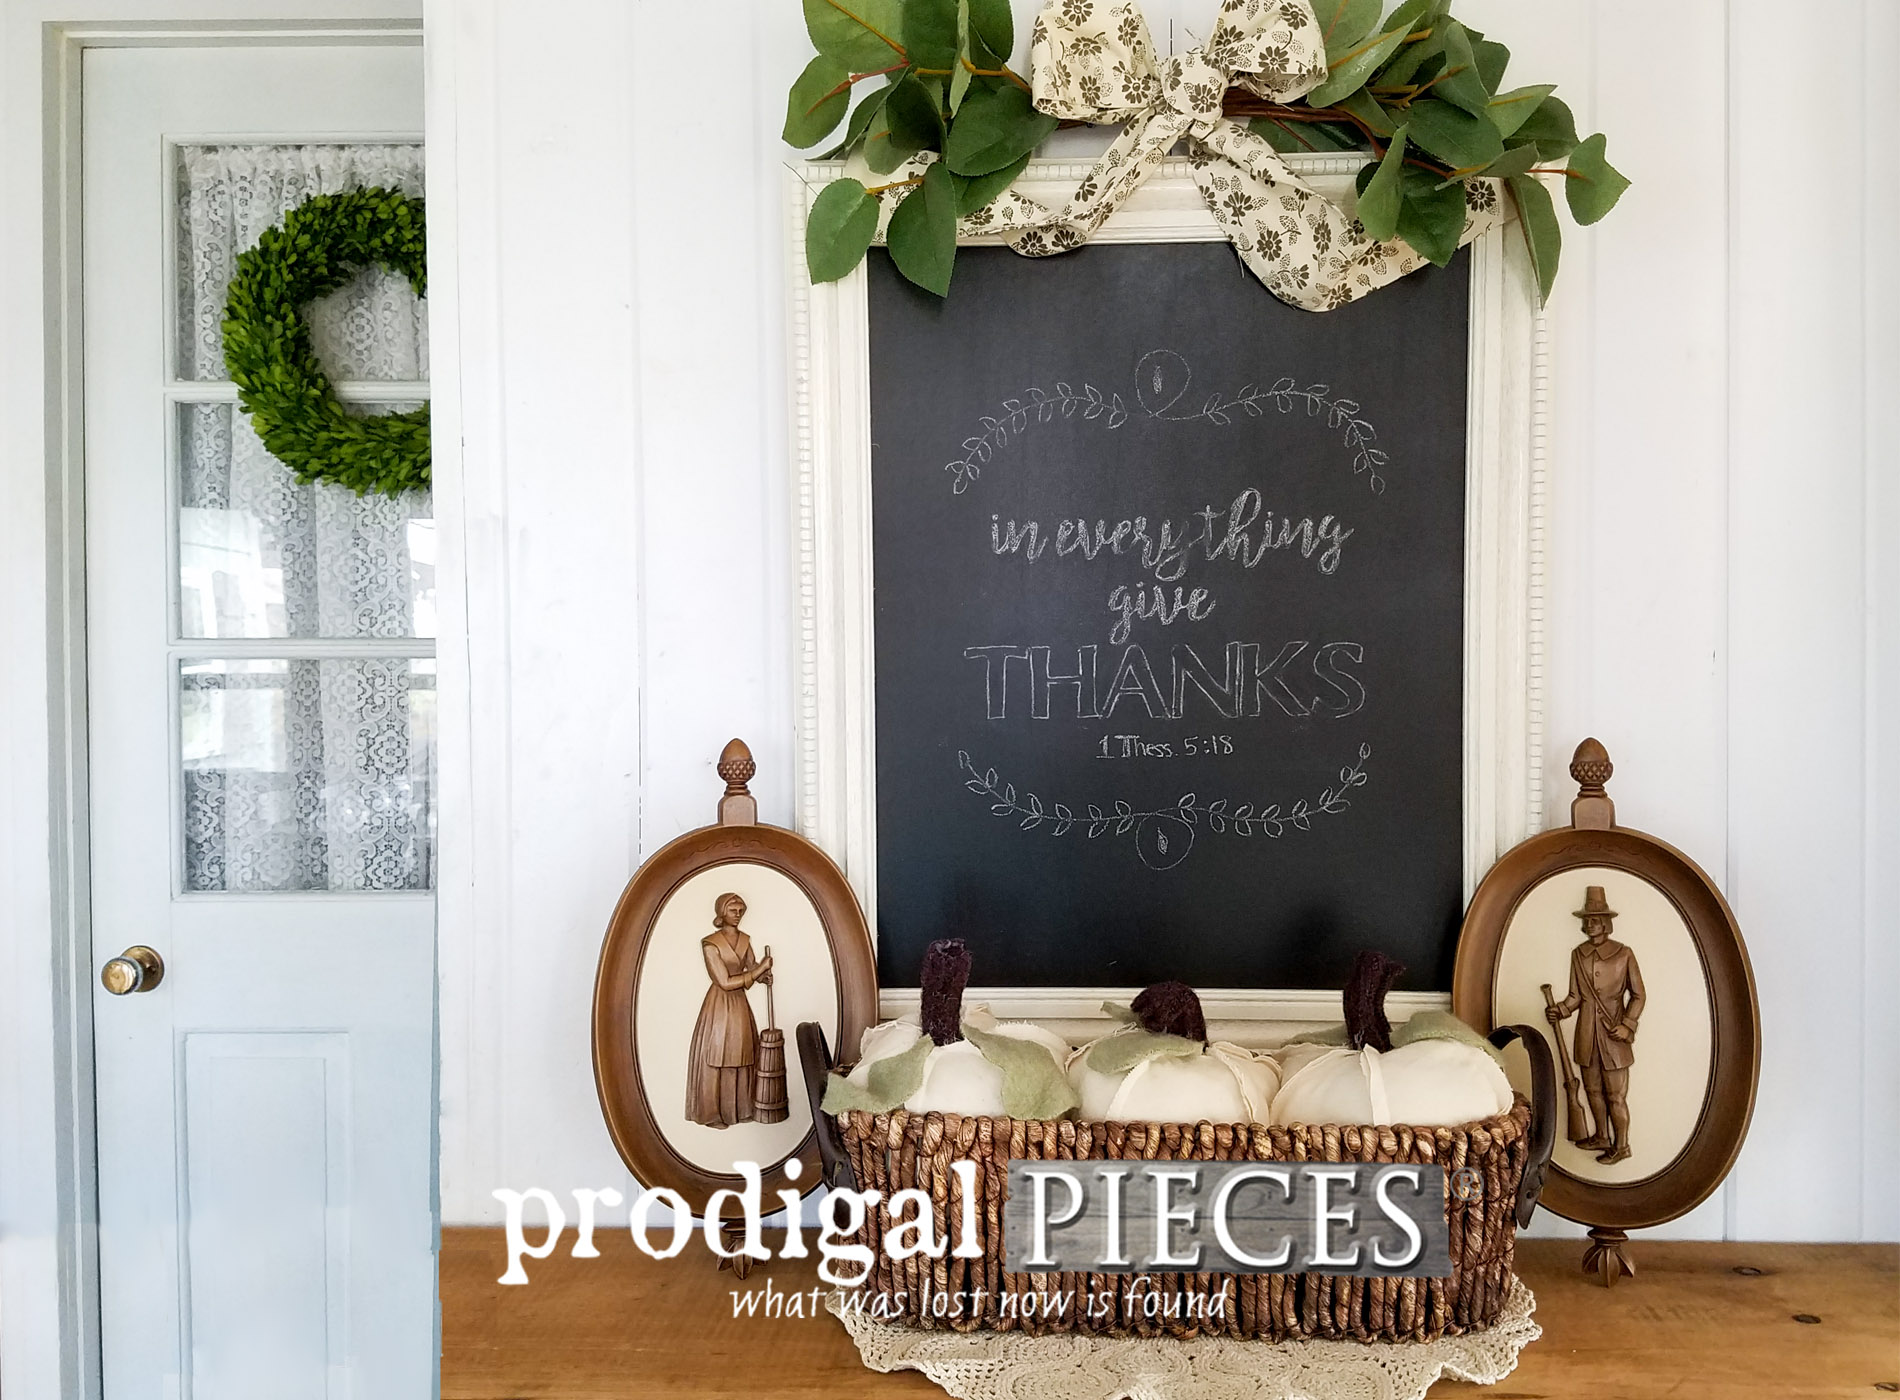
THE REVEAL
And, your last-minute Thanksgiving decor is done! Now you have a beautiful piece to greet your guests and family, and you can even change it up for the next holiday...Christmas! Chalkboards are fun in most every room of the house and make for great gifts too. They really are easy to whip up using cast-off wall art as the base.
 I'm enjoying my vintage pilgrim plaques I recently found. I was so stoked to find them in time for the holiday.
 The thrifted basket looked like it needed some cuteness, so I made a few repurposed pumpkins out of felted sweaters and remnants to fill it up. In addition, you can't see it, but I added a burlap sign to the other side. You can find this chalkboard (in case you're not into DIY), the pumpkin basket, and other fun items in my online shop.
 Pin and share this last-minute Thanksgiving decor tutorial as you just may help someone in a pinch. Thanks!
 To get these DIY tips & tricks in your inbox, be sure to sign up for my newsletter. PLUS, you will get your FREE Furniture Buying Checklist and special discount to my shop. Until next time!

Also, more DIY last-minute Thanksgiving decor ideas:

