It's that time of the month where my
Furniture Fixer Upper friends and I are all eager to share our latest furniture projects. You'll see what they have for you in a bit. Today, my project is this thrifted kids play table that has seen better days.

When I first passed it at the thrift store I was like...oh...cute. But then two seconds later, I was like OOOH....cute...POTENTIAL! haha. I love when that happens.
Funny thing was that there wasn't a price tag on it. So, I walked up to the counter to inquire the cost. I decided to bring it home since it wasn't going to break the bank. It has permanent marker on it, chipped edges, wear to the seats, missing center panel, and stains to the toy holder bin.

I'm the kind of mom that loves kid things, but maybe not those that have cartoon qualities. To me it needed a new look. The design has a modern feel, but I decided to take this kids play table to a whole new level. mwahahaha!!
You can see my video tutorial below, but I'll outline the steps here for you too.
DIY TIME
First order of business was to take it apart. I removed the cloth toy bin, took the chair backs off, and got ready to get 'er done. Since one of the chairs was a Tigger and the other a Pooh, I decided to remove Tigger's head to make the pair match. Yeah, I'm morbid like that. haha!!

Before I did that, I broke out my sander and removed the design. Actually, I was surprised how easy it came of the MDF board. No wonder it was so worn.

Next, I use the Pooh chair back to trace onto the Tigger chair back.

Then, I used my jigsaw to cut it down, and then sanded it smooth. In addition, I also used my jigsaw to cut and create a new center panel for the middle of the table. In order to make it functional I used my drill and forstner bit to make a finger hole. You can see it leaning on the wall in the picture below.
PAINT TIME
Once I had everything prepped, it was time to prime. Since this is an already painted piece, I chose to use the same Gripper primer I've used on laminate pieces seen
HERE in these posts. Notice I'm working on the bottoms first (and I have the best helper). There's nothing worse than starting on the top only having to flip it upside down and potentially ruin your hard work.

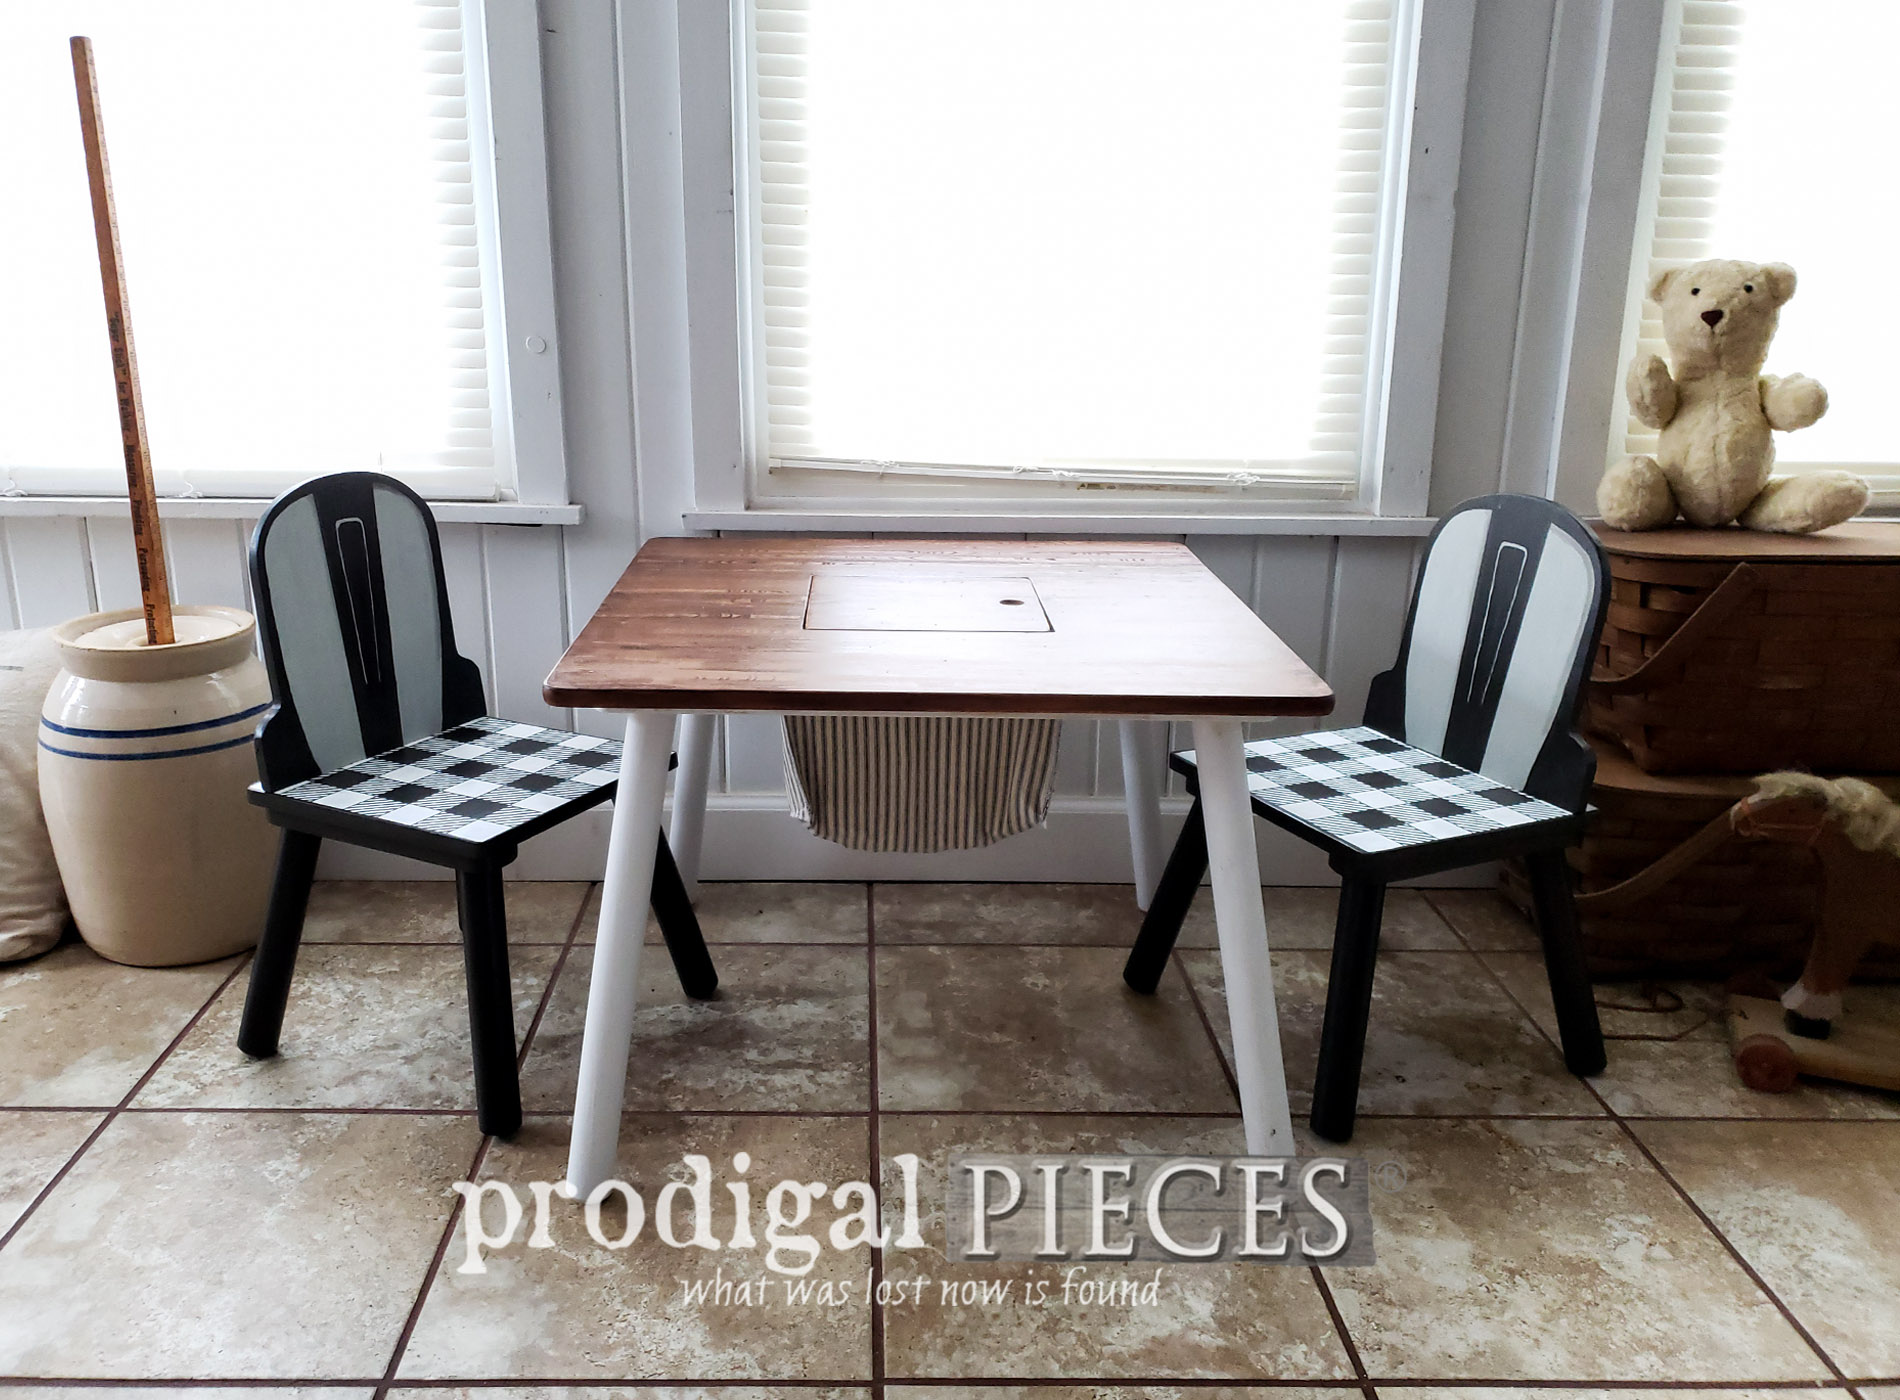
Once the primer has cured, I used two coats of white on the table legs, and two coats of a charcoal on the chair bases. While those were curing I worked on the chair backs. Call me crazy, but I took the time to make them look like those popular armless metal chairs you see everywhere.

NEXT STEPS
How did I do it? Well, I explained in the video. Basically, I used a real image and
my transfer method to get the design on and then hand-painted it all in.
When that all cured, I flipped them over and primed the tops of the chair seats and table top with a same primer and a micro foam roller.

Since there were many layers to let cure, I made use of that time working on other things that needed done. For instance, I whipped up a new fabric toy bin in about 45 minutes. Talk about flying like the wind! haha! And do notice it is made of black ticking...aaaah yeah. I do love to sew.

Finally, the primer has cured and I can apply the paint to the table top. I am after a faux wood top, so I begin with my base coat of this brown. It's the same technique I use often on my blog and can also be seen in
my faux wood garage door post.

Once two coats of paint have cured, I use a Hickory gel stain and my graining tool to create the faux wood look. Again, see the video below for details.

The stain needed to cure, so while that was going on I went back to work on the chair seats. Two coats of the dark gray, it was time to stencil. Who doesn't love buffalo check? Cute!!

To top it all the surfaces off, I used two coats of a matte poly. DONE!

THE REVEAL


Isn't it cuuuute?!? My two littlest just had to give it a test run, of course. They knew there was a surprise hidden inside!


This sweet farm pretend play set is included with this kids play table ensemble. I painted the center panel with a reverse side meadow so the animals could graze. tee hee!


The best part is that all pieces get stored in the center storage bin when playtime is done. Oh yeah! That makes everyone happy, even mama.

Ya gotta admit those chairs are pretty cute! It makes me wish I had some in my size. tsk.

Here's a fun view of the before and after of the kids play table. Crazy to think Pooh and Tigger were once there, isn't it?

If you're in love with this set and would like it for your littles, you can find it available in
my online store. It includes the farm play set too!


INSPIRE
My goal is to inspire you to see past the obvious and envision what could be. I have been working hard to provide video tutorials because I'm a visual learner and it makes it easier to see the DIY in action.
Do pin and share this mini makeover of a kids play table. So many are looking for inspiration on how to make their house their home. Plus, it's fun to share!

To get these DIY tips & tricks in your inbox, be sure to
sign up for my newsletter. Time to see what my friends have worked on for you!


Check out what these Furniture Fixer Upper ladies have for you. Woot!

- The Interior Frugalista
- Petticoat Junktion
- Confessions of a Serial DIYer
- Just the Woods
- Girl in the Garage
More fun projects like my kids play table: