 This could easily be something you already own and maybe you're ready for a new look. Shopping your home is the cheapest way to change it up. However, your local thrift store, estate sales, garage sales, and flea markets (even online markets) are brimming with possibilities. Oh, and don't forget the curb! So much trashure to be had out there...really! I certainly didn't furnish my house by running to the local box store in a day. It takes time and patience to find all the jewels there are to be had, and that creates your home story. Plus, many of these places offer incentives, discounts, and sales that can make it even more affordable.
WHAT TO DO?
This storage box is meant to be hung on the wall to store daily used items or even display decor inside as well. Is there anything wrong with this thrifted gem? Not really aside from some wear and tear. It just wouldn't fit my decor...but...I can make it fit. mwahahaha. The dark stain and kinda funky finish was making me go bleh. Time to make it fit my decor because my expense is a few basic materials and a small amount of time. First, I remove the hardware and use my favorite stain-blocking primer to seal all the odor and prevent bleed through. Just FYI, that any piece with a cherry or mahogany finish that has had damage to it with scuffs and such will bleed through your paint. Zinsser BIN primer prevents all that and is an excellent odor barrier for smoke, etc. and prepares a great surface for accepting paint. This piece isn't smoky, but I wanted that stain blocked.
TIME TO PAINT
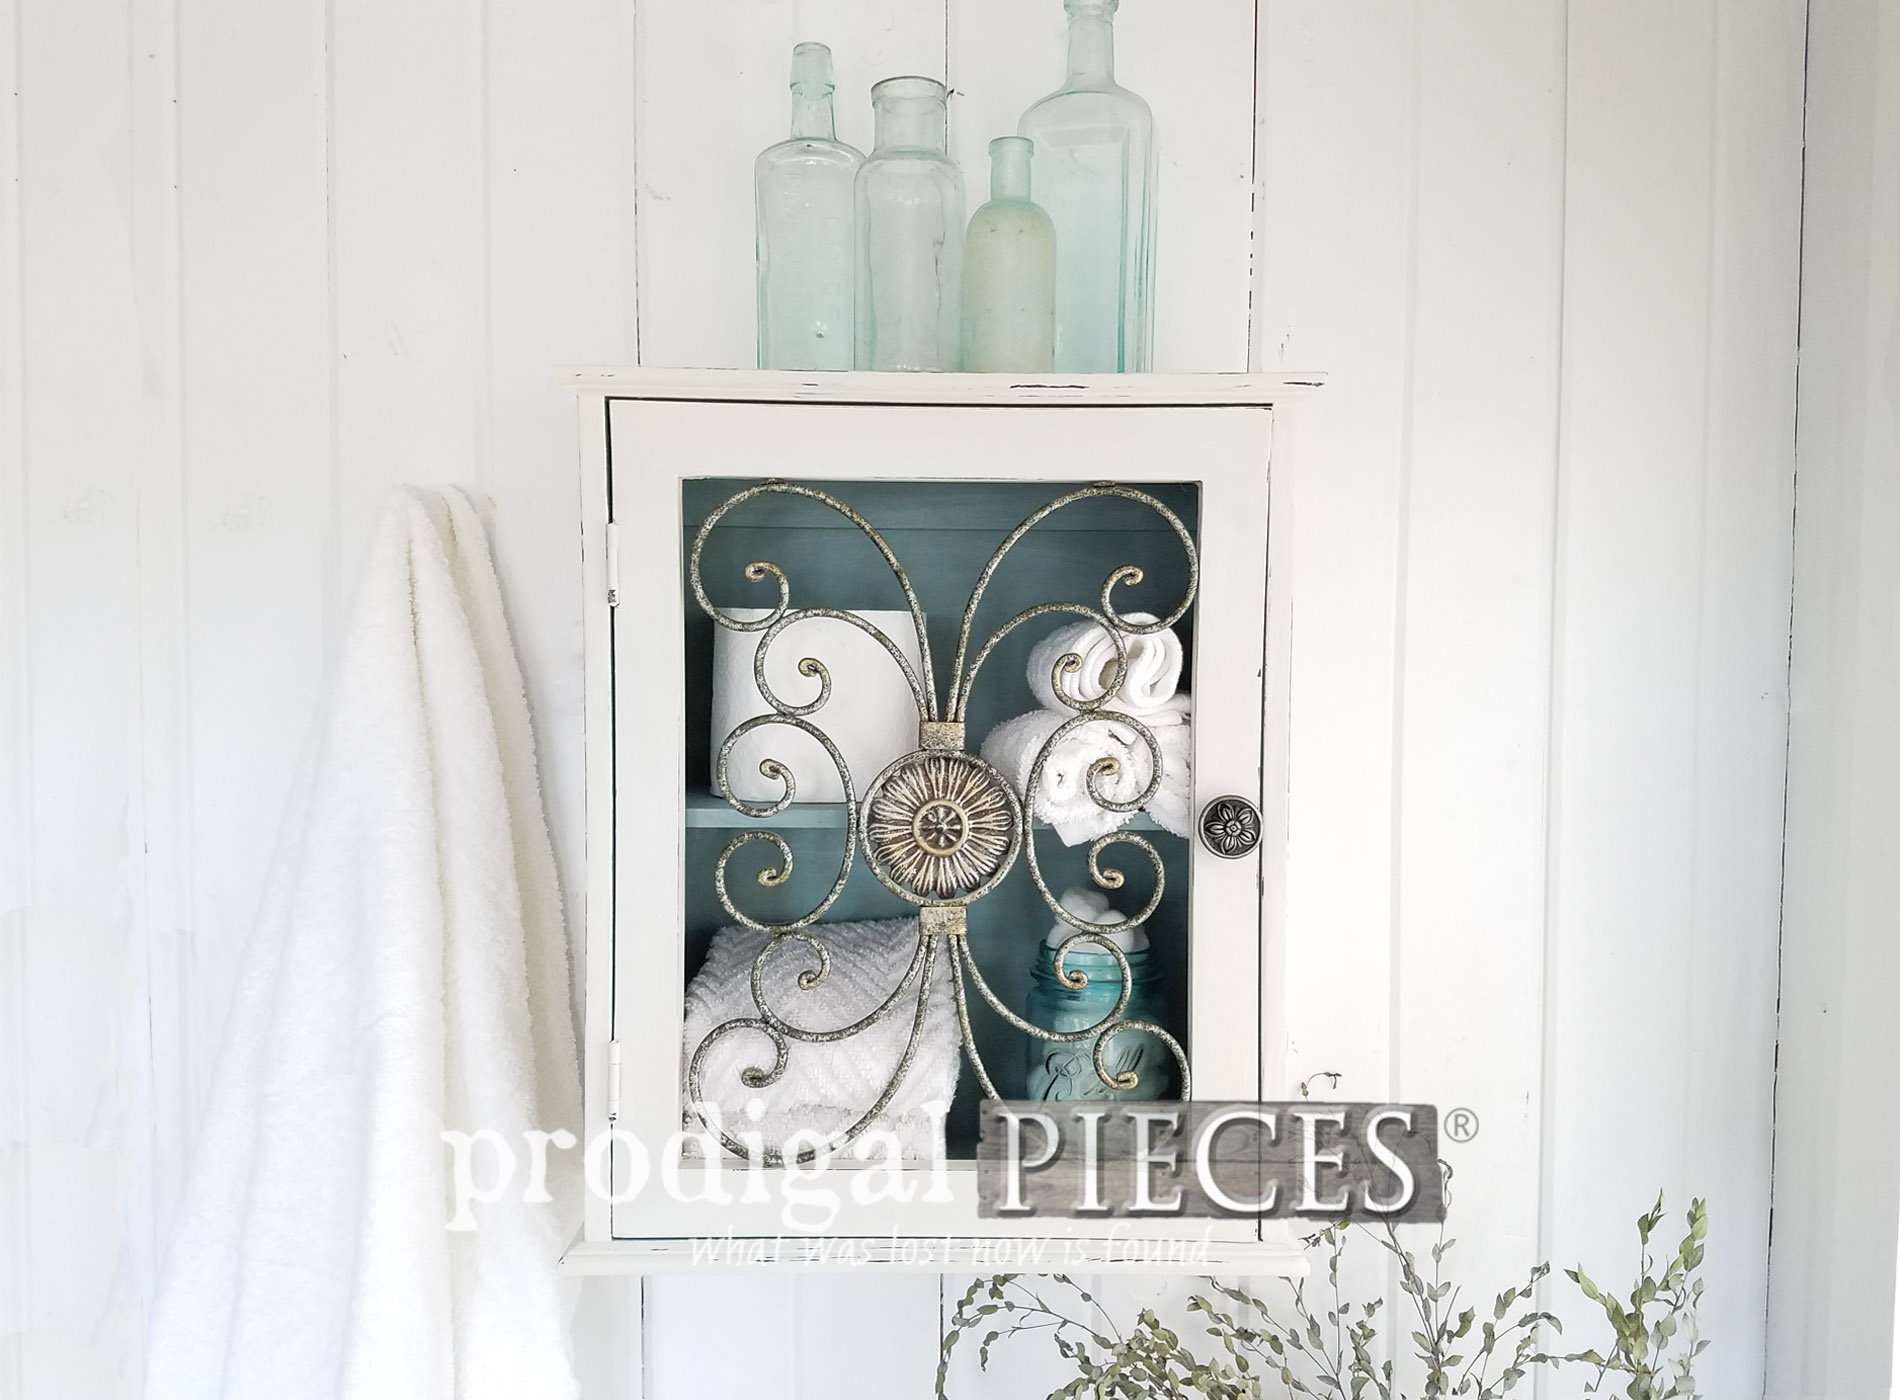
Once the primer cured for about an hour, it's time to break out the paint party. Woot! I wanted a crisp new look with a contrasting interior, so I chose these a soft white for the exterior and soft teal blue for the interior. Again, with my triangle brush to get in all those interior corners like a boss, I apply the blue in two coats with time to cure between. The outside got two coats as well. Meanwhile, I debated on painting the filigree metalwork and knob, but I liked their faux patina and decided to leave it as-is. Here it is after a coat of white wax and a little distressing.


INSIDE
For me, seeing the new look is like a breath of fresh air. The dark stained before was pretty, but I prefer to create as much light as possible in my home. The blue interior makes it a fun peek to see what's inside. I filled this with basic bathroom items for staging. However, this home decor storage box is perfect for most any room of the home or office. I love that kind of feature.
 In addition, if you love this newly created piece, you can find it along with many other furniture and home decor items both made new and in vintage goodness in my online shop.
[metaslider id=30251]
 So I have to ask...what color would you have painted it? I'd love to hear what you would do.
Additionally, pin and share this mini makeover of a home decor storage box to inspire others to give DIY a try. It's fun to shop our home or recreate a find. Ya just never know until you try!
So I have to ask...what color would you have painted it? I'd love to hear what you would do.
Additionally, pin and share this mini makeover of a home decor storage box to inspire others to give DIY a try. It's fun to shop our home or recreate a find. Ya just never know until you try!

WHAT'S NEXT?
Up next, I'll be sharing what I did with this other broken thrift store score. Any guesses? Likewise, you won't believe the after...see HERE in this post. To get these DIY tips & tricks in your inbox, be sure to sign up for my newsletter. PLUS, you will get your FREE Furniture Buying Checklist and special discount to my shop. Until next time!

Also, more thrift store projects like my home decor storage box:

