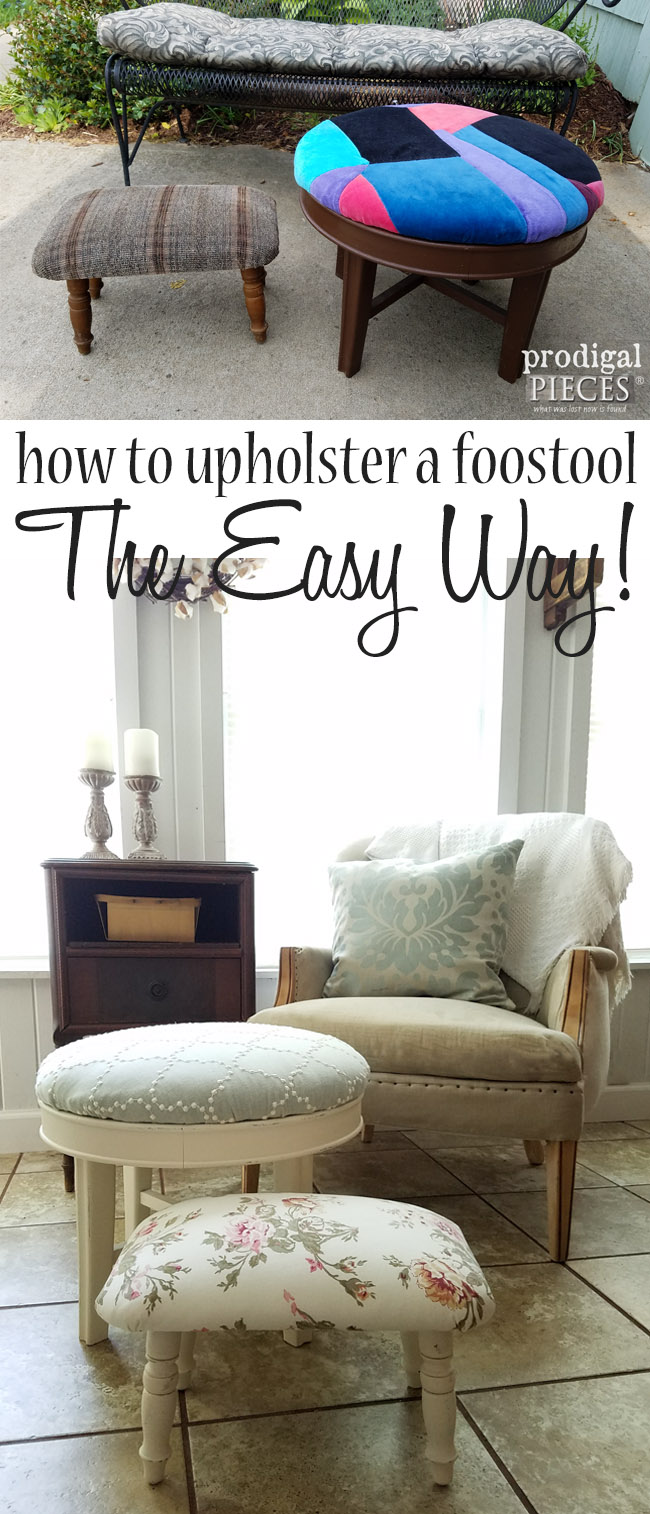
 Do you see why they need a little...ahem...help? The footstool on the right is a handmade cover that isn't bad, but just needed some oomph. The footstool on the left was kinda dingy and also could use a lift. That one on the left is the one that will be my subject for today.
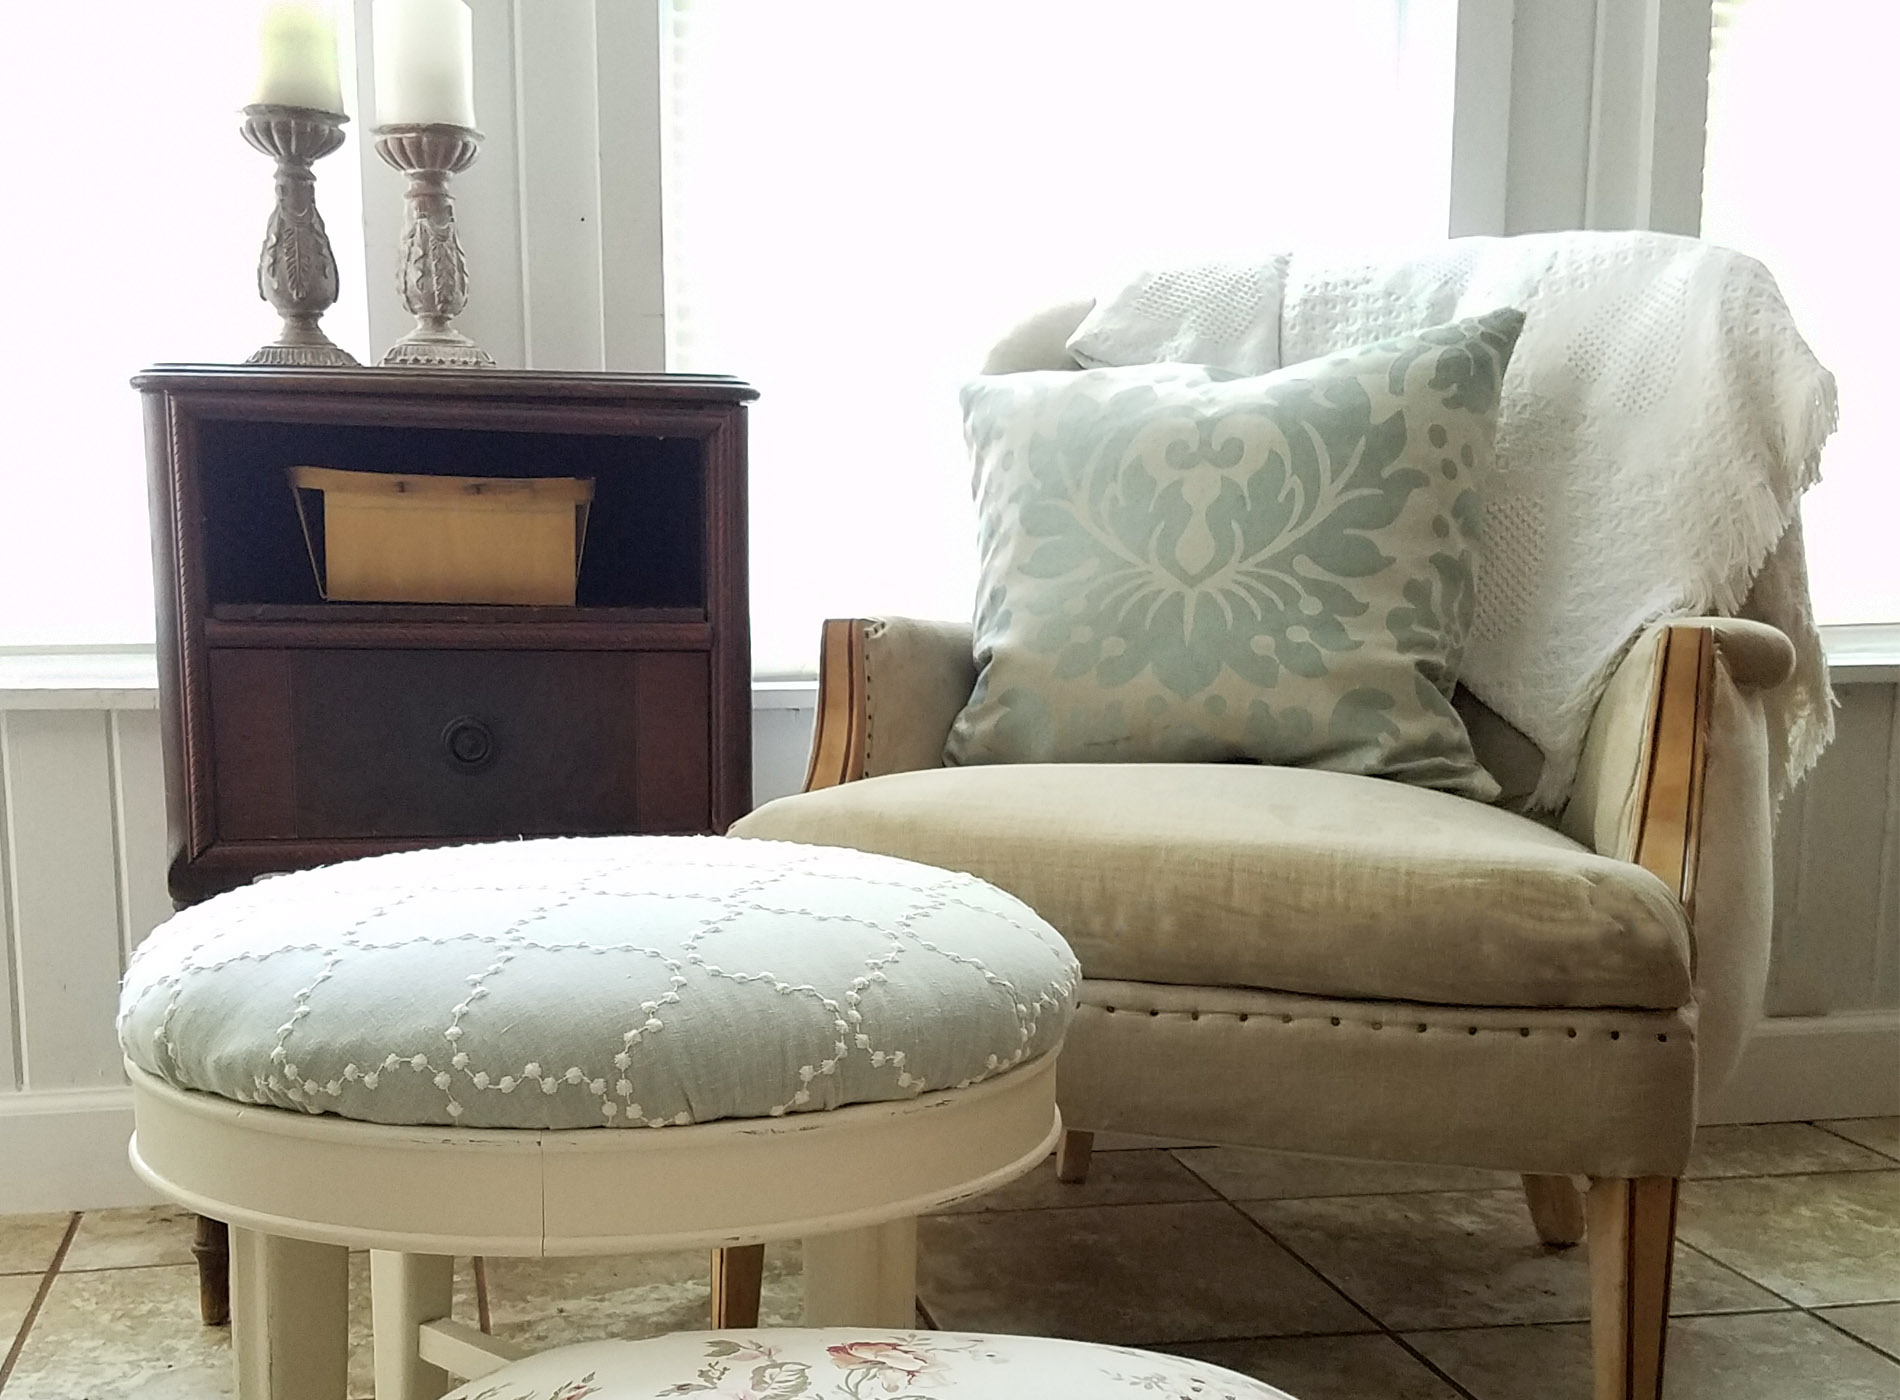
 With a little DIY know-how, they will look like this...

*post sponsored by HomeRight (see full disclosure)
So much better, right? You know you can do this. {{chariots of fire music begins}} Ready to get started?Tools & Supplies:
- upholstery batting or equivalent
- fabric - upholstery or home decor fabric of your choice
- upholstery underlining (aka. dust cover) or remnant upholstery
- spray shelter
- spray paint - your color choice
- stapler (either staple gun or an Airstrike Crown Stapler - preferred)
- staples (either 3/8" staple gun staples or crown staples)
- upholstery foam, if needed to replace current
- safety goggles
- respirator or dust mask
- sewing scissors
- drill or screwdriver
- awl - optional
DIY TIME
To get started, begin by removing the legs from the footstool with a drill or screwdriver. I always use a container to hold my hardware the minute I remove it because it saves my sanity. (ask me how I know) Next, remove any backing that is there and discard. Sometimes you will find several layers and that makes it fun to see how a piece a been changed over the years. Then, remove all the staples, any padding and upholstery. Set aside the batting and upholstery we will use it later.
 Clean the legs using a damp cloth, make any repair, and let dry.

PAINT TIME
When dry, It's time to paint your legs. This is where a spray shelter helps oodles. I can't tell you enough how much I love this thing. I have used it in all these posts and it has saved me so many overspray explanations (ahem) and frustrations. You can't beat how easy it is to set up and the fact that it is so compact. Sure beats a cardboard box and sheets, eh? TIP: I found using a thrifted lazy susan covered in newspaper makes the job easier and faster because you can spin the item to be painted to get all sides coated.
 Using your choice of paint, (I used RustOleum Heirloom White) give the legs a first coat of paint being sure to stay about 12 inches away to avoid drips and runs.
 Let the first coat cure for about 20-30 min. and then coat again. Repeat as many times as needed to achieve the look you are after. Let cure for 2-3 hours.

UPHOLSTERY
While the paint is curing, it's time to get your footstool upholstery game on. First, decide if you need to replace any of the batting or foam. Most of the time you can save the old layers and simply add a couple new layers of batting to refresh it. In conclusion, here is what your upholstery layering will look like. Grab that old fabric we removed and saved and use it as a stencil to cut a new piece of fabric for your footstool upholstery. Be sure to pay attention to pattern layout and design for optimal placement.
I have found the best place to do my footstool upholstery is on the floor, particularly when I am working alone. Why? I use my body weight to hold things in place and makes the job faster. This is me with my knees on the board to compress the foam and make the job of stretching and keeping the fabric taught easier.
Grab that old fabric we removed and saved and use it as a stencil to cut a new piece of fabric for your footstool upholstery. Be sure to pay attention to pattern layout and design for optimal placement.
I have found the best place to do my footstool upholstery is on the floor, particularly when I am working alone. Why? I use my body weight to hold things in place and makes the job faster. This is me with my knees on the board to compress the foam and make the job of stretching and keeping the fabric taught easier.

Step 1
Beginning on one side of the board, tug the fabric up and over keeping it snug, but not too tight. Staple a few across to get started.
Step 2
Turn the board and repeat the process on the opposite side.
Step 3
Repeat the same steps on the opposite ends until it looks like this below. Step 4
Pull back the excess corner of the upholstery and trim the batting as shown.


Step 5
First, tuck in sides and pull over the footstool board as shown and staple 3-4 times to secure.
Step 6
Trim excess batting and fabric if needed. Your footstool should like like this at this point.
Step 7
Last, using either a scrap of your upholstery or upholstery underlining, fold over edges and staple to make a clean finish of the bottom of your footstool. Then, using the awl, carefully poke through the underlining/upholstery to mark where your screw holes are. Also, this will help prevent the screw from grabbing and twisting the fabric when adding the legs back on.
THE REVEAL
Now you're ready to add the legs back on and you're done! Now this little cutie patootie looks refreshed and ready to go, and so is the companion footstool. Which one is your favorite? While you're at it, this second one I used the same fabric I fell in love with for my curbside find settee. See it HERE.
 Likewise, both stools are available in my online store for purchase. I already have several, so how many does a girl need? Truly tempting!

 What is more, my hope is to have inspired you to give DIY, including footstool upholstery, a try. It really can be that easy! Additionally, pin and share to encourage others to make their house their home too.
 To get these DIY tips & tricks in your inbox, be sure to sign up for my newsletter. Until next time!

Also, more projects like this footstool upholstery makeover:

