{deep breath} It's done. Our year-long journey of remodeling to give us our farmhouse master bedroom is complete. If you're new here, there's more to the story that meets the eye. We are a family of 8, but not when we started this project. Having lost two babies mid-term just before expecting our 6th child was enough pressure, but when baby came 6 weeks early it put EVERYTHING on hold.
Our full baby story is HERE.
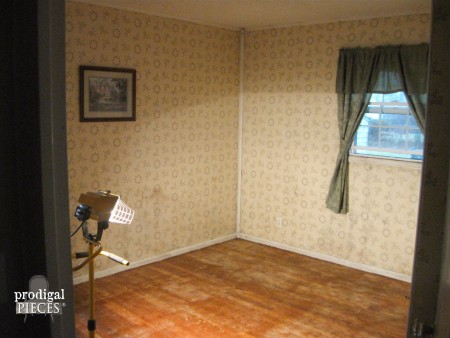
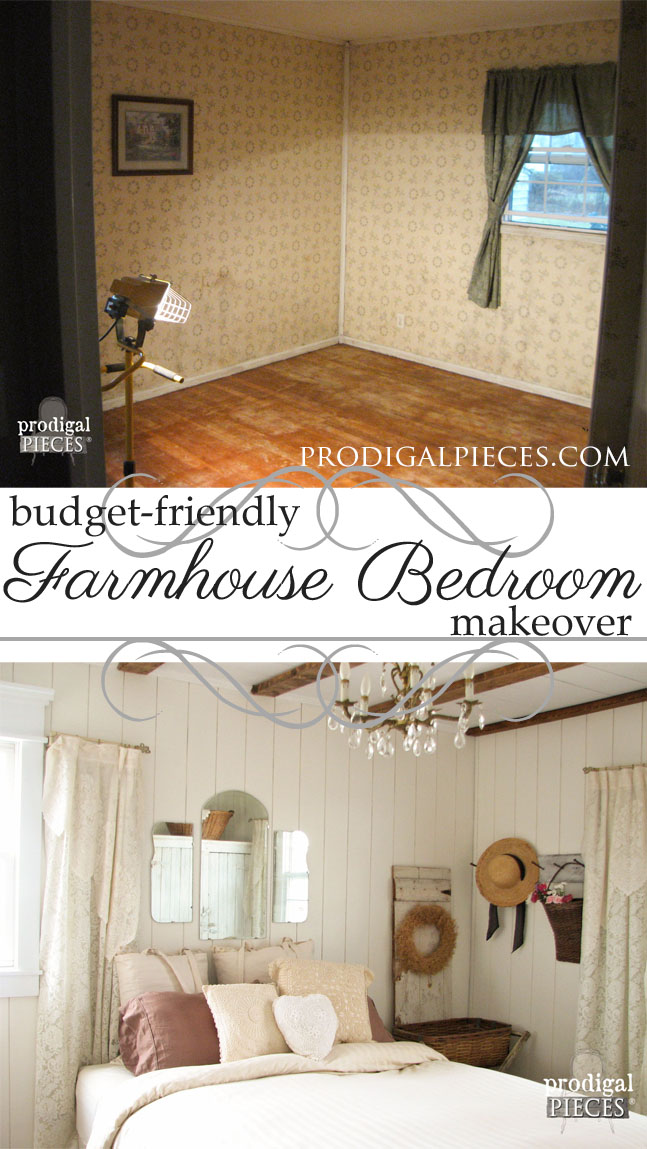
To catch new readers up to speed, here is the before of our bedroom...
I'm not going to fuss around...Are you ready? I am!
With all the work involved in this project, I first want to give praise to God for blessing our family beyond measure, and to my family - my husband and kids. Without their efforts and love, it just wouldn't have come to fruition.
REMODEL
You've seen how we've (1)
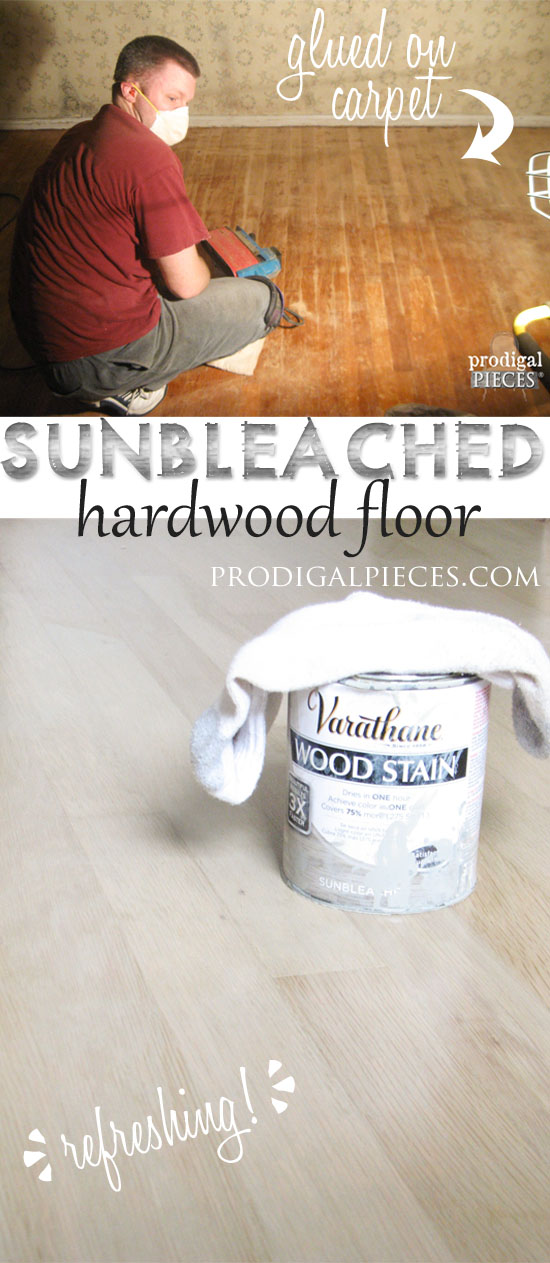
refinished our floors, (2)
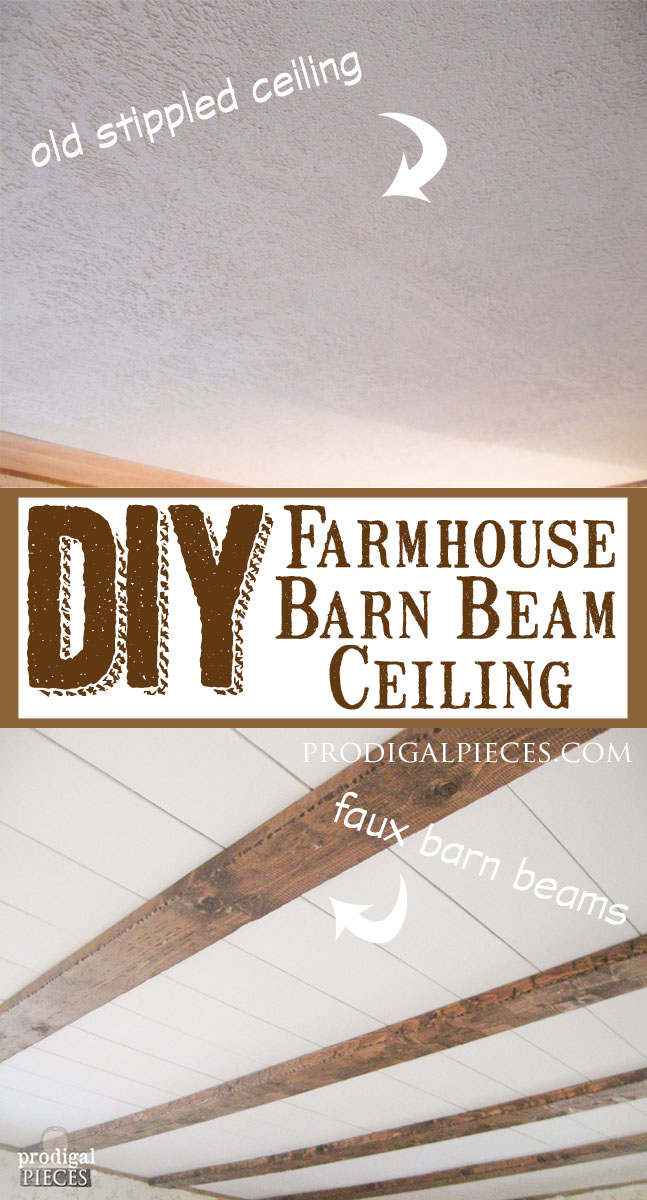
created a faux barn beam ceiling, (3)
added plank walls, and (4)
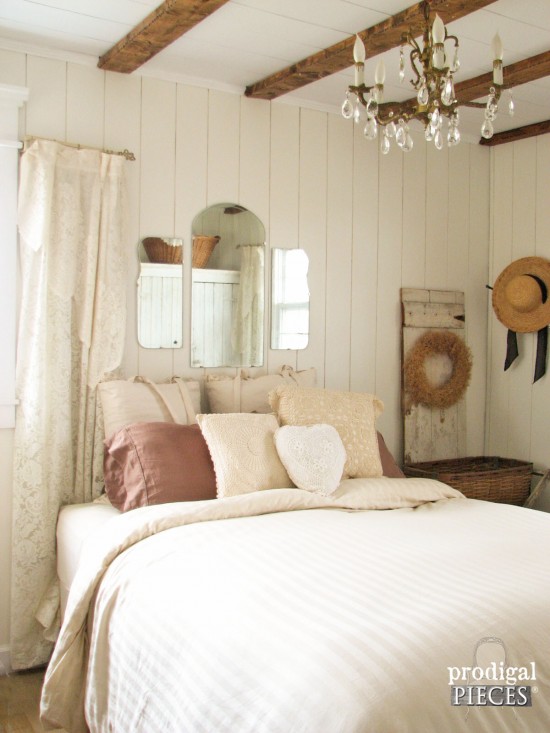
finishing touches, now join me on a tour through our refinished (an all mine) bedroom...
Come on in and see for yourself how to change a room with a DIY attitude.
Every aspect of our room has a story. I am not a department store shopper (cringe at the thought, actually) and prefer my choices have meaning. I hope you don't mind that I'm going to share with you how everything came to be as well as the cost, so that you can see for yourself this look is achievable.
TOP TO BOTTOM
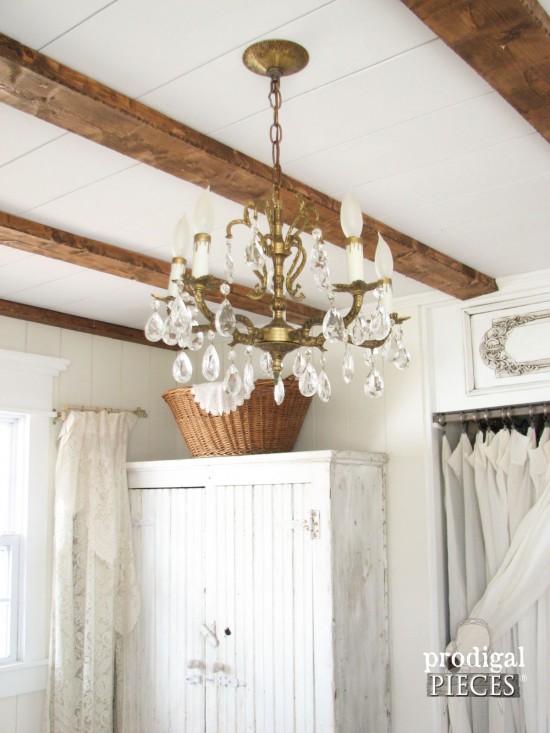
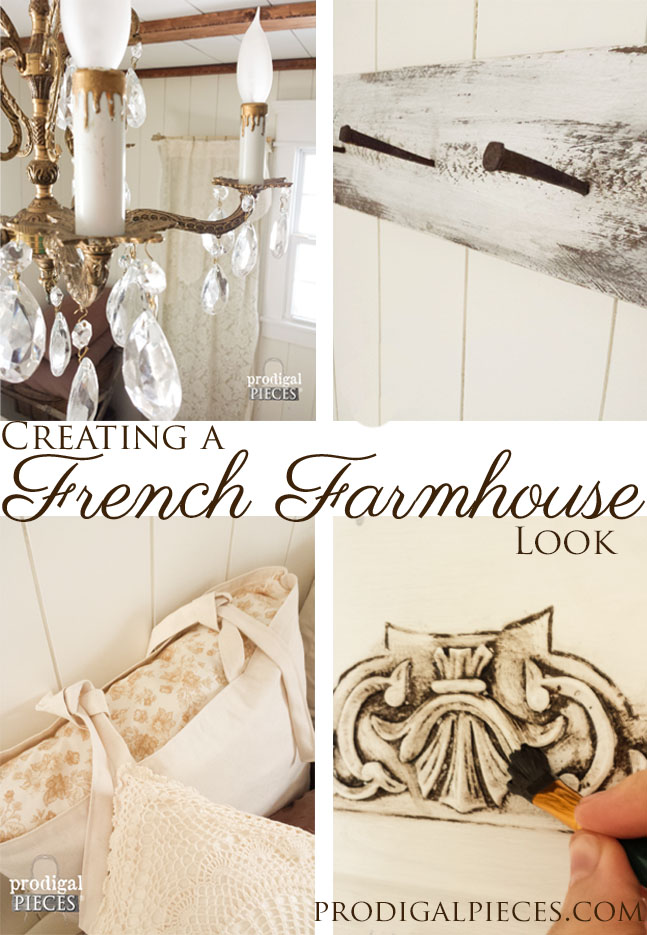
Let's start with that gorgeous antique chandelier. I told you in my
last post, that I found not one, but a pair of these on eBay for about $80 each. I had bid on several before and was trying to keep it around $60-$70, but since it was a matched pair, I stretched a bit. It was crazy bidding on two auctions ending within three minutes of each other. The seller misrepresented them and told me they were complete with all crystals and found them to be missing some. She relented after I questioned her and refunded me the cost of replacements.
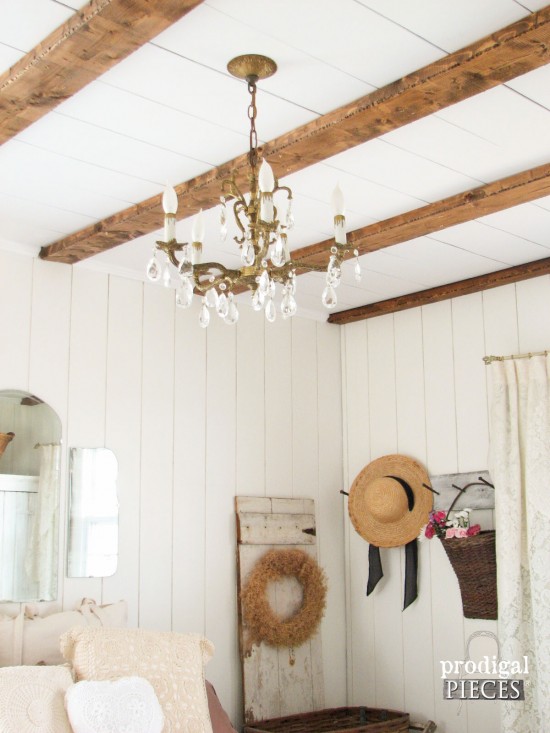
If you're not picky and are patient, you will find such treasures yourself. Can I just say I giggled like a schoolgirl when it was up and lit because not only was it pretty, but I could walk into our room with light on. amaaazing...
TRANSOM
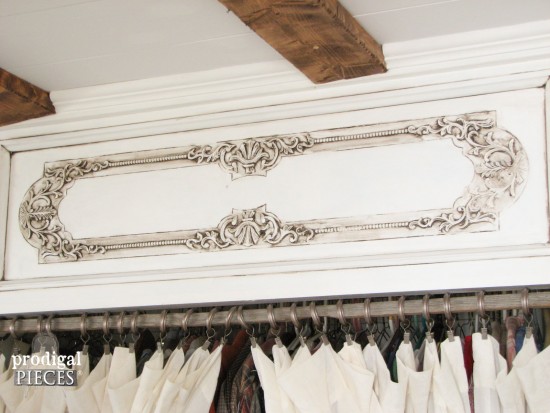
Also in my last post, I showed you how I took a curbside find antique piano face and turned it into our closet transom. After painting and glazing, I was just in awe of the detailed craftsmanship and carving.
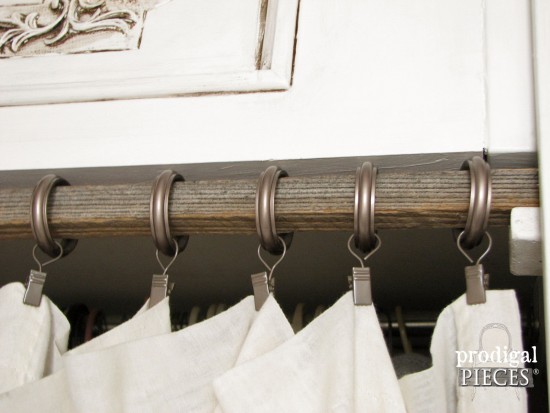
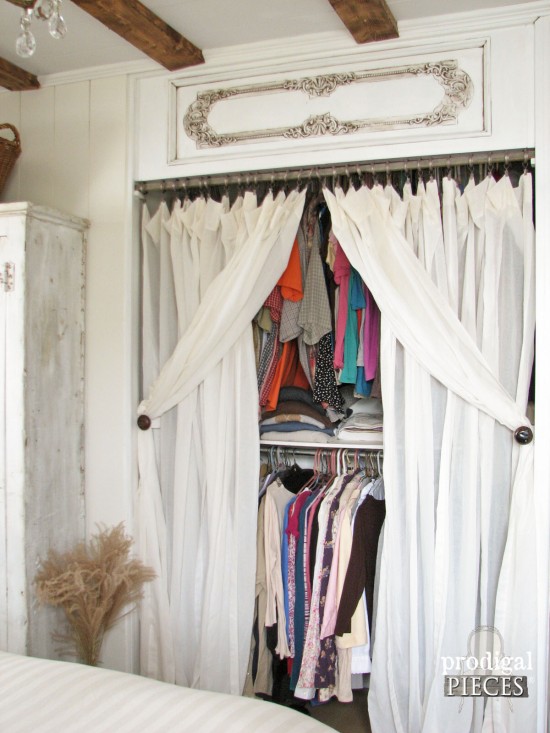
Below the transom, we took some reclaimed barn wood and ripped it with our table saw to make a curtain rod. I found curtain rings at Walmart on clearance to hang up a curtain style cover.
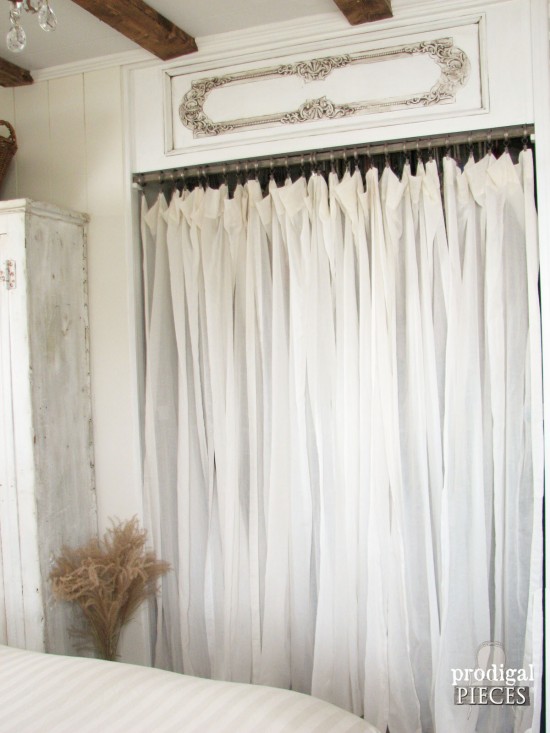
I found 6 matching curtain panels at Goodwill the day I needed them. Amazingly, the total for them was around $6. I didn't even have to alter them, they were perfect as is. For privacy's sake we generally will keep the curtains closed while hosting guests like this...
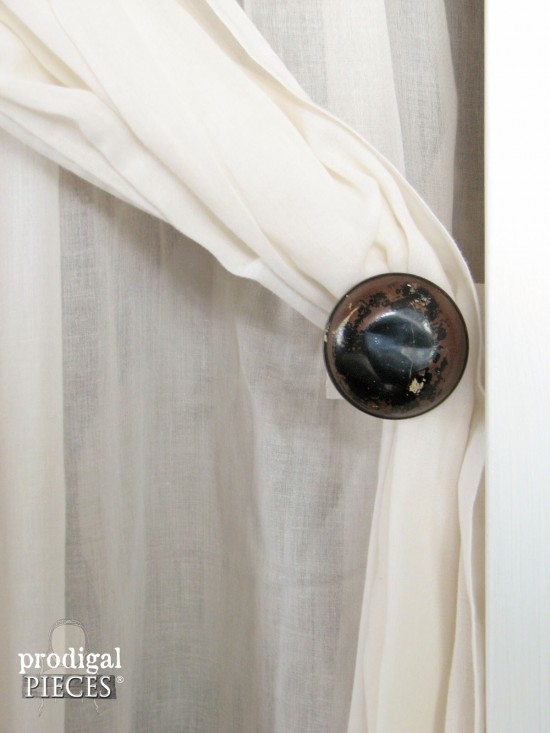
...but for our daily use, I added an antique knob from a door I snatched curbside as tie-backs. No worries, I used the door on our basement entry - I'll have to show you sometime.
Couldn't ask for more than free, right?
STORAGE
Our behind the door shelving was a tad ugly initially, because it was stained orange and had huge corbels underneath that made storage difficult. We wanted to reuse them, so I sanded them down and refinished them, but also yanked off those corbels and replaced them with iron shelving brackets I found on eBay. I like the dark contrast of the wood against the white. If you like the cotton branch display, I have a video tutorial on how to make them
HERE. Everything else here is thrifted or found curbside.
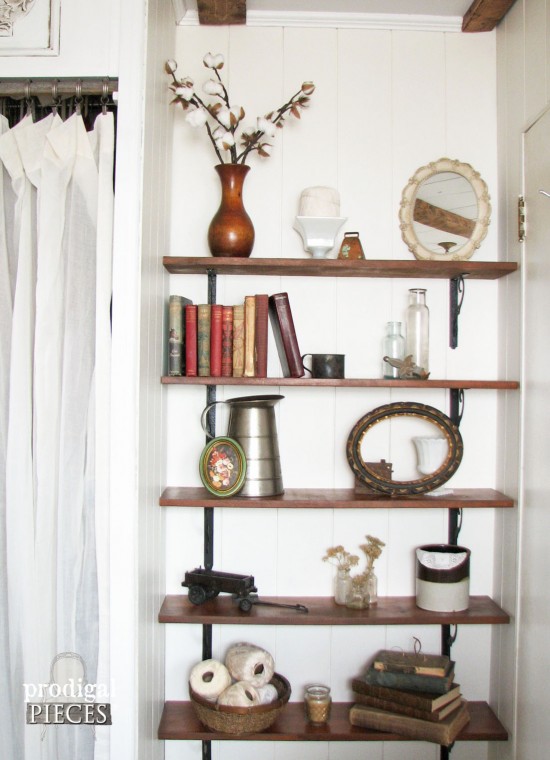
We did use the corbels on our new window boxes we built - we never throw anything away that can be reused. (BTW, my shelves don't look like this on a daily basis...my shoes go there but didn't think you'd like to see my clod-hoppers hanging out!)
After purchasing some farmhouse goods for
my online shop, I found a pile of hand-forged nails in the bottom of the box and knew exactly I would be using them to create a coat rack with some of our leftover
reclaimed barn wood in my room.
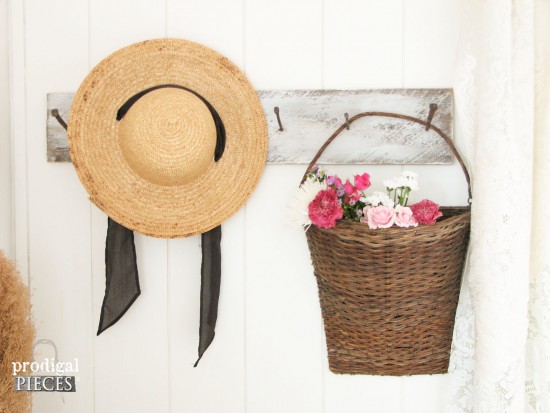
I tend to collect hats, and have oodles in my stash, but this one came from Goodwill and cost a quarter, and the basket was the same price at a garage sale. Can't beat it!
BLING-BLING
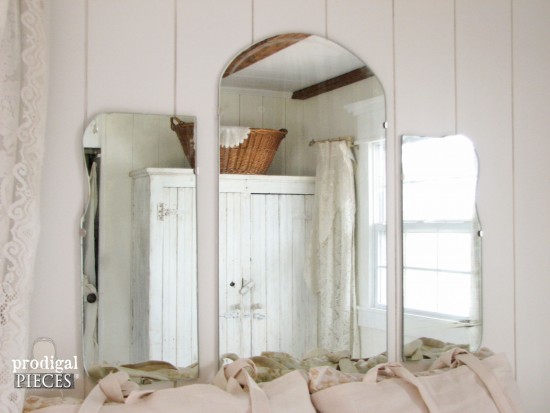
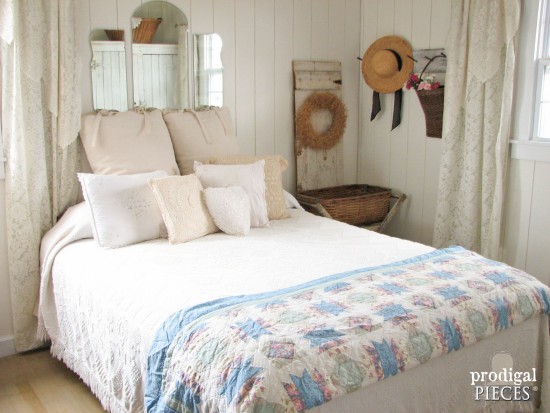
Our antique vanity mirrors came off a custom order I did awhile back, and since I love the frameless style, they would be perfect to add depth to our otherwise boxy room.
So pretty, right?
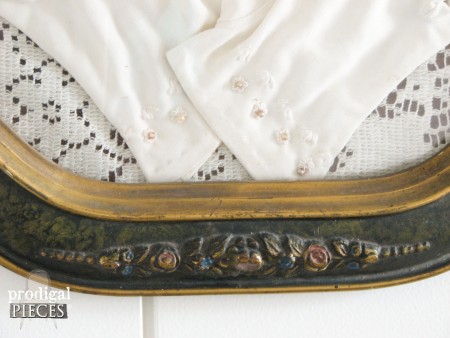
My mother gave me an antique bubble glass frame to use as I like or put it in my shop. I couldn't let it be sold and knew it would look perfect in our room.
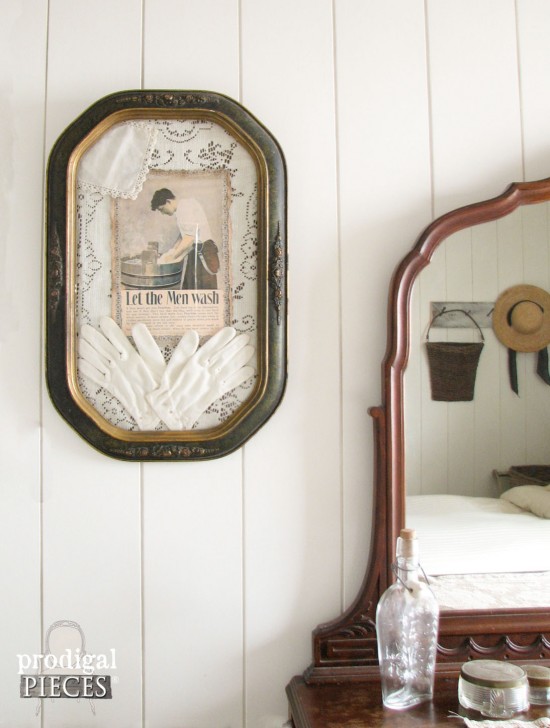
I intend to fill it with old family photos, but for the time being, I found a creative laundry soap ad to stick in there, and used an old thrifted lace tablecloth, doily, and a pair of ladies' gloves.
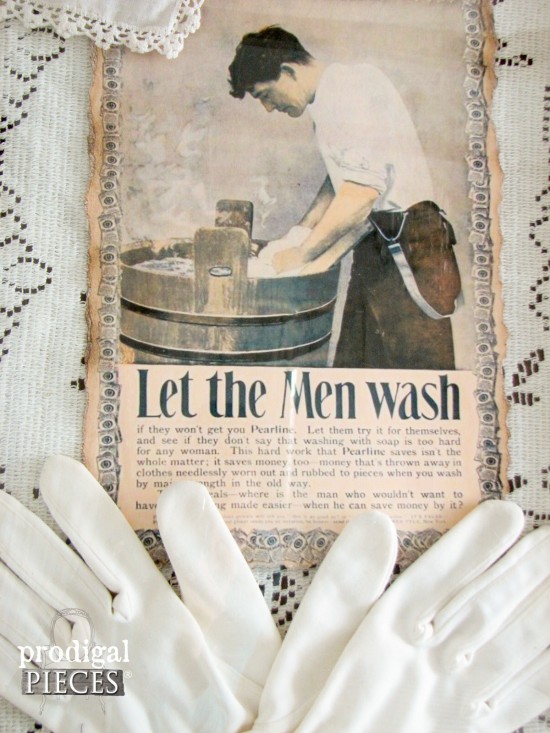
The genius behind this advertisement is perfect. Why not appeal to the man in this way...hahaha...I love it. And I love the details of this hand-carved frame.
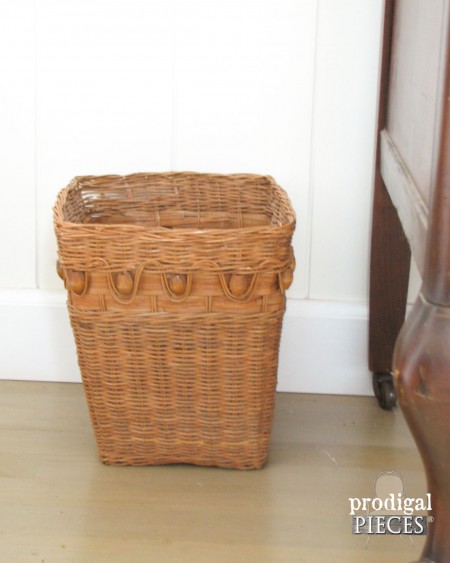
Even the wastebasket came from my childhood home and has its quirks but creates that texture I'm looking for when decorating.
WINDOWS
Our window trim and treatments came together so well, and I was nervous because I was pulling this all together in my mind. As I mentioned before, the curtains and valances were thrifted for about $3, and the rods I found on eBay for around $20. Now my room is so light and bright, and I love being in here!
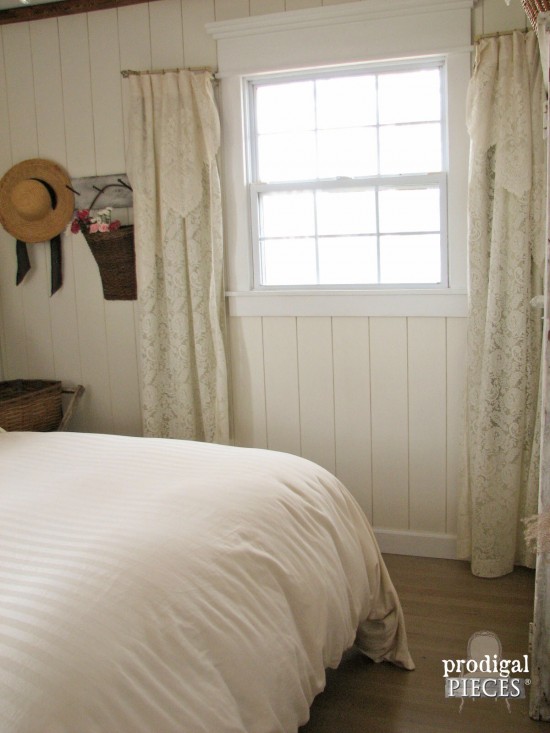
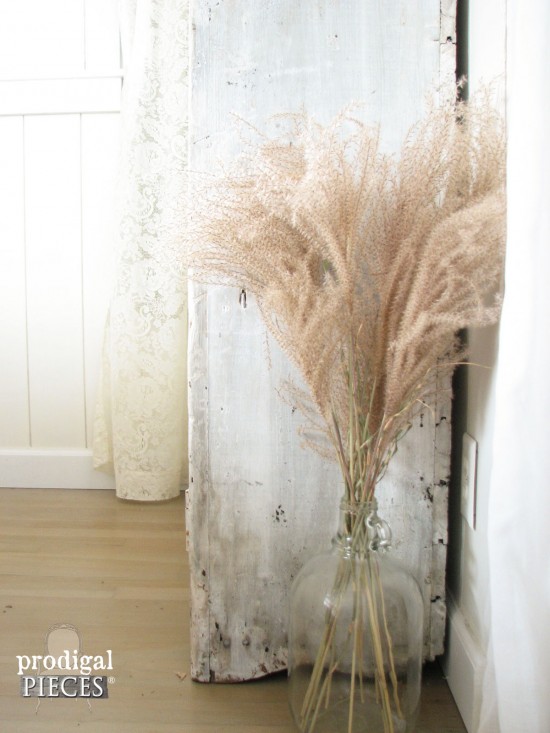
Never take for granted adding natural elements you can find outside your own home. These grass tops are from my flower beds and the vinegar jug came from a dozen set I scored for FREE off of Craigslist.
DIY DECOR
While fleatiquing, I happened to nearly fall over flat when I saw this gorgeous laundry basket with cart. Price tag: $65. Those perfectly rusty wheels and chippy paint just made me swoon! I also found another one with an old wash tub top, and it quickly sold in my shop. I seriously could have kept them both.
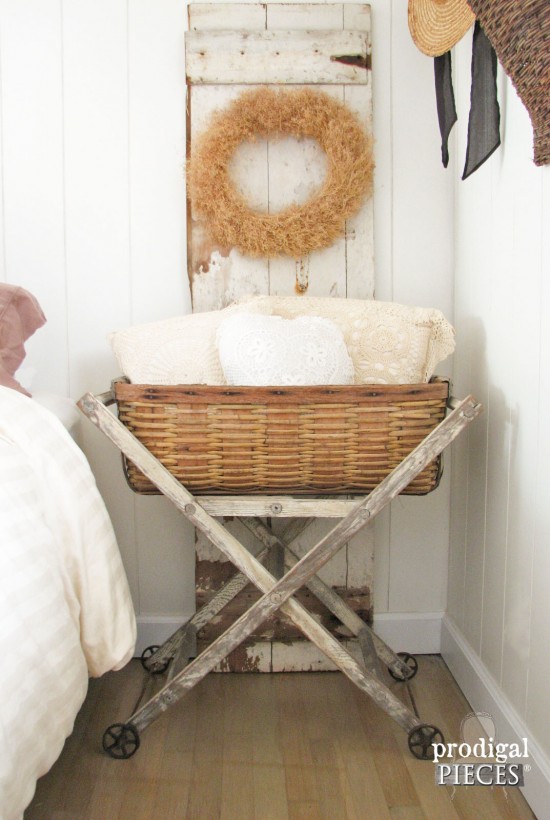
It's the perfect place to store my bed pillows while were sleeping, and I stash my jammies there during the day. The shed door behind it I found during city clean-up and kick myself daily for not grabbing the other (fussy kid syndrome made me leave). The dried floral wreath was at Goodwill for fifty cents.
TIME FLIES
Can you believe we were without furniture in our room for over a year? Yes we had a bed frame and a couple of tables I found curbside to put a lamp on, but we lived out of boxes. ugh.
We originally had my parents first bedroom suite in our room, but since it was not quite our style and I so desired some furniture of our own, (though I hated to part with their set) we sold it and had a replacement budget of $350. After scouring Craigslist for the perfect piece, I found this chippy white cabinet and it was the perfect size for my wall space. Cost was $225.
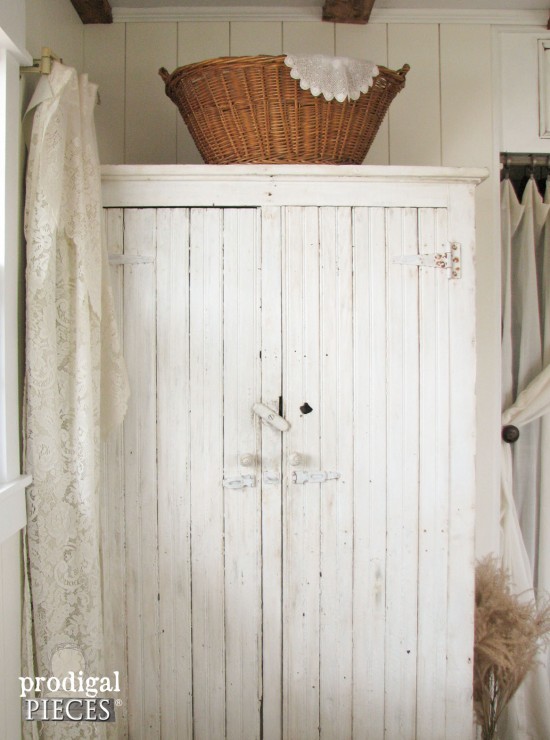
The laundry basket on top in from my childhood room. I used to stash my stuffies in it in a corner of my bedroom. The doily is from Goodwill. Doesn't it look fantastic there??
FURNITURE
That purchase left me with $125 to find the rest of our furniture. Again, on Craigslist I found a mirrored dresser about an hour from us for $75. The guy kept asking us if we're sure we wanted it since it was junk. His wife just wanted it out of the house (he was drunk). No problem...we'll take it off your hands.
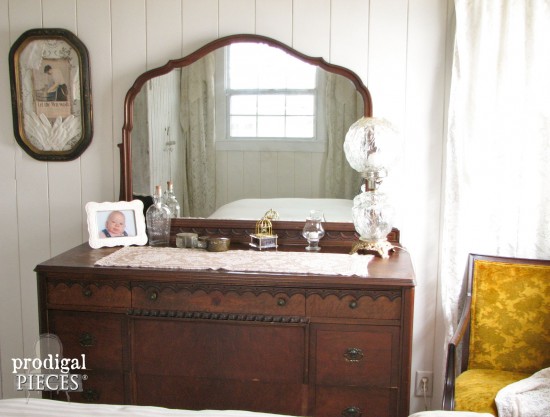
It does have ample wear and missing some trim, but I just can't touch that finish, and check out that inlaid rose woodwork...wow.
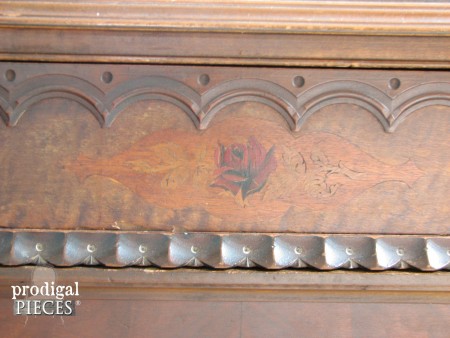
Maybe one day I'll refinish it, but I love its character for now. Junk...yeah right.
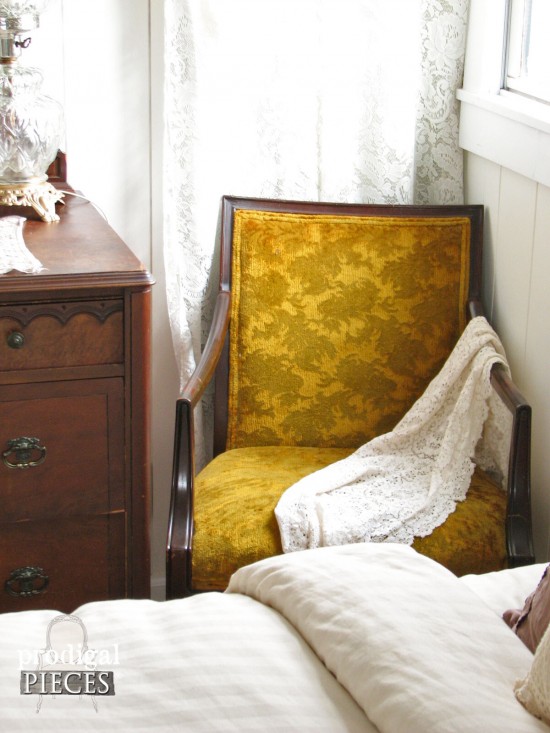
The chair beside the dresser came with a set of 3 a lady was selling for $15 each on Craigslist. I fell in love with the textured velour upholstery and its deep color wood. The other two I sold, but this one was for me.
You would have kept it, right?
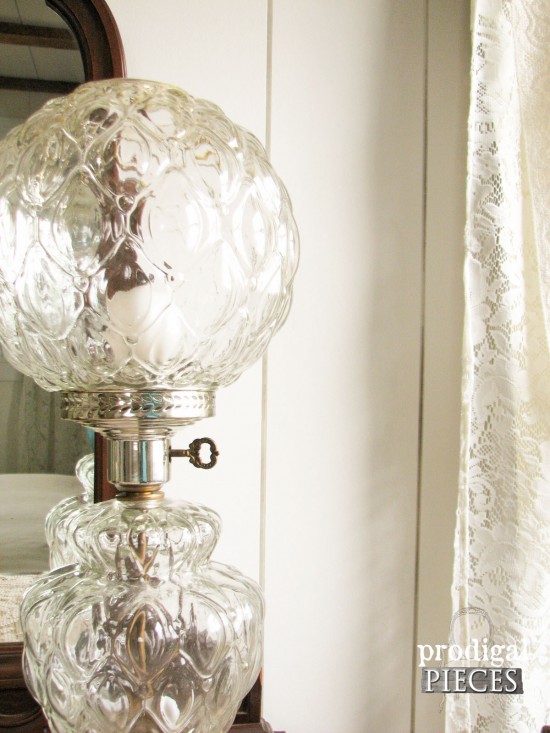
The lamp on the dresser came from a local garage sale for $15.
BUDGET-FRIENDLY
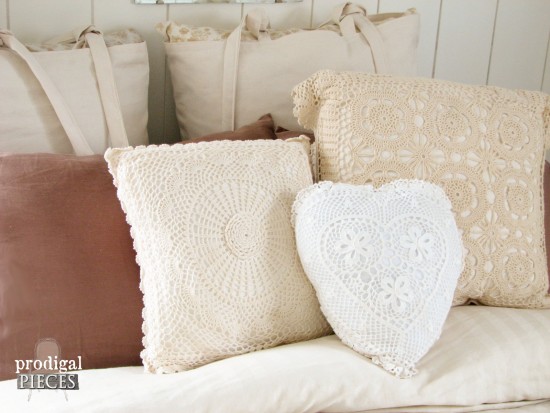
So if you're doing the math, I still have a bit of credit in our furniture budget. I guess you could say it went the pillows on our bed. The crocheted ones were thrifted for fifty cents each and I stitched up the large pillows from some my mom gave me for about $6 in fabric.
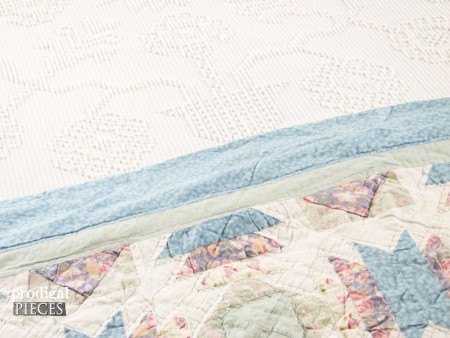
My initial room show was one of our level 5 down comforter I scored off of eBay for $50 (new, opened). But for summer months, I found a vintage chenille bedspread on eBay for about $40 and also use my great aunt's handmade quilt for lighter warmth.
In addition, aren't those textures delish?
We are so absolutely blessed to be able to do things like this ourselves and on a tight budget. With all costs roughly figured, our remodel total was around $500. So amazingly wonderful! There are no words to express our gratitude and delight on this project. Although I wasn't able to deliver our sweet babe at home as I've done with my other children, it's now a place we continue to cuddle and read stories, snuggle and enjoy each other.

SHARE
I hope you've enjoyed following along with us in our makeover. Furthermore, our home has more than one room that is getting a makeover. You can see my
remodel projects HERE.
Additionally, if you loved farmhouse master bedroom remodel, pin and share to inspire others too!
Before you go, be sure to
sign up for my FREE newsletter. Until next time!

 PINTEREST | EMAIL
Also, here's the past farmhouse master bedroom posts if you'd like to read it from start to finish:


 I'm not going to fuss around...Are you ready? I am!
With all the work involved in this project, I first want to give praise to God for blessing our family beyond measure, and to my family - my husband and kids. Without their efforts and love, it just wouldn't have come to fruition.
I'm not going to fuss around...Are you ready? I am!
With all the work involved in this project, I first want to give praise to God for blessing our family beyond measure, and to my family - my husband and kids. Without their efforts and love, it just wouldn't have come to fruition.
 Come on in and see for yourself how to change a room with a DIY attitude.
 Every aspect of our room has a story. I am not a department store shopper (cringe at the thought, actually) and prefer my choices have meaning. I hope you don't mind that I'm going to share with you how everything came to be as well as the cost, so that you can see for yourself this look is achievable.
 If you're not picky and are patient, you will find such treasures yourself. Can I just say I giggled like a schoolgirl when it was up and lit because not only was it pretty, but I could walk into our room with light on. amaaazing...
 Below the transom, we took some reclaimed barn wood and ripped it with our table saw to make a curtain rod. I found curtain rings at Walmart on clearance to hang up a curtain style cover.
 I found 6 matching curtain panels at Goodwill the day I needed them. Amazingly, the total for them was around $6. I didn't even have to alter them, they were perfect as is. For privacy's sake we generally will keep the curtains closed while hosting guests like this...
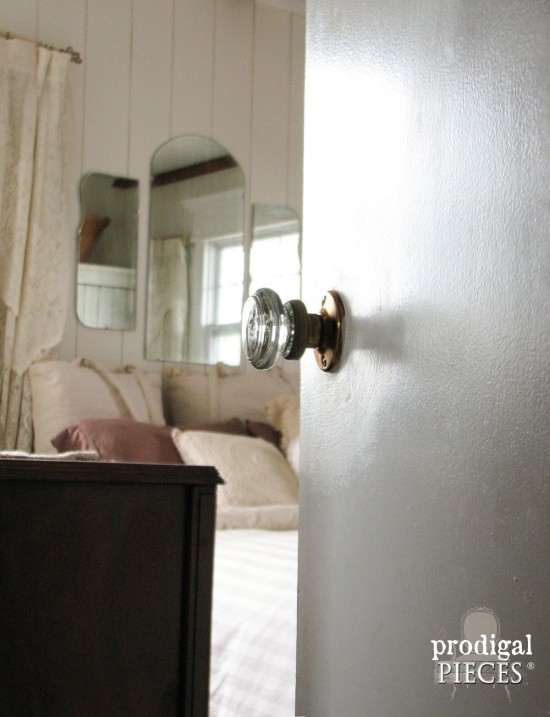
 ...but for our daily use, I added an antique knob from a door I snatched curbside as tie-backs. No worries, I used the door on our basement entry - I'll have to show you sometime.

 Couldn't ask for more than free, right?
 We did use the corbels on our new window boxes we built - we never throw anything away that can be reused. (BTW, my shelves don't look like this on a daily basis...my shoes go there but didn't think you'd like to see my clod-hoppers hanging out!)
After purchasing some farmhouse goods for my online shop, I found a pile of hand-forged nails in the bottom of the box and knew exactly I would be using them to create a coat rack with some of our leftover reclaimed barn wood in my room.
We did use the corbels on our new window boxes we built - we never throw anything away that can be reused. (BTW, my shelves don't look like this on a daily basis...my shoes go there but didn't think you'd like to see my clod-hoppers hanging out!)
After purchasing some farmhouse goods for my online shop, I found a pile of hand-forged nails in the bottom of the box and knew exactly I would be using them to create a coat rack with some of our leftover reclaimed barn wood in my room.
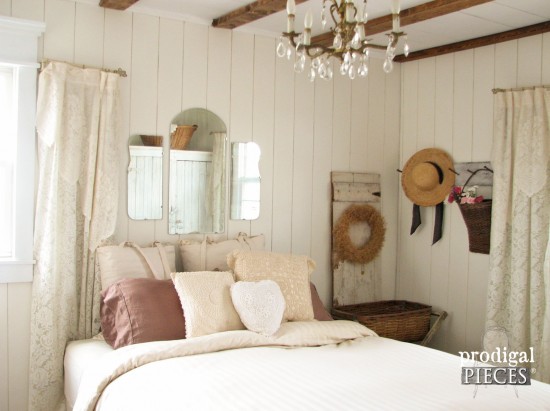
 I tend to collect hats, and have oodles in my stash, but this one came from Goodwill and cost a quarter, and the basket was the same price at a garage sale. Can't beat it!
 So pretty, right?
 My mother gave me an antique bubble glass frame to use as I like or put it in my shop. I couldn't let it be sold and knew it would look perfect in our room.
 I intend to fill it with old family photos, but for the time being, I found a creative laundry soap ad to stick in there, and used an old thrifted lace tablecloth, doily, and a pair of ladies' gloves.
 The genius behind this advertisement is perfect. Why not appeal to the man in this way...hahaha...I love it. And I love the details of this hand-carved frame.
 Even the wastebasket came from my childhood home and has its quirks but creates that texture I'm looking for when decorating.

 Never take for granted adding natural elements you can find outside your own home. These grass tops are from my flower beds and the vinegar jug came from a dozen set I scored for FREE off of Craigslist.

 It's the perfect place to store my bed pillows while were sleeping, and I stash my jammies there during the day. The shed door behind it I found during city clean-up and kick myself daily for not grabbing the other (fussy kid syndrome made me leave). The dried floral wreath was at Goodwill for fifty cents.
 The laundry basket on top in from my childhood room. I used to stash my stuffies in it in a corner of my bedroom. The doily is from Goodwill. Doesn't it look fantastic there??
 It does have ample wear and missing some trim, but I just can't touch that finish, and check out that inlaid rose woodwork...wow.
 Maybe one day I'll refinish it, but I love its character for now. Junk...yeah right.
The chair beside the dresser came with a set of 3 a lady was selling for $15 each on Craigslist. I fell in love with the textured velour upholstery and its deep color wood. The other two I sold, but this one was for me.
Maybe one day I'll refinish it, but I love its character for now. Junk...yeah right.
The chair beside the dresser came with a set of 3 a lady was selling for $15 each on Craigslist. I fell in love with the textured velour upholstery and its deep color wood. The other two I sold, but this one was for me.
 You would have kept it, right?
The lamp on the dresser came from a local garage sale for $15.
You would have kept it, right?
The lamp on the dresser came from a local garage sale for $15.

 My initial room show was one of our level 5 down comforter I scored off of eBay for $50 (new, opened). But for summer months, I found a vintage chenille bedspread on eBay for about $40 and also use my great aunt's handmade quilt for lighter warmth.
 In addition, aren't those textures delish?
 We are so absolutely blessed to be able to do things like this ourselves and on a tight budget. With all costs roughly figured, our remodel total was around $500. So amazingly wonderful! There are no words to express our gratitude and delight on this project. Although I wasn't able to deliver our sweet babe at home as I've done with my other children, it's now a place we continue to cuddle and read stories, snuggle and enjoy each other.
 Before you go, be sure to sign up for my FREE newsletter. Until next time!


