In my
last post, I was finally able to tell you that our farmhouse bedroom remodel is complete, and I showed you how we created faux plank wall. This time, I want to show you how we dressed up the room with trim, architectural details, and bling. tee hee hee.
As a refresher, this is how our room started out over a year ago. We have never taken so long on remodel, but as I mentioned last time, a premature baby can throw a few kinks in your plans (it's all good). With God's help and provision this dream has been complete.

DIY TIME
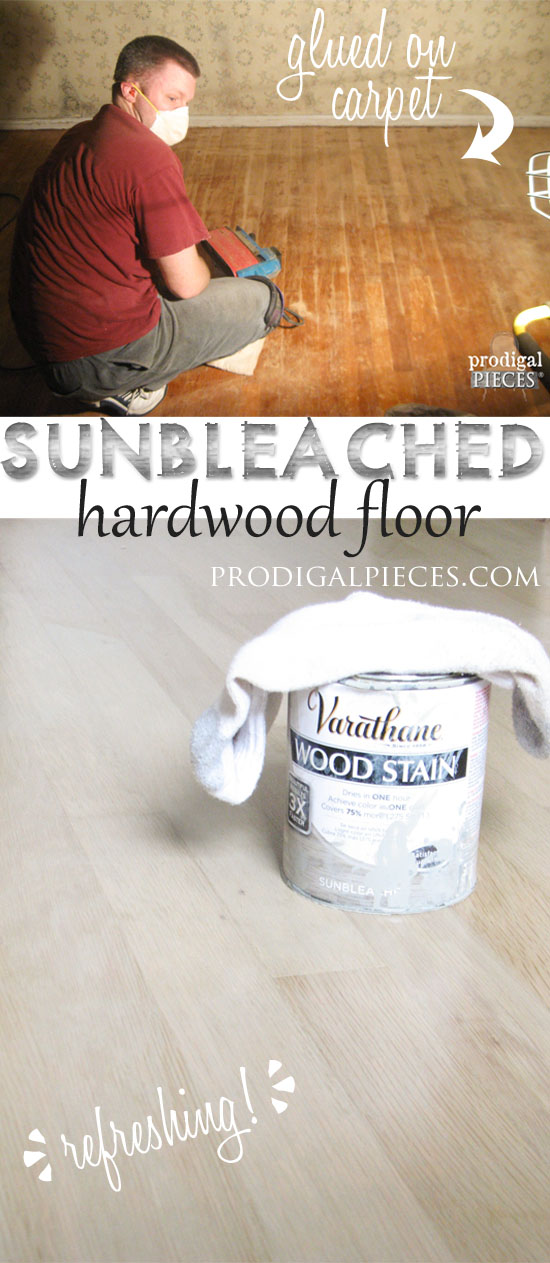
We're obviously hoping to achieve a farmhouse look with a French twist in our bedroom, so after we
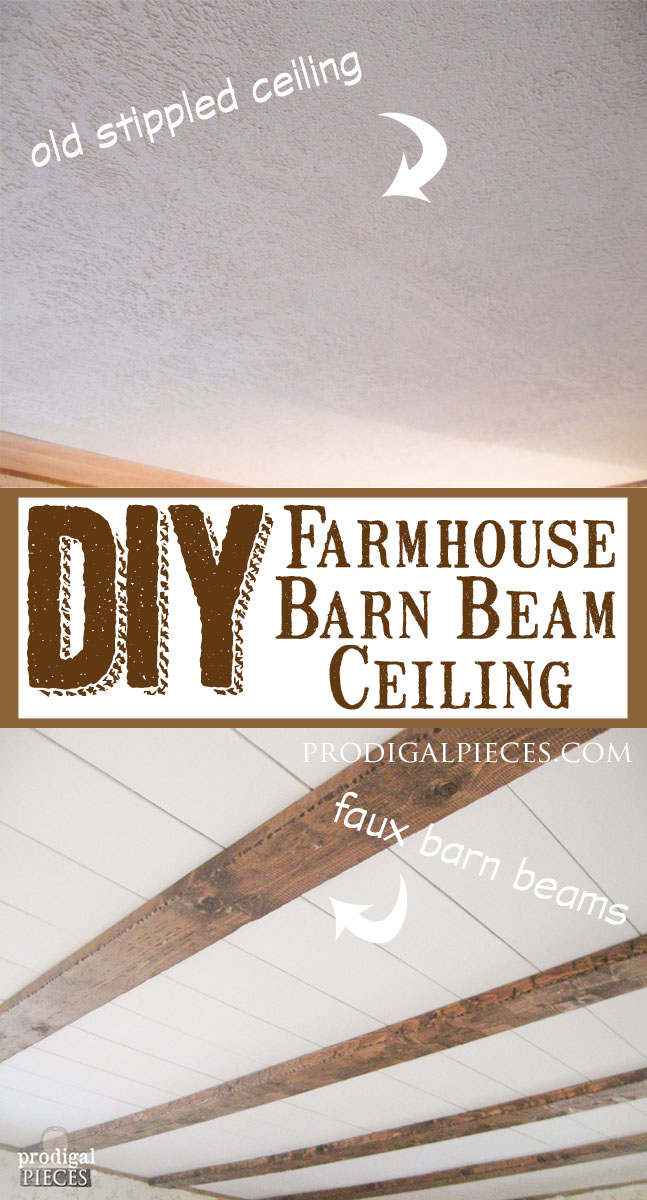
sunbleached our floors, added a
faux barn beam ceiling, and created the
plank wall, it was time to add the finishing details.

We are able to implement new framing on our windows with some basic box store pine. Yes, it is freezing outside at this point, but when you live in the northeast, this is how you roll.

Again, our brad nailer was the most handy tool to have in this entire project and made everything so much easier than pre-drilling and having to use a nail set to finish the nails.
We have to work in evenings and on weekends, so this is what most days it looks like in our room.

Now we've created that dramatic look by increasing the size of the window. Also, it's not so boxy as the other trim we had. I am in love with it! It totally suits the farmhouse bedroom we're after.

TREATMENTS
Once the trim was painted it was time to hang the window treatments. Can you believe I had to look a this for over a year? Yes, those are bed sheets on my windows and it was time for them to come DOWN.

I had seen a pair of curtain rods on Pinterest that were retractable and hinged. I wanted something exactly like that so I could get full light in my room. After scouring Craigslist, Etsy, and eBay, I found two sets of these antique rods on eBay and snatched them up. I'm now kicking myself because I sold the other set in order to pay for the purchase. tsk. Ah well. These lovelies hung out in my closet for year, and I couldn't wait to see them in action.

DIY DECOR
I am a thrifter to the end and found all my curtains, and window coverings at Goodwill. Over time I've accumulated quite the stash of lace tablecloths, and what-nots, and I truly believe this can be done for any room in your home if you're patient enough. I took apart a couple large lace panels to create smaller sets to go on each curtain arm, then added a valance in front of that.

To make the room dark at night, I simply hung a layer of room-darkening fabric behind the curtains. No sewing involved, just cut and hook on the rings. Easy-peasy to do. I like it!
Next up was the addition of the rest of our floor baseboard and then our ceiling trim between the barn beams.

Now a few weeks ago on social media, I showed this curbside treasure I had found about two years ago while junking during city cleanup. Any guesses as to what it is before I tell you?

It's the face of an antique piano that sadly someone had beat up into pieces in able to get it out of their house. The horror!! I have held this in my stash for quite some time, waiting for the right use. Finally, my bedroom is it.
CLOSET
Our home is a souped up manufactured home (a Gunnison home), and the design was one of a quick build. No intricate details, but a home nonetheless. Our closest flow from ceiling to floor with no break and originally had two stinking heavy door that passed in front of each other, moving side to side. They constantly came off their track and were sooo annoying! We removed them ages ago and have had a gaping opening since.

Guess what. That cast-off piano face was the perfect side to add some architectural detail to the top and bring the height of the closet down (aka. look normal). So with a bit of trimming and a casing made, we were able to put it right in with ease.

BAM! I like it and my pulse quickens at the fact my farmhouse bedroom is coming together! After a little paint and glazing, this piece has new life.


After adding a barn beam curtain rod and some thrifted curtain panels to the closet, I made some curtain tie-backs with an antique door knob.

I found these hand-forged nails in an assortment of goodies I purchased for
my online shop, and instantly knew I would be implementing them into my farmhouse bedroom.

ACCENTS

With some barn wood from my stash, I created a coat hook to hang by my bed. A girl needs a place to hang her pj's, right?

PILLOW LOVE
I love to sew and wanted to create a comfy spot on our bed to lean back and read with the kids without a headboard, so I grabbed two 2' x 2' pillows my mom had given me and stitched up some pillow cases. With some twill and cotton fabric, it was pretty simple to create a tie-top cover. While thrifting I always grab hand-crocheted pillows for wherever in my house, so I had plenty collected to stash my bed. Sooo comfy...

While on the bed I had pillows, I needed something above the bed to add to that blank wall space. One of the many benefits of reworking furniture is you get to keep odds and end for yourself. When I did this
custom Queen Anne dressing table for a client, I just couldn't get rid of the old mirrors when they were replaced with new.

I decided to mount them in a frameless fashion above our bed. Thankfully with JC's help is was smooth to do.

Now for some jewelry, some bling, some LIGHTS.
Our room was wired to a dedicated outlet and turn it off and on when entering a room. One problem, because of the layout it wasn't possible for us to put a lamp in that dedicated outlet. So, for 13 years I've had to creep into my room in the dark (which in Ohio is most of the year). JC and I wanted to be able to enter the room and turn on a light. Not too much to ask, right?
LIGHTING
About a year ago, I won a pair of matching antique brass chandeliers. One of them was going in my room. The other is yet to be determined if it'll be for our girls' room or my kitchen. These poor things had to hang out for a year in my basement. tsk.

We planned to center the chandy, so after adding the correct wiring setup, we just cut a hole. Then, we brace the opening to hold the fixture. Don't you love our audience?

BLING
Some bling never hurt a girl, right? My husband and I are so tickled we can walk in our farmhouse bedroom and have light. Amaaazing, isn't it?

I bet you're aching to see the grand finale...see it
HERE!
To get these DIY tips & tricks in your inbox, be sure to
sign up for my newsletter. PLUS, you will get your FREE Furniture Buying Checklist and special discount to
my shop. Until next time!

Also, other posts from earlier in the farmhouse bedroom remodel:


 We are able to implement new framing on our windows with some basic box store pine. Yes, it is freezing outside at this point, but when you live in the northeast, this is how you roll.
 I had seen a pair of curtain rods on Pinterest that were retractable and hinged. I wanted something exactly like that so I could get full light in my room. After scouring Craigslist, Etsy, and eBay, I found two sets of these antique rods on eBay and snatched them up. I'm now kicking myself because I sold the other set in order to pay for the purchase. tsk. Ah well. These lovelies hung out in my closet for year, and I couldn't wait to see them in action.


 After adding a barn beam curtain rod and some thrifted curtain panels to the closet, I made some curtain tie-backs with an antique door knob.
 With some barn wood from my stash, I created a coat hook to hang by my bed. A girl needs a place to hang her pj's, right?

 We planned to center the chandy, so after adding the correct wiring setup, we just cut a hole. Then, we brace the opening to hold the fixture. Don't you love our audience?


