Do you know that old country tune by Gene Autry, "Back in the Saddle Again"? I told you when I work that music comes to mind. This ditty became my theme song as this is the first big project I've done since my shoulder injury. The challenge ahead of me was to take this damaged dresser and give it a new look to bring it back to life. This time I'm going with a farmhouse chic finish. Check it out... Queen Anne Dresser Before Makeover by Prodigal Pieces | www.prodigalpieces.com This was another one of those cases where I purchased something sight unseen. ahem. I had the guy deliver this and another gem I have yet to show you, and I was a bit miffed when I looked close. I was told it was in "great shape and only had minor wear". Damaged Dresser Top | Prodigal Pieces | www.prodigalpieces.com First, take a look at that back right corner - that's a whole chunk missing! Not only that, but one of the drawers had been haphazardly rebuilt. So, lesson learned again. I honestly can't complain too much. I have two great pieces delivered for free from a half hour away . Bonus: they're solid, quality pieces. They just need some love.

LET'S BEGIN

Now, normally I just use a tiny bit of wood filler, but a hole of that size requires the big guns come out to play. This is when I make use of auto-body filler. (dramatic music begins to play...) I aint' foolin' when I say this stuff is hard as a rock when cured and works wonders on major damage like the spot I have. Autobody Filler to Repair Badly Damaged Furniture | Prodigal Pieces | www.prodigalpieces.com Like any epoxy, you mix different ratios together to get a highly stinky concoction and you have a small time window to work quickly. Slap it on leaving some extra to sand down, and let it cure about 20 minutes. However, there are also plenty of other blemishes that require the wood filler. Last, once all was cured, I sanded with my favorite sander and got a new top to work with. Corner of Damaged Dresser Repaired with Autobody Filler | Prodigal Pieces | www.prodigalpieces.com

PAINT TIME

Whew! Time to move on to the fun part. (enter in theme music for the day) 
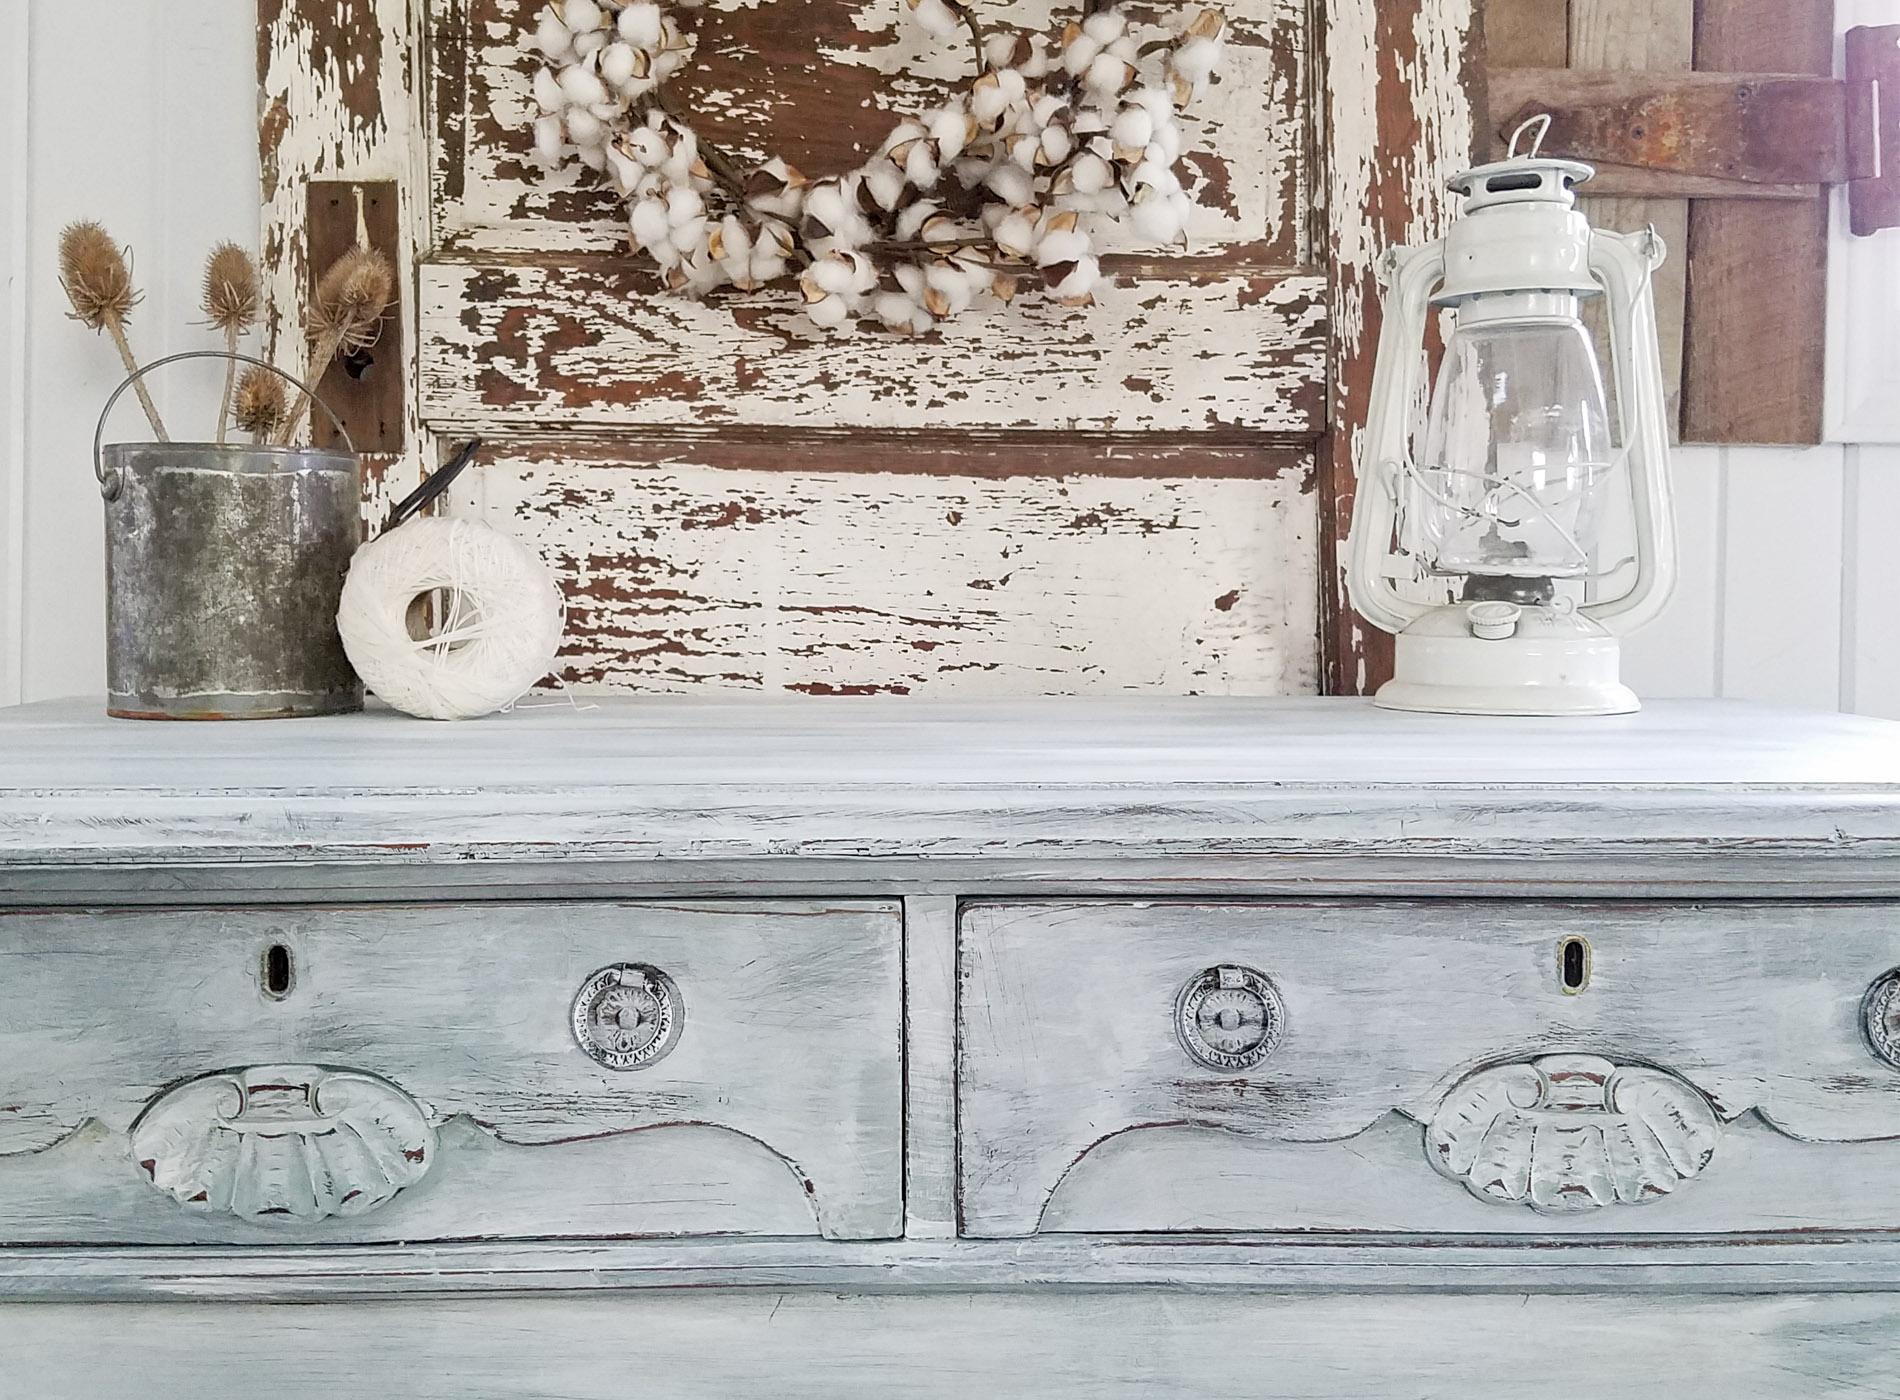
Because I'm after a farmhouse chic look with layers and time-worn appeal. I start out by applying a base coat of DecoArt Chalky Finish paint in Vintage. Then, once the first coat is dry I am ready for the second layer. I only use one coat of the Vintage color and then am going to use a whitewash. Thankfully, I ab able to knock out this second layer of whitewash in no time. All I need to do now is distress and topcoat with my handmade furniture wax.

THE REVEAL

Finally, are you ready to see the after? I'm lovin' the new look... Damaged Dresser Made New with Farmhouse Chic Makeover by Prodigal Pieces | www.prodigalpieces.com Top of Farmhouse Chic Dresser Made New by Prodigal Pieces | www.prodigalpieces.com It was missing casters, so I dove into my ginormous caster stash and plugged some in. Queen Anne Leg on Farmhouse Chic Dresser by Prodigal Pieces | www.prodigalpieces.com Likewise, the distressing helps to create that time-worn look we're after and really brings out the details of the dresser. Rustic Farmhouse Chic Dresser by Prodigal Pieces | prodigalpieces.com And you know I love playing with my vignettes. Love me some trashure! (see what I'm talking about HERE). Collected Vignette of Rustic Items | Prodigal Pieces | www.prodigalpieces.com As with most of my projects, this lovely new addition can be found in my online store if you would like to make it your own.

Shop Prodigal Pieces | shop.prodigalpieces.com prodigalpieces

SHARE

Additionally, pin and share this project so that others can learn a few tips and tricks to help them make their house a home. Get the Farmhouse Chic Look with this Tutorial by Larissa at Prodigal Pieces | www.prodigalpieces.com Next up, I'll be working on this antique radio cabinet. I am so tickled to show you my secret plan. tee hee hee. Head HERE TO SEE. Antique Radio Cabinet Before Makeover by Prodigal Pieces | www.prodigalpieces.com To get these DIY tips & tricks in your inbox, be sure to sign up for my newsletter. Until next time! blog signature

Also, more farmhouse chic makeovers for you:

Outdated Child's Wooden Chest Gets Farmhouse Chic Makeover by Prodigal Pieces | www.prodigalpieces.comFarmhouse Style Bedroom Makeover with Trim and Bling :: Part 2 by Prodigal Pieces | www.prodigalpieces.com


Sherry Stuifbergen

Shared publicly - 2016-12-01 10:14:51

Glad you are "back in the saddle." I will look for Zibra brushes. Is your newsletter your blog I get? Always look forward to your new creations. You have heard the term, "make a silk purse from a sow's ear"....that is what you do. You make things good again, in a different way.

Larissa

Shared publicly - 2016-12-01 12:23:49

Thanks, Sherry! It feels good and to be back at in adjusted form. On to more!

Marie from The Interior Frugalista

Shared publicly - 2016-12-01 19:02:14

Glad your shoulder is feeling better, Larissa and that you're back in the saddle. I MUST try these Zibra brushes, you definitely have me intrigued. The dresser is beautiful - pinning to share.

Cheryl

Shared publicly - 2016-12-01 19:55:30

Wow, I love what you did! Great job on fixing it, I will have to keep that in mind if I need to repair big holes. Can't wait to see what you do to your next project!!

Becky

Shared publicly - 2016-12-02 09:28:13

Yea!!! Shoulder pain is seriously miserable! Glad you're through the worst of it! Lovely refinish here! Beautiful job.

Larissa

Shared publicly - 2016-12-02 13:40:21

Thanks, Marie! I'm even more excited about my shop and the new exciting things to come. I think this is the Lord's leading in more ways than one. :)

Larissa

Shared publicly - 2016-12-02 13:40:40

Thanks, Cheryl! I'm having fun on both accounts. :)

Larissa

Shared publicly - 2016-12-02 13:42:28

Thanks, Becky! Yes, soreness is minimal, but definitely a new way of living.

Susie

Shared publicly - 2016-12-02 14:46:57

So happy to hear you are doing better now. A shoulder injury is tough. And your piece is beautiful, too! A wonderful way to kick off your "back in the saddle" theme. Love the brushes, too. Will give them a try very soon. All the best for the holidays! Susie from Chelsea Project

Larissa

Shared publicly - 2016-12-02 15:04:37

Thanks so much for stopping by, Susie. Yes, the shoulder, I'm afraid, is going to be an issue for a long time and I'm going to have to adapt. On to new learning and projects!

Marti VanRavenswaay-Waddell

Shared publicly - 2016-12-17 23:22:24

I am just silly excited to learn we love the same brushes!!! Makes me feel like I've improved my status of amateur crafter just the tiniest bit!! I'm always very impressed with everything you create or re-create and enjoy your blog immensely. I learn something from every posting! You are such a talented individual!!

Larissa

Shared publicly - 2016-12-18 05:37:54

awww...you are too sweet, Marti! Yes, I don't believe you have to spend big bucks to get quality finishes. It's part the user knowing how to manipulate it, the paint, and, of course, those bristles. :)

Melinda

Shared publicly - 2017-09-08 19:26:43

How long does it take to go from start to finish on a dresser this size.

Cheryl B.

Shared publicly - 2017-09-08 22:24:07

I love how you fully explain thongs learning so much I love your ideas..

Larissa

Shared publicly - 2017-09-11 05:39:41

This one had the bad damage on the top, so it took a little more time, but around 6 hours.

Larissa

Shared publicly - 2017-09-11 05:39:55

That's music to my ears, Cheryl. Thank you!

Sign Up To Comment