 If you remember, I asked JC (aka. husband) which piece he would have left on the curb. He said the chest. {{gasp}} In spite of the obvious, I replied that it was the best one. Consequently, that made him look closer, and he saw that it was oak It was only then he sorta understood my take on it.
 Is it a hot mess? Yes. Does it have potential. YES!! However, the funny thing is that I have sworn off fussing with painted pieces for various reasons I have described over the last few years. Generally they can be a pain!
HOT MESS
This one definitely could look to be that way. First, the top is pretty beat up. Then, the rail laying on top is from the back which has a missing panel or two. Last, there's the bottom drawer. You know you've been around the block when you're stoked that the drawer is even there. haha. Aside from the broken bottom, it also has a broken escutcheon. Thankfully, I can fix both no problem.
 If you're curious how I determine what's worth working on, sign up for my newsletter to get my FREE furniture guide. Not only will you receive that freebie, but a discount to my shop too.
I just love when an antique piece still has markings to tell of its maker and history. Does that penmanship give you goosebumps too?
If you're curious how I determine what's worth working on, sign up for my newsletter to get my FREE furniture guide. Not only will you receive that freebie, but a discount to my shop too.
I just love when an antique piece still has markings to tell of its maker and history. Does that penmanship give you goosebumps too?

DIY TIME
Well, you know my sander had to come out to play, right? There is at least two coats of paint on this and they are oil base. First, green is under the brown paint, but it does make for a fun backdrop. So much so it reminds me of chocolate mint. tee hee. After I got the top sanded down, I decided to restore this farmhouse chest of drawers to a proper height. The holes for the casters were there, but missing the hardware. No problem. At any rate, I always say it pays to have a stash. My antique caster loot came to the rescue yet again. Aren't these gorgeous?
 Meanwhile, my youngest son jumped in to help me remove the hardware that was incomplete. He's not new to this DIY game and wanted to try out his new tools. You can see his past projects HERE. Gotta love a cute helper!

ALMOST DONE
Finally, I can see the light at the end of the tunnel. I use my circular saw and Rip Cut Jig to cut a new drawer bottom. Easy-peasy. With this in mind, I decided to wait until later to install it. Next, it's time to repair that broken escutcheon. Over the years, I've used this trick many times seen in my tutorial HERE. Further, polymer clay can be your best friend in furniture repair. See how I had a broken piece and made a replica using a cast to make a mold. Then, I used the mold to make a new escutcheon.
 I won't say my replica was perfect as it was a bit thicker than the original, but it still works.
However, before I tackle the bottom of my farmhouse chest of drawers, I add several coats of Hemp Oil to nourish and seal the top.
I won't say my replica was perfect as it was a bit thicker than the original, but it still works.
However, before I tackle the bottom of my farmhouse chest of drawers, I add several coats of Hemp Oil to nourish and seal the top.

PAINTING
In between coats of hemp oil, I began the fun part...PAINT. Yahoo!! I chose to use this dark navy blue. This is the same paint I use on my Antique Store Sign Tutorial.
 It's a gorgeous milk paint in navy that will add the dimension I'm after.
 The look I'm after is utilizing those previous paint layer and the chippy, rugged look of milk paint. Nevertheless, dare I say my heart starts to palpitate at this point? eep!
 I'm amazed at the adhesion of the milk paint to the oil base paint - no bonding agent needed. Plus, I wanted it to come off in a natural look anyway. Last, I install the new drawer bottom using my nailer, lined the drawers, and added the new hardware.

THE REVEAL
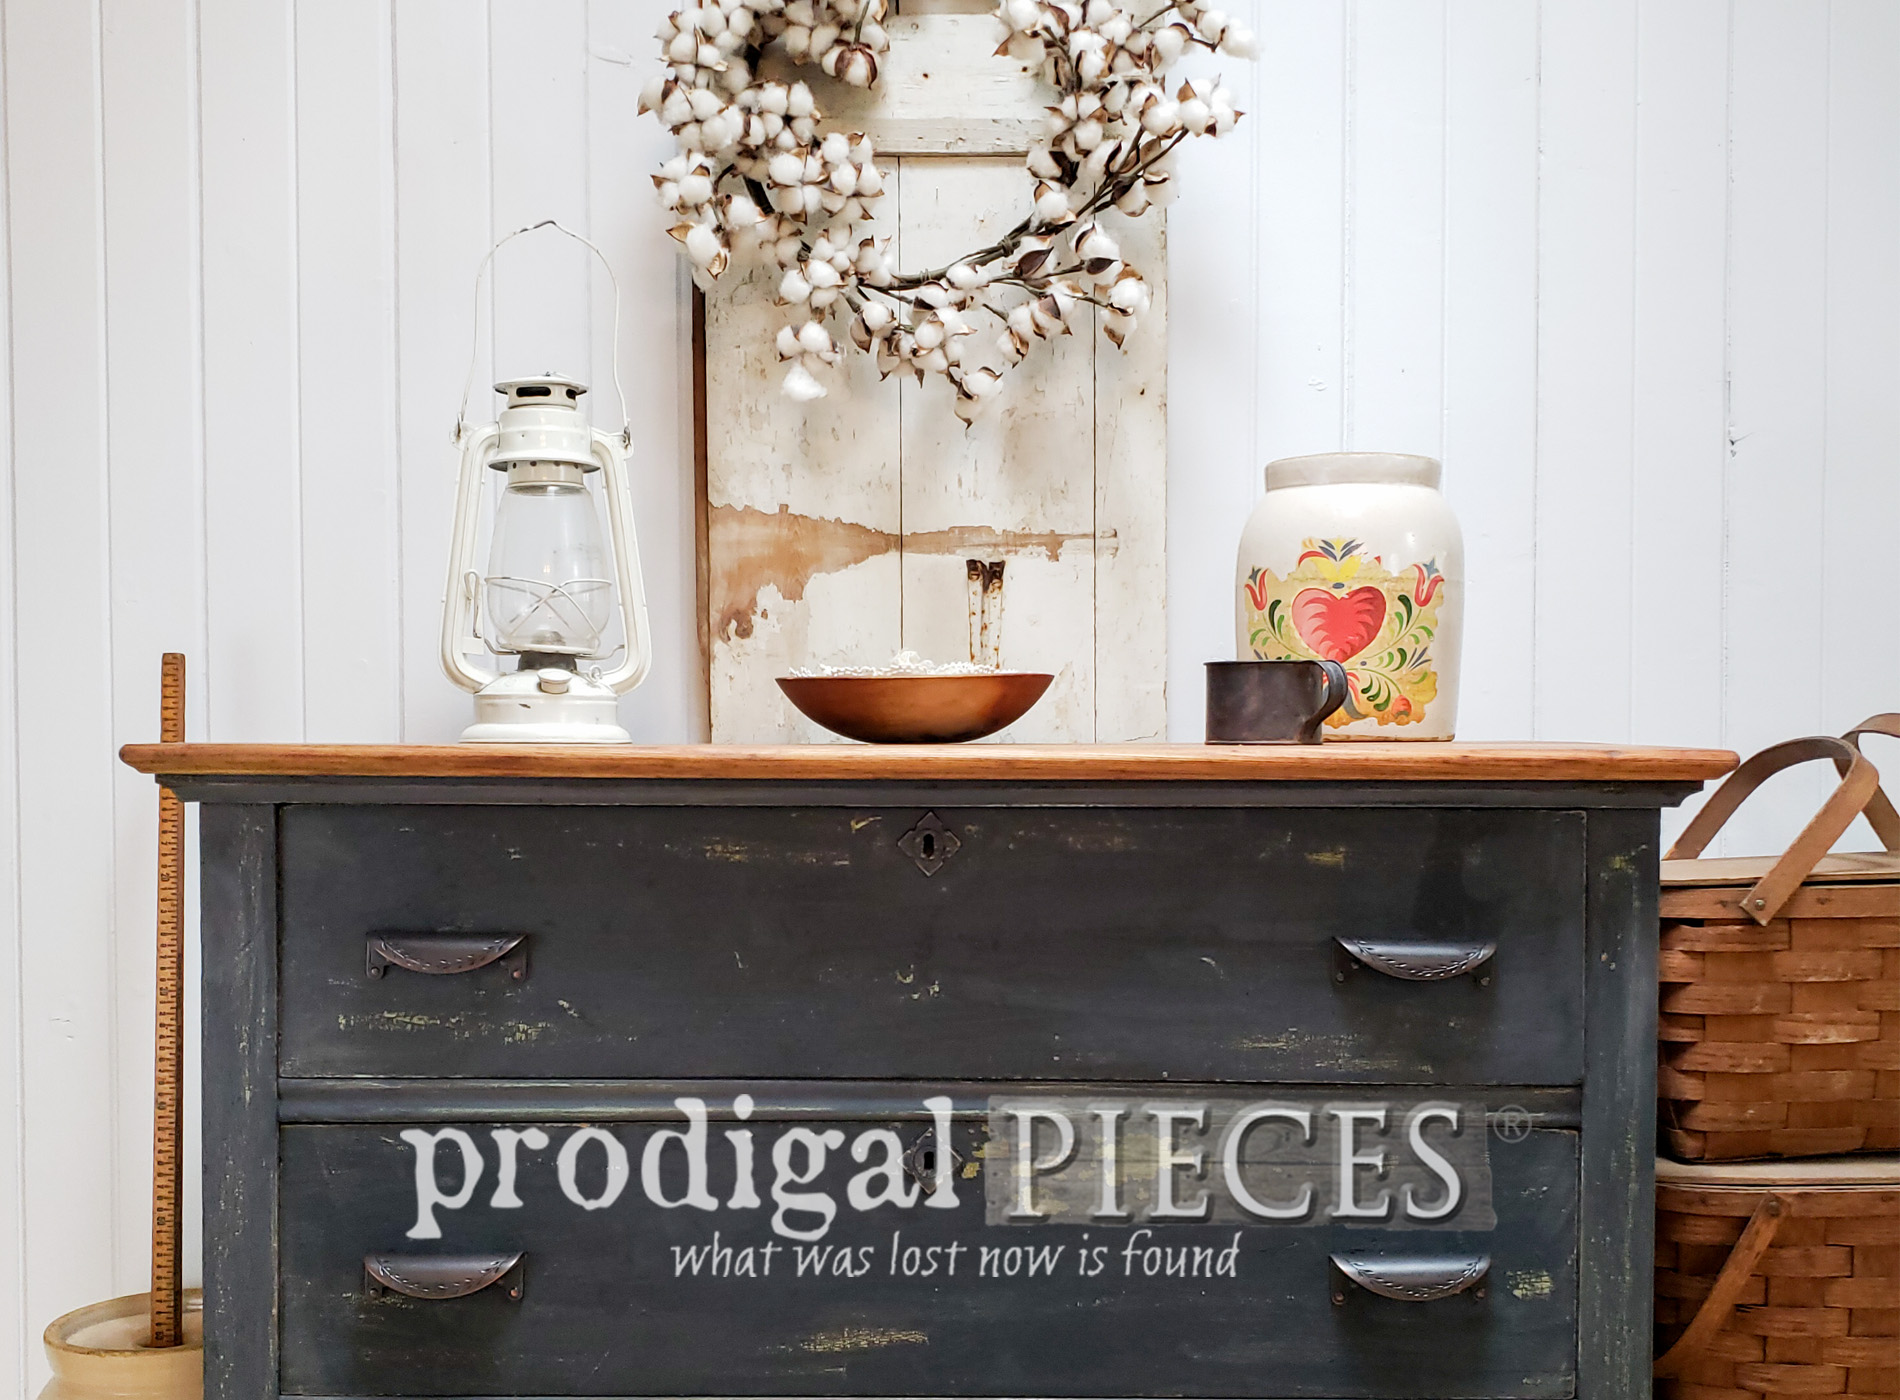
While I could have applied more, I only used one coat of the milk paint, distressed a bit, and it's good to go. Are you ready to see my farmhouse chest of drawers made new? I am!!
 The hardware was an exciting find as it emulates the simple farmhouse style I'm after. Although the pulls come in several finishes, I thought this oil rubbed bronze gave the warm feel I was after.
 And, how about that chippy paint. I love it!! Even the top came out better than I had expected. There is still a couple of deep scratches, however, I choose to embrace them as part of the story.

 Also, the drawer lining is a vintage Waverly pattern that I scored the same time as the ticking stripe wallpaper at a garage sale. Brand new in package rolls for a buck...yes, please!!

 And, how 'bout 'dem casters?!? I am swooning over here. Likewise, notice the worn finish of the paint too. While I could have used the hemp oil to saturate and deepen the color, but I wanted time-worn.
SHARE
Finally, I hope my curbside find turned farmhouse chest of drawers has inspired you. If you'd like to own this chest, you can purchase it from my online shop, We deliver to your door both in the U.S. and any country upon request.[metaslider id=30251]
 Additionally, pin and share my farmhouse chest of drawers makeover. Help inspire others to rescue cast-off pieces too.

UP NEXT
Up next, I'll am taking a break from the curbside haul. I am so excited to show you how to make use of those glass jars leftover after you've forced your bulbs for spring. See their new life HERE. Afterward, I'll be back to the curbside makeovers with those dining chairs after that. Stay tuned!

- Antique Pie Crust Table Makeover
- Hunting Scene Shelf Makeover
- Farmhouse Chest of Drawers
 Check out these fantastic projects my friends have created to inspire you:


In addition, more DIY projects like my farmhouse chest of drawers:

