
DIY TIME
Let's get this DIY wall pocket party started! It's simple with a few tools. I'm using what I have in my arsenal, but really you can use basic tools to create this too. As I go, I share what tool you could use instead of a big toy. My motto is toolsoverjewels. TERMS OF USE: If you want to create a wall pocket or stockings, you agree to the following: it cannot be shared or distributed for monetary gain in any way, it may not be modified in any way, and you may not claim the work as your own.Supplies & Materials:
- 10 paint stir sticks
- 5 - 9" slats
- 2 – 8 ½” slats
- 2 – 8 ¼” slats
- 1 – 7” slat
- scrap wood - I'm using 3 - 1" x 4" pine cut into 6 ¾” lengths
- >wood glue
- saw - miter saw, miter box, coping saw...whatever you want
- stapler and/or nailer
- jig saw
- HomeRight Quick Finish Paint Sprayer
- Small Spray Shelter
- Turn Table
- sawtooth hanger
- eye hook (optional)
- paint (optional)
- stain (optional)
- linen (or similar) and twine for stockings (optional)
- fabric transfer paper (optional)
*post sponsored by HomeRight (see full disclosure)
STEP 1
First, decided what size you want your DIY wall pocket to be. I wanted to maximize my stash as well as the full amount of wood on the stir stick. So, I began by cutting 5 sticks into 9" lengths. Then, I wanted to bring them to a raw state, so I sanded off the text. However, you could totally leave the ruler side for a fun effect. Just sand of the other text, if so.
STEP 2
Next, I use two scrap pieces of 1" x 4" pine to cut two pieces 6" long with my jigsaw that have a slight taper to them. Feel free to design it in any way you like. Don't have a jigsaw? You can use a coping saw easily too. Also, I add a bottom pieces with wood glue and a nailer or pre-drill. Attach screws from outside into the bottom piece. The back slats are not attached yet - see next step.

STEP 3
In the above picture, the slats are not attached. There may be a better way to do this, but this is what I found that worked. First, I use my nailer and wood glue to attach slats to the bottom edge piece. You can also use a basic heavy-duty hand-held stapler with ½" staple too.
STEP 4
With those slats sort of loosely attached, we add two supportive slats to the back at the top and bottom edge. These are the 8 ½” slats you cut. Notice I use wood glue and nails to the bottom edge, and only to the outer edge of the top slat.
STEP 5
Flip it over and add a third slat 7" slat directly in front of the upper slat on the back.
STEP 6
Last, add the two 8 ¼” slats to the front. Feel free to place them where you like.
FUN PART
At this point, you can finish however you like. For my wall pocket, I wanted a time-worn look. To accomplish that, I choose to use this aged wood reactive stain. This stuff is awesome! No stinky chemicals, no wiping off yucky, and it's done in flash. I then load up the canister and spray away. Can you imagine how long it would take to stain each side of every slat and corner by hand?


STOCKINGS
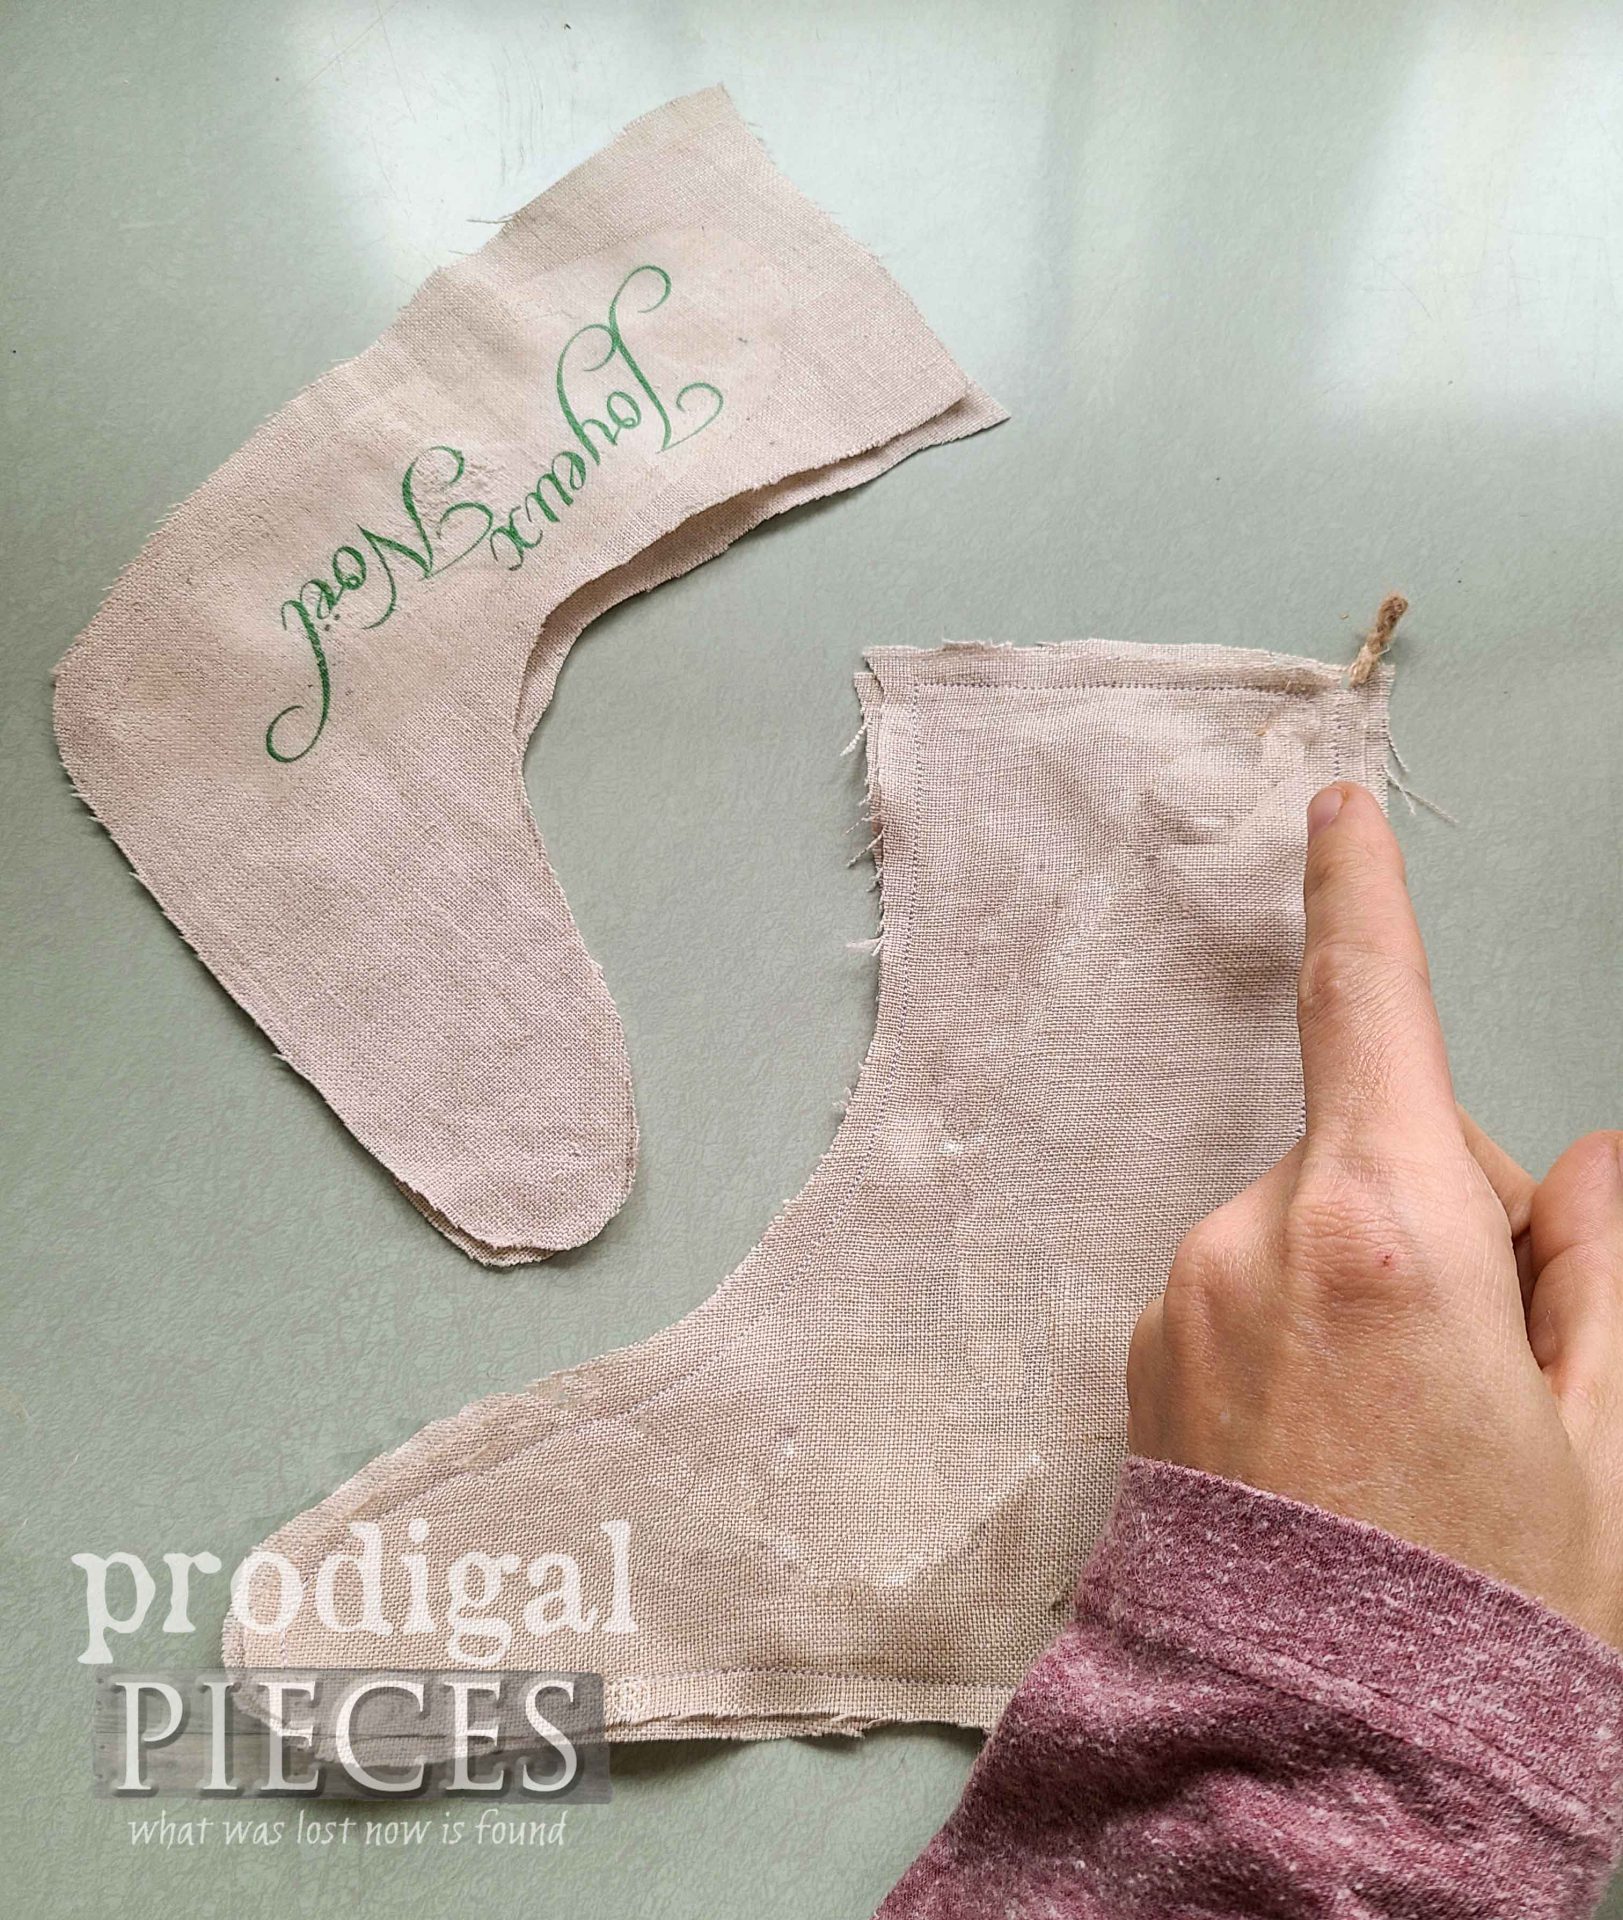
One last thing. It's totally optional, but oh so cute! I wanted to add a cozy touch to my DIY wall pocket. So, I decided to whip up some primitive stockings using up some scrap linen fabric and twine. You could use burlap, muslin, cotton...you get the idea. However, if you'd rather not have stockings, just skip ahead. First, print out the FREE STOCKING TEMPLATE HERE. Note: I made a template for a larger version (which I used), and a slightly smaller version. This isn't rocket science, so I'll keep it brief.- Cut out the paper template with seam allowance left in tact
- Trace template onto fabric for four stockings (2 for each stocking)
- Cut out the fabric stockings
- Add any text or design using fabric markers, paint, or a iron transfer
- Place stocking pieces right sides together with 12" length of twine tucked inside and end sticking out corner. Stitch around the stocking leaving a 2" opening on the heel side for turning.
- Turn out first stocking with twine string. Next, take first stocking and insert it between the two remaining stocking pieces with the other end of the twine sticking out top corner as before.

- Stitch around as before, leaving a 2" opening again.
- Turn out the inside as well as pulling out the first stocking.
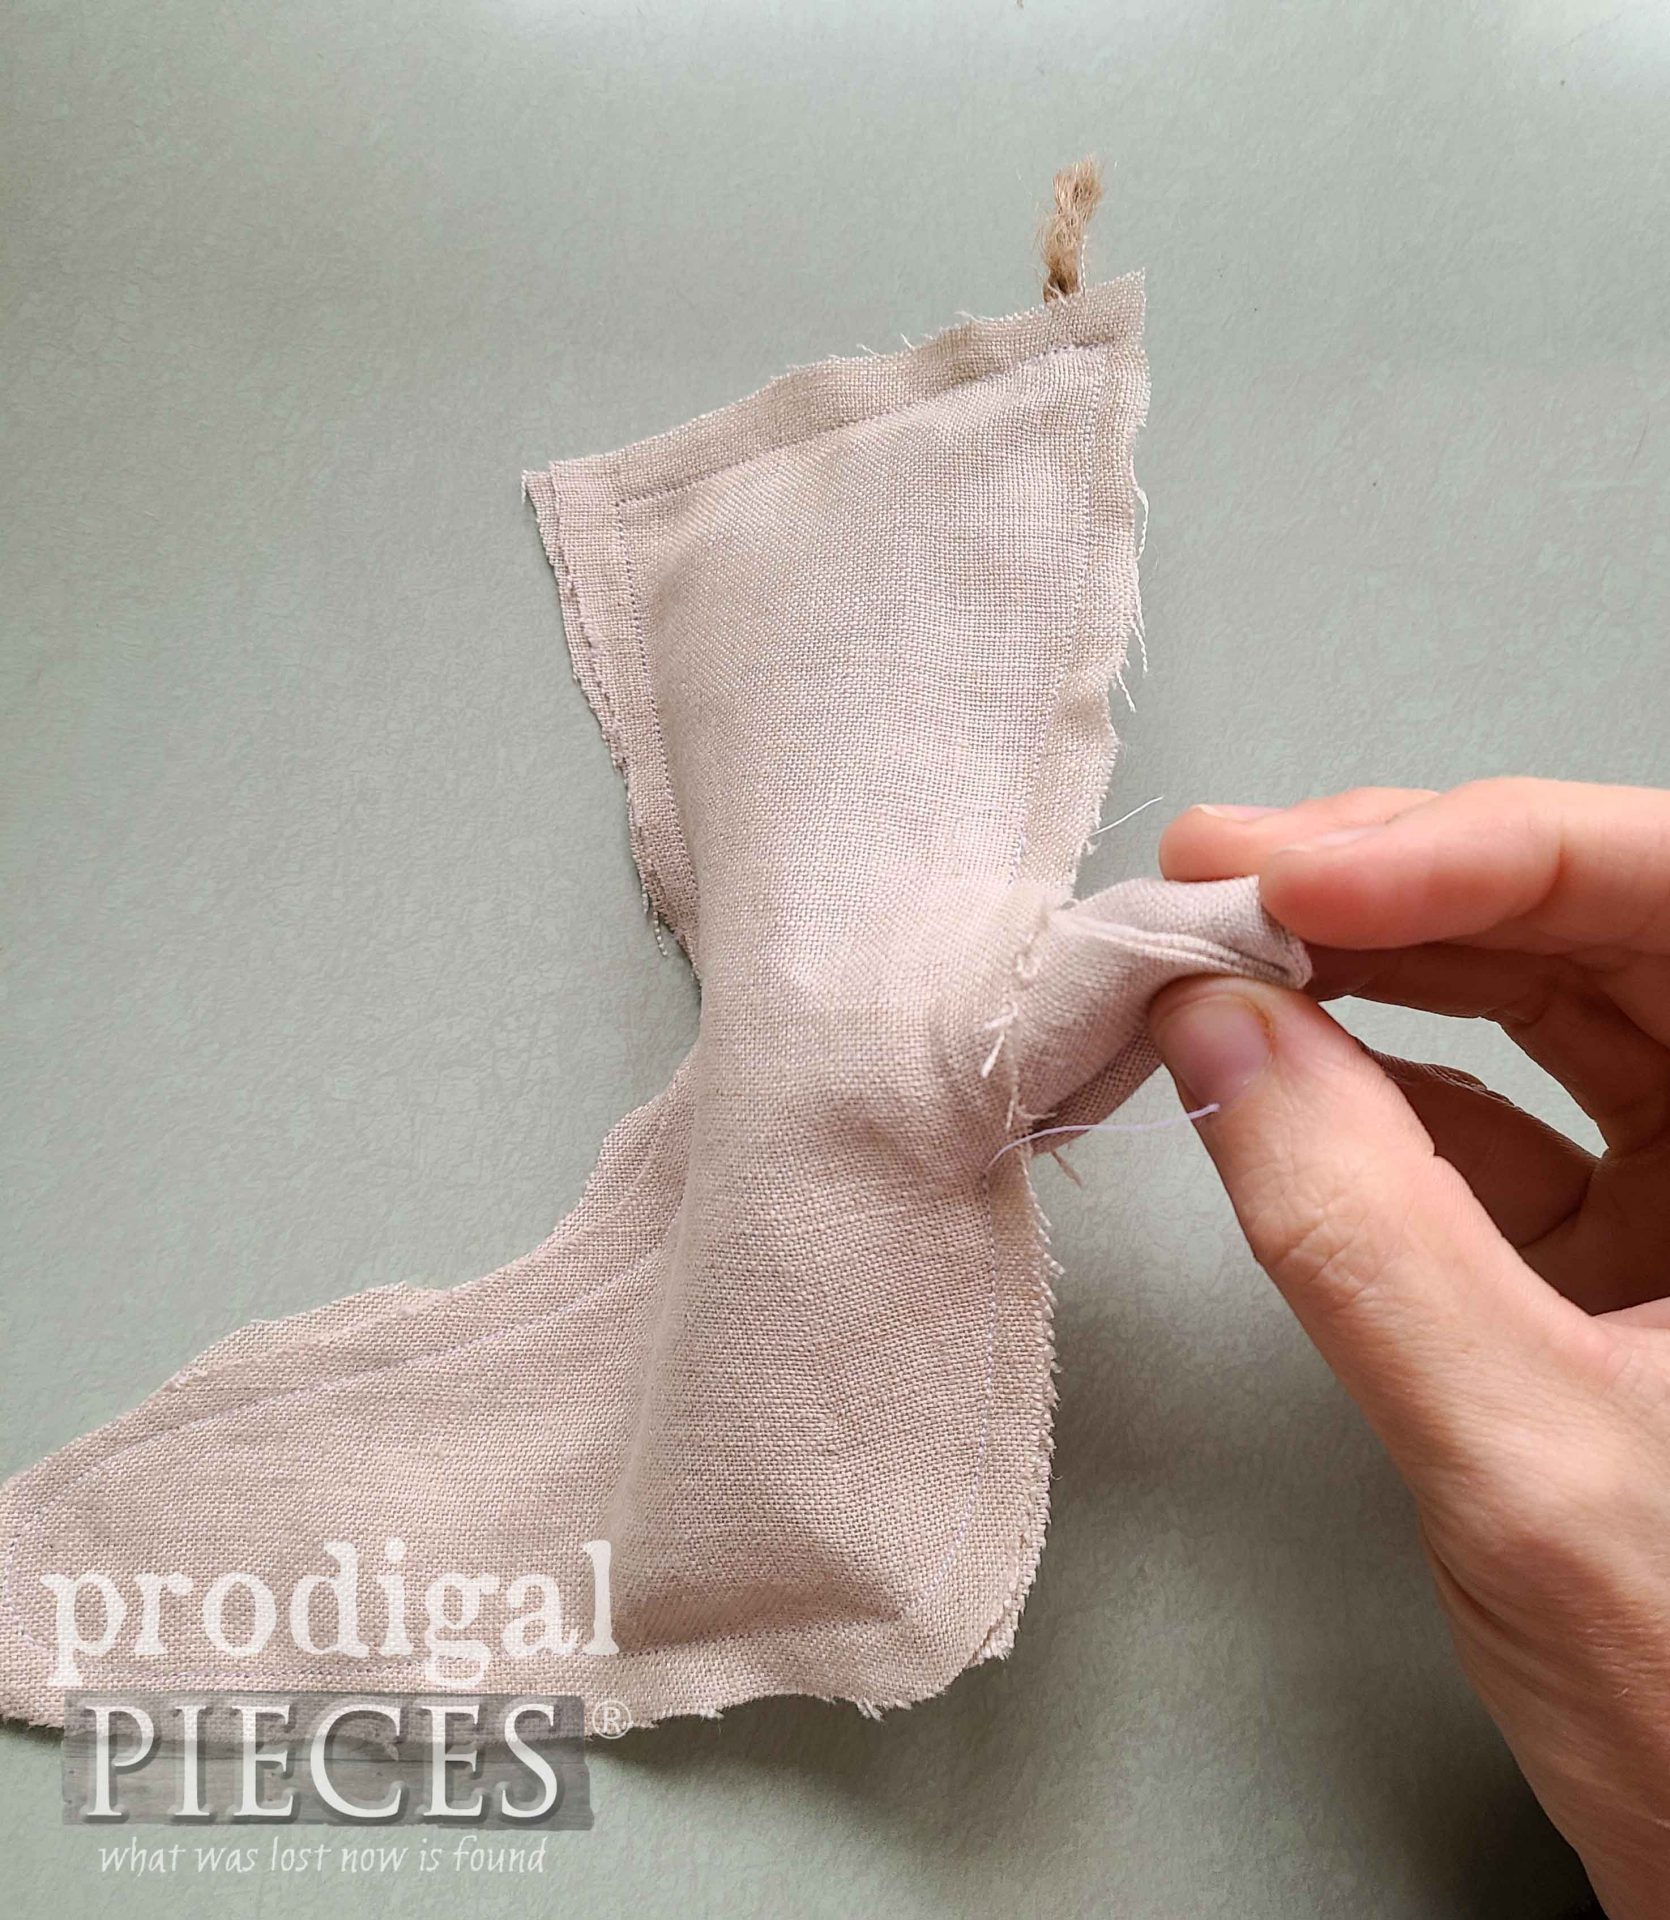
- Now you have a set that just needs stuffed and stitched closed. Yay! Last, use a hidden ladder stitch to close them up.

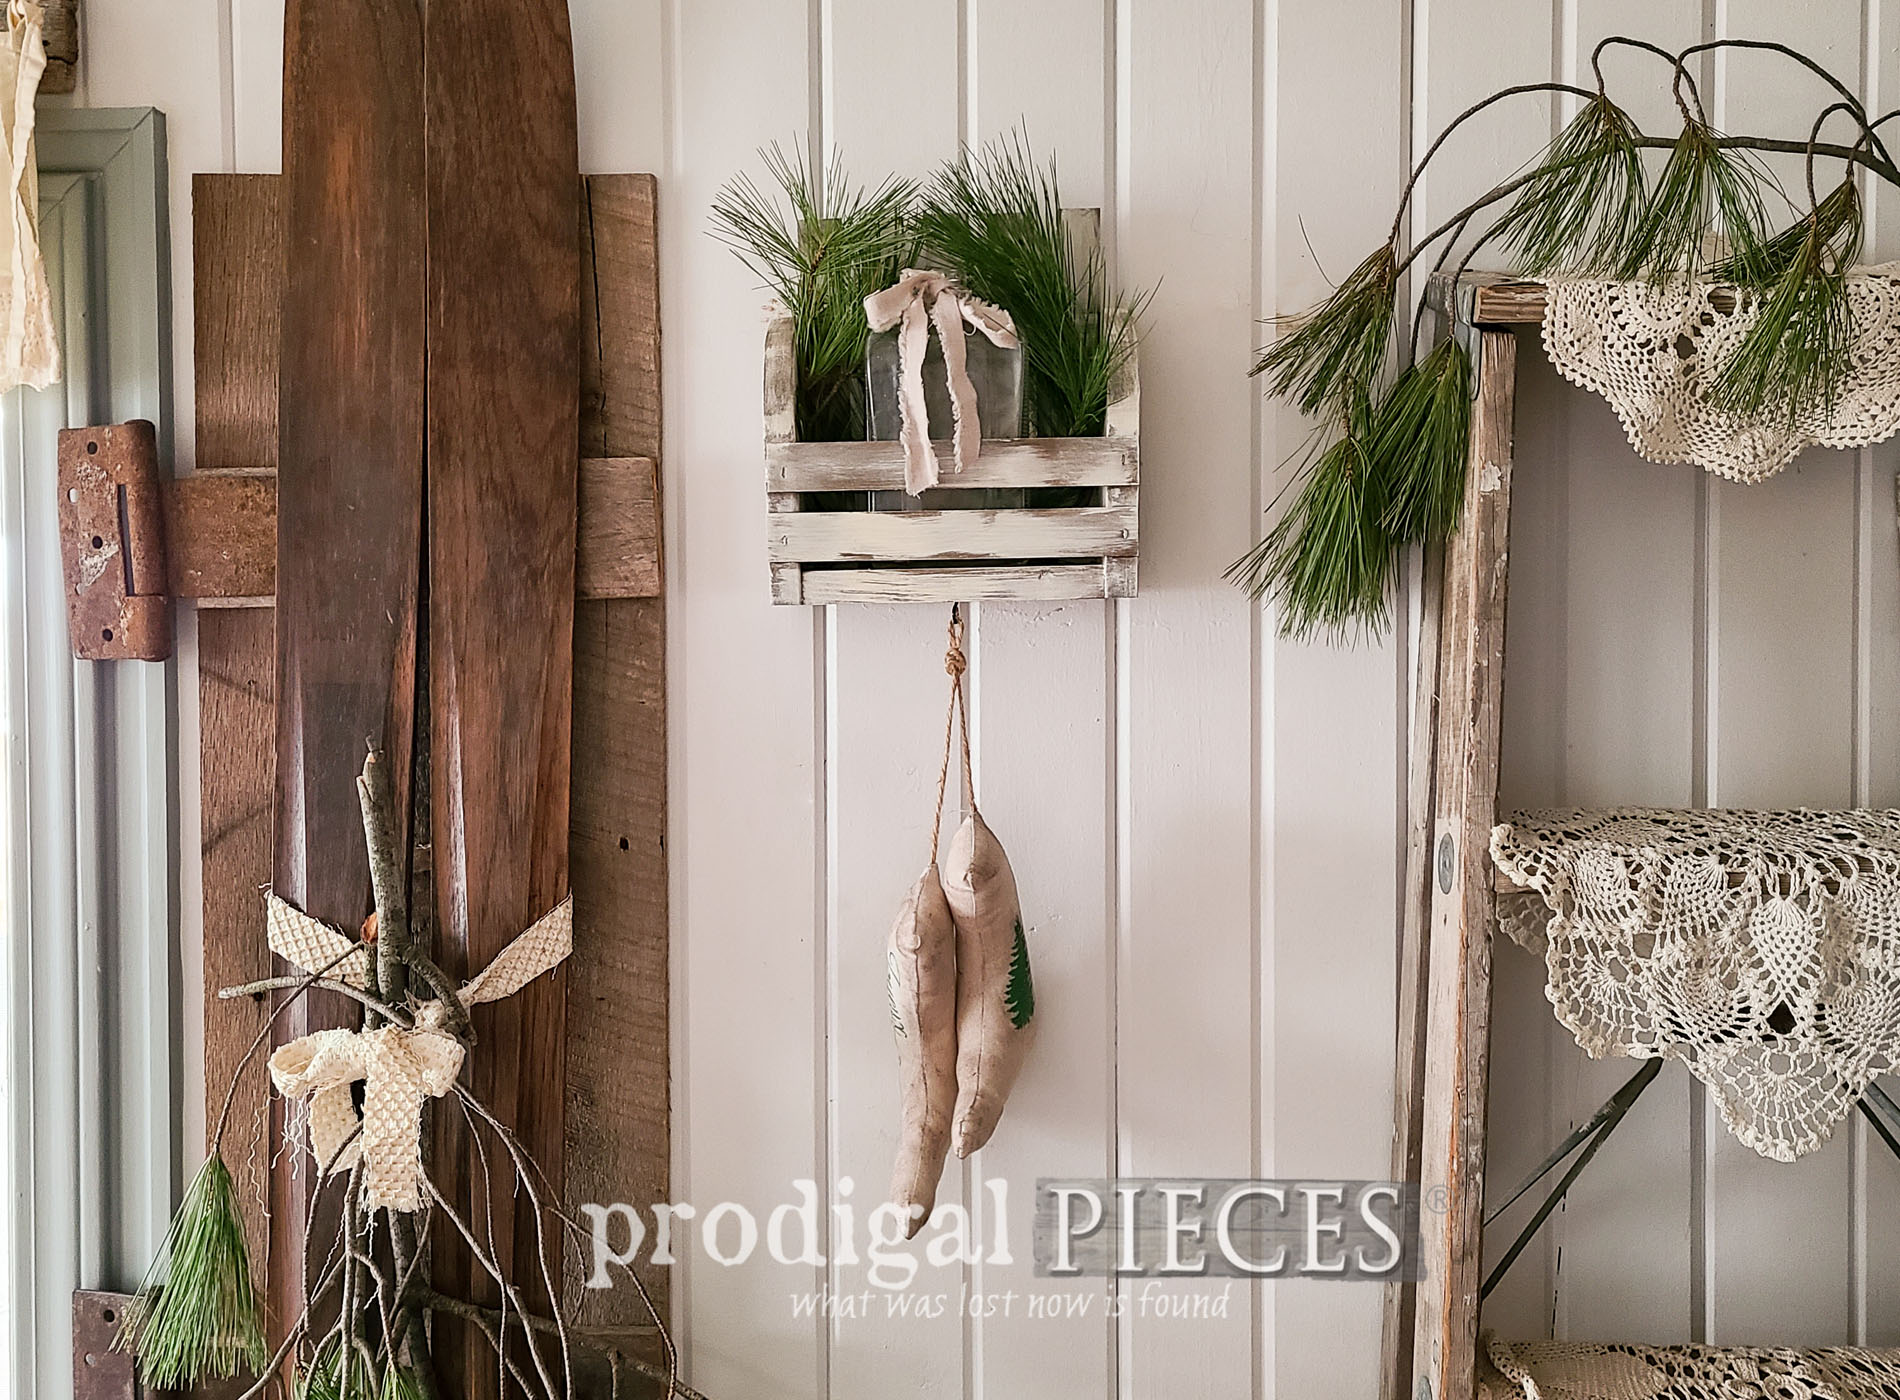
THE REVEAL
After our fun work, we finally have our DIY wall pocket with funky farmhouse stockings to boot! tee hee!
 Also, notice I added my sawtooth hanger to the top back horizontal slat, and an eye hook to the bottom for the stockings. In addition, I tucked in a vintage apothecary bottle with linen bow. I'm super excited that I found white pine tree branches that had fallen that were a perfect fit.

 In addition, the wall pocket and the stockings both received a dark wax dressing for an aged appeal. I do think I'm smitten!

 So tell me...how would you decorate your wall pocket? If you're not handy and want this wall pocket, you can find it and more available in my online store.

SHARE
Above all, do pin and share my DIY wall pocket to encourage others to have fun with their paint stir sticks. tee hee! Up next, I'm diving into my thrifted wood decor stash to give this a fun new look. See this vintage goodie redone HERE.
 Before you go, be sure to sign up for my newsletter. Until next time!

Also, more holiday fun like this DIY wall pocket:

