Do you feel the need for change? I think it's safe to say we all go through a time where our homes and lives need a switcheroo of sorts. I'm in the mode for various reasons and am working on making a new home story. Per my usual, I don't go out and buy box store goods but rather prefer to watch the story evolve with finds and projects. Today, I'm taking this circus rooster-ish piece and sharing with you my DIY textured vase tutorial.

This vase is definitely colorful filled with the dollar store blooms (price tags still intact) and is not my style.

For me, I'm into the more muted earth tones with oodles of texture. Hence the focus of this simple mini makeover today that I aim to inspire you into trying it yourself. Sound good? Let's go!
PREPPING IS KEY
As you can imagine, much of the end result relies on the prep work. Painting a room - no problem. However, getting ready to paint takes an elaborate more amount of time than the actual painting does. That's the case when taking a smooth surface like this metal vase and adding texture. To make this workable for all, I have the steps outlined as well as a short video tutorial for you too.
First, I empty out the vase and find some gems like these mini magnets. Aren't they cute?

Then, I use rubbing alcohol to wipe down and rub off grime from the outside of the vase. Say buh-bye to the rooster! And for the record, I do enjoy chicken as you can see in
my chenille bedspread chicken. {{wink,wink}}

If you'd like to give this a try, here are the supplies you will need:
Tools & Supplies
- a vase - or anything you want to change up (wall art, furniture... you get the idea)
- rubbing alcohol or a water/vinegar mixture with 2:1 ratio
- soft rag
- spackling or similar product like topping joint compound, texture medium, etc.
- putty knife or similar
- paints for base layer and adding layers
- paint brushes (old and artistic)
- waxes for dimension (optional)
- misting bottle
Then, once clean, I begin by adding my base layer. While I'm using a soft white, you can use any color you like. The idea is layering so consider that when making your choice.

After one coat and letting it cure, I start to add my texture by using a putty knife and spackling to spread it on thin enough it will adhere, but not too thick it's chunky. (see video for details)

As soon as I apply, I take an old paintbrush and stipple the spackling.

This particular spackling will dry white when cured. Then, when you see it is fully white, take your putty knife or similar object and knock down the spackling gently to remove the pokey peaks. Also, in case you want to create a design instead, you can use a stencil and your spackling as I show in these projects:
LAYERING PAINT
Next, this is where you can leave it as-is or go even more into texture with color. Since muted tones are my preference most of the time, I choose this combo of slate green, golden brown, and oatmeal.

Again, as I show in my video demo, I use a fine misting bottle to lightly spray the vase before and during me adding paint. Not only can you start with whatever color you choose but also go as big or bold as you want.

Last, but not least, I use a dark wax for just a touch of more depth.


TEXTURED TREAT
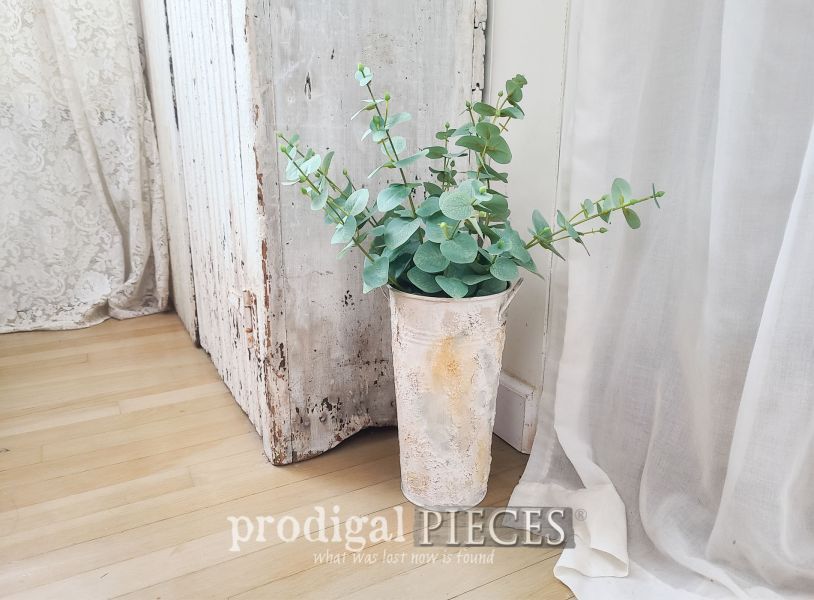
Essentially, I toned down the circus and brought a breath of fresh air for my home. Here's my DIY textured vase with a new "old" look.


Yes, I could have just painted the rooster and left it go, but what fun is that? Of course, the texture and colors make me smile.


Additionally, yes, I did fill the vase with more faux eucalyptus which I tend to remedy when I finish reworking my living room where this is replacing my
trashure nail barrel.


Stay tuned to see what I've been up to!
SHARE
Now, it's your turn. Tell me, would you have bought this vase in the first place? If so, what would you do with it? Leave some comment love on my work below and pin and share to inspire others. Let's give DIY a try!

Before you go, be sure to
sign up for my FREE newsletter. Until next time!

 PINTEREST | EMAIL
While you're at it, here are more mini makeovers like this DIY textured vase tutorial: