If you've known me for long, you know that I love anything that grows, and anything old or holding a story. My heart has long since been taken by succulents. So, what better combination for me than succulents and old barn wood? mmm... Today I'm sharing how this set of mini crocks got me started on an adventure to create a DIY succulent centerpiece. Stay with me now...

Aren't they cute?? I just had to have them. My first thought was to plant succulents in them, but then I decided to do something a little more fun. First, I made these cuties into candles using my beeswax and wicking. I have a thing for beeswax as I use it in
my furniture wax as well as
my natural body products.

It can't be easier...just melt up the wax in an old slow cooker, pour into prepared container that has suspended wicking, let cure. Also, no paraffins or junk in the to pollute your home, just pure, sweet, honey-scented goodness. I prefer to source the beeswax from my local apiary to support them. One thing I don't do is burn store-bought candles...too toxic. However, I do have a few of the LED battery-operated types too.
DIY TIME
While the wax is curing, let's get our build on to make this fantastic planter. Feel free to use fresh or faux, or any plant of your choice. The centerpiece would look fabulous in weddings, any special occasion and everyday use indoor or out. Mine will be on my dining table through the winter months.

I built mine using reclaimed barn wood and old pallets, but you can build yours from new stock too. Here is what you'll need to make your own DIY succulent centerpiece.
 TERMS OF USE:
 when you create this planter, you agree to the following: it cannot be shared or distributed for monetary gain in any way, it may not be modified in any way, and you may not claim the work as your own. This planter design cannot be used as decor in a store either online or brick and mortar. Thanks for complying!
Materials:
- 2 - bin pulls
- 1 - 1" x 8" x 30" board
- 2 - 1" x 4" x 30" boards
- 2 - 1" x 4" x 8" boards
- 3 - 1" x 3" x 25" boards (or shorter if you prefer more soil space)
- 2 - 1" x 3" x ? (you will measure this as you build)
- 4 scrap pieces of wood for feet
- 1½" screws
- 1½" brads
- ¾" crown staples
- black plastic sheeting - a 38" x 22" piece
- 5 votive candles or DIY candles
- assorted fresh succulents, or any kind of plant
- small gravel or stone
- succulent soil
- sheet moss (or moss of your choice)
- stain or paint (optional)
Tools:
- miter saw or circular saw or jig saw
- table saw
- nailer
- stapler
- drill / drill bits
- tape measure
- quick square
- utility knife
- pencil
- garden trowel
- garden gloves
When visualizing this planter, think of it as you're building a box within a box. The smaller one is upside-down inside the larger one. Make sense?

For my inner box, I used pallet wood which is thinner. Therefore, your dimensions may need adjusted to fit if you are using new wood. Simply adjust the length to give you ample space to plant your succulents. Also, I added feet to my planter using some bits of scrap wood to create air circulation since it will be exposed to the elements. Whether you add them or not is totally up to you.
Step 1
Once you have your boxes built, center the smaller one inside the larger one and trace around the smaller perimeter.

Step 2
Remove the inner box to reveal your tracing. Next, using your drill and bit, make holes just inside the traced line so that they will be centered in your box sides.

Step 3
note: You may want to read Step 4 before proceeding in case you are using back-mounted hardware. First, using your screws, get them started into the holes on the back side of your centerpiece. This will make attaching the smaller box easier. You may need a buddy for this next part. Then, lay the large box on its side while holding the smaller box in place, and sink in the screws to attach. I did it by myself, so it isn't super hard.
Step 4
Attach your hardware to the ends. I chose these gorgeously rustic cast iron bin pulls.

However, this hardware was front mounted. So, if your hardware requires attaching from the back, you may want to do that before attaching your inner box.

Step 5
Take your piece of black plastic sheeting and lay it over your planter. This is the same sheeting I used in
my other DIY planters, so one roll goes a long way.

Using your utility knife, cut the plastic from one end of the other starting and stopping ½" before the ends. Then, make two diagonal cuts to each corner as shown below. However, you may prefer to use scissors if you don't want to score your wood. I didn't care as my wood is rustic anyway.

Step 6
Pull the plastic down over the inner box as shown. There will be excess plastic, but we'll take care of that in a minute.

Step 7
Fold the plastic to the back side of each side to line up where you like it and staple. You're almost done with your DIY succulent centerpiece! woot, woot.

Step 8
The fun part - time to fill!! {{applause}} First, begin by adding your gravel of choice. I used our limestone as I have a 5-ton pile on my driveway for our upcoming fire pit makeover. However, feel free to use whatever you want, just be sure to add some. In addition, succulents do not like wet "feet" (soggy roots), so be sure to put your stone in first, then fill the rest with your soil.

Step 9
Last, fill with your choice of succulents (fresh or faux), flowers, even just use rocks if you would rather skip the plant part. So many possibilities at this point. Then, once your plants are in, take your moss and tuck it in here and there. Not only does it add texture, but also helps the soil retain moisture.

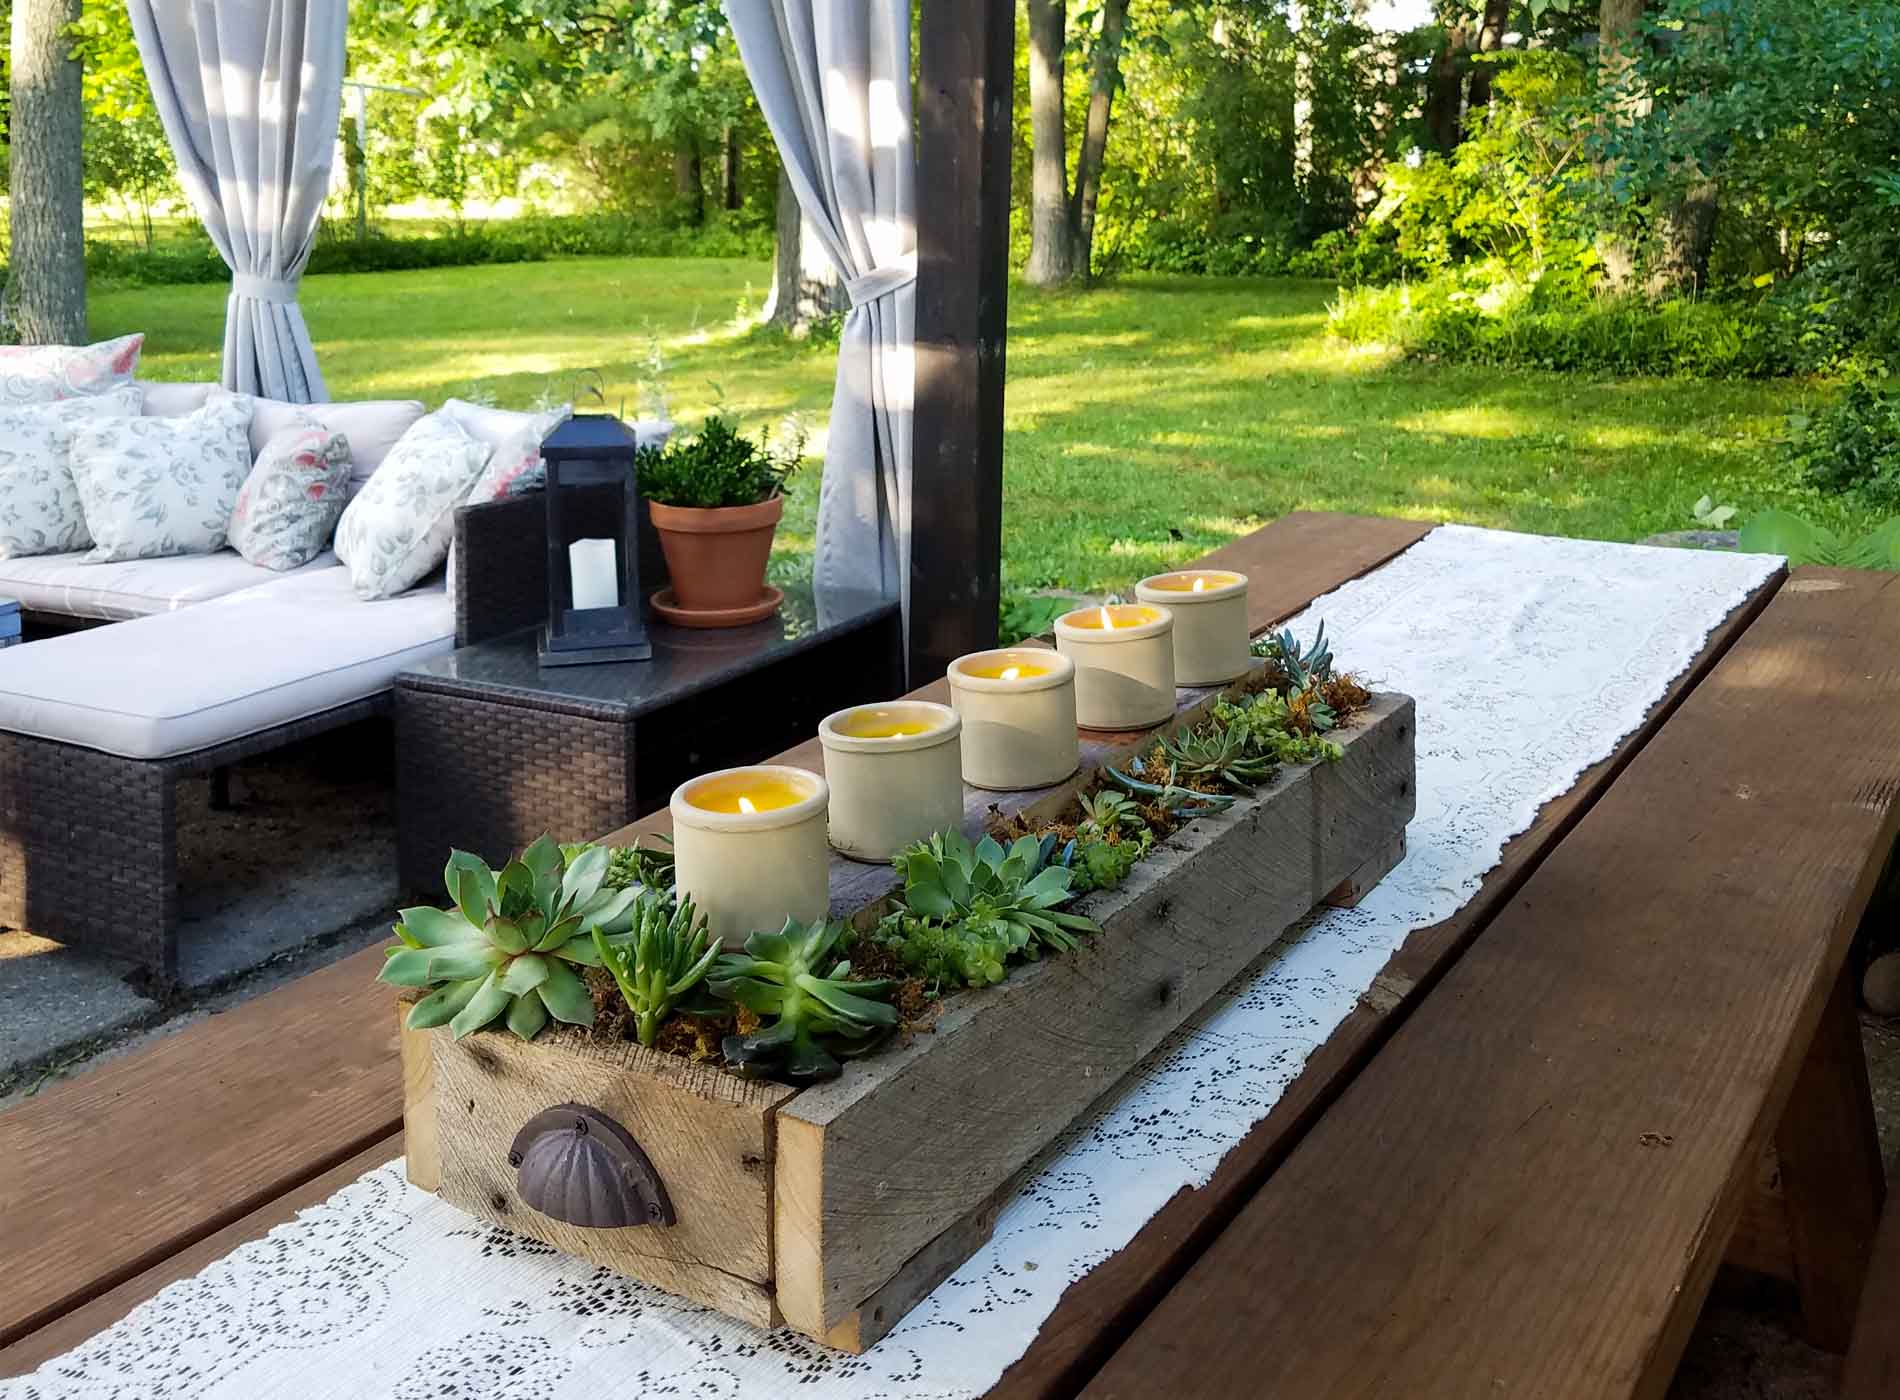
THE REVEAL
And... your DIY succulent centerpiece is done!


The candles add that special ambient lighting that I adore, and the scent is oh so good. As for upkeep, I typically plant my succulents in a terra cotta container, but these will do fine in this environment. Just poke a finger in to check for moisture and keep it more on the slightly moist side.

Additionally, this was such fun to create, and I can't wait to watch it fill in and grow. Also, the added bonus to succulents is how easy they are to propagate. Just pinch off a leaf and lay it on potting soil and watch it go! So fun to share with friends and neighbors.

Finally, my DIY succulent centerpiece is getting us ready to reveal to you our latest backyard makeover coming up next week. We have much to do and can't wait to share! See our latest addition
using pallets in this post.
PATIO FUN
Doesn't everyone need a 12 ft table to seat family and friends? We love it. If you haven't seen our patio makeover from the start, be sure to stop over and see. (
see the start HERE)

Funny to think this all started with me finding those cute mini crocks. Me thinks I should stay away from the thrift store, eh? hahaha...NEVAH.
In addition, do pin and share this DIY succulent centerpiece to inspire others to DIY too. Not only is this a versatile piece, but you can do so many things in your home.

After that, our firepit is next on the hit list. mwahahaha... See
the after HERE.

Before you go, be sure to
sign up for my newsletter. Until next time!

Also, more projects like my DIY succulent centerpiece:


 Aren't they cute?? I just had to have them. My first thought was to plant succulents in them, but then I decided to do something a little more fun. First, I made these cuties into candles using my beeswax and wicking. I have a thing for beeswax as I use it in my furniture wax as well as my natural body products.
 It can't be easier...just melt up the wax in an old slow cooker, pour into prepared container that has suspended wicking, let cure. Also, no paraffins or junk in the to pollute your home, just pure, sweet, honey-scented goodness. I prefer to source the beeswax from my local apiary to support them. One thing I don't do is burn store-bought candles...too toxic. However, I do have a few of the LED battery-operated types too.
 I built mine using reclaimed barn wood and old pallets, but you can build yours from new stock too. Here is what you'll need to make your own DIY succulent centerpiece.
 TERMS OF USE: when you create this planter, you agree to the following: it cannot be shared or distributed for monetary gain in any way, it may not be modified in any way, and you may not claim the work as your own. This planter design cannot be used as decor in a store either online or brick and mortar. Thanks for complying!
 For my inner box, I used pallet wood which is thinner. Therefore, your dimensions may need adjusted to fit if you are using new wood. Simply adjust the length to give you ample space to plant your succulents. Also, I added feet to my planter using some bits of scrap wood to create air circulation since it will be exposed to the elements. Whether you add them or not is totally up to you.


 However, this hardware was front mounted. So, if your hardware requires attaching from the back, you may want to do that before attaching your inner box.

 Using your utility knife, cut the plastic from one end of the other starting and stopping ½" before the ends. Then, make two diagonal cuts to each corner as shown below. However, you may prefer to use scissors if you don't want to score your wood. I didn't care as my wood is rustic anyway.


 The candles add that special ambient lighting that I adore, and the scent is oh so good. As for upkeep, I typically plant my succulents in a terra cotta container, but these will do fine in this environment. Just poke a finger in to check for moisture and keep it more on the slightly moist side.
 Additionally, this was such fun to create, and I can't wait to watch it fill in and grow. Also, the added bonus to succulents is how easy they are to propagate. Just pinch off a leaf and lay it on potting soil and watch it go! So fun to share with friends and neighbors.
 Finally, my DIY succulent centerpiece is getting us ready to reveal to you our latest backyard makeover coming up next week. We have much to do and can't wait to share! See our latest addition using pallets in this post.
 Funny to think this all started with me finding those cute mini crocks. Me thinks I should stay away from the thrift store, eh? hahaha...NEVAH.
In addition, do pin and share this DIY succulent centerpiece to inspire others to DIY too. Not only is this a versatile piece, but you can do so many things in your home.
Funny to think this all started with me finding those cute mini crocks. Me thinks I should stay away from the thrift store, eh? hahaha...NEVAH.
In addition, do pin and share this DIY succulent centerpiece to inspire others to DIY too. Not only is this a versatile piece, but you can do so many things in your home.
 After that, our firepit is next on the hit list. mwahahaha... See the after HERE.
 Before you go, be sure to sign up for my newsletter. Until next time!


