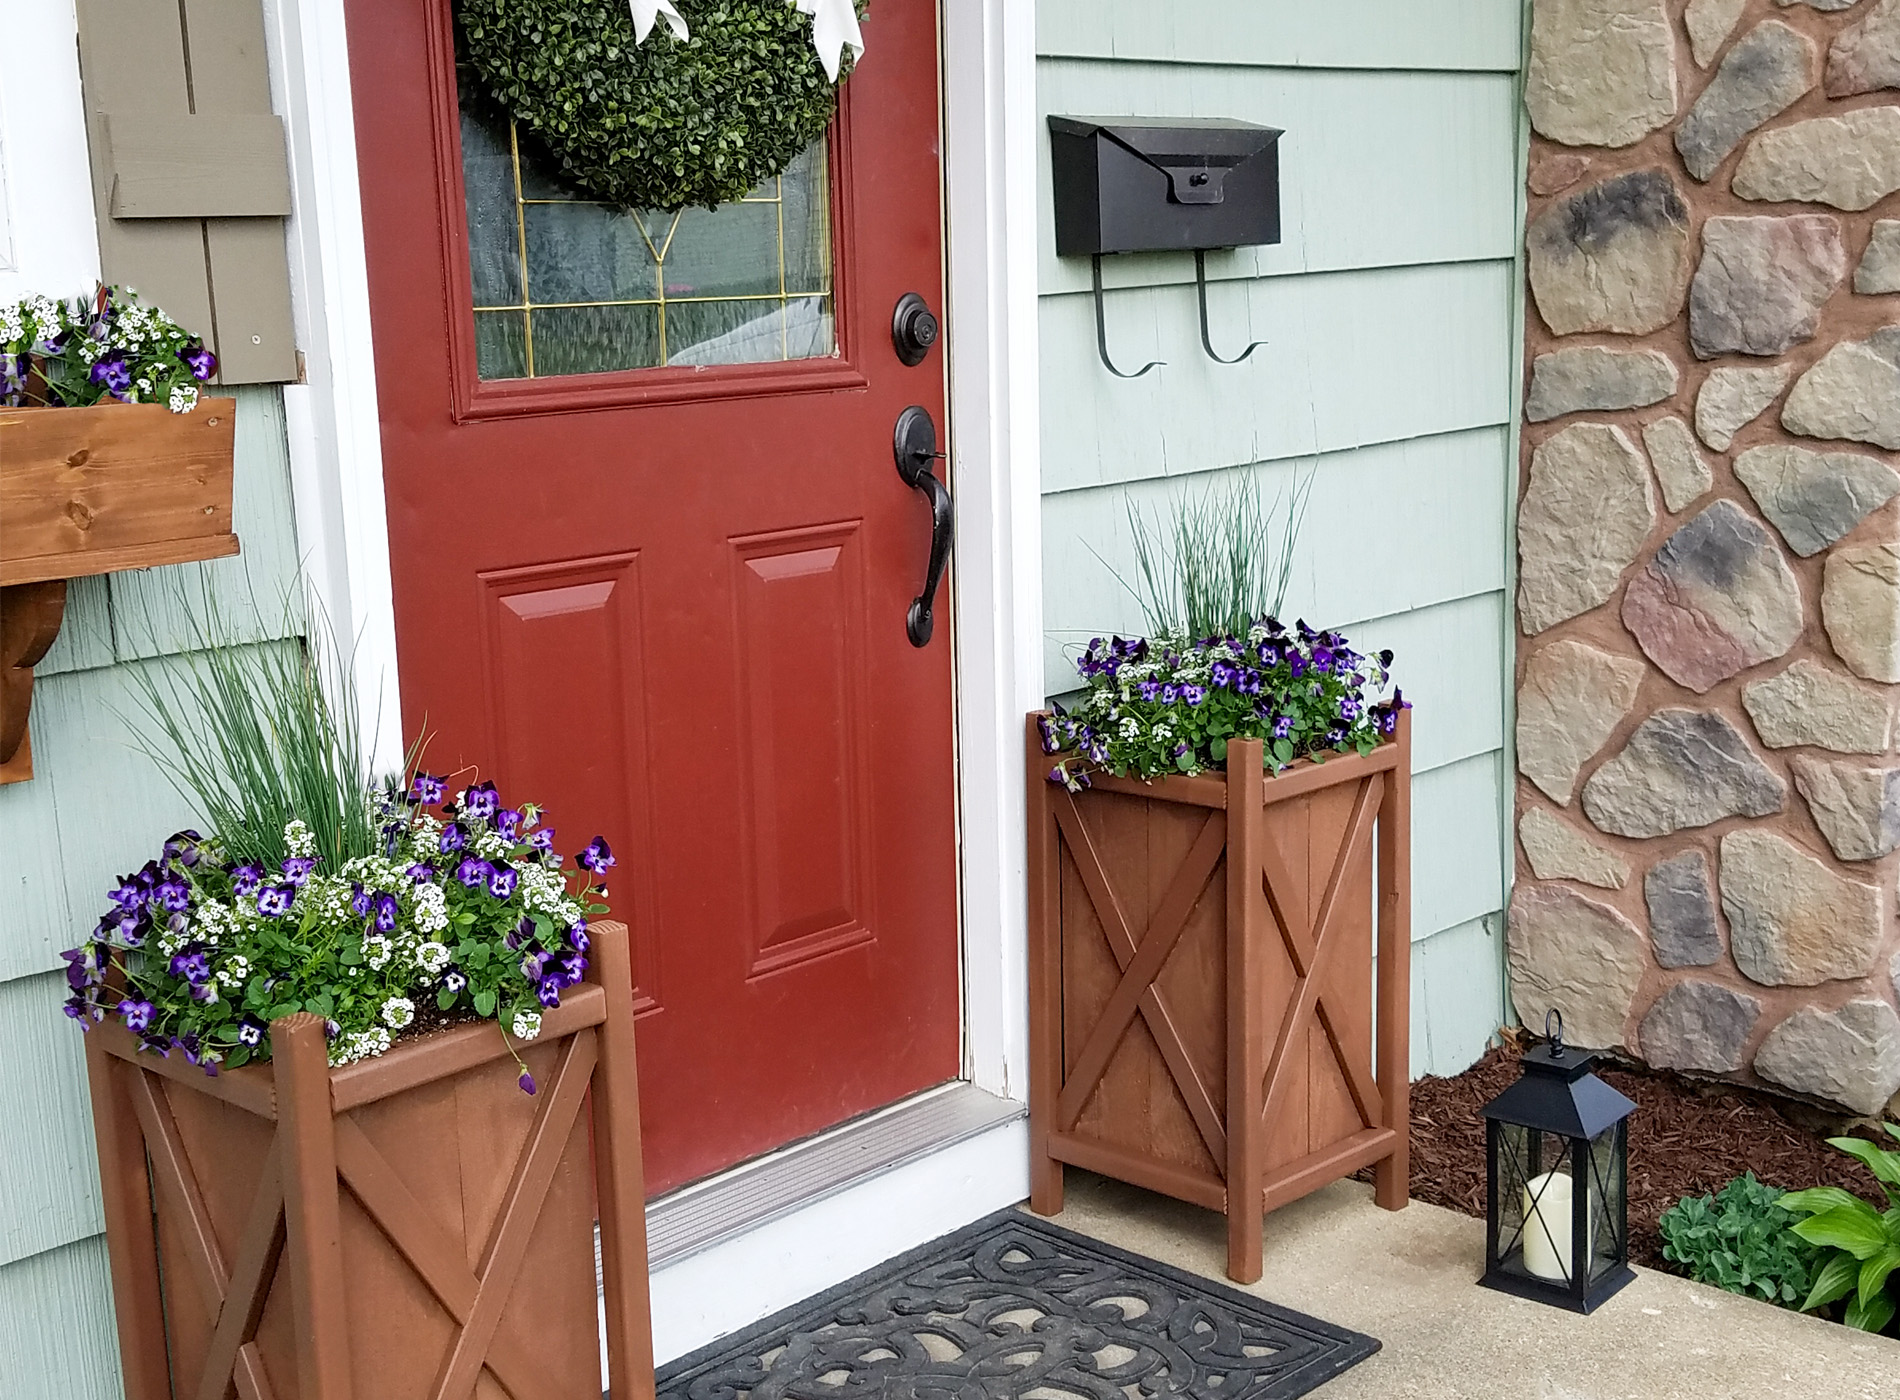
 I'm just a little stoked to get these done and share them with you as I have had them in my brain for quite some time. From start to finish I made this pair in a day. I'm tickled at how versatile they are for any decor - leave them natural or add your favorite stain or paint. You can even adjust the dimensions to suit your space.

*post sponsored by HomeRight (see full disclosure)

Here's what you'll need:
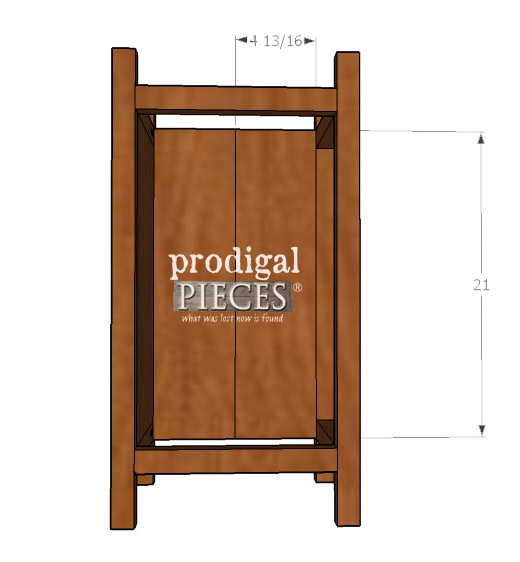
Materials - wood can be either pressure treated pine or cedar- 8 - 6" x 8' fence boards cut to 21", 4 need to be ripped to 4 13/16"
- 4 - 2" x 2"x 26" posts
- 8 - 2" x 2" x 11" cross pieces
- scrap 2" x 1 2" or whatever you have on hand for bottom slats
- 8 - 1 x 2" x 8" strips for "X" slats - we'll cut those later
- 1" brads
- ¾" crown staples
- 1 ¼" exterior or construction screws
- Thompson's WaterSeal in Acorn Brown (or color of choice, also optional)
- heavy duty black plastic
- potting soil
- flowers/plants of choice
- Kreg Jig pocket hole system
- jig saw
- brad nailer or stapler (see nails/staples sizes above)
- miter saw, circular saw, table saw, or hand saw
- drill
- HomeRight Light Duty Stain Sprayer
- HomeRight Spray Shelter (optional)
- bench top planer or sander (if preferred)
- tape measure
- pencil
- small level
- safety equipment - ear and eye protection, dust mask or respirator, and gloves
Step 1: Assemble the Frame
 Using your Kreg Jig set at ¾" bit depth and ¾" hole depth, drill both ends of your 11" cross pieces on the same face. I look for the face that has imperfections so that I can have the best side facing out.
 Once those pieces are prepped, we are going to mark on our 26" posts. Measure 2" in on one end and 3" in on the other end for all four posts. Using your drill, attach the cross pieces at the 2" and 3" intervals as the diagram shows above. Check each side to see if they're level. Being a little off won't matter much, but we do need it to be pretty square for the next step.
Step 2: Creating your "X" pieces
Now you have your empty frame. The next step is more of a prepping stage than building. For this quick fix lady, I found it easier to make my "X" cuts before I attached the side panels. Here's why: trying to figure those angles and moving my miter saw back and forth would be a pain. So I measured a top corner diagonal down to the bottom corner. I added a bit to the length for overlap and then cut one of the strips to length.(approximately 22") After I had that diagonal length piece, I laid the planter frame on top of it and marked the angles as shown below.
 Now that you have your markings, you can cut it with a jig saw. Much easier than figuring angles. Next, you need to create the alternate "X" pieces. I put the piece I just cut in my frame as a dry fit and then measured from the upper right corner to the "X" piece. Again, cut it a little longer to allow for angled cuts. Lay it against the frame and mark. Likewise, repeat that process for the opposing corner.
Here is what mine looked like in a dry fit - not attached yet. Not bad if I do say so myself for my first try at a DIY planter.
Now that you have your markings, you can cut it with a jig saw. Much easier than figuring angles. Next, you need to create the alternate "X" pieces. I put the piece I just cut in my frame as a dry fit and then measured from the upper right corner to the "X" piece. Again, cut it a little longer to allow for angled cuts. Lay it against the frame and mark. Likewise, repeat that process for the opposing corner.
Here is what mine looked like in a dry fit - not attached yet. Not bad if I do say so myself for my first try at a DIY planter.
 At this point, you will continue cutting and working around your frame using your first "X" as a stencil. All of your sides will not be perfect, so using the jig saw to make tweaks as you dry-fit each side will make it go faster.
Step 3: Install side panels
When all your "X"'s are cut, you can being to install the side panels. I preferred a more rustic look to my planter with the fence panels being left shaggy. However, you could certainly clean them up with a bench top planer to take it off for a sleek look. You will be using four of the boards in standard width, and four boards in the ripped dimensions above. First, attach your standard width boards using your nailer as shown. You will be attaching at both the top and bottom.
 Next, using your ripped board, attach those onto the other two sides remaining. Your DIY planter is almost there!
Step 4: Attaching the "X" pieces
Attach your pre-cut "X" pieces using your brad nailer and 1" brads. This part is self-explanatory.
Step 5: Adding the bottom slats
Since I built two of these in one day, I had plenty of scrap and needed to add a few bottom slats to hold the soil in. Your build may be different than mine, so I measured my finished build from side to side and then cut accordingly. To attach them, I simply used my Kreg Jig again to make pocket holes as shown below. Easy-peasy.
Step 6: Paint or Stain (if desired)
Fun part, fun part!! I love to build, but seeing your project come to fruition in the finish is glorious. This is the point where you can leave the DIY planter as-is and they will age with the weather, or you can seal them with either an outdoor paint or stain. I choose to use a solid stain by Thompson's WaterSeal in Acorn Brown and a new tool, the HomeRight Light Duty Stain Sprayer. You can see me use a sprayer in these past projects. This sprayer is just as nice, so I stopped to make a video.

 This thing knocked my socks off! I should have known it would be so cool, but man, what a back, time, and stress saver!
 Now my mind is reeling about what else I can get done around here AND where was this thing when I brushed our pergola?? {{head-smack}}
Okay...let's continue, shall we? deep breath.
Step 7: Line the planter
Your stain or paint is done. Next, grab your roll of black plastic liner and cut two 5' lengths. (or longer if needed) I found mine at a local home improvement store for $8 for a 50' roll.
Find center of your plastic and stuff it down into the planter. Starting at one side, fold the top edges flush with the top of the planter. Overlap the plastic at two sides that need it and staple up. Last, finish by stapling around the top edge to secure.
Now my mind is reeling about what else I can get done around here AND where was this thing when I brushed our pergola?? {{head-smack}}
Okay...let's continue, shall we? deep breath.
Step 7: Line the planter
Your stain or paint is done. Next, grab your roll of black plastic liner and cut two 5' lengths. (or longer if needed) I found mine at a local home improvement store for $8 for a 50' roll.
Find center of your plastic and stuff it down into the planter. Starting at one side, fold the top edges flush with the top of the planter. Overlap the plastic at two sides that need it and staple up. Last, finish by stapling around the top edge to secure.


THE REVEAL
Finally, give yourself a high five and fill that puppy up! You can use a topiary, trees, or like I did and grab a hanging basket flower bunch and drop it in.
 Not only do I now have some updated planters for each season of the year, but I even made some for our garage door area too (aka workshop - who needs cars in there anyway?). Curb appeal here I come!
 I love how that stain matched my faux wood treatment I did a few years ago. See the tutorial HERE.

My hope is that you are inspired to give this DIY planter a try, if not for yourself, then certainly a gift would be sweet.
While you're at it, pin and share this DIY planter so that others can save and score BIG on the budget saving decor.
UPDATE
Finally, after a few years, I decided with our new door installation that my DIY planters needed a new look. Take a peek HERE. Up next, it's Furniture Fixer Upper time and this vintage tea cart is getting a new lease on life. Come see the after HERE. What is more, be sure to sign up for my newsletter. Until next time!

In addition, more build plans like my DIY planter:

