Don't you just love a good haul? While I may not have scored oodles in my last jaunt, I did come upon this handmade gem. It was resting beside the Pinterest fail footstool I shared in
this last post. The hearts alone made me giggle since as I've mentioned before that
80's heart cut-outs and geese are EVERYWHERE. Am I right?? So, what is hiding in this oak cabinet? Well...you might be surprised to find this DIY ironing board inside.

It's awesomely made and complete with a self-made country blue hearts and stripes fabric cover. hahaha...I die!


Notice the green iron-on patch on the right edge. This totally makes me wonder what stories it could tell. Shall we get this makeover party started?
SEWING NEW FABRIC "OLD"
While it's obvious that this dated gem is going to get a new look. I need to begin with the ironing board cover. At first glance, I'm honestly surprised that this original DIY ironing board cover is basically a piece of cotton fabric with worn-out elastic in it. There's no cotton batting or insulation layer that prevents the ironing board from damage. weird.
However, for my new ironing board cover I will remedy that huge mistake to take this makeover up a notch. First, I take the old cover and lay it on this red ticking fabric yardage found at a local thrift store. It's brand new and the woven kind, not screen-printed. Good stuff!! I cut out adding an inch or so in the seams for allowance in the edge of the cover in making a casing for cord.

Then, on top of that, I cut a lightweight layer of Insulbrite as a protective layer. I simply trace the board adding a bit to cover the edges and cut. After ironing it all out, I sew a casing so I can add satin cord instead of elastic. That way I can tighten it up and the elastic won't wear out. When casing is sewn, I use a safety pin to feed the cord through.
After that, I cut another piece of
ticking with added seam allowance of a half-inch so I can encase the insulated layer and sew it down on the wrong side of the fabric.

MILK PAINTING
Now that I have the new top made for this DIY ironing board makeover, I'm ready to tackle the cabinet and board itself. Being that it is registering 10 ° outside, but feels like 3 °, I'm not taking my frozen behind outside to refinish this piece. With that, I decide to have fun with some milk paint. This barn red color is one I use on this
farmhouse desk rescue or my
reclaimed sleigh.

Next, while the paint is curing, I set about to handle those heart cut-outs. I dig into my stash and grab a piece of luan (thin plywood) and cut it to fit on the two door fronts.

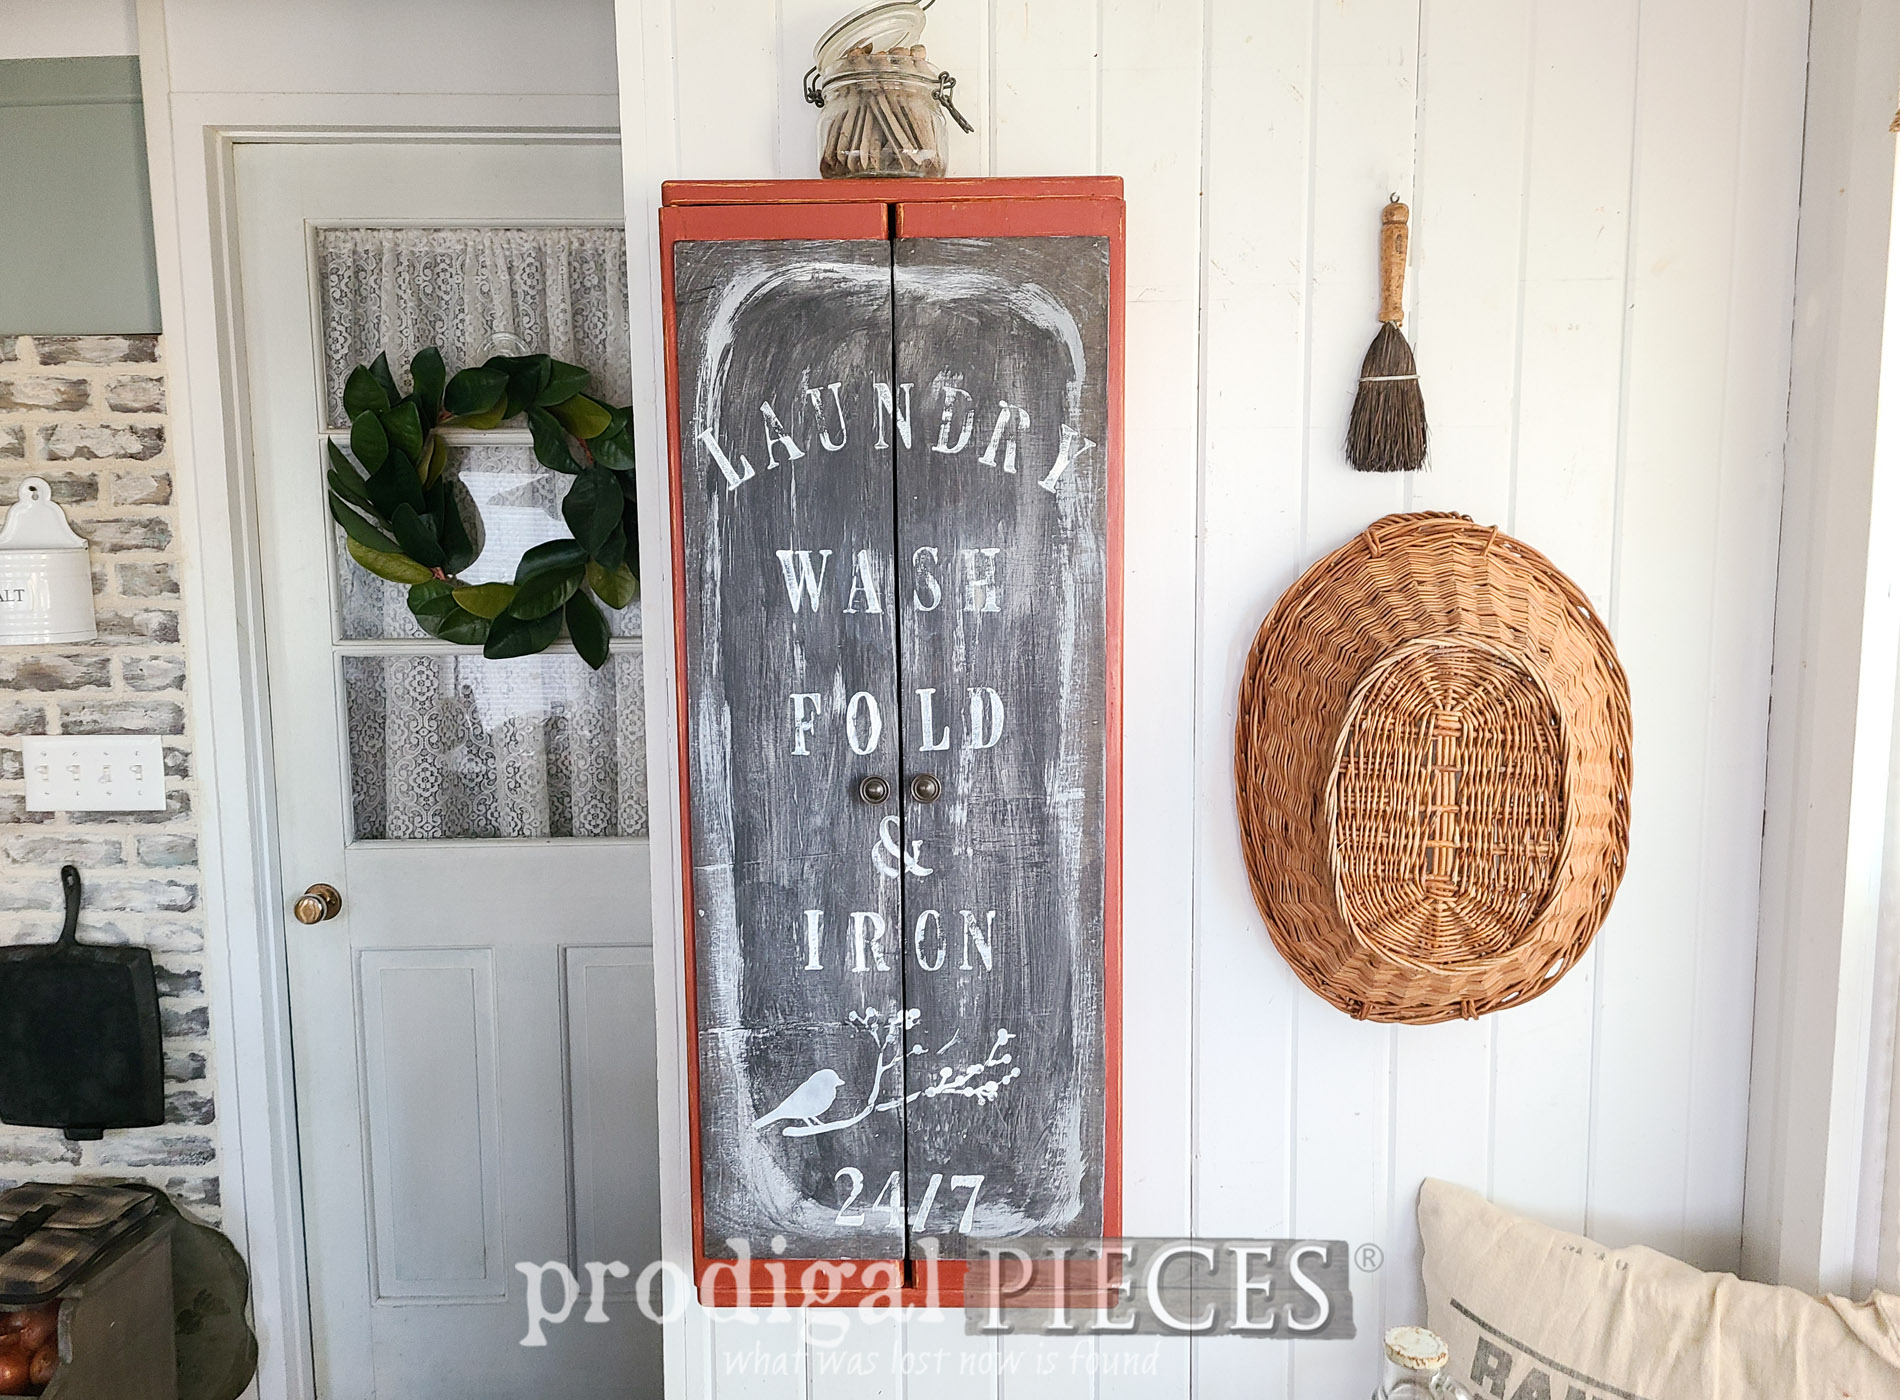
Not only is my goal to add function, but also a bit of whimsy. You know I adore my typography! I have this awesome set of brass typeset letters and now is the perfect time to use them. wahoo!!

Finally, I use a black milk paint to coat the interior and stain the luan I cut. I'm using a charcoal reactive stain that works with the tannins in the wood to naturally age it.

However, I'm not just straight sticking it on, but rather create layers with more milk paint and aged effects.

Last, it's time for those letters to come out and play. Aren't they fun?!

IRON IT OUT
With hearts gone and a new vintage style, this ironing board is ready for many more years without the 80's vibin' hearts.


It's rustic on the outside, while an ironing party on the inside. tee hee! Those hearts from the inside are now corkboards with vintage button tacks. You know I had to...


Not only that, but also look how I repurposed a closure from one of my long-past maternity dresses. haha. I recovered it and it works
perfectly for holding that new cover nice and tight. Additionally, you can see the satin cord with cord stop at the base.

Then, here it is folded out and ready for helping you make those fine creases and wrinkle woes go buh-bye.


And...the absolute best-est part of it all...it tucks away nice and snug where no one has to know about the party going on inside. Yeah, baby! Oh, and also notice the vintage brass knobs I pull out from my stash.


As with most of my creations, you can find this and more available in
my online store. Add it to your laundry room for added storage space.


SHARE
With that, my project is complete, and I'd love for you to take a minute to leave some comment love below. In addition, sharing and pinning this project inspires others to try their hand at DIY too. Let's share the inspiration!

WAIT! Before you go, make sure to
sign up for my FREE newsletter because up next, I'm sharing my latest
Reduce, Reuse, REFASHION inspiration for you.

Until next time!

 PINTEREST | EMAIL
Also, more fun laundry makeovers like this DIY ironing board makeover: