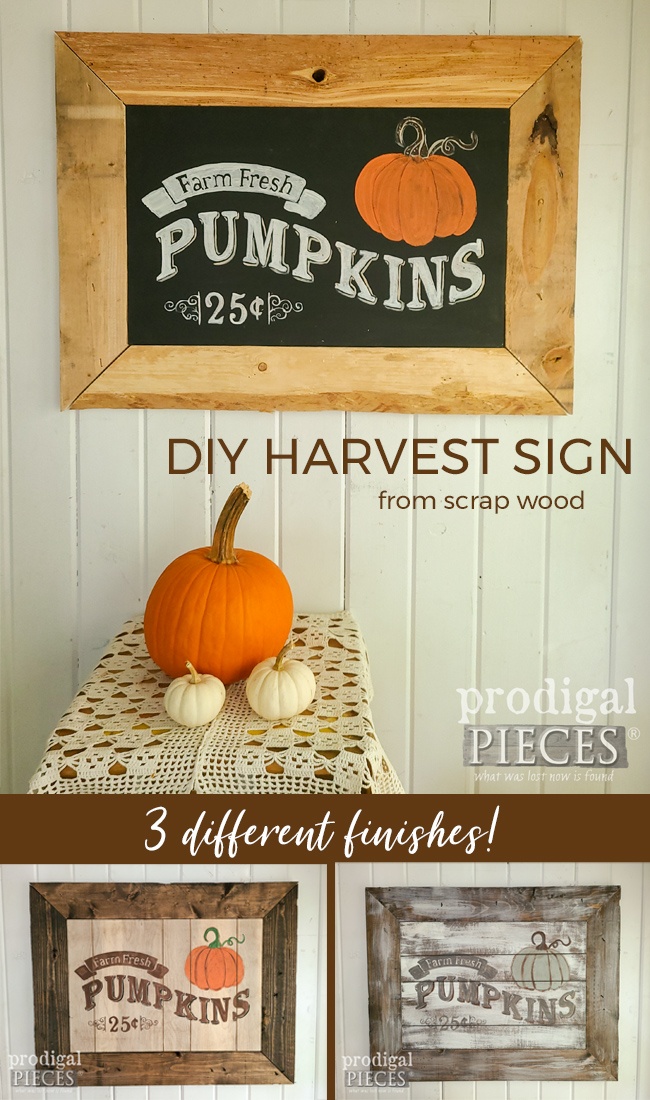
I tell ya, there needs to be a song about harvest time. It truly is a wonderful time of year where we reap the benefits of sweat equity in our labors of garden and more. I'm especially thankful for farmers and their endless devotion to keeping us fed. To celebrate, I'm taking these scrap pieces of wood and sharing a DIY harvest sign fit for any home.

Well, I had these 3 similar pieces of cabinet-grade plywood staring at me in my stash. It's not a magic number, just thought it would fun to take each 3 and make them up in the same manner, but with 3 different finishes. So, at the end I want to hear which one suits your fancy, k?
If you want to make this too, here's my basic supplies list:
TOOLS & SUPPLIES
TERMS OF USE: if you recreate this exact harvest sign, you agree to the following: it cannot be shared or distributed for monetary gain in any way, it may not be modified in any way, and you may not claim the work as your own.
- ¾" thick scrap plywood (can be any grade in any size)
- scrap pallet wood
- paints & stains of choice
- circular saw (optional, but fun)
- Kreg Rip Cut Jig (optional, but also super fun)
- Kreg Pocket Joint Jig (a must-have for any DIYer)
- miter saw
- tape measure
- builder's square
- stencil or graphic of your choice
- artist pastels
- 1 ¼" wood screws
- >wood glue
- keyhole hardware
DIY TIME
Let's get started! First, I wanted to create a faux planked look on two of my harvest signs. In order to do that the easiest way, I hook up my circular saw to my jig and add random cuts about ¼" deep.

Notice I did cuts vertically on one and horizontally on the other. That's just to show you variations using this idea.
Next for my DIY harvest sign, I use my pocket hole jig to add joints to the back side of each of my boards. If you don't have one of these jigs, I can't stress enough how awesome they are! You can build endless things...like
my mudroom storage and
reclaimed workbench.

Also, we need to cut a frame for our sign. I am using leftover pallet wood from
this project to make a frame. I wanted to miter my ends, but you could make it flush if you prefer. To make a mitered frame, measure the outer dimensions of your art and add the width of the wood. So, for instance, my sign was 19" wide and my pallet wood is 3 ½" wide. I add 7" to my 19" width. Cut on a 45° angle with a miter saw or miter box.
Last, add pocket holes to the frame as shown below. However,
don't assemble yet.

Then, before I assemble, I give each one a different finish. One I use a flat black paint (still wet in pics), the next I use a reactive weathered wood stain, and the last is a darker stain.

NEXT STEPS
After my stains/paint cure, I wanted to add texture to one of them. With an old brush I whitewash the dark brown stained one following the cut lines.

One more thing, I love to add typography, so you knew that was coming. haha. Using my age-old technique first mentioned
in this post, I rub pastels over the back side of my own design. Use a window or a light pad to make it easier. You could also use any graphic you like or even stencil at this point as well.

Next, center and tape the design to the front of your sign. Using a colored pencil so you can see where you're working, trace the design onto your sign.

Then, paint in your design. Feel free to mix it up and add different depths with shadows and such. Have fun!

While we're waiting for the paint to cure, you can finish you pallet frames in whatever finish you want. Last, assemble it all together and add your keyhole hardware to make it ready to hang.
THE REVEAL
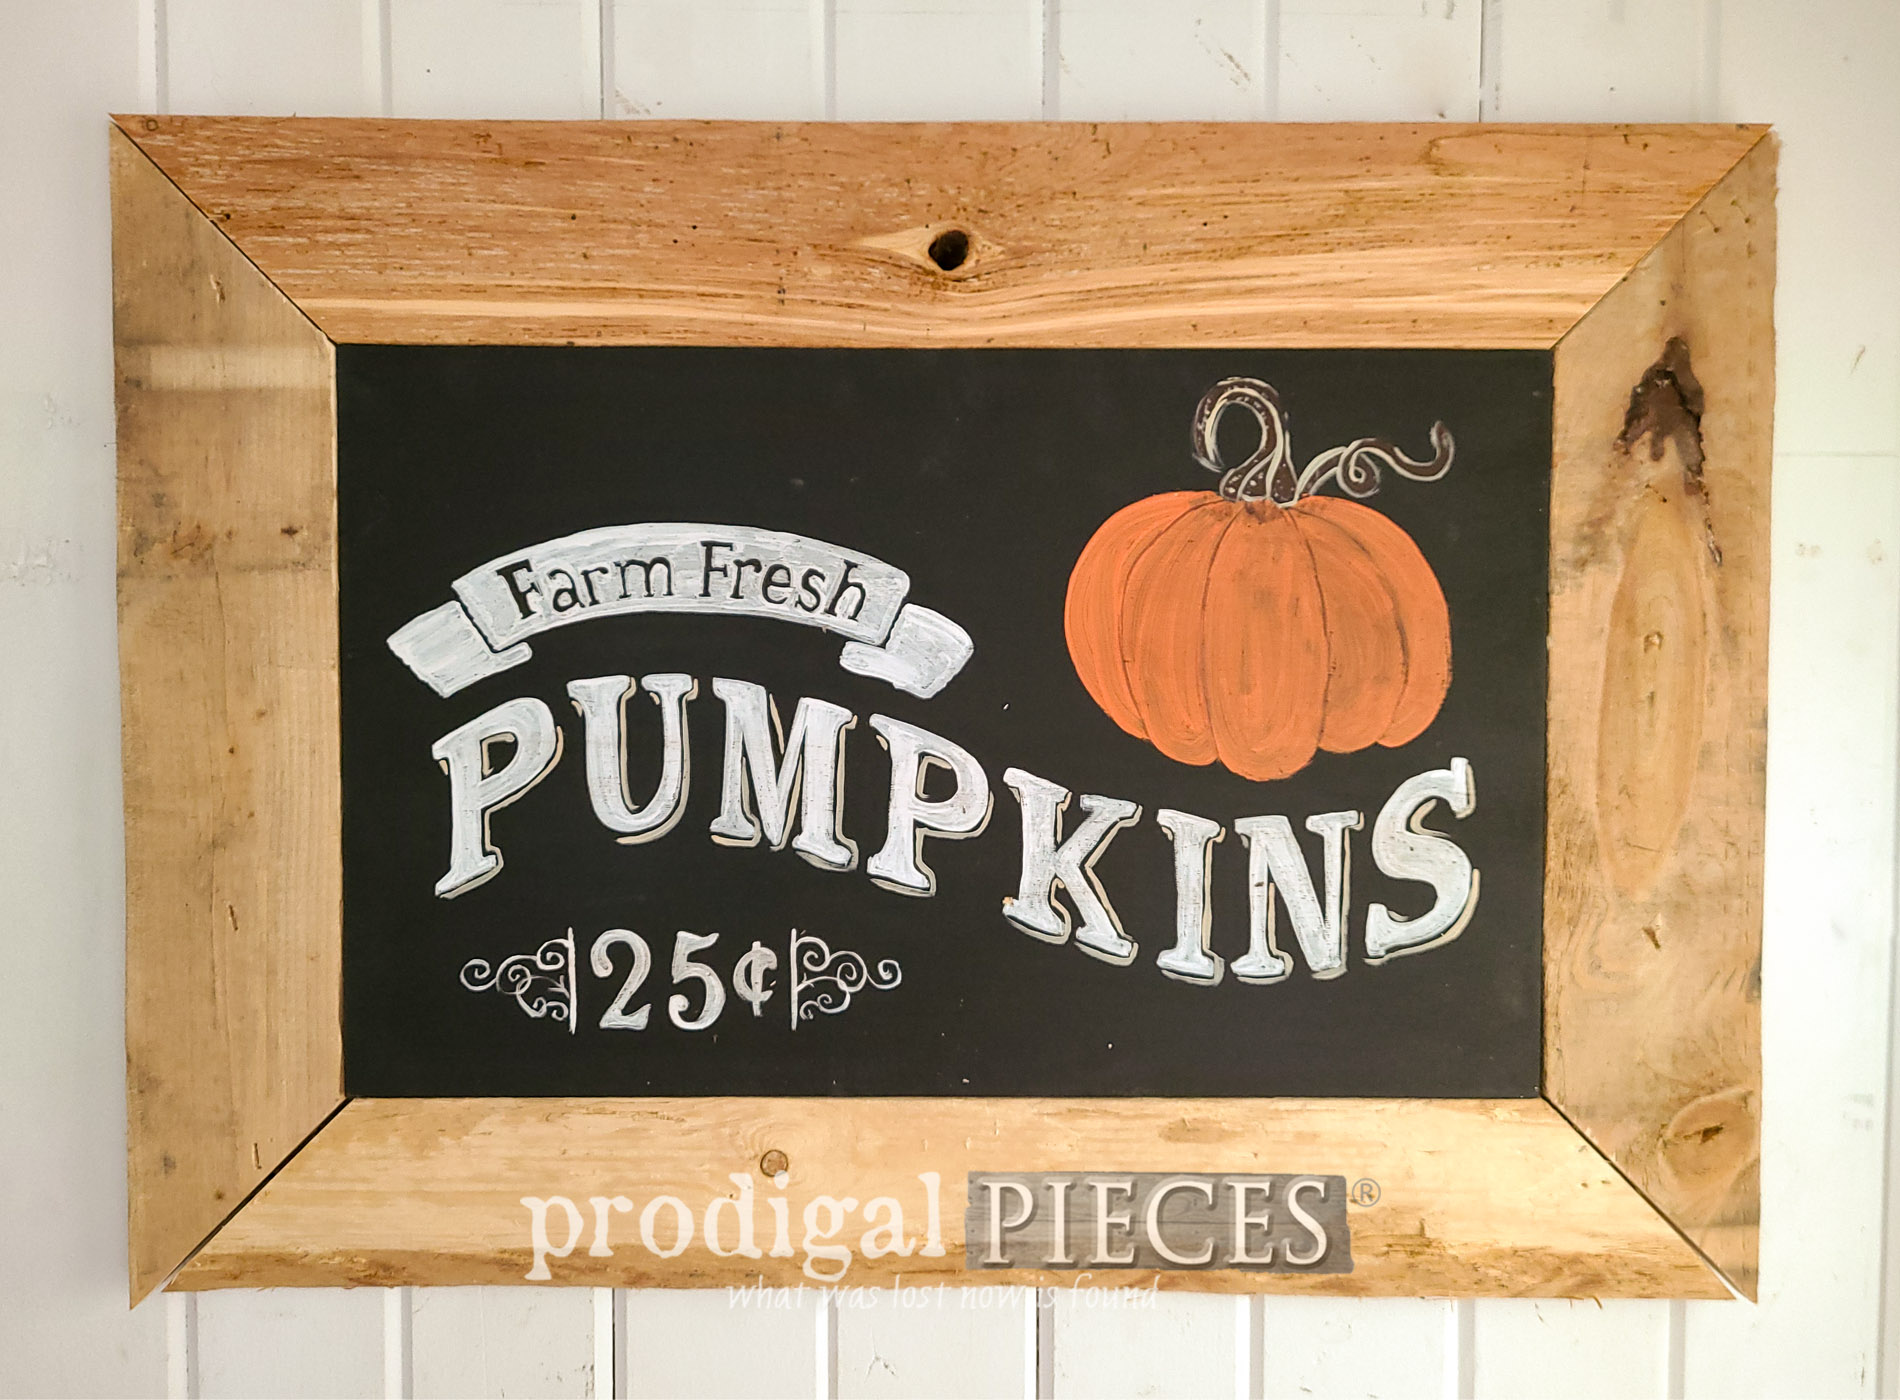
It's time to see all three DIY harvest signs complete. wahoo! First, is this chalkboard style harvest sign with a natural, rustic pallet frame.


Second, is this one I finished with reactive stain and a dark frame.


Last, but not least, is my whitewashed sign with gray-wash frame.


So...which is your favorite? Most of my kids were partial to the last one. However, I like them all for different reasons.
If you'd like to make one of these your own for your home, you can find them and more available in
my online store.

In addition to giving me feedback, do pin and share to inspire others to skip the box store and create their own harvest fun decor.
Up next, I'll be giving this vintage piece some repair and TLC.
Come see its new life HERE.

Before you go, be sure to
sign up for my newsletter. Until next time!

 PINTEREST | EMAIL
Also, more fall fun like this DIY harvest sign:

. Larissa of Prodigal Pieces shows you how in her video tutorial | Head to prodigalpieces.com prodigalpieces diy fall farmhouse home homedecor autumn")