Maybe you're like me and when you feel the shift in the seasons, you know you better get your ducks in a row. I realize part of that is because of where I live, but also because life shifts with the seasons. Come autumn we enter back into our full-time homeschool (we school all year, just lighter in the summer). Plus, we need to have our winter preparations complete. I get in a sort of tizzy to wrap up projects so I can settle in. Today, I'm taking this garden shelf and reclaiming it into my DIY folding potting bench.

If you've been following along with us, then you saw how we took our dilapidated garden shed and rebuilt it over the spring/summer. See our
full post HERE (video below) One of the things I didn't want to toss was this 3-tier garden shelf. While I could have knocked it over by blowing it a kiss, I saw it still had potential.

I love that it is made of slats so that when you are potting your plants, you soil can fall thru to the ground. That didn't make it an ideal shelf inside the shed, but it makes it perfect for my potting bench. Also, don't forget I also have my upcycled
potting bench from a changing table too. tee hee.
DIY TIME
First, I take my handy hammer and knock it all apart. Why? Well, like I said, the shelf was barely standing, so I need to rebuild it stronger. Lemme just say, I have never had to take so many nails out of anything!

You can tell that it would begin to fall apart and then they would add more nails. My solution: SCREWS. haha. After I tore it down to pieces, I used my nailer to tack it all together, and then added screws.

This makes it so much stronger and ready to go. However, do note that I am not rebuilding it into a shelf, but rather three separate DIY folding potting benches. You can build this for yourself too. While mine is untreated pine and will most likely fall apart, that's okay. However, I would use pressure treated pine or teak if I were to start over. Cedar would be too lightweight for a purpose such as this. If you'd like to make your own, here's the details:
Materials & Dimensions
- Finished size: 49" W x 18" D x 1 ¾" H
-
- 8 - 48" L x 1 ¾" W x ¾" D
- 2 - 18" L x 1 ¾" W x ¾" D
- 2 - legs cut to the desired height (40" for me)
- 1 - box of 1 ¼" decking screws
- 2 - 1 ½" L x ½" W hinges
- 3 - 3" L x 1" W hinges
- 1 - self-locking gate latch
NEXT STEPS
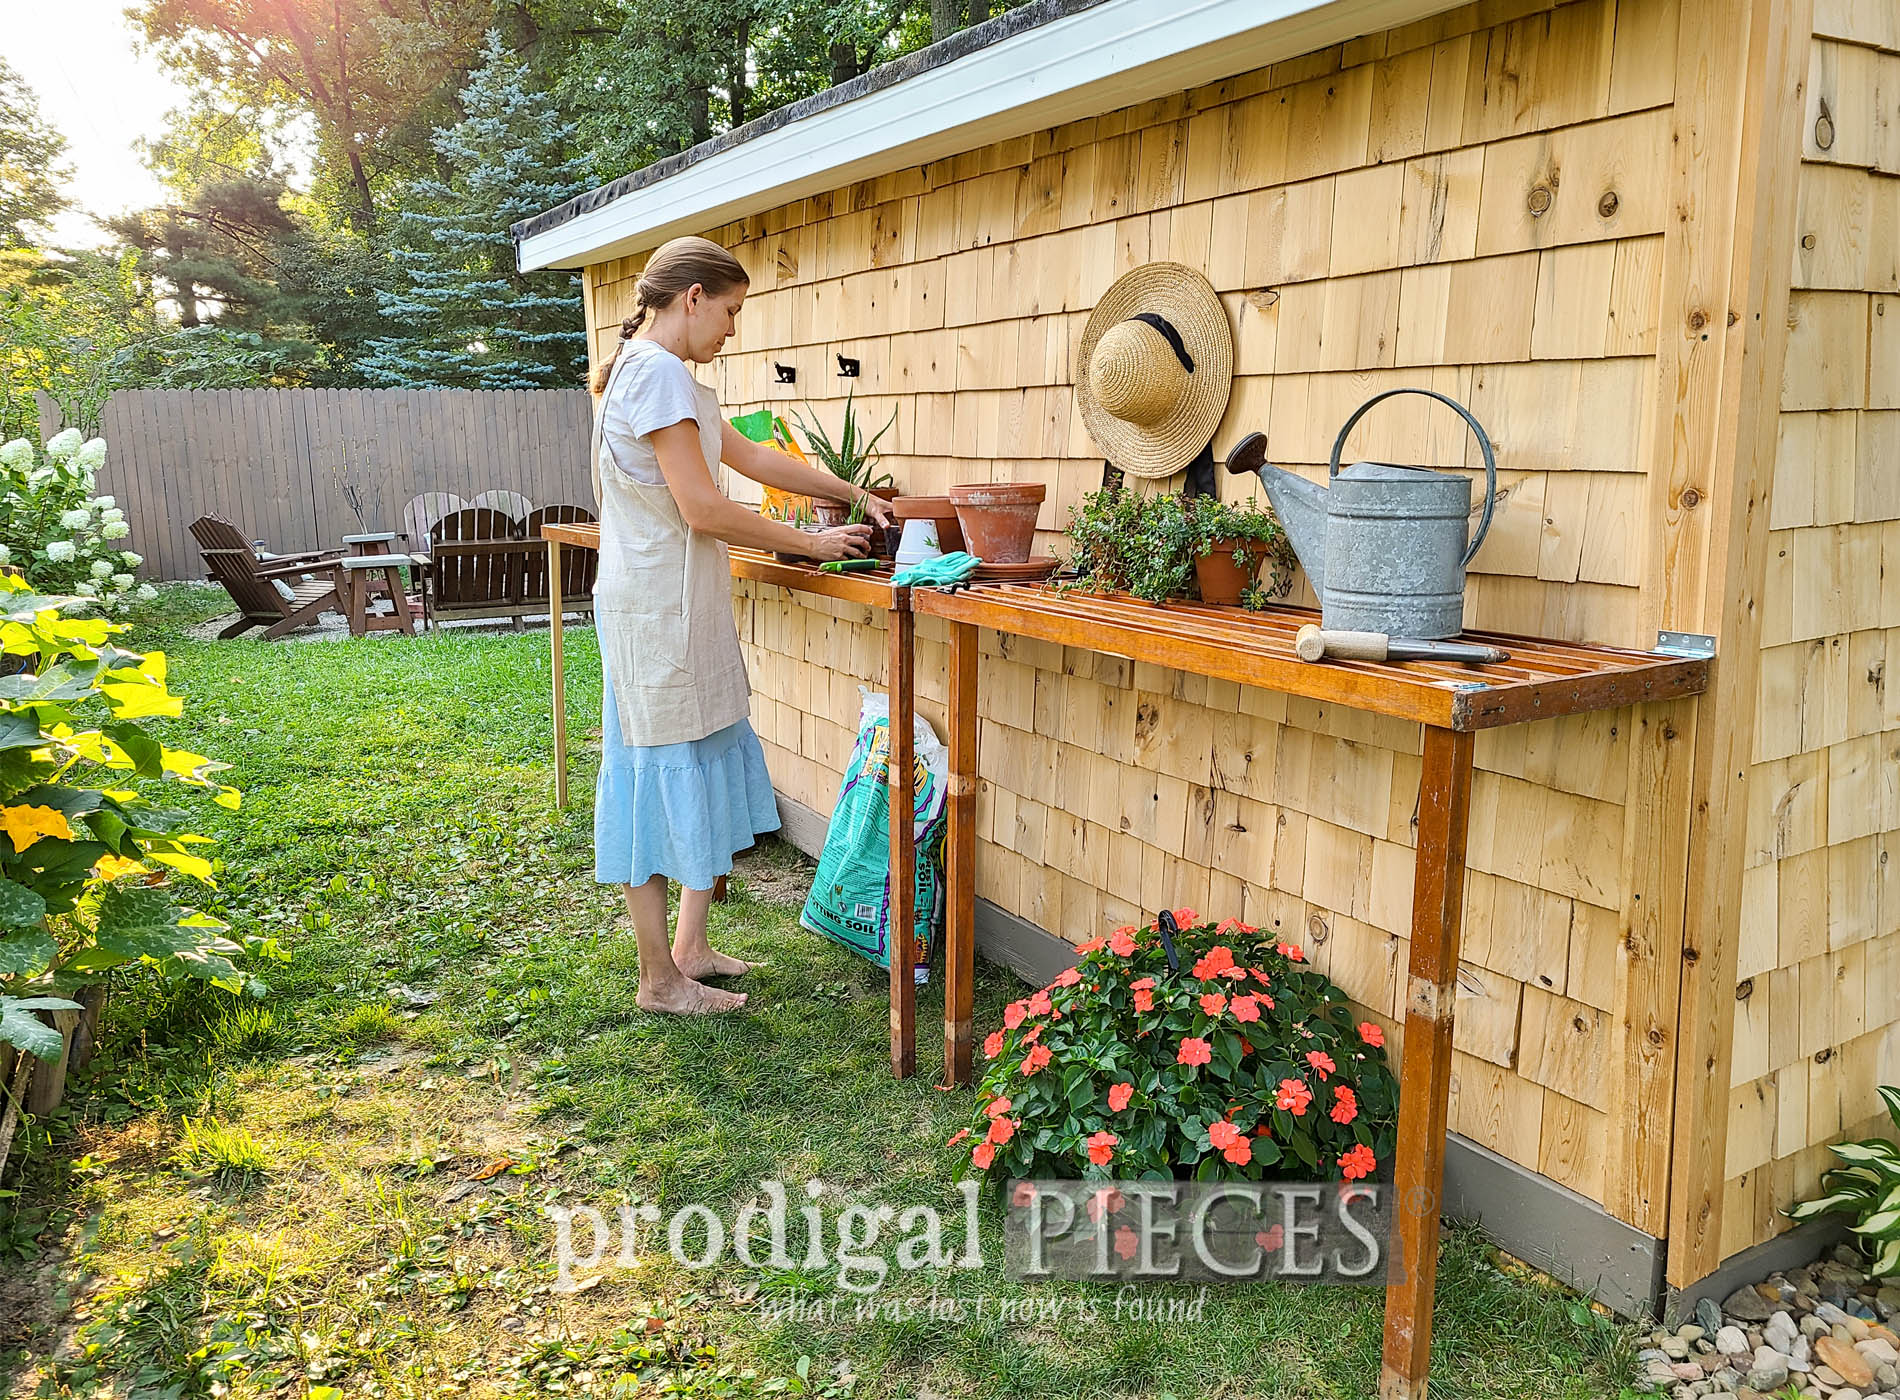
Next, after I had assembled my racks, all I needed to do is add the hardware and legs. For two of the benches, I used the upright legs from the shelf. For the third one, I needed to make two legs out of pressure treated pine I had on hand. Here is the location on the back of my garden shed where I intend to add my folding potting benches.

You can see our
DIY fire pit in the background, and just behind it are my
DIY compost bins. That will make it so nice for me to be able to grab compost as I need it instead of hauling it in 5 gallon buckets.

Also, I'll be using a similar mount as the
my drying rack I added on the side of my shed. That was made from a rocking chair back and some chain from a light fixture.

Here is my first potting bench attached and folded. I set the height of mine to 40", but that may be too high for some. I am tall and didn't want back aches from hunching down. Feel free to set your height at what suits you. That means cutting your legs to the height you want, and attaching the back edge to that same height.

Once I got the hang of one, adding the other two is a breeze, especially with the help of my daughter.


A CLOSER LOOK
If you take a closer look, you'll see that the legs are attached flush to the top edge of the bench with hinges. One leg is in the first slat opening, while the next leg is in the second slat opening. That way they can fold up and not hit each other.


You can also see the gate latch tongue on the bench, while the latch is mounts to the wall. Just add that were it makes the best connection.

My setup is sorta rustic, and that's okay. This is only for gardening purposes and for ME. I'm stoked to have these up so I can re-pot my plants before winter rolls in.


Gardening totally is therapeutic and offers the biggest of blessings, especially when you can share. I was blessed to receive my aloe start from a lady who also shares her herbs from her beautiful garden. When they get overgrown she lets folks come and dig up to help her and them.

Every few months, I take my new aloe starts and pot them up and give them as gifts. Who doesn't love succulents?


My kids and I forage some of our sunflowers, load up the wagon, and head off to hand out to neighbors. Bringing sunshine and flowers is the best!


We came home hot, tired, and overjoyed at the smiles and fun we gave. Giving is more rewarding to the giver than the receiver. Do you agree?
WRAP-UP
My goal is to inspire you to create your own home story, dabble in some dirt therapy, and be willing to share with others. We met many folks feeling a heaviness, but we hope we lightened their load, even just for a bit.


Also, do pin and share my DIY folding potting bench because inspiring others is a blessing too.


Up next, I'll be sharing the makeover of this vintage beauty. See the new look
HERE.

To get these DIY tips & tricks in your inbox, be sure to
sign up for my newsletter. Until next time!

While you're at it, here are more garden builds like my DIY folding potting bench: