Spring is here and so is this month's
Reduce, Reuse, REFASHION time! The last Tuesday of every month I create to bring you a new way to use your household textiles, fashion accessories, clothes, shoes...you get the idea. Because summer is just around the corner and those glorious rays of sun (I can't wait!!), that means I get to make some fun for myself with a DIY bucket hat.

If you recall, a couple months ago, I used these exact same tablecloths to make mice. Yes, MICE. But,
ballerina mice - so cute! However, as you can imagine, I had plenty of tablecloth leftover to make into something even more fun. Let the refashion time begin!!

REFASHION TIME
While I do love to create my own patterns, for this time around, I am going to send you to
Heather Handmade for the free pattern. Simply scroll to the bottom of the post and sign up for free email. Why reinvent the wheel when I love her design and her pattern is so easy to follow, plus I
love supporting other bloggers. There would be no Pinterest without us!
First, simple print out the pattern, and then cut and tape together. Easy-peasy.


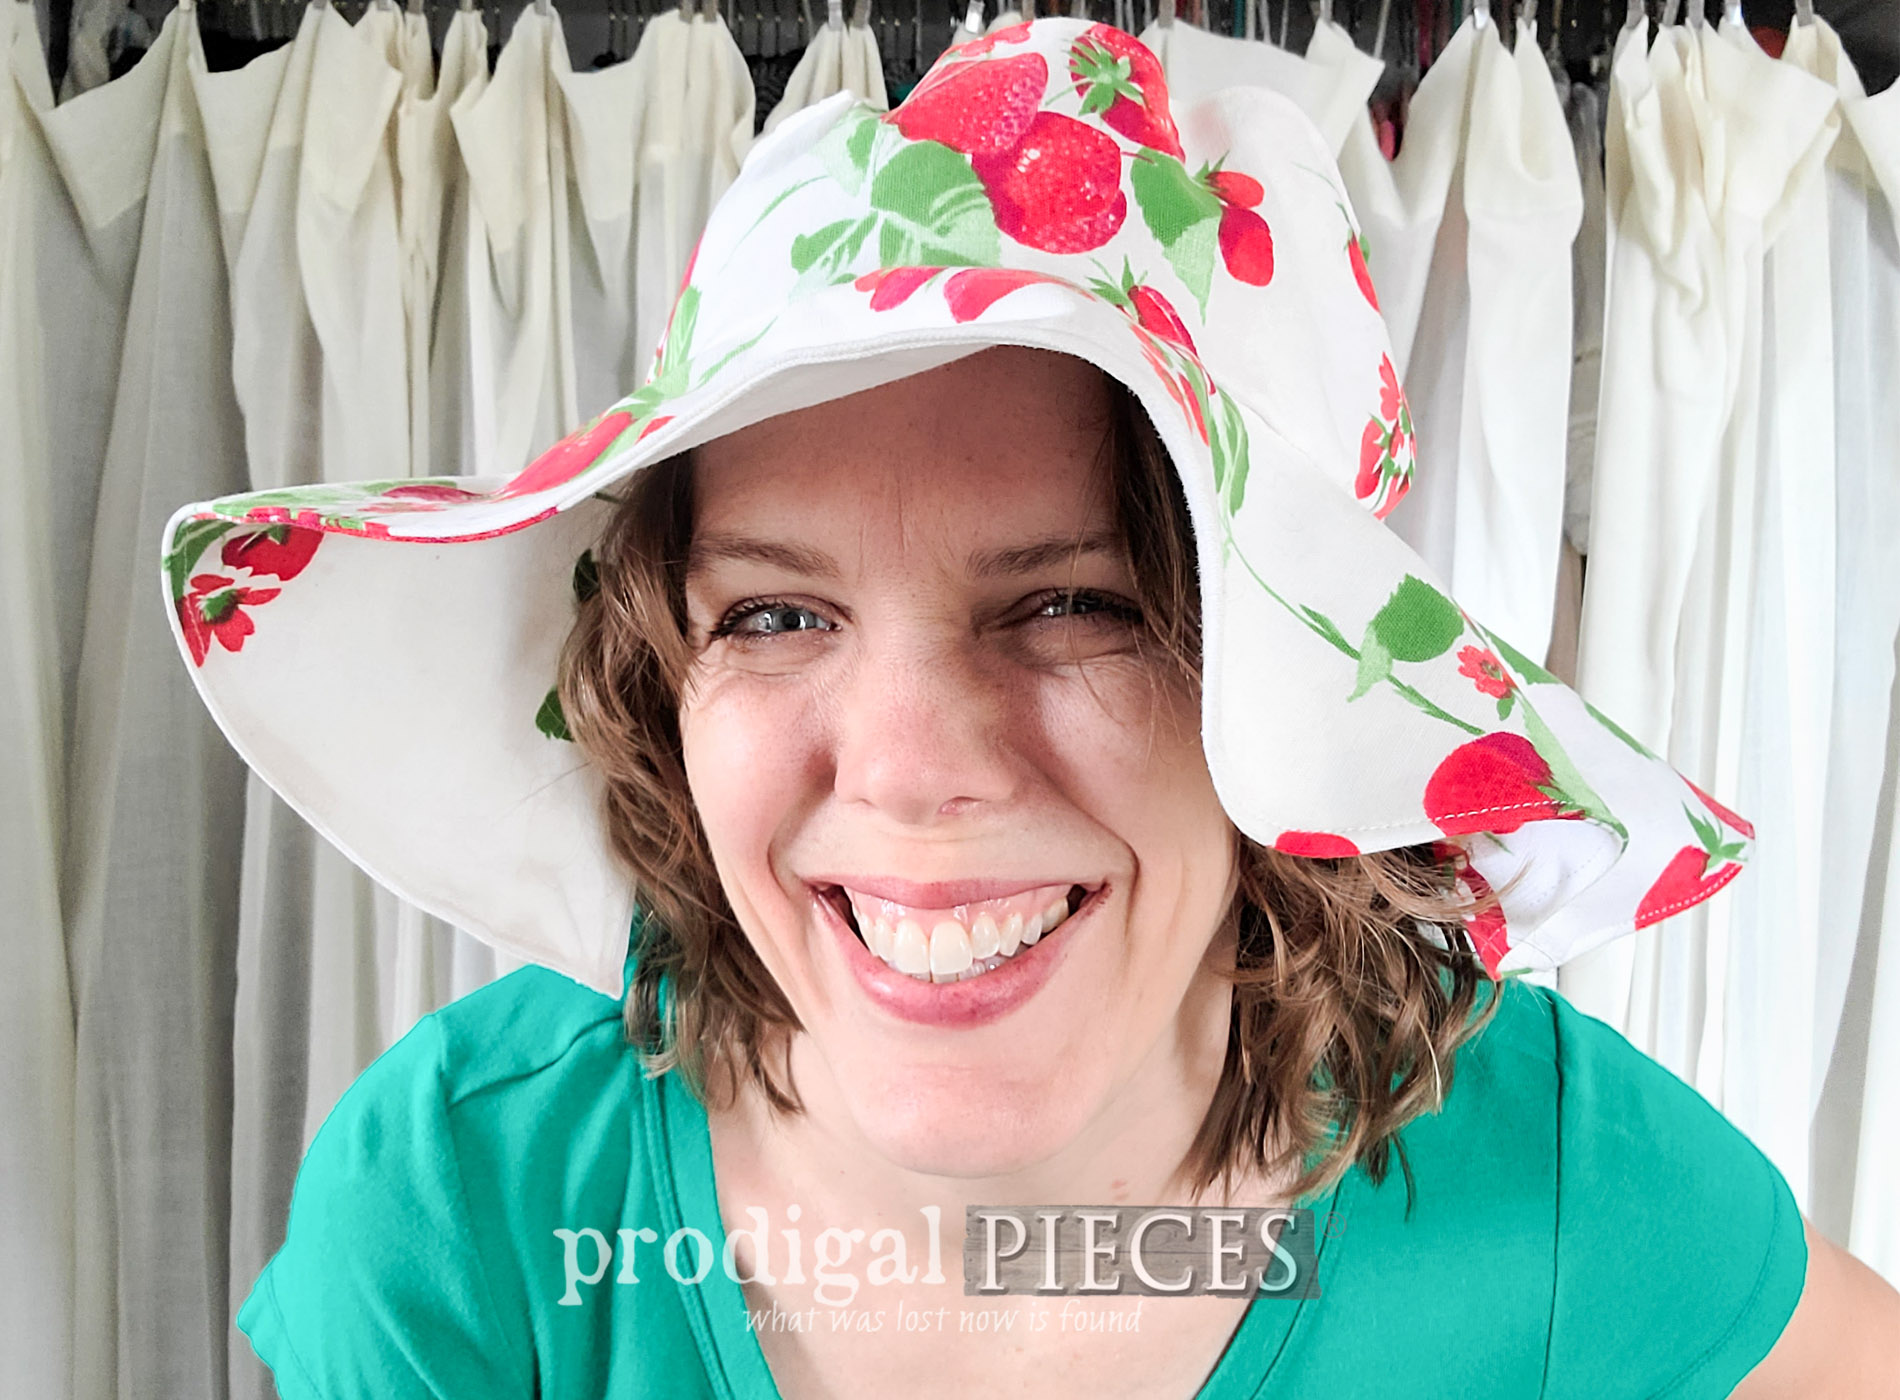
Then, after I have my patterns ready to go, I place them on my fabric and cut into my vintage tablecloth - eep! Because I'm June baby, the strawberry one catches my fancy most. Notice I place the pattern on the fold not allowing for seam allowance. That way, I can use the center cutout for my hat crown. No waste here!


SIDENOTE
Also, I want to say that I did end up cutting a larger size than my head actually measures according to Heather's chart. It ended up HUGE!! In my defense, I was recovering from my illness and didn't want to make it too small, so I sized up. In the end, I ended up going down nearly two sizes. Plus, I found the sides too deep for my liking (FYI).
After that, once you have your pieces cut (fabric and interfacing - I used iron-on Heat n' Bond Lightweight) it's time to assemble. In addition, keep in mind that I'm using a tablecloth, but you can use any canvas or quilting cotton material (skirts, curtains, bedding...you get the idea). There's no need to buy brand new fabric when you have oodles sitting around needing new life.

If you're hesitant to try sewing, this is a
perfect beginner project. Just keep in mind when sewing curves, just take your time - you can do it!
HATS OFF TO REFASHIONING
Y'all...check out my new, and oh so fun, hat!


It's floppy, cute as all get-out, and perfect for the use of fabric that may have gone to the dump in someone else's hands. Per normal Ohio spring, when I want a sunny day to show you my hat, it rains and rains. So, I decided to pretend that I'm in one of those photo booths to make it fun.

What most wouldn't notice is that I had to remove the crown after sewing because it was too deep for my liking. That just means I now have an outside seam with a rim which I don't mind a lick.


Soon enough I'll be headed to tennis matches for my kids in a burning sun (which I love). Not only that, but also gardening, and so much more.


SHARE
As you can imagine, I'm smitten with the outcome! I'm so eager to head out to sun, sun, and more sun. Let me hear your comment love below as well as pin and share to inspire others too!

Up next, I'm finally back to
my sewing table upcycle with the top becoming something new.

While you're at it, be sure to
sign up for my FREE newsletter. Until next time!

 PINTEREST | EMAIL
While you're at it, check out these other refashion fun projects like this DIY bucket hat: