It's perfect for when you need that therapeutic soak at the end of a long day for holding your bathtime essentials. Makes a perfect gift, don't you think? With one power tool and a few basic materials, you'll be saying, "Calgon, take me away!"
Let's get to building, shall we?
It's perfect for when you need that therapeutic soak at the end of a long day for holding your bathtime essentials. Makes a perfect gift, don't you think? With one power tool and a few basic materials, you'll be saying, "Calgon, take me away!"
Let's get to building, shall we?
Here is your materials list:
- Drill/drill bits
- 1 - 1" x 10" x 6' board (can be any width you prefer and of any species - pine or hardwood) cut into length discussed below.
- 2 - 1" x 3" x 8' furring strips cut into 9" lengths in pine or similar wood as board if staining
- 2 - 4" window sash handles or any type of drawer pull suitable for picking up your tray - make sure it includes screws.
- 8 - 1½" wood screws
- Your choice of finish (ie, paint, stain, wax or poly if waterproofing)
- Paint brush or rag for finish work
- Tape Measure
- Notepad/pencil
- Fine Sandpaper
- Pencil
- Builder's Square or ruler
- Table saw / Miter saw / Jig saw
 Write it down. The measurement I used for my project was 30". Next, measure the width of the inside span of the opening of your tub from side to side like this:
 My tub inner span measures 25", and again write this down, so you don't forget. (ask me how I know).\
BUILD TIME
Now, I want you to know that most everything I build is from reclaimed wood and I know not everyone has aSTYLES
For our building purposes I'm going to be showing you two different styles of the tray - a rustic barn wood one like the tray pictured above, and a more modern style painted version. Instead of buying new wood for my examples, I am using some new wood from my stash that is an 8" width (it's actually only 7.5" wide, crazy, I know.) I really like the width of my 10" barn siding tray for a bit more room, so that is why I reference to that width for your project. If you'd rather cut your lumber at home, just measure and mark...

 ...then buzz it to the size of the first measurement you got from your tub.
 Grab your 1" x 3" (furring strips) and cut to length if not done in store already. Remember, the length you need is 1" less than the width of your board.
[caption id="attachment_7507" align="aligncenter" width="550"]
Grab your 1" x 3" (furring strips) and cut to length if not done in store already. Remember, the length you need is 1" less than the width of your board.
[caption id="attachment_7507" align="aligncenter" width="550"] Just a side note: This is my first time using our table saw since 2 years ago I buzzed my fingertips. My heart is beating, but happy to overcome it![/caption]
FINE DETAILS
To make those cuts look pretty, just hand sand the edges and any rough spots nice and smooth.
ASSEMBLY
Now for the fun part of this DIY bathtub tray...assembly. To add your slats to the bottom, use this graphic as a guide. You're going to find the center of your board and mark lightly. Then take the inner tub dimensions you wrote down and divide it by 2. Starting from the center, measure out that length you just got and mark. That is where the outer edge of your slat will lay. The slats are to prevent your tray from moving side to side and falling into the tub.
Once you've got your measurements marked, take your slat and center it a half-inch in from each end, and pre-drill four holes near the ends to prevent splitting of the wood. Be sure to not drill too deep or you'll pop through the top of your board.
You're going to find the center of your board and mark lightly. Then take the inner tub dimensions you wrote down and divide it by 2. Starting from the center, measure out that length you just got and mark. That is where the outer edge of your slat will lay. The slats are to prevent your tray from moving side to side and falling into the tub.
Once you've got your measurements marked, take your slat and center it a half-inch in from each end, and pre-drill four holes near the ends to prevent splitting of the wood. Be sure to not drill too deep or you'll pop through the top of your board.
 Using your 1¼" wood screws, attach the slats to your tray bottom. Flip it over and we're ready to add holes for the handles.
 The handles I'm using came off of a gorgeous stash of wooden windows I have had for quite some time and decided to part with them. Before I gave them away (tearfully), I saw that hardware and gasped. In all honesty, there's no way was all that rusty goodness leaving my sight! I had minutes before the person was coming to pick up and my kids and I flew around with screwdrivers snatching it off. Hahaha...(Just in case, no I didn't cheat the person, they didn't know they were there.)
HARDWARE
My handles measured 4" long, but you could use knobs, longer pulls, whatever floats your boat. That's what's so fun about this project...endless possibilities. Lay your handle on the tray top and center it about 1" in from the end, and centered top to bottom. Pre-drill for what your hardware requires and then set aside the handles for now.
 Now for the finishing touches. For one of my trays, I am painting it a dark charcoal semi-gloss that I found as a seconds at Home Depot, and the other I'm using a weathered look stain, called Sunbleached by Rust-Oleum Varathane. We used it on our bedroom floor and I love the look.
 Here's a peek at what the underside should look like.
 To create a water-resistant topcoat, you could add either wax or a poly finish. It's totally your preference. Just follow instructions on the can.
For the charcoal tray, I'm using brass handles and adding a bit of text by freehand painting. If you're not confident you can add text, just follow my tutorial on how to DIY it.
To create a water-resistant topcoat, you could add either wax or a poly finish. It's totally your preference. Just follow instructions on the can.
For the charcoal tray, I'm using brass handles and adding a bit of text by freehand painting. If you're not confident you can add text, just follow my tutorial on how to DIY it.
 The weather tray is getting some rusty goodness and is left to look old and worn. You could add text to it too for a personal touch.
TWO CHOICES
So, which is DIY bathtub tray is your favorite? The modern version with the dark paint?
 I'm lovin' the crisp feel of it and that's what I love about our bathroom. Likewise, I can switch from classic vintage to vintage modern with a few easy changes. Makes you want some cheesecake and a soak, right?
 On the other hand, maybe you prefer the rustic new wood, made to look like barn wood?

 I'm head over heels that summer is practically here and I can enjoy all the beauty that abounds.
 A tea light soaking with homemade beeswax candles in tart tins sounds good to me too!
 I hope you've enjoyed this simple project and I certainly welcome any and all questions you may have. For those of you that just have to have one of my trays, they are both available in my shop. (SOLD)
[metaslider id=30251]
Also, pin and share my DIY bathtub tray to inspire others and encourage them to try DIY too.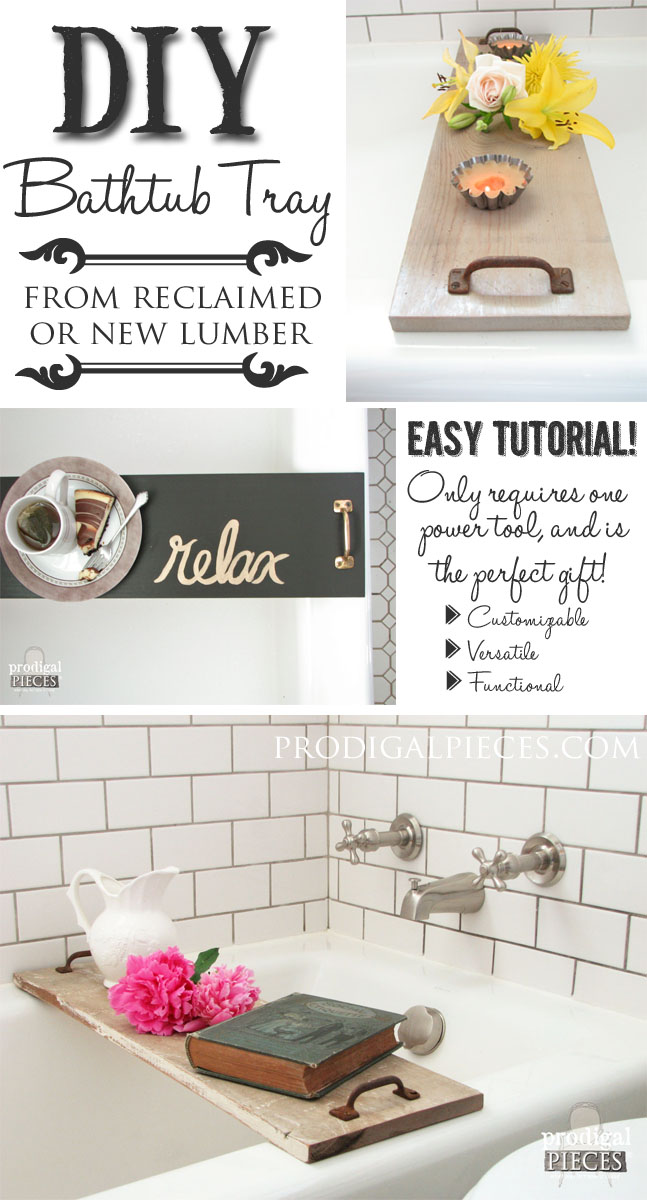 To get these DIY tips & tricks in your inbox, be sure to sign up for my newsletter. PLUS, you will get your FREE Furniture Buying Checklist and special discount to my shop. Until next time!

In addition, here's some more projects for you like my DIY bathtub tray: