 While I'm not your typical box store fall decorator, I do prefer simple understated style in my home. You can take a peek at how to set up a thrifted fall vignette in this post.
 *post sponsored by HomeRight (see full disclosure)
POTENTIAL
Take this tractor trailer full of pallets...what do you see? I spy potential. These are all loaded on here because they are the cast-off, busted pallets that businesses all have hanging around. However, thanks to JC, my husband, I'm able to get my hands on this fairly easy. They even have a bin of pallet pieces that I can snatch up.
 If you don't know of my affinity for crates, you can see them in my Crate Turned Footstool tutorial, or in my faux crate drawers in my kitchen. Also, I built a soda crate stand, or a crate built of cupboard doors, and my DIY crate turned wagon.
DIY TIME
Are you ready for some fun? If you'd like to create this DIY antique crate for your very own (or add it to your "please-help-me-create-this" list), let's get started. You can do it! Here's what you'll need:Tools & Materials:
- raw pallet wood
- saw - hand saw, jig saw, circular saw, miter saw (your choice)
- wood glue
- tape measure
- nailer (optional)
- masonry nails or black drywall screws (I used 1 ¼" length)
- drill
- drill bits
- finish sprayer
- stain (or paint) or choice - I used Weathered Wood Accelerator
- stencil or DIY design (you can do it!)
- acrylic paints & artists brushes (optional)
STEP 1
First, you want to decide the dimensions of your finished crate. You can build it BIG to fit over something, or smaller for table top decor. I wanted to mimic the crates I have in my home that I've found over the years. The rough dimensions are 14 ½" W x 18" L x 12" H. Also, a typical pallet piece is 48" L x 3 ½" W. With that in mind, I cut:- 6 - 18" pieces
- 6 - 13" pieces
- 4 - 12" corner pieces
 These are the pieces for the sides only. Eventually, we will cut and add the bottom pieces once we have the crate assembled. In addition, you'll see I have 12" L triangular pieces for the corners. This was scrap we happened to have on hand from the reclaimed elm we are using to build faux beams in our living room remodel. (coming soon!) I realize not all will have reclaimed elm available. haha. You can use any wood that is roughly 1" x 1". Likewise, I love that pallet wood is shaggy. It adds to the rustic charm we're after.
STEP 2
Next, we will use a piece of the crate to trace onto three 18" long pieces on both ends. Then, add a bit of wood glue to the corner pieces, line up the edge, and attach it to the three 18" pieces.

 If you don't have a nailer, you can just let the glue cure and then assemble.

STEP 3
Finally, it's time to attach your long sides to your short sides. Follow the same steps with glue and stapler from the inside. Then, when you have it square, use the drill and drill bit to pre-drill from the outside of the crate into those corner pieces. Then, drill in the drywall screws to anchor it all together. Also, at this point, you can skip the screws and go even further "antique" and use some rusty masonry nails. There is no doubt using screws are easier, but this is fun. Just so you know, masonry nails don't come rusty, but in one day you can have them looking like this if you use my recipe in this post HERE.

STEP 4
Before we get to the finishing fun, we need to add the crate bottom. If our build is square and as it should be, we just measure and cut. My crate bottom is made of 18" pallet wood lengths, the same as the sides. How many lengths you need depends on your build.
STEP 5
At long last we are ready for the best part of creating...the final part! haha. It's at this point you can choose the route you want to finish your DIY antique crate. Whether you choose to keep it natural, paint, or stain, be sure to use the Quick Finish Sprayer. No joke, when they say quick, they mean it! I just pour in my stain and have at it.
This weathered wood stain is also the one I demonstrated in my video. If you haven't tried it yet, I can't say enough good about it - easy, affordable, and fun!
No joke, when they say quick, they mean it! I just pour in my stain and have at it.
This weathered wood stain is also the one I demonstrated in my video. If you haven't tried it yet, I can't say enough good about it - easy, affordable, and fun!
 Also, this stain just goes on and you let it set for 30 minute to an hour. I wanted this to be as rustic and weathered as possible, so I let it sit for over an hour. It's so fun to see it age right before your eyes!
 When you are done, just use the Quick Release feature to pop off the canister and the nozzle for easy clean-up.

STEP 6
Last, before we call our DIY antique crate done, we want to add a bit of whimsy. Using a bit of thinned black paint, we want to go over the screw (or nail) heads in a horizontal pattern to make it look like they are weather-worn. Then, if you like, add typography or a stencil or some artwork...whatever your heart desires. I wanted to stick with the antique crate vibe, so I paint on a few words. You can use my simple transfer tutorial too, if you are so inclined.

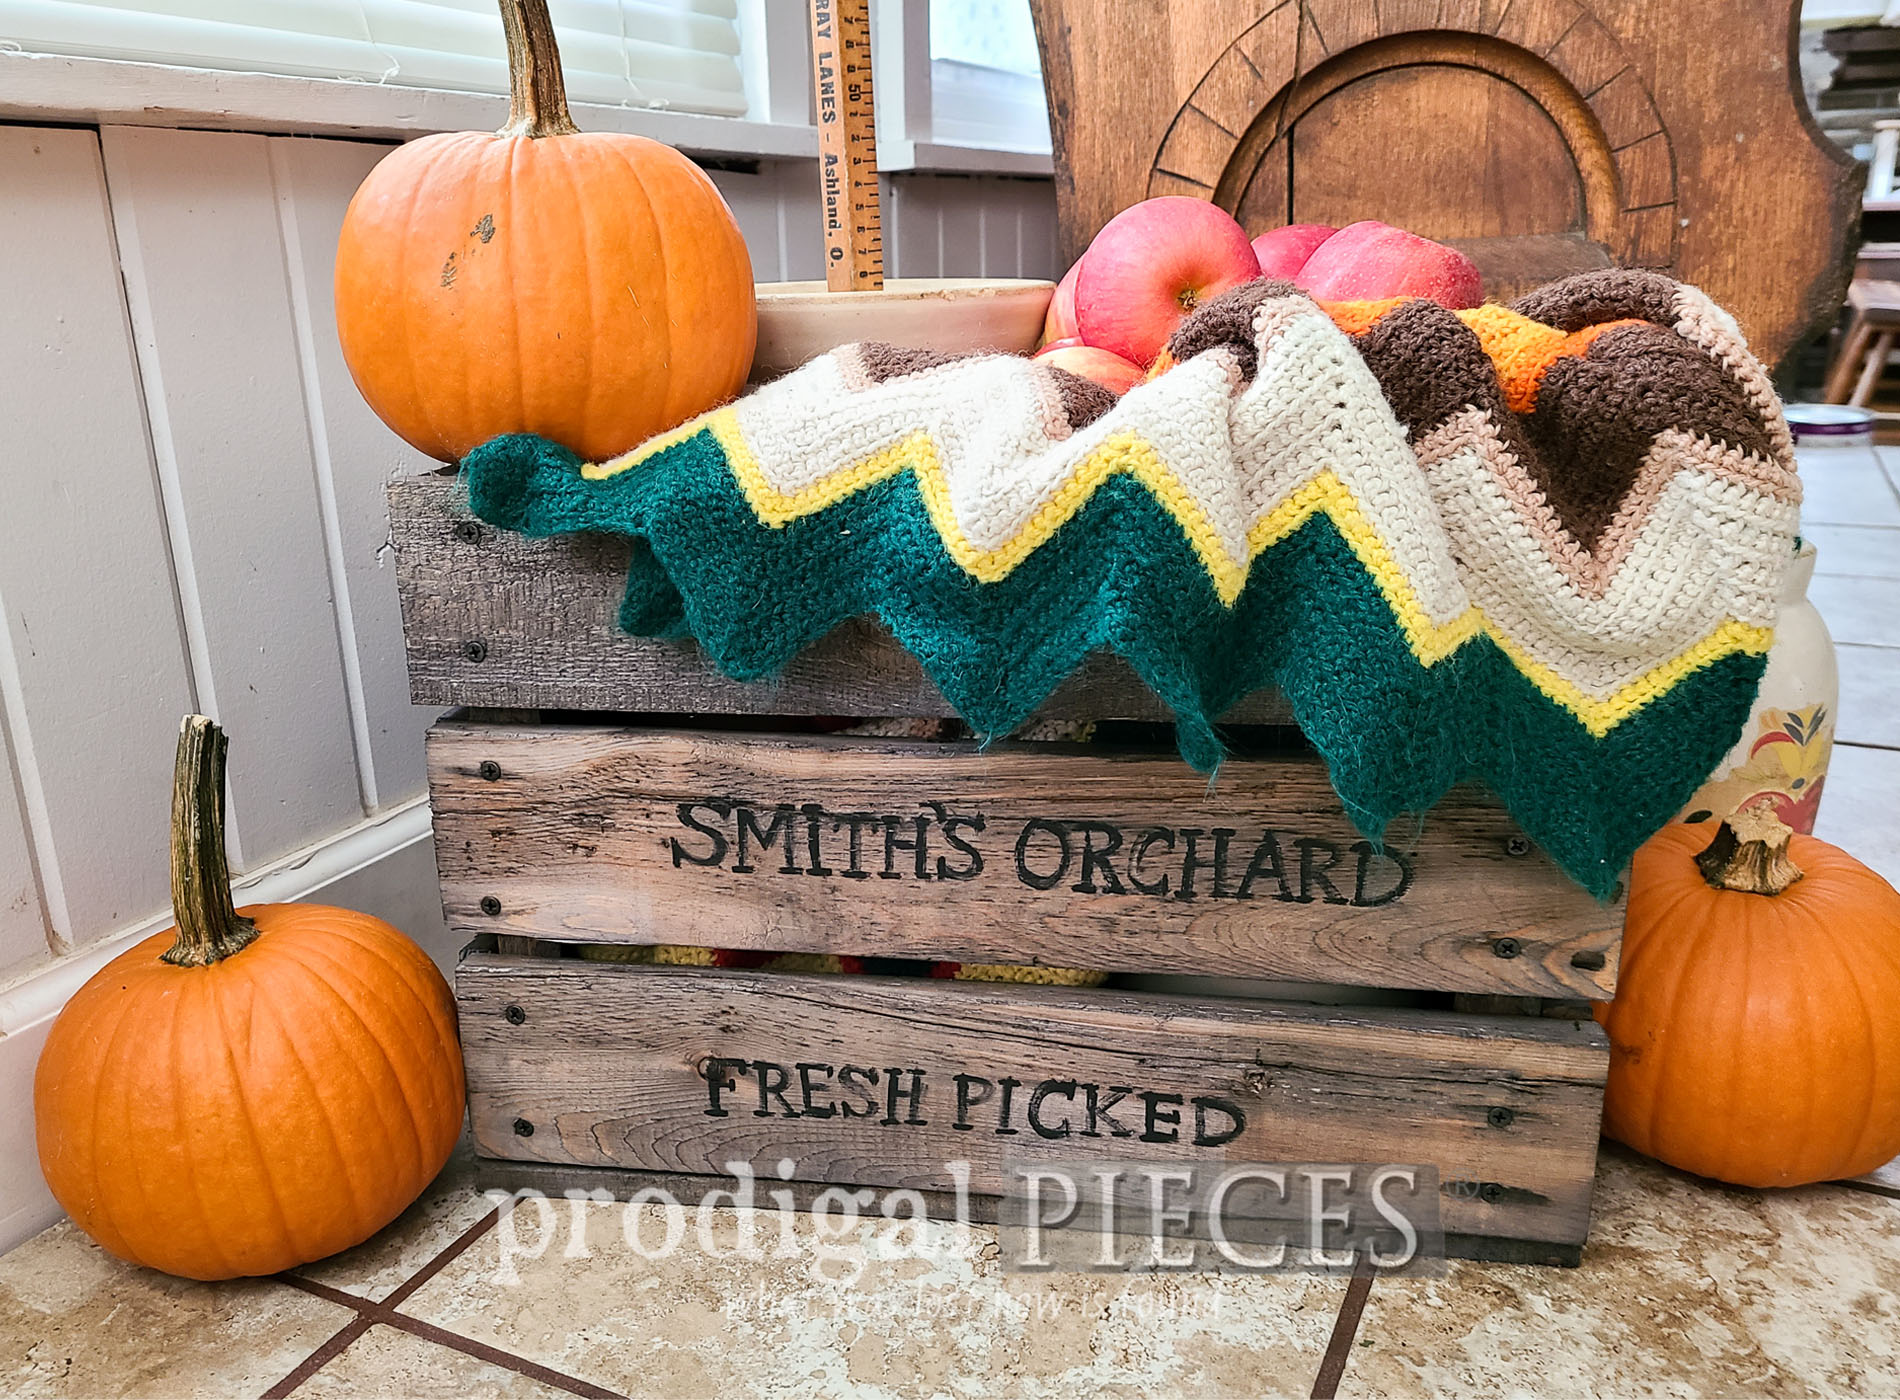
 Isn't it so fun! I have it staged for my autumn decor, but it is suited for any time of year. Use it inside or out, just have fun with it. Picture it with a Christmas tree standing inside. eep!

 If you're totally not into DIY but would love to have this crate as your very own, you can find it and more in my online store.


SHARE
Also, do pin and share my DIY antique crate tutorial because you know there are oodles of pallets that need new life! woot! To get these DIY tips & tricks in your inbox, be sure to sign up for my newsletter. Until next time!

Also, more fun builds like my DIY antique apple crate tutorial:

