It never ceases to amaze me how fast a month rolls by. It's as if I blink and were beginning another month. Do you feel that way too? With this new month comes a brand new
Trash to Treasure time on the second Tuesday. What a fun time when my blogger friends and I each work on a new project just for you. My contribution this month is this 1800's damaged chest of drawers that is need of much TLC.

When I was offered this beautiful, yet dilapidated, chest, I couldn't refuse. So, here's the good: it's made of solid walnut, has all the drawers, and is still standing.

However, the bad: it's missing the marble inlay in the top just like this other chest
I redid HERE, the side rail is laying in the top drawer, and the other side rail is half missing. Also, the drawer guides are floating loose, the top has softball size dents, and it has several cracks in the frame.

I don't know...maybe someone dropped a bowling ball three or four times? haha. Either way, they are all issues I can deal with and am anxious to dive in and see what I'm up against.
DIY TIME
First order of business is to take off the top. That's easy enough as I believe someone refinished this before me and it's missing the drawers that rested on top and even the mirror. When I take off the top, I find that the front spreader has the notch in it for marble.

This leaves me with a problem...if I replace the top I will have this opening to cover up. I can either (1) cover the notch with a corner round piece of trim, (2) or I can replace the stretcher. Because I want to keep this as true to original as possible, I decide to replace it. With the cost of lumber skyrocketing, I am all about reusing what I can find in any way. With that in mind, I cut the top using my jig to make a new stretcher.

Then, I use my pocket hole jig to create joints so I can attach the stretcher.

A HISTORY
However, before I put it in, I want to also reset the drawer guides and replace the missing rails on each side. See, I told you it is a hot mess. haha. Though, it's not quite as bad as
this antique chest I turned into a bench.

Next, I cut a new piece out of the remnant top to replace the rail on the opposite side. Wast not, want not! Also, if you like my DIY saw dust collector, you can see
the tutorial HERE.

In addition, I have to point out the Knapp joints on the drawers. This tells me this piece is from the mid to late 1800's. I get goosebumps! You can read more about them
HERE.

NEXT STEPS
Meanwhile, I also work on the drawers. The knobs were missing so I need to find a suitable replacement. First, I fill the knob holes with dowel and let glue cure.

Then, I drill the dowel to fit the replacements...these antique ornate swag pulls I have in my stash.

However, before I can assemble, I sand down the drawer fronts to showcase that gorgeous walnut. After that I am using hemp oil to bring out the grain and protect the wood. In addition, you can see how basic oil transformed
my antique church pew.

Finally, I'm left with figuring out the top. Because I am all about reducing our landfill occupants of good wood, I head to my stash from my recent city clean-up haul where I grabbed this pair of closet doors and the framing as well.

By the way, who throws away Old Glory? It made sad to see as it should be burned in respect instead. Anyhoo, I take the framing from those closet doors and make a new top. Since it's pine, it doesn't match the walnut, so that leads to paint.
Also, I'm able to give the damaged chest of drawers cabinet a final finish as well. You can see my little helper is getting bigger and is enjoying the soft white milk paint.

LOOKING GOOD
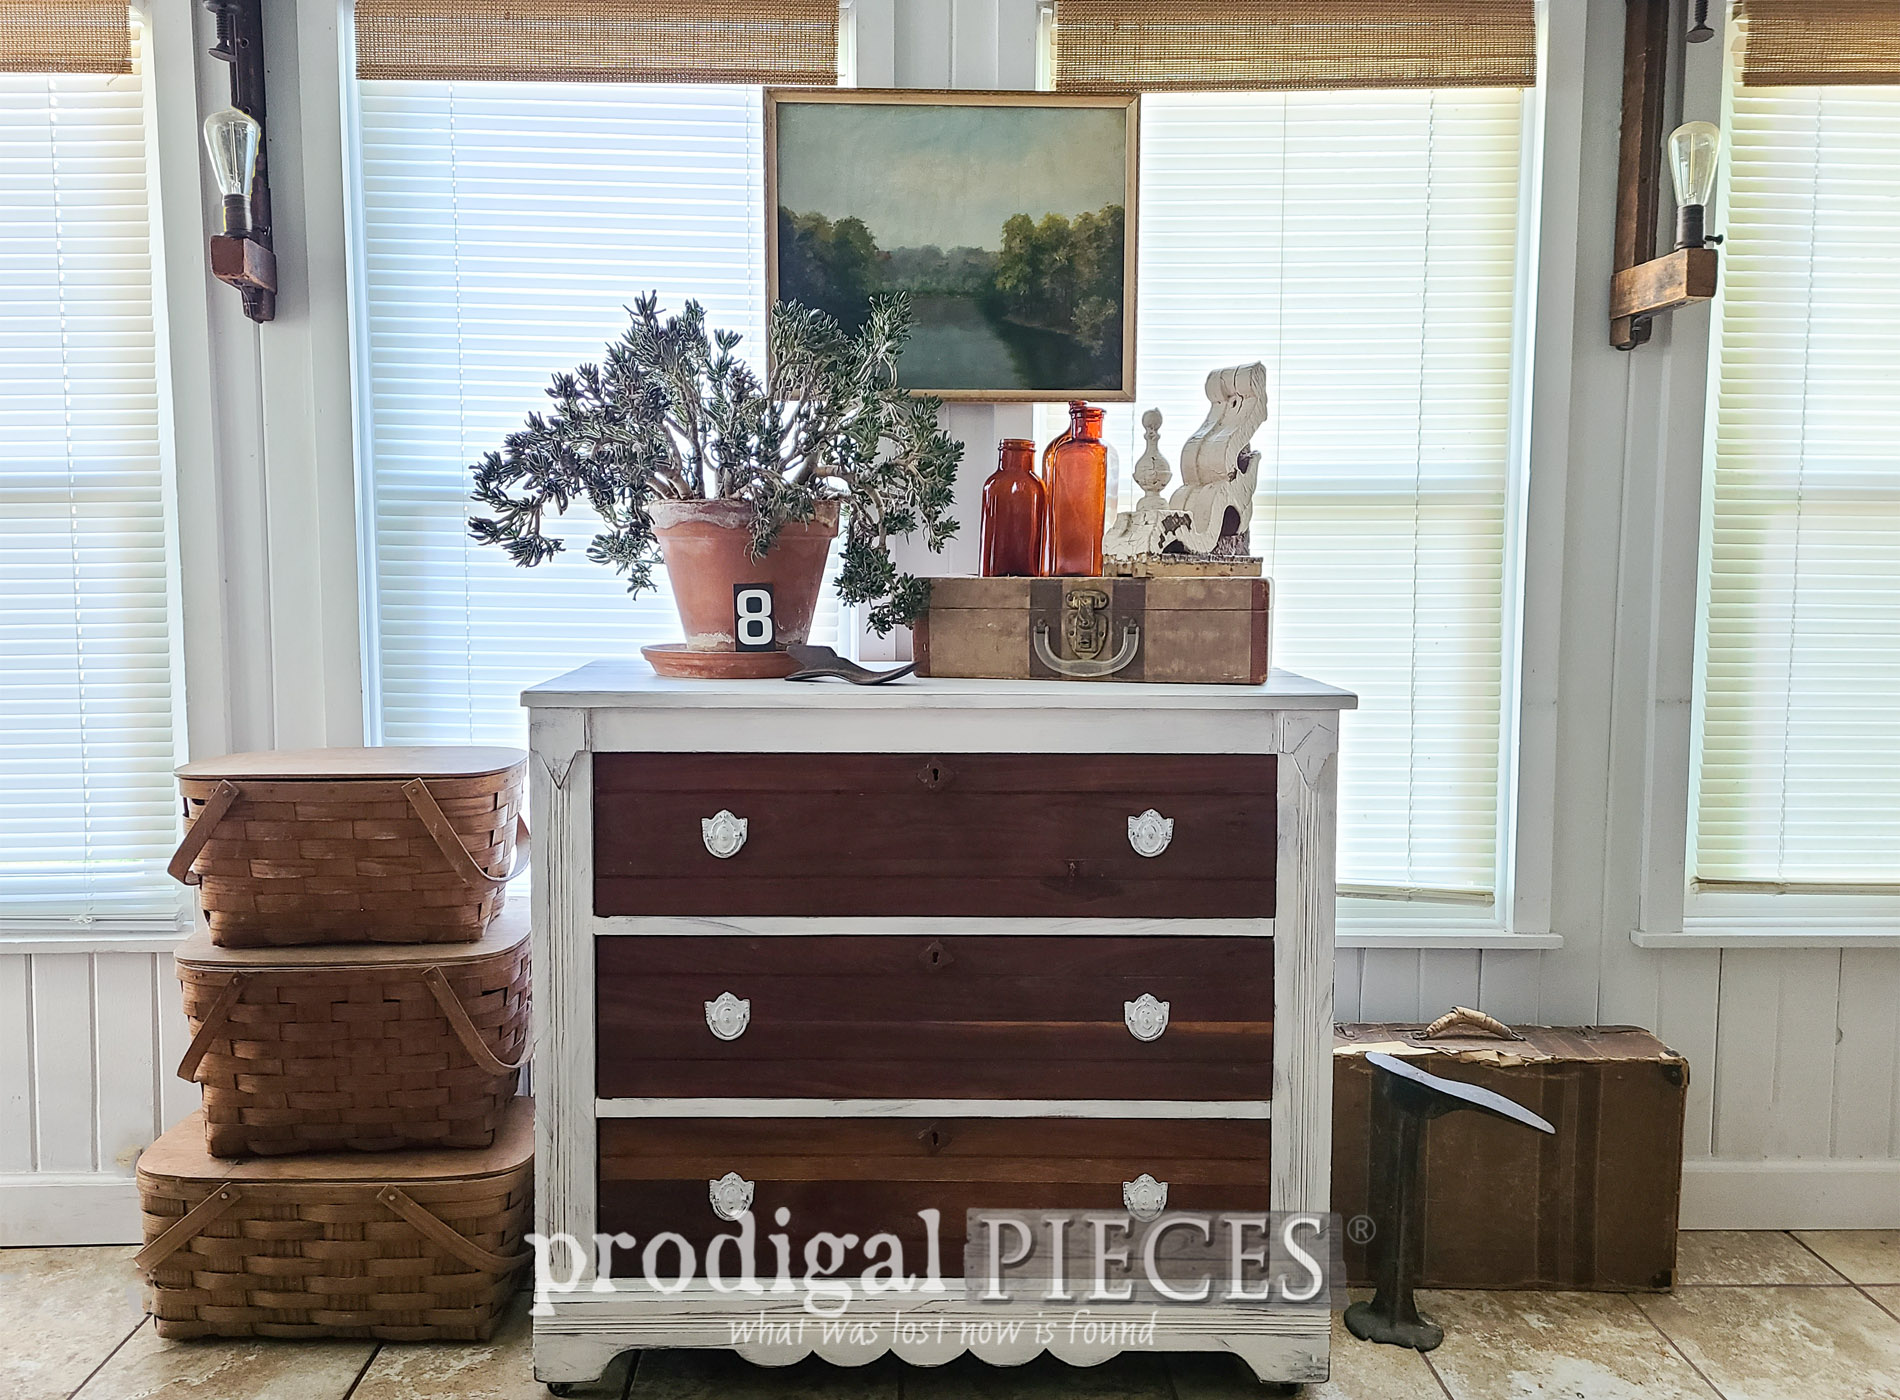
It may have been destined for the trash at one point but look at it now. woot!


Not only am I so excited that it is ready for many more years of use, but also because it is restored using other pieces of "trash" (aka.
trashure). Is it perfect? nah. However, it sure tells a story of simpler times where the craftsmen put their heart and soul into their work. It didn't roll off an assembly line made of manufactured wood.


Additionally, I'm so happy that I could, at least, showcase that walnut in the drawers. That wood is hard to beat!


As with most of my pieces, this chest is now available in
my online shop along with many other fun story-telling pieces too. We do ship to your door and within the continental U.S.


SHARE
So tell me...would you have given this damaged chest of drawers a second look? It definitely would scare away some. Call me a nut, but I love it! haha! In addition to leaving me a comment below, I'd love it if you pin and share to inspire others on their DIY journey.

And there's more! Up next these two thrifted totes caught my eye.

Don't you think they have potential See them next by
signing up for my newsletter. PLUS, you will get your FREE Furniture Buying Checklist and special discount to
my shop. Now, it's time to see what my Trash to Treasure friends have for you - head below!


- Salvaged Inspirations
- Confessions of a Serial Do It Yourselfer
- Artsy Chicks Rule
- Girl in the Garage
Also, more furniture projects like this damaged chest of drawers makeover: