 I know I say it all the time, but I had no intention of coming home with this size of a table. My workshop was empty, and I was loving it. So, how did it end up with me? Well, I took my kids for a thrift store scavenger hunt - where I give them a list of things to find, and they team up to see who can find them first. With that in mind, we needed a break from our schedule and that was a last-minute option.
While they were racing to find their items, I found a few tables. Yes, I say few, because this wasn't the only one I brought home. ahem. More on that later...after the shop manager told me the price of the other set and I picked up jaw up off the floor, he told me I could have this for the same price. I am not kidding. To tell the truth, I normally play it like poker face and be like, "Okay, cool." However, this time...this time I said, "Really??!!" and clasped my hands in front of me excitedly.
I know I say it all the time, but I had no intention of coming home with this size of a table. My workshop was empty, and I was loving it. So, how did it end up with me? Well, I took my kids for a thrift store scavenger hunt - where I give them a list of things to find, and they team up to see who can find them first. With that in mind, we needed a break from our schedule and that was a last-minute option.
While they were racing to find their items, I found a few tables. Yes, I say few, because this wasn't the only one I brought home. ahem. More on that later...after the shop manager told me the price of the other set and I picked up jaw up off the floor, he told me I could have this for the same price. I am not kidding. To tell the truth, I normally play it like poker face and be like, "Okay, cool." However, this time...this time I said, "Really??!!" and clasped my hands in front of me excitedly.
COMING HOME WITH ME
Now, who would be the sane one to leave that antique library table made by Larkin Company sitting there? I love the story behind this line of furniture that stemmed off of a soap line. Just goes to show how interesting history can be. It did wobble, it did have ample gashes, gouges, and wear, but...it's so beautiful! And...it didn't stink. Bonus! Can you blame me when I also find things like this vintage Powell globe the minute I walk in the door? This little gem will eventually find a home in my living room when we are done.

THE BACKSTORY
Funny thing was that when my son and I were loading it, we tipped it over to turn it upside down and dropped the drawer on the ground. It fell into pieces and the shop guy said, "Your husband can fix it for you." I paused (stared for a long time) and replied, "I can fix it myself." (and in my head, "thank you very much. ahem") Some wood glue and clamps and it was good as new. I will say that if the antique library table were staying in my home, I would leave it with wear and all. I have dark woods like that in my living room, including an upright grand over 100 years old with the same mahogany patina.DIY TIME
However, since I planned to sell it, I decided to give it new life. The only tools I used were my sanders to get started. First, my orbital sander took off not only the stains and blemishes but knocked out those 3-foot-long gashes in the top. Those had me worried as they were deep. Thankfully, the veneer on top was nice and thick and took my sanding well.
WHOA
Then, I can't get all the gouges out, but I am going for a rustic farmhouse look to play with the original feel of it anyway. Bring on the time-worn wear! See that beautiful mahogany peeking out? This is super fun for me to see it come to life, especially because I did all of this outside for HOURS in my garage with door open and it was a balmy 5 degrees with windchill of -20.
MAKING A MESS
Now, in all my years, I have never come across a dark stained table like this that was made of all the same woods. They always used the dark stain to hide various wood species and make it gel as one. This table was no different. However, I had hope to find a solid piece, but alas it was a mut (if you will). First, I found the tabletop and top of the bottom shelf where mahogany veneer - the good kind, nice and thick and made of wood. However, the bottom shelf was oak, the skirt, the tabletop, and legs were maple. That's all fine with me since it adds to the rustic charm I was after. It reminds me of how God created us all unique and each part of us works together to make us who we are.
 MORE SANDING
While my orbital knocked out most of it, I am so stoked to give my newest addition to my tool arsenal a try. It's a Ryobi Corner Cat that my brother and sister and law gave to me for Christmas. They quoted my toolsoverjewels motto, and they are right! Not only can this thing able to take that corner leftover my orbital couldn't reach and knock it out, but it's easy to use.
 Not only that, but I did the table edge and the leg details too. I was so happy I didn't have to do it by hand. AND it even uses the same batteries as all my other Ryobi cordless tools, so a total win. Hooray!
Once everything is sanded, I add a bit of dimension. Next, I took some remnant paint and watered it down to create a wash. I've used this technique hundreds of times, and show you how in my own dining room table redo seen HERE. As a matter of fact, it adds depth as well as creates the aged look I'm after.
Finally, it was time to finish this antique library table. Since I wanted rustic, but also durability, I used a poly topcoat to finish.
Not only that, but I did the table edge and the leg details too. I was so happy I didn't have to do it by hand. AND it even uses the same batteries as all my other Ryobi cordless tools, so a total win. Hooray!
Once everything is sanded, I add a bit of dimension. Next, I took some remnant paint and watered it down to create a wash. I've used this technique hundreds of times, and show you how in my own dining room table redo seen HERE. As a matter of fact, it adds depth as well as creates the aged look I'm after.
Finally, it was time to finish this antique library table. Since I wanted rustic, but also durability, I used a poly topcoat to finish.
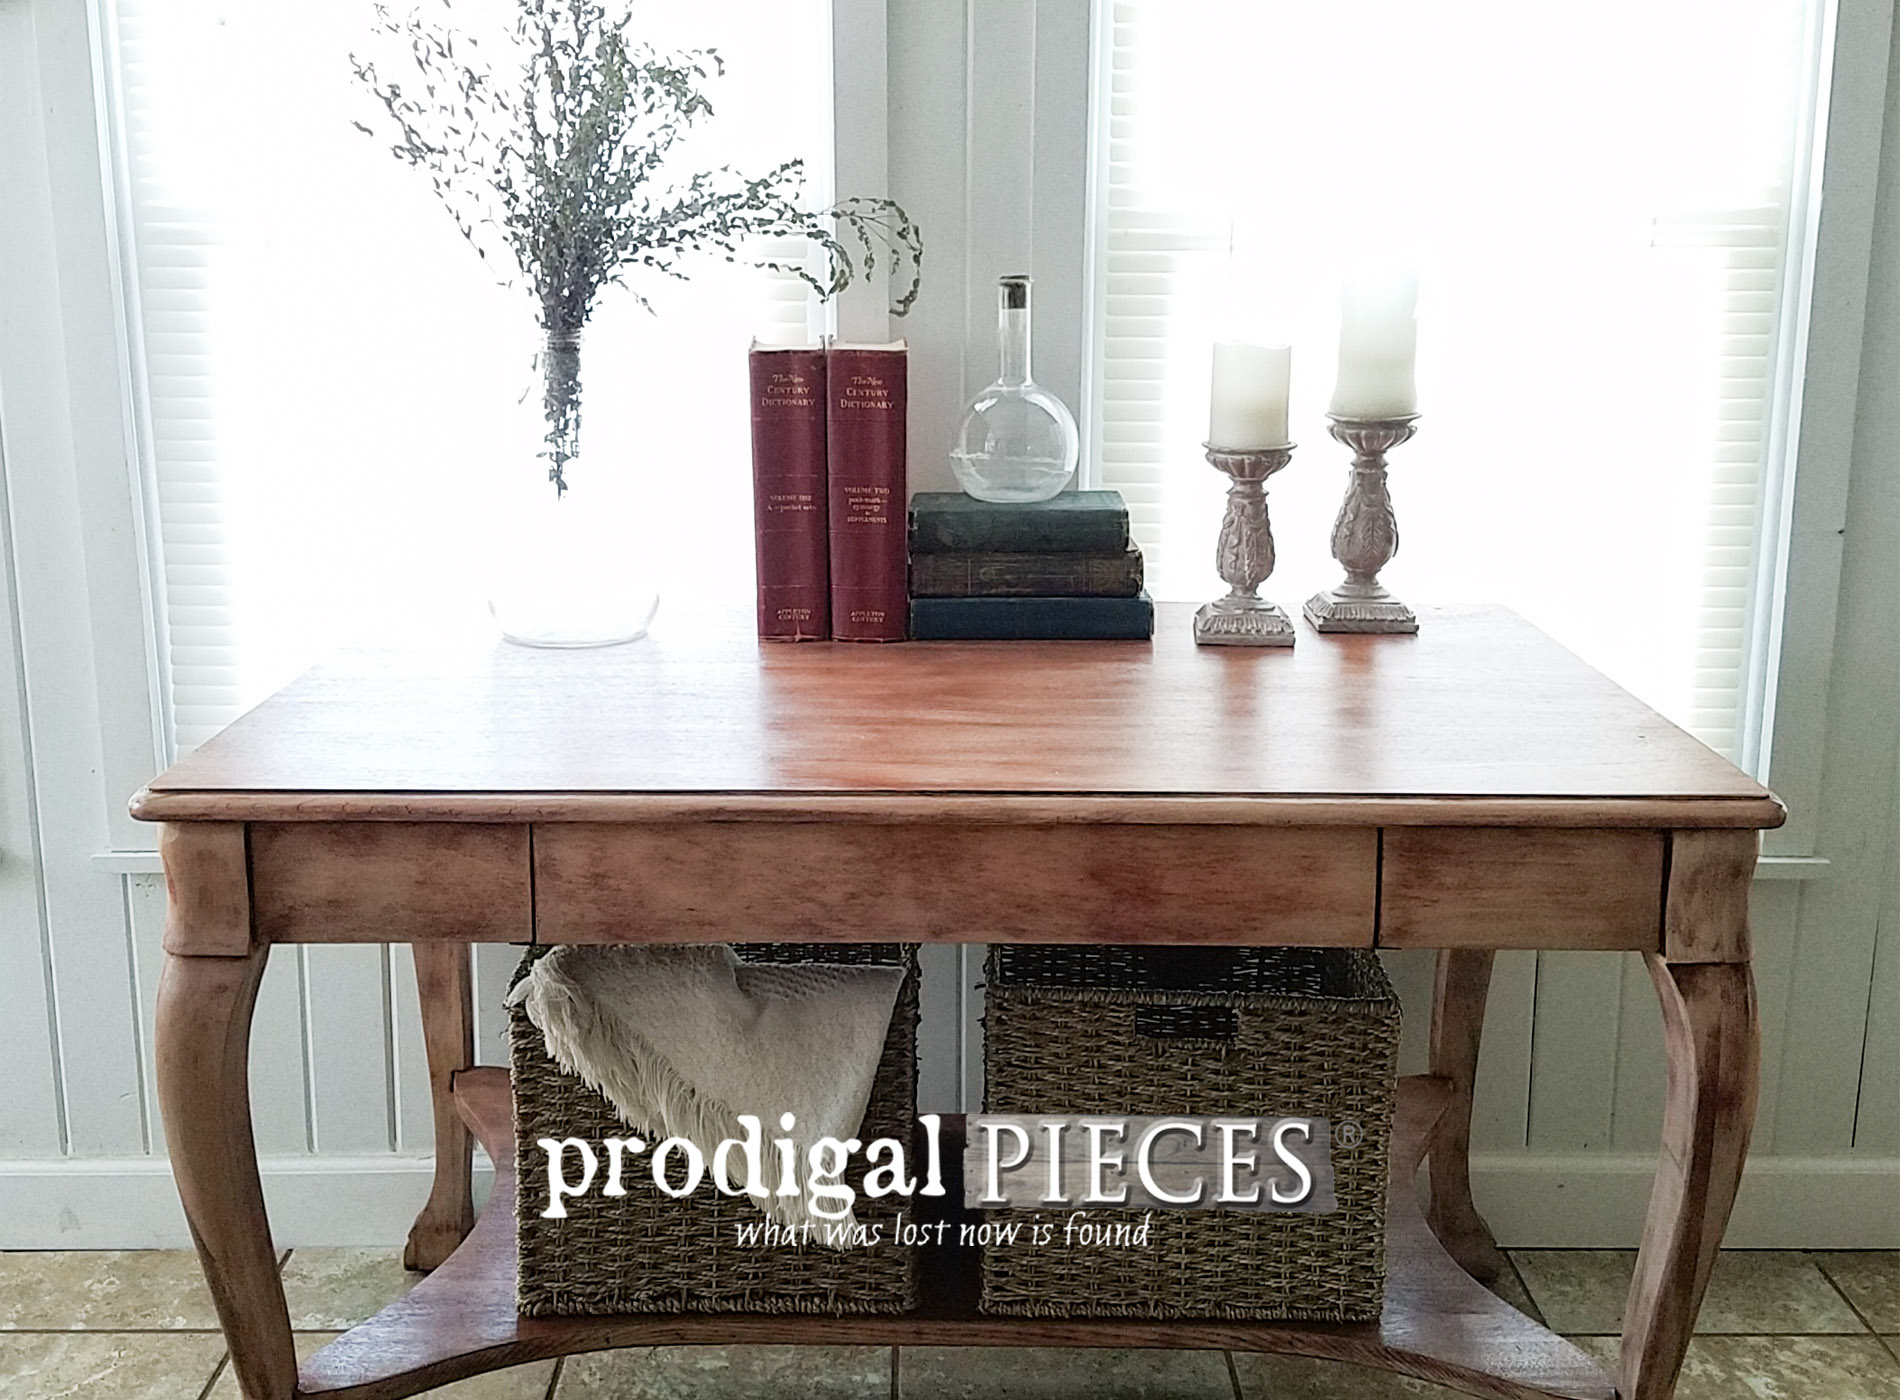
THE REVEAL
Accordingly, I applied two coats of poly and it's done!
 Last, this, for me, was like taking a deep breath. Then, after spending countless hours sanding it down, giving it the wash, and protective coats, it sure felt good to step back and see it finished.


A STORY
There are still some time-worn "wrinkles" if you will, telling the story this antique library table has. However, there is so much to love about it with the legs and unique design. Likewise, my home is small and cozy so this piece will not be staying with me. But let me tell ya, I would love to keep it!! If you are interested in it, it's available in my online shop long with all my other creations and finds. Not only are we available anywhere, but we also ship anywhere and can ship multiple furniture pieces and smaller items for no extra cost.[metaslider id=30251]

 Meanwhile, next time you're in the thrift store or out fleatiquing, never underestimate what is waiting to be found. Also, I can't wait to show you my next table set I found the same day. SEE HERE.
SHARE
In addition, pin and share this antique library table makeover to inspire others to give DIY a try. As well, to get these DIY tips & tricks in your inbox, be sure to sign up for my newsletter. Even more, it's time to head below for more fun!
 Finally, it's time to check out what these awesome ladies have created for you for Trash to Treasure Tuesday:


Also, more DIY projects like my antique library table:

